I have a TaG kart and have been adding things to my mychron 4, like gps, external battery cable, things like that. I have a ton of wires and boxes that the cables are connected to. I just got a new drivers panel and was wondering if anyone had any good advice for running the cables and mounting the various ignition, and monitoring things on the kart without drilling a bunch of holes, and using zip ties.
1 Like
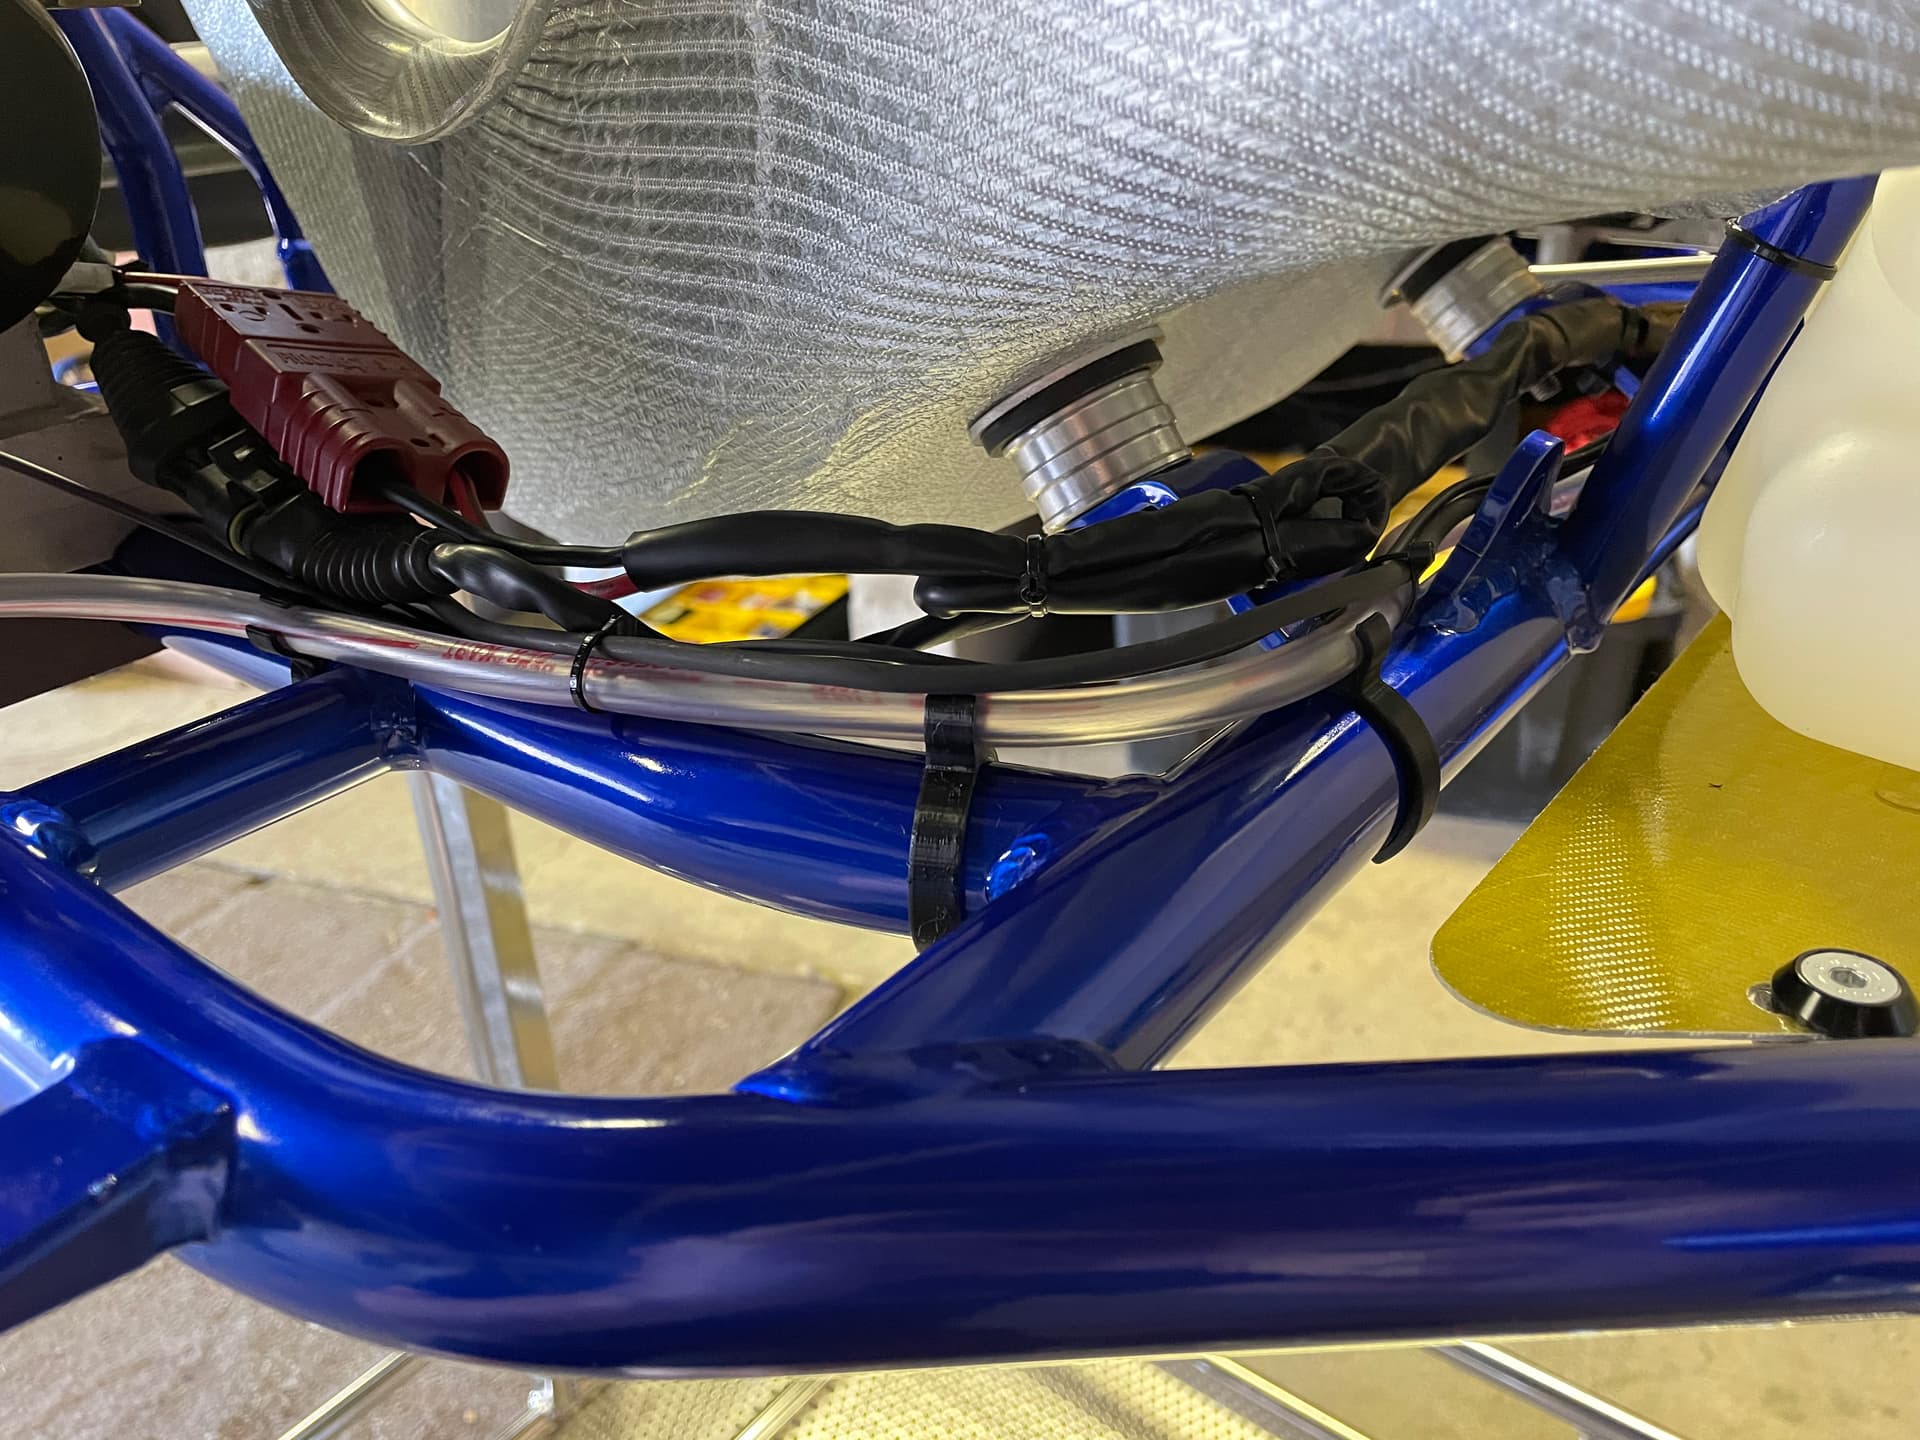
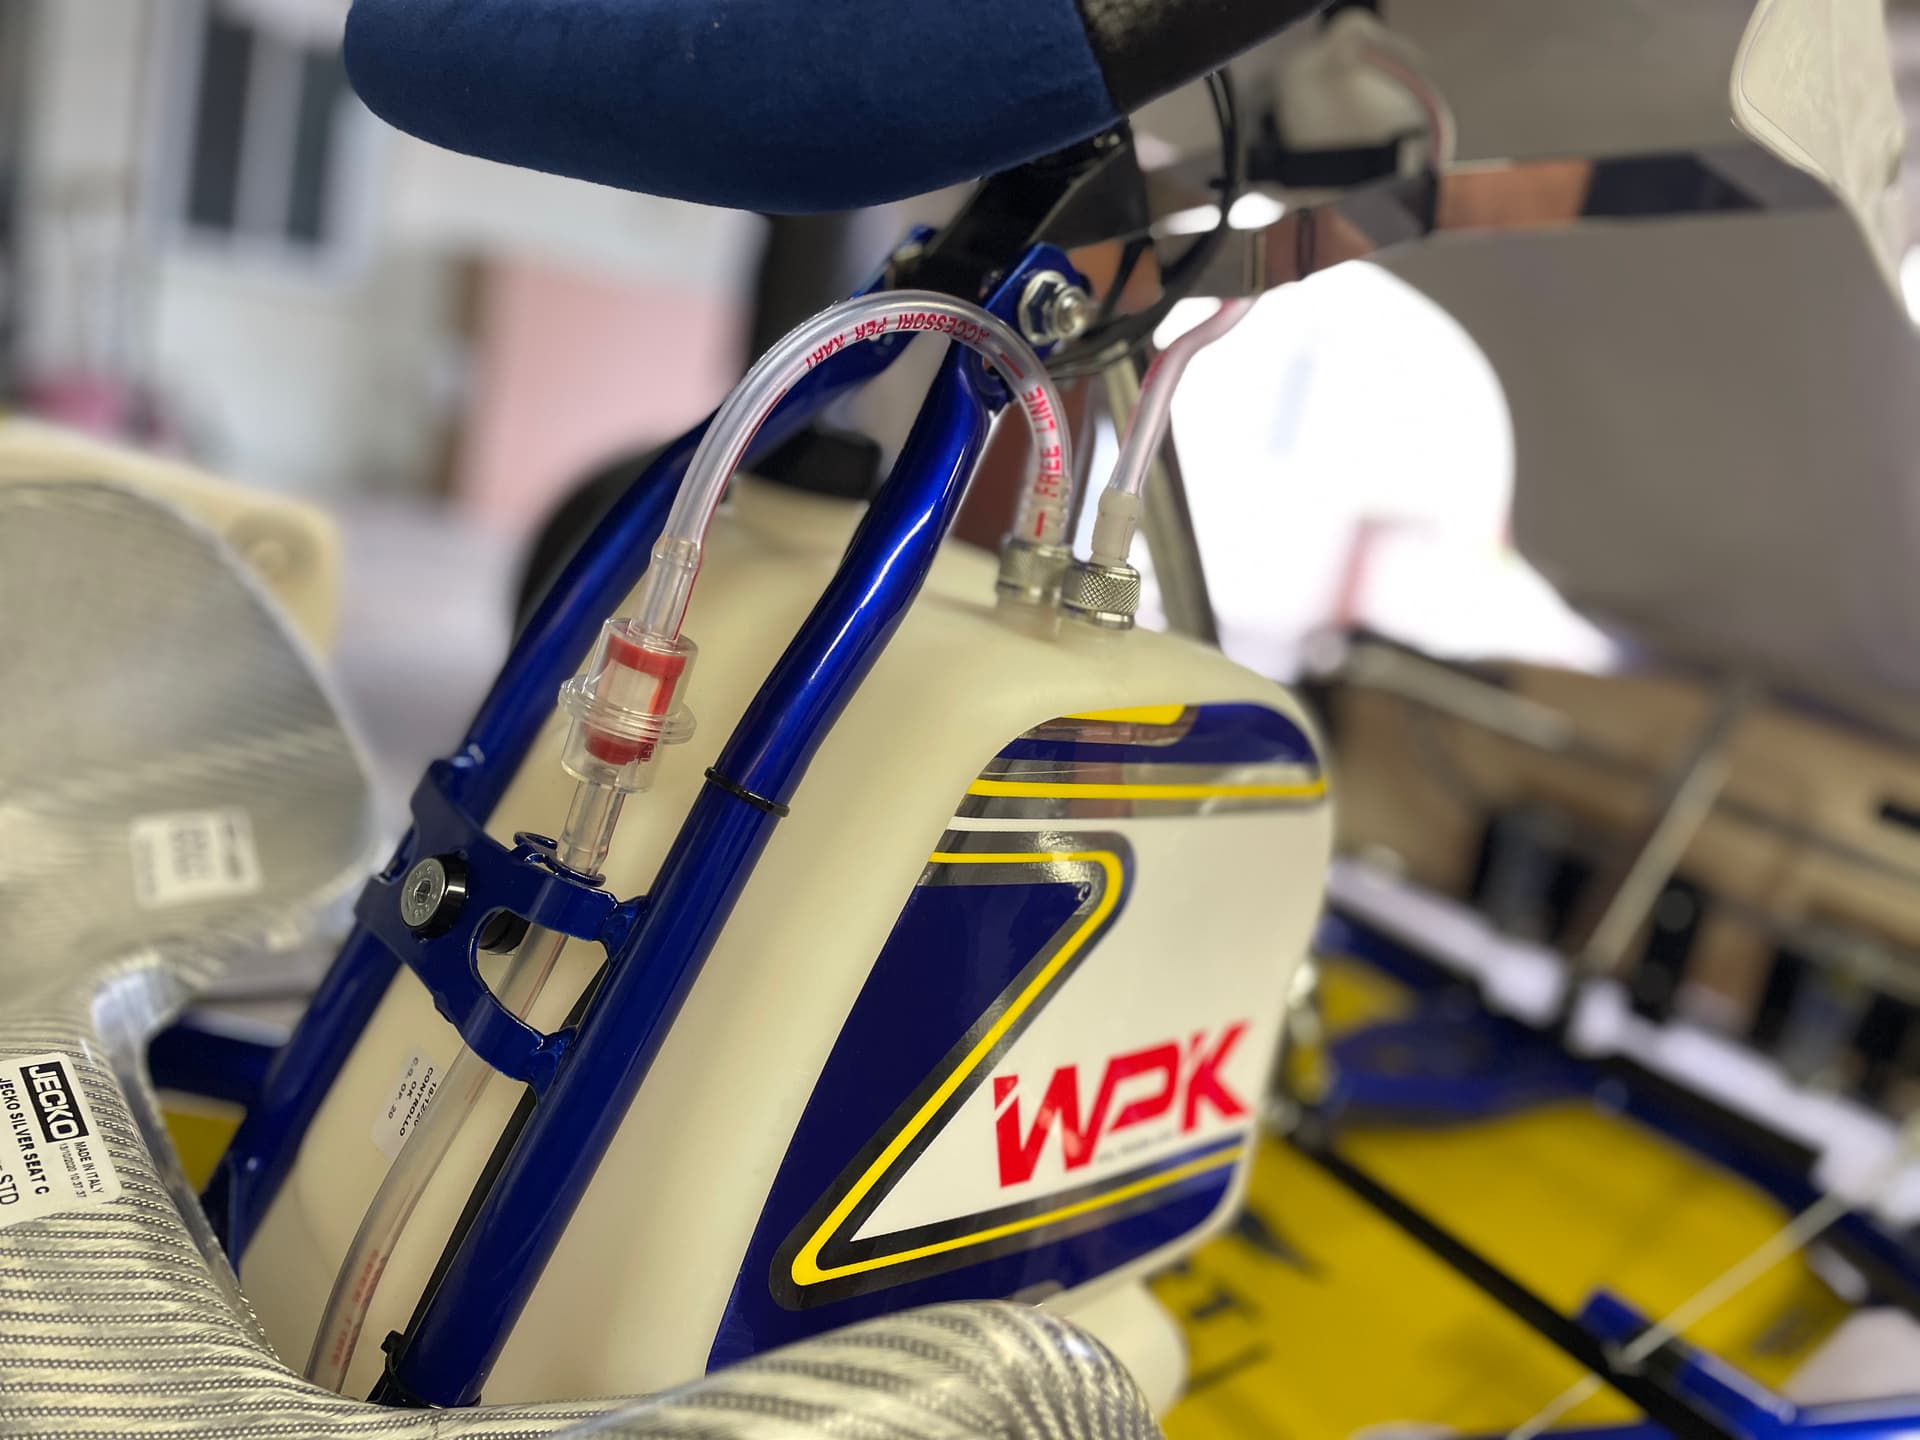
On my KA I used 3D printed fuel line holders and then zip tied the temp/tach wires to the hose. With the engine harness I just wrapped zip ties around the lower seat mounts. Up by the dash I just turned the wheel full left, zip tied the wires to the wheel (leaving a little slack) and then down next to the fuel tank.
1 Like
Yeah, that looks good. I have a 3d printer, so I need to print some of those clips! lol. Well I didn’t mention that I have a 09 leopard, so I have an ECU box, key start, and gps reciever that I have to find spots for as well.
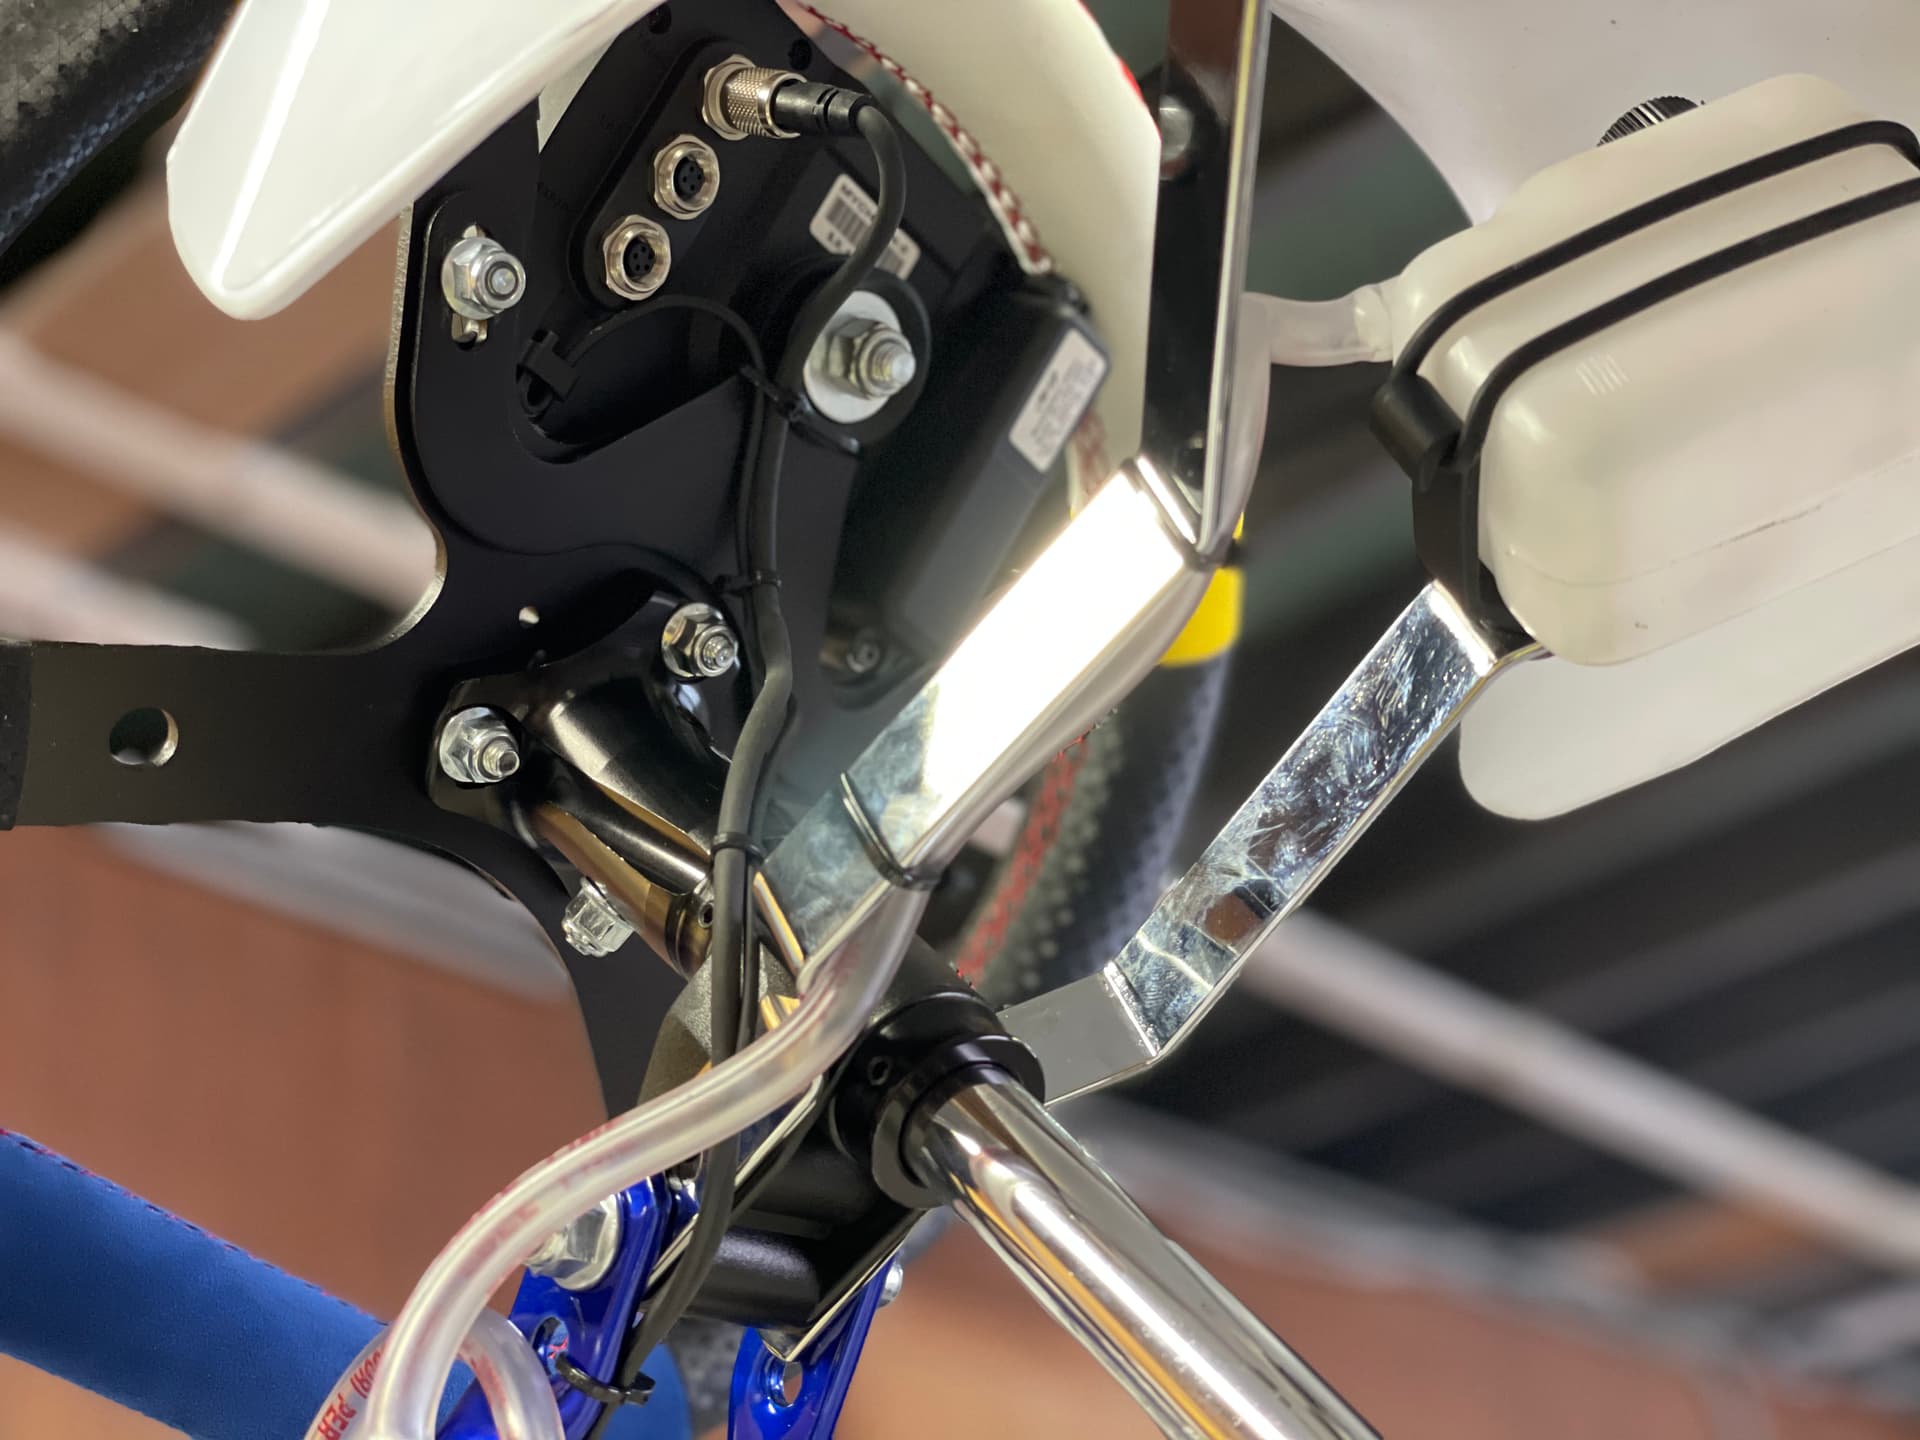
The factory box works pretty well for holding all of the electronics in one place (though a bit ugly). You could also mount the ECU and starter relay to the seat (put foam between them to reduce vibration) and make a 90* bracket to the fuel tank bolt for the switch. For the GPS I’ve made little aluminum 90* brackets to bolt to the front fairing struts and then either 3m double sided tape or dual lock.
Ah yeah, those are good ideas. I had been trying to come up with a box or something to 3d print to hold all of that stuff to mount somewhere, just hadn’t come up with a good design, or location for it. Im going to try to do some of the aluminum brackets. Thanks!
Just keep in mind the vibrations will affect the 3d printing. I wouldn’t use 3D printed holders for anything of weight because it’ll probably crack/fail over time.
2 Likes
I don’t use this yet, but I should.
T&B ty-raps… 20char
My last motor was an 09 Leopard too. It was very busy with all of the cabling. I bought it second hand, so most of the cabling was already done. I added a MyChron 4 with GPS. On the OTK steering wheel, the upper middle section was between spokes and I just made a simple sheet of aluminum cut out and drilled to fit between the steering block and the wheel to mount the MyChron. I drilled a hole in the upper fairing support to hold the data link/12V feed block with a M6 bolt. After making all of the connections, I zip-tied the wires along the chassis tubing from the battery side and engine side up the steering support. Any excess wire was looped and zip-tied to compact it and allow for movement of the steering wheel. The Key Start was drilled through the side of the front fairing (Nassau Panel) for easy access. The starter relay and ECU were attached with double sided velco to the underside of the front fairing. Generally tidy, but not the prettiest thing you ever saw!