EP04 Regarding “wiring spaghetti” is a great idea. I’ve been guilty of that one LOL
1 Like
1 Like
Hehe I like the Benny Hill music. He was very naughty. Assembling those battery packs seems tedious. That is a lot of work.
1 Like
This is an awesome project. Very impressive. I wish I had your math skills :-). I think you are creating a very fast and exciting go kart.
1 Like
That’s nothing compared to making the busbar sandwiches. If I’m going to make more batteries, this is not the method I would choose.
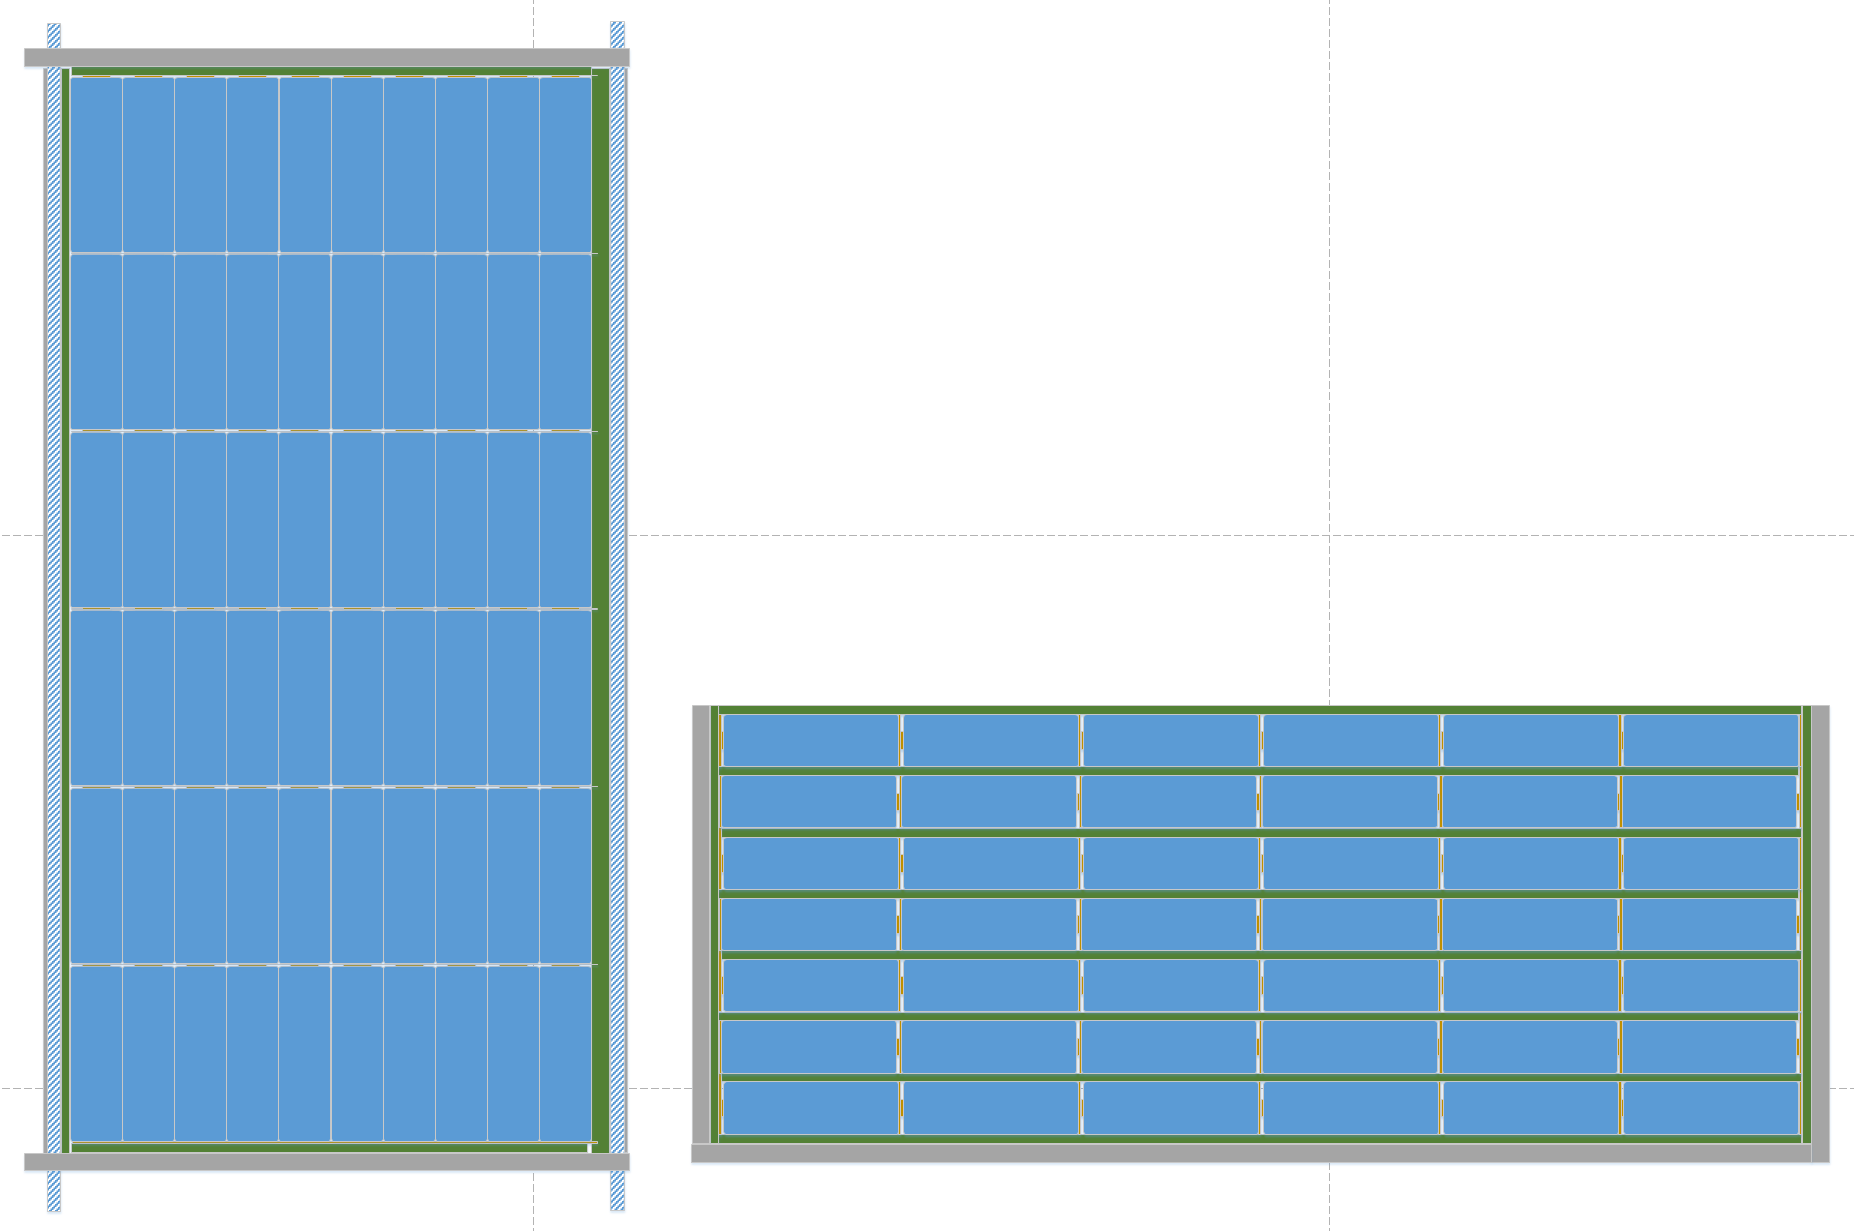
Instead, I’ve been considering laying the cells down flat, end to end. The left side is a top-town view showing rods to keep the cells compressed, and the right is looking from the side. A thin narrow double-sided (indented to make contact with the cell ends) strip busbar would be between the cells to connect them as well as tie them in parallel. Then end cells then tied together alternating rows like a Z pattern. The green here is plastic sheet insulation to electrically isolate them. The right side is a little thicker to allow for a bent-over tab from the busbar to pick up the cell voltage for the BMS. This design would make a battery very fast to assemble and eliminate all spot welding.
1 Like
Enjoy… more to come as soon as the 3D printed parts arrive.
3 Likes
Cliffhanger! Never thought of baking solder.
1 Like
Latest video is now up… enjoy.
2 Likes
Really cool video. Love the intro. I think it’s awesome that you’re documenting everything like this. Great work.
2 Likes
What’s cool about hobbies like karting etc is there’s always gonna be smart engineering types doing cool projects, it must be in their blood.
I’ve sent a reader or two this way from Reddit as it appears that there are Uni students that have e-karting as engineering projects, occasionally. To the best of my knowledge, this is the only serious home brew ekarting attempt I have seen that has documented the build process and decisions. Very neat idea.
3 Likes
Thanks for the feedback. Making that intro was fun…
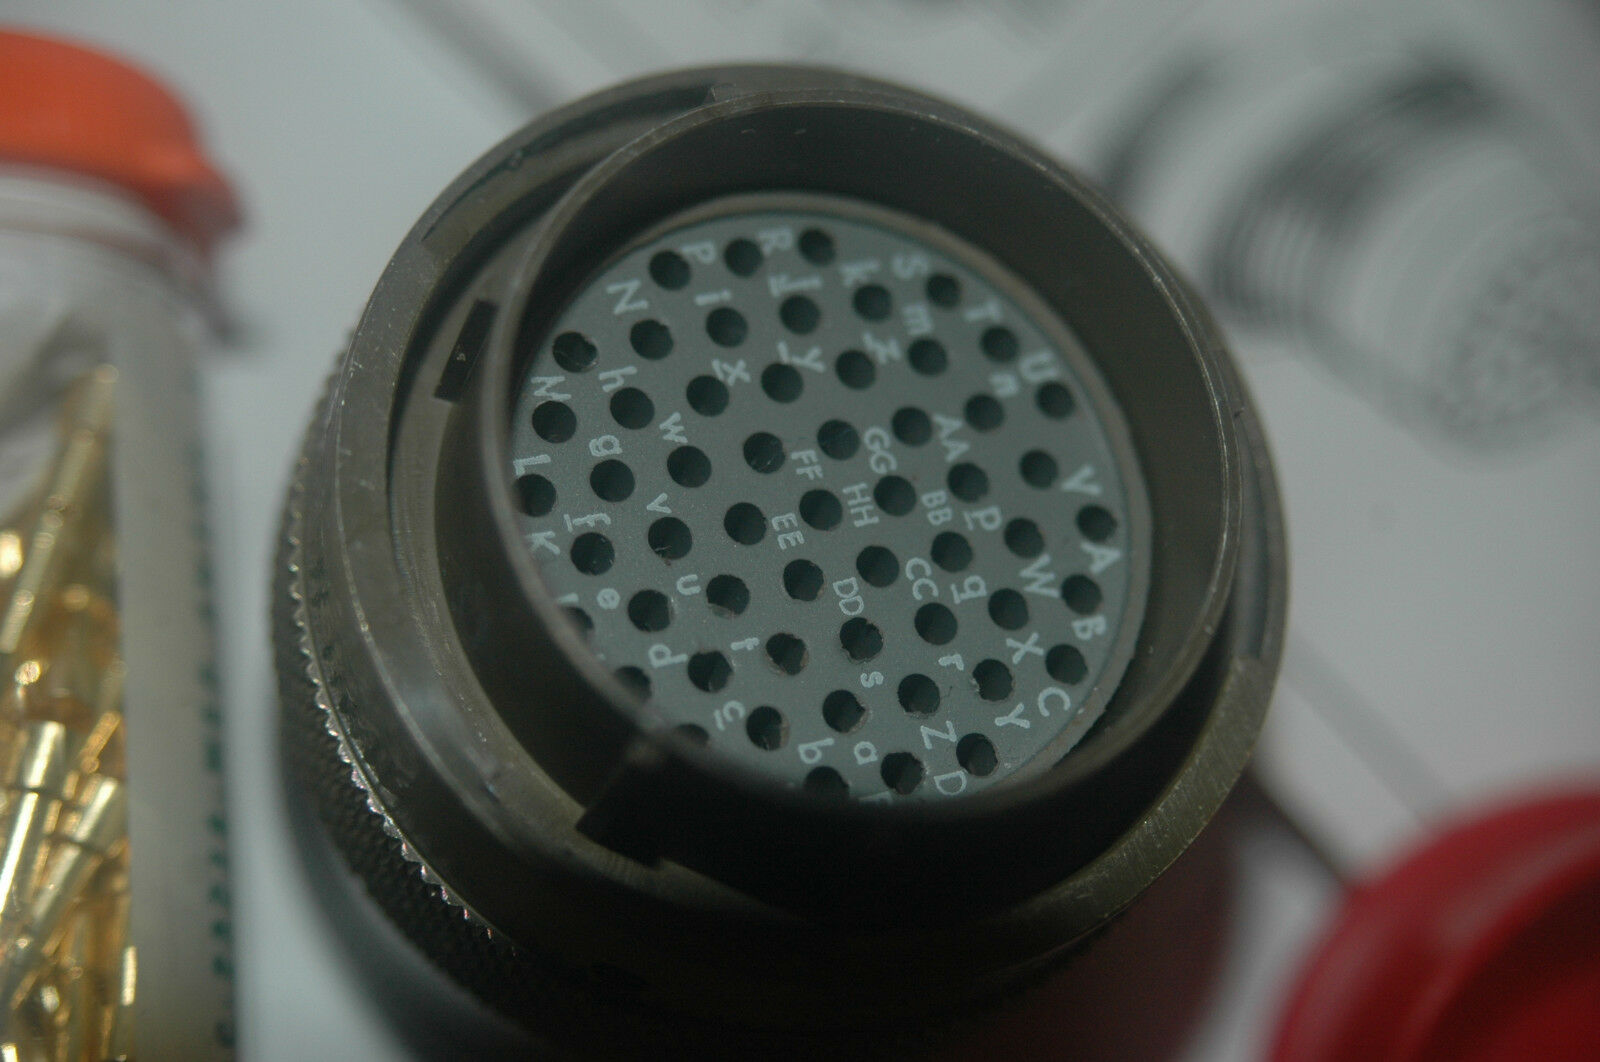
I’m still waiting on the 3D parts to be printed (delayed no doubt due to Christmas) - but tonight I will make the jigs for pressing the copper strips. After those are pounded out with the indents for the cell contacts, I will then attach and label the BMS leads. The leads will then be trimmed and connect to a MS3126E22-55P mil-spec quick connector. That lets the Orion BMS live outside the battery case while still allowing for quick battery changes (once I have more than one).
The next video should be up this weekend.
1 Like
I really like the Orion BMS’s. Excellent choice. Incredibly flexible software.
1 Like
Long time no update, so here is a synopsis to bring this up to date:
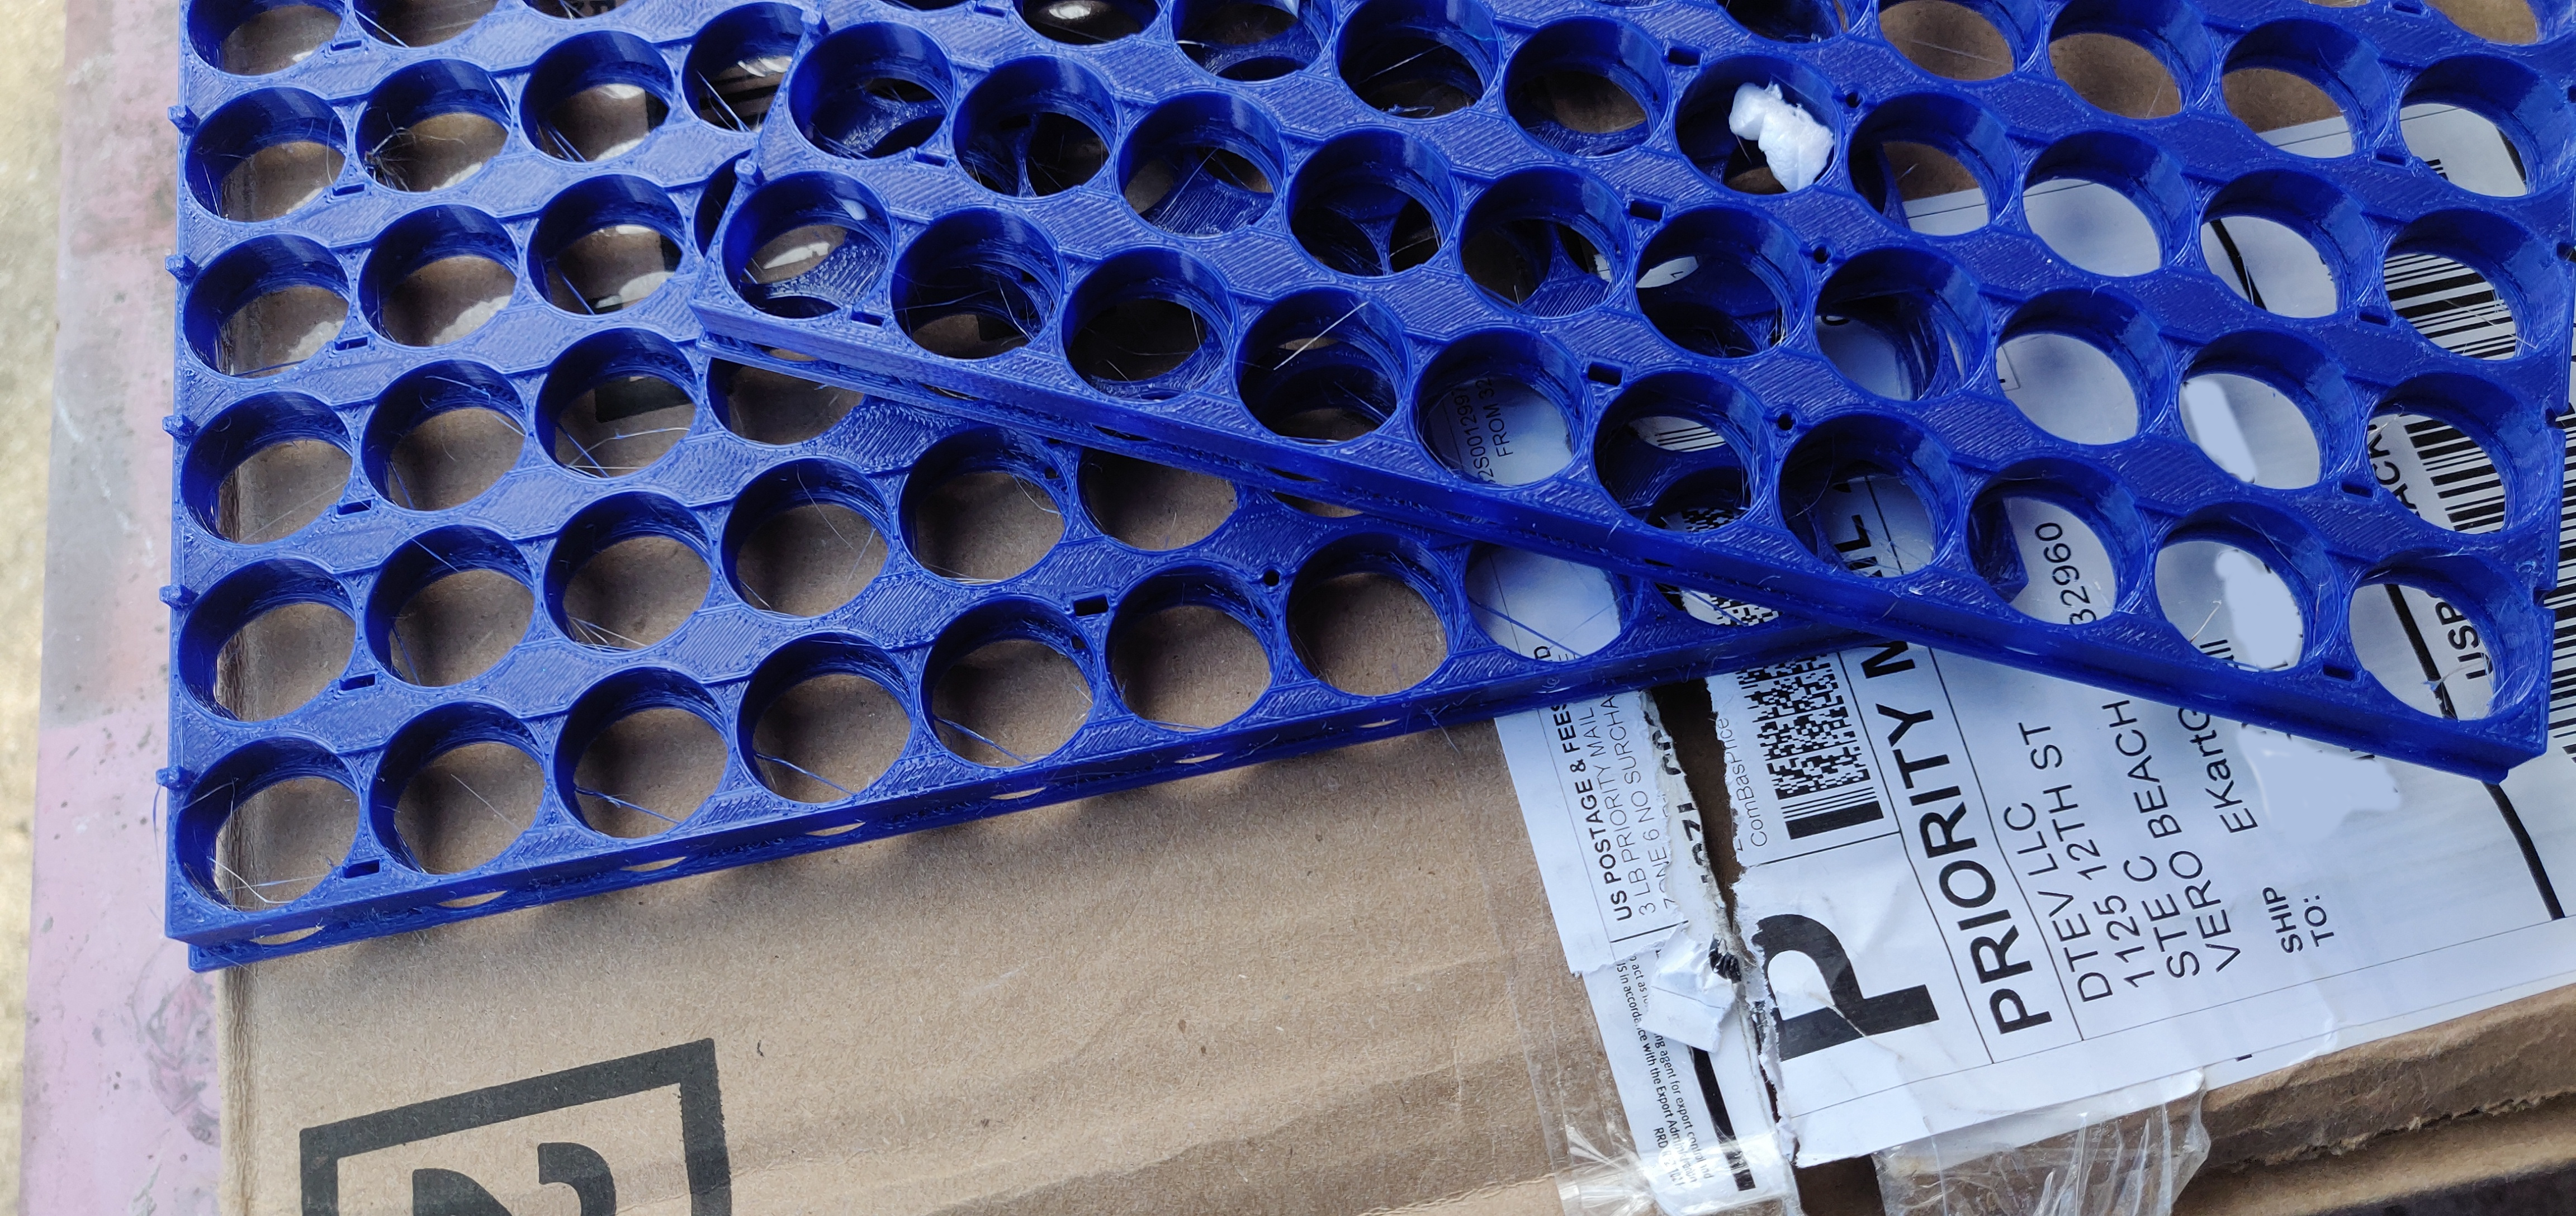
First off, some of those first 3D printed parts were worthless. The printer doing the work shipped many junk parts. Thankfully I at least got a partial refund. for this mess.
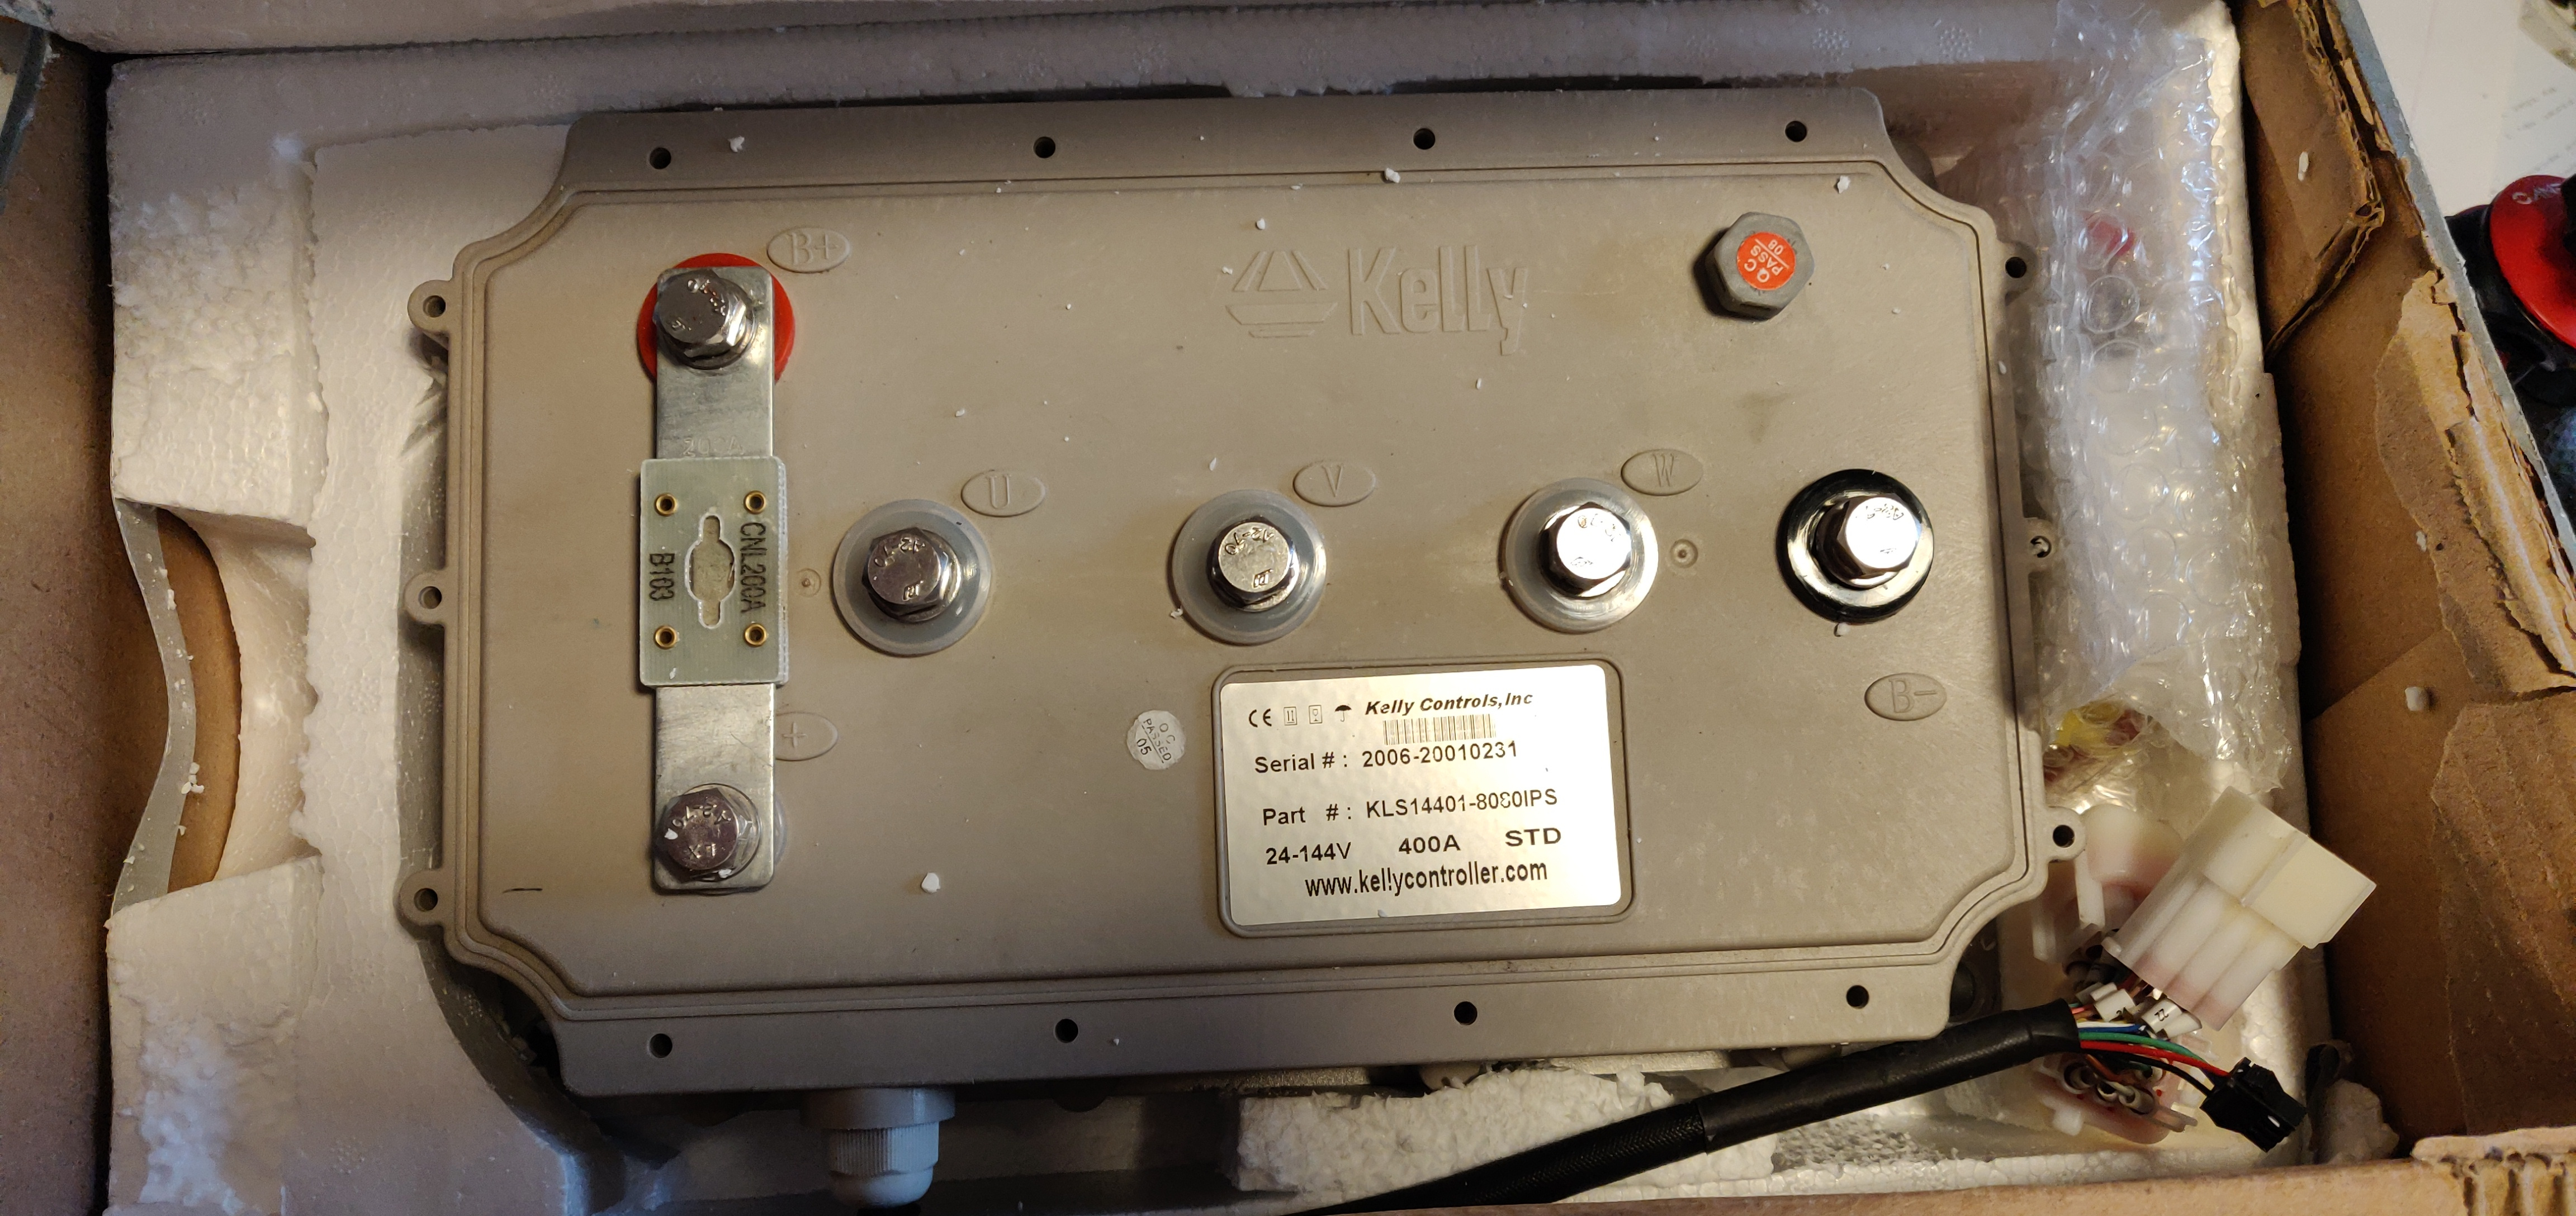
Next, I picked up a used motor controller for a good price. A fellow had listed the Kelly KLS14401-8080IPS controller I wanted on Endless Sphere last fall, and I replied but he just saw my message. Anyhow, a good deal for what it is and it should work great for the DHX 144v motor with just a little programming.
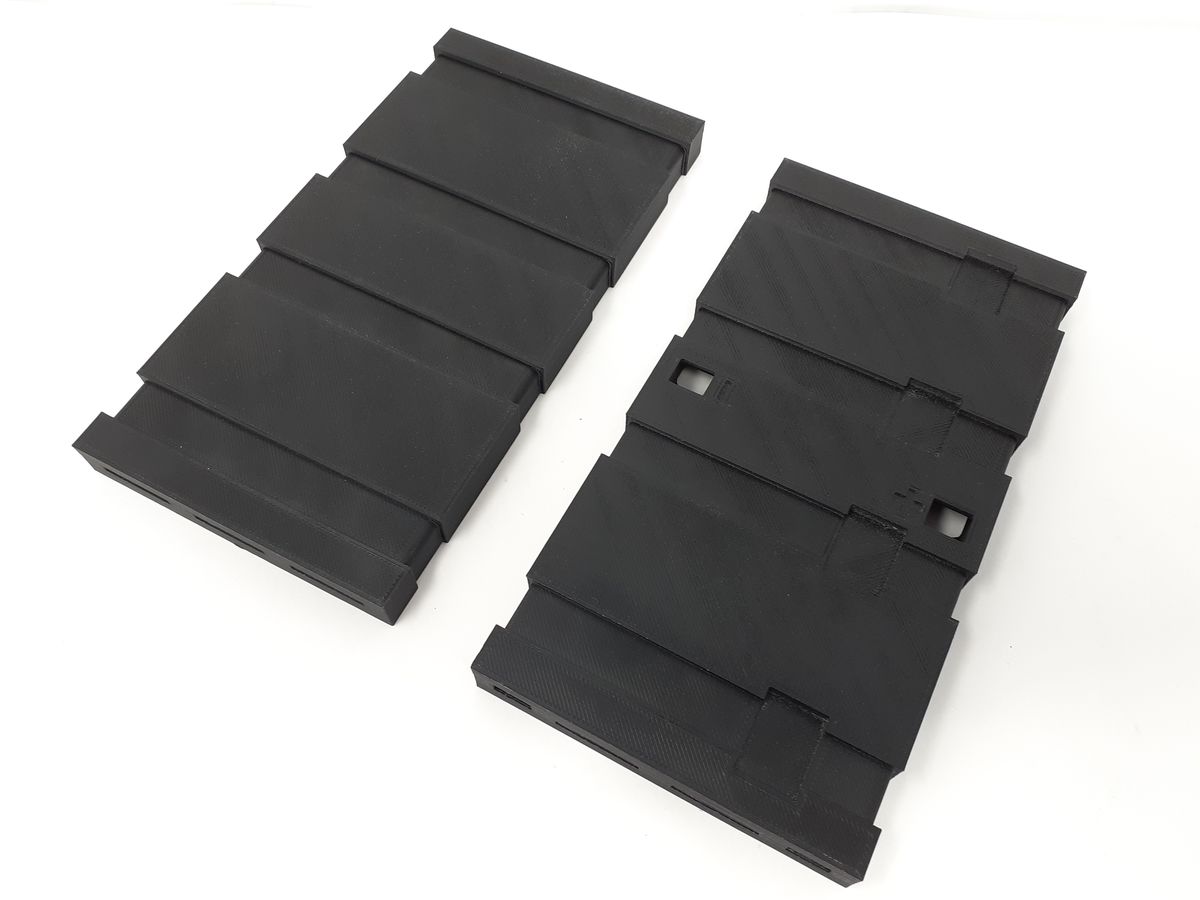
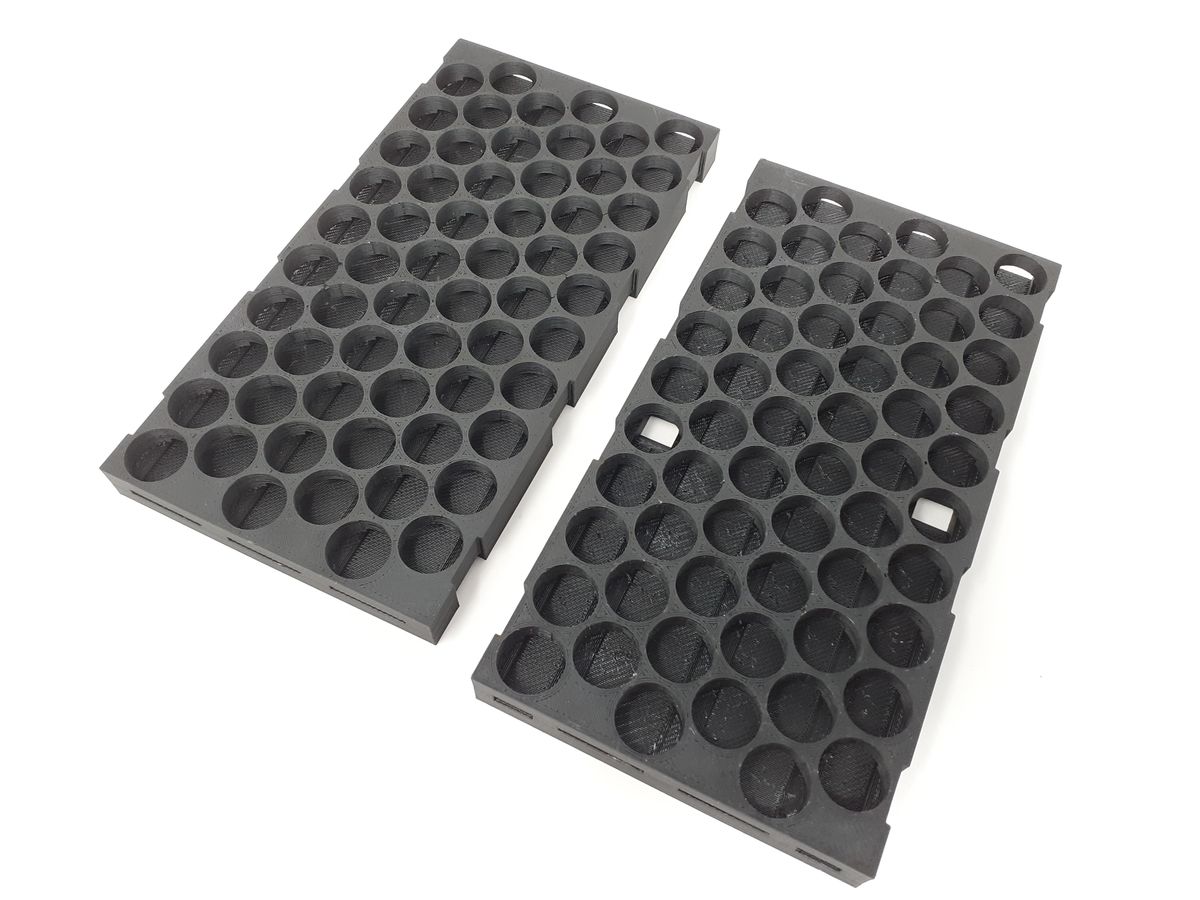
Then back on 2 Feb I ordered new rev 6 battery parts in ABS. I would prefer nylon, but until I build a printer to make them myself that is just too costly due to the small number of places that can create them in that material. From the looks of i-Solids in Texas, I think this round will be better than the last one.
Here’s some photos of the new parts they sent me after printing (I hope to get them tomorrow or Wednesday, weather depending).
On the same day I received an email from DHX Machines with the CAD file for the new Peregrine alpha-test motors. So hopefully they will be out for testing sooner than later. Yes!
I then worked on the motor support. I think this will prove to be a good and flexible design. There were lots of things to consider for this torque monster (estimated to be about 120Nm, 89ft. lb) to keep from bending the frame. For reference, an IAME X30 Super Shifter Spec. USA 175cc only delivers 27 Nm, 19.9ft. lb!
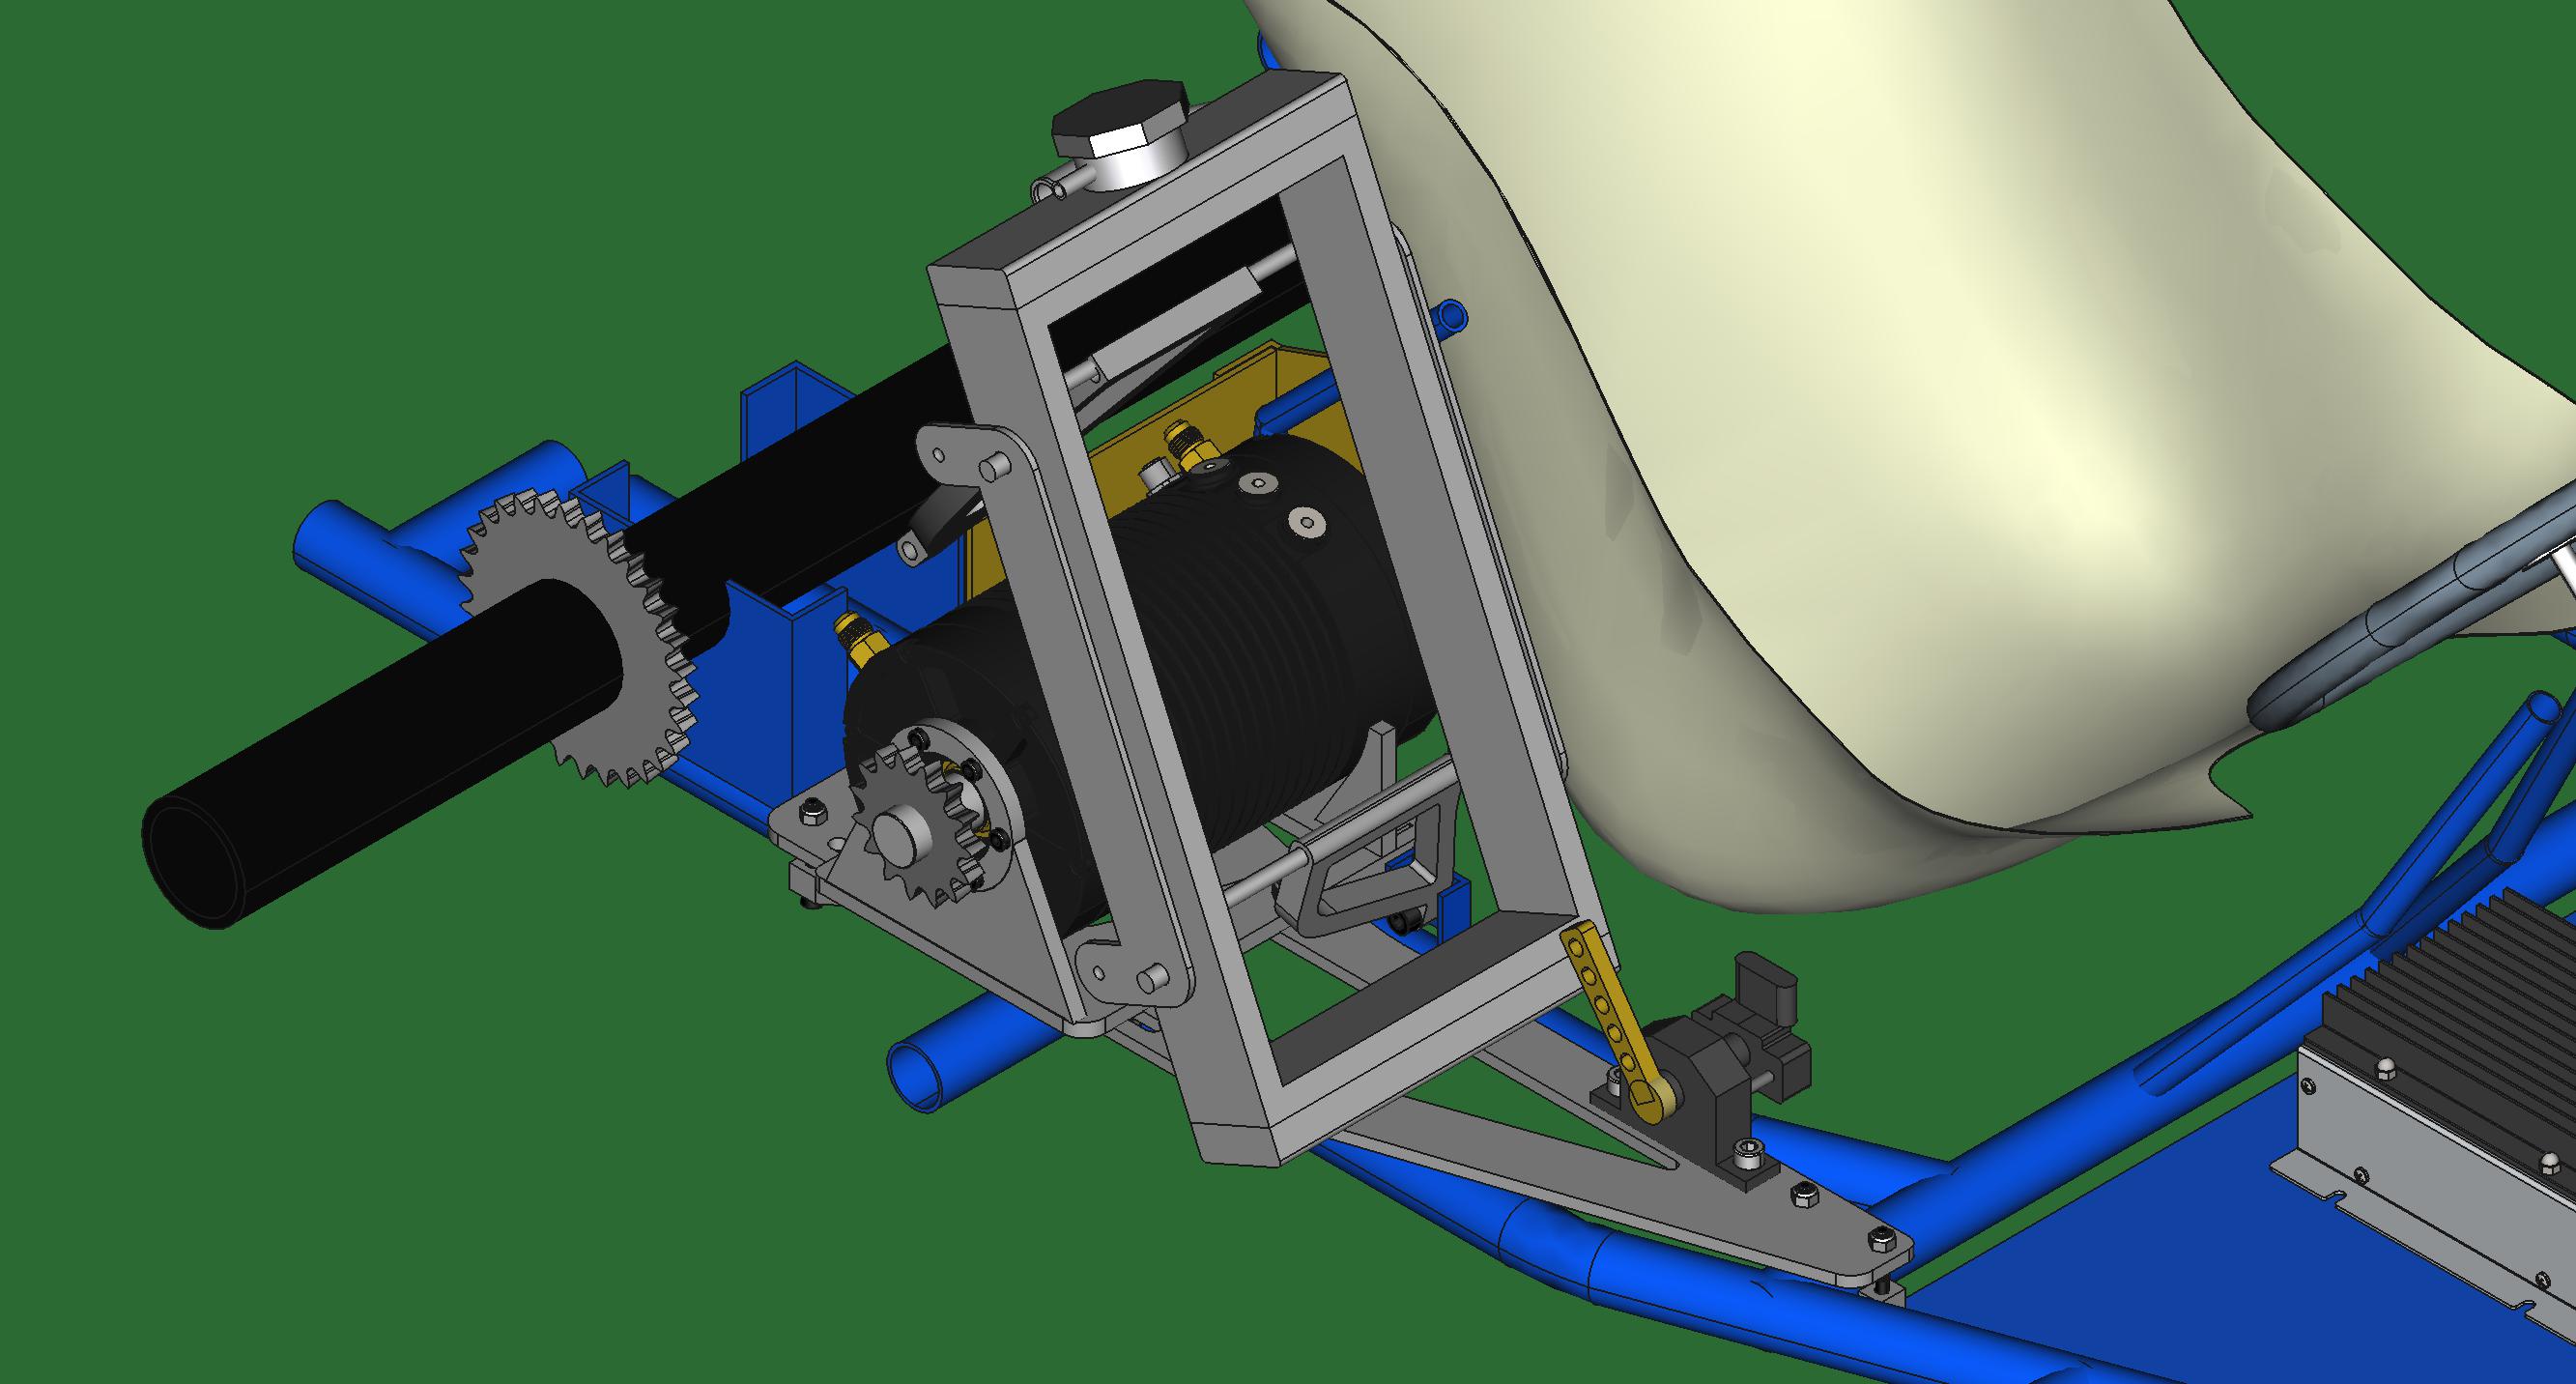
Now I’m working on the controller mount. I think something like this will work with ducting added to the bottom to draw cool air across the heat sink. If not, I’ll get a water cooling plate for it and upgrade to a double pass radiator.
Of course right now - it’s mostly about staying warm with something like -15F tonight. 
3 Likes
Catching up on your build 
I see your doing 18650s! I have 6x 13s3p batteries that I plan on making a 96v pack
I’m trying to sort charging solution, I have a level2 charger at home so I’m looking for a bms and on board ac to dc to talk to the level2. Would be fun as well because tracks in Los Angeles have level 2 chargers or at least a 110 outlet nearby.
2 Likes
Thanks… Honestly, I’m not sure what the low voltage range for a level 2 charger is. I vaguely remember something about 196v or so being the low point, but that is probably not right.
The Orion2 BMS I will be using could talk to chargers to tell them what it needs, but only if the charger can go as low as my pack voltage of about 176v (42S10P) with this first battery. I will be using a stand-alone 240v charger that communicates via canbus with the BMS to correctly charge the pack, so it will have the same effect of a level-2 charger. Unfortunately there are no easily accessible 120v outlets at the track, let alone 240v so I’ll need to use a gas generator to recharge at the track.
The track I visited has 3 level2 chargers near by =)
the level two is 220/240 AC, the charger controller would take the AC to DC. Still looking for a solution for it. I see a couple but man they are pricy…
Chevy volt is an option on the table right now…
I looked up what the Orion2 BMS supports, which is CHAdeMO that seems to support anything from 50-500v. Your 96v battery should work fine with that.
Yes, EV anything new is pricy due to the small, but increasing market. A quick search shows (at least one version) of the volt BMS is designed for 360v. I’m not sure if they can be reprogrammed for what you need.
1 Like
How this sort of stuff would have been fun when I was first in school!
1 Like
Update…
Progress has been much slower the last couple of months due to work taking more time than I like and leaving me exhausted. Plus some ice storm cleanup, freezing cold repairs, etc. Anyhow, enough excuses…
Battery parts are ALL here and getting assembled this weekend! Controller/inverter mount is being made. Motor mount design is complete (just needs cutting and some TIG welding). Charger and BMS are on the way. Seat is being be moved over about 2.5 inches to the right this weekend (no more crazy angle karting), and then paint. I will then mainly just need… the motor! Dang wuhan flu delays…
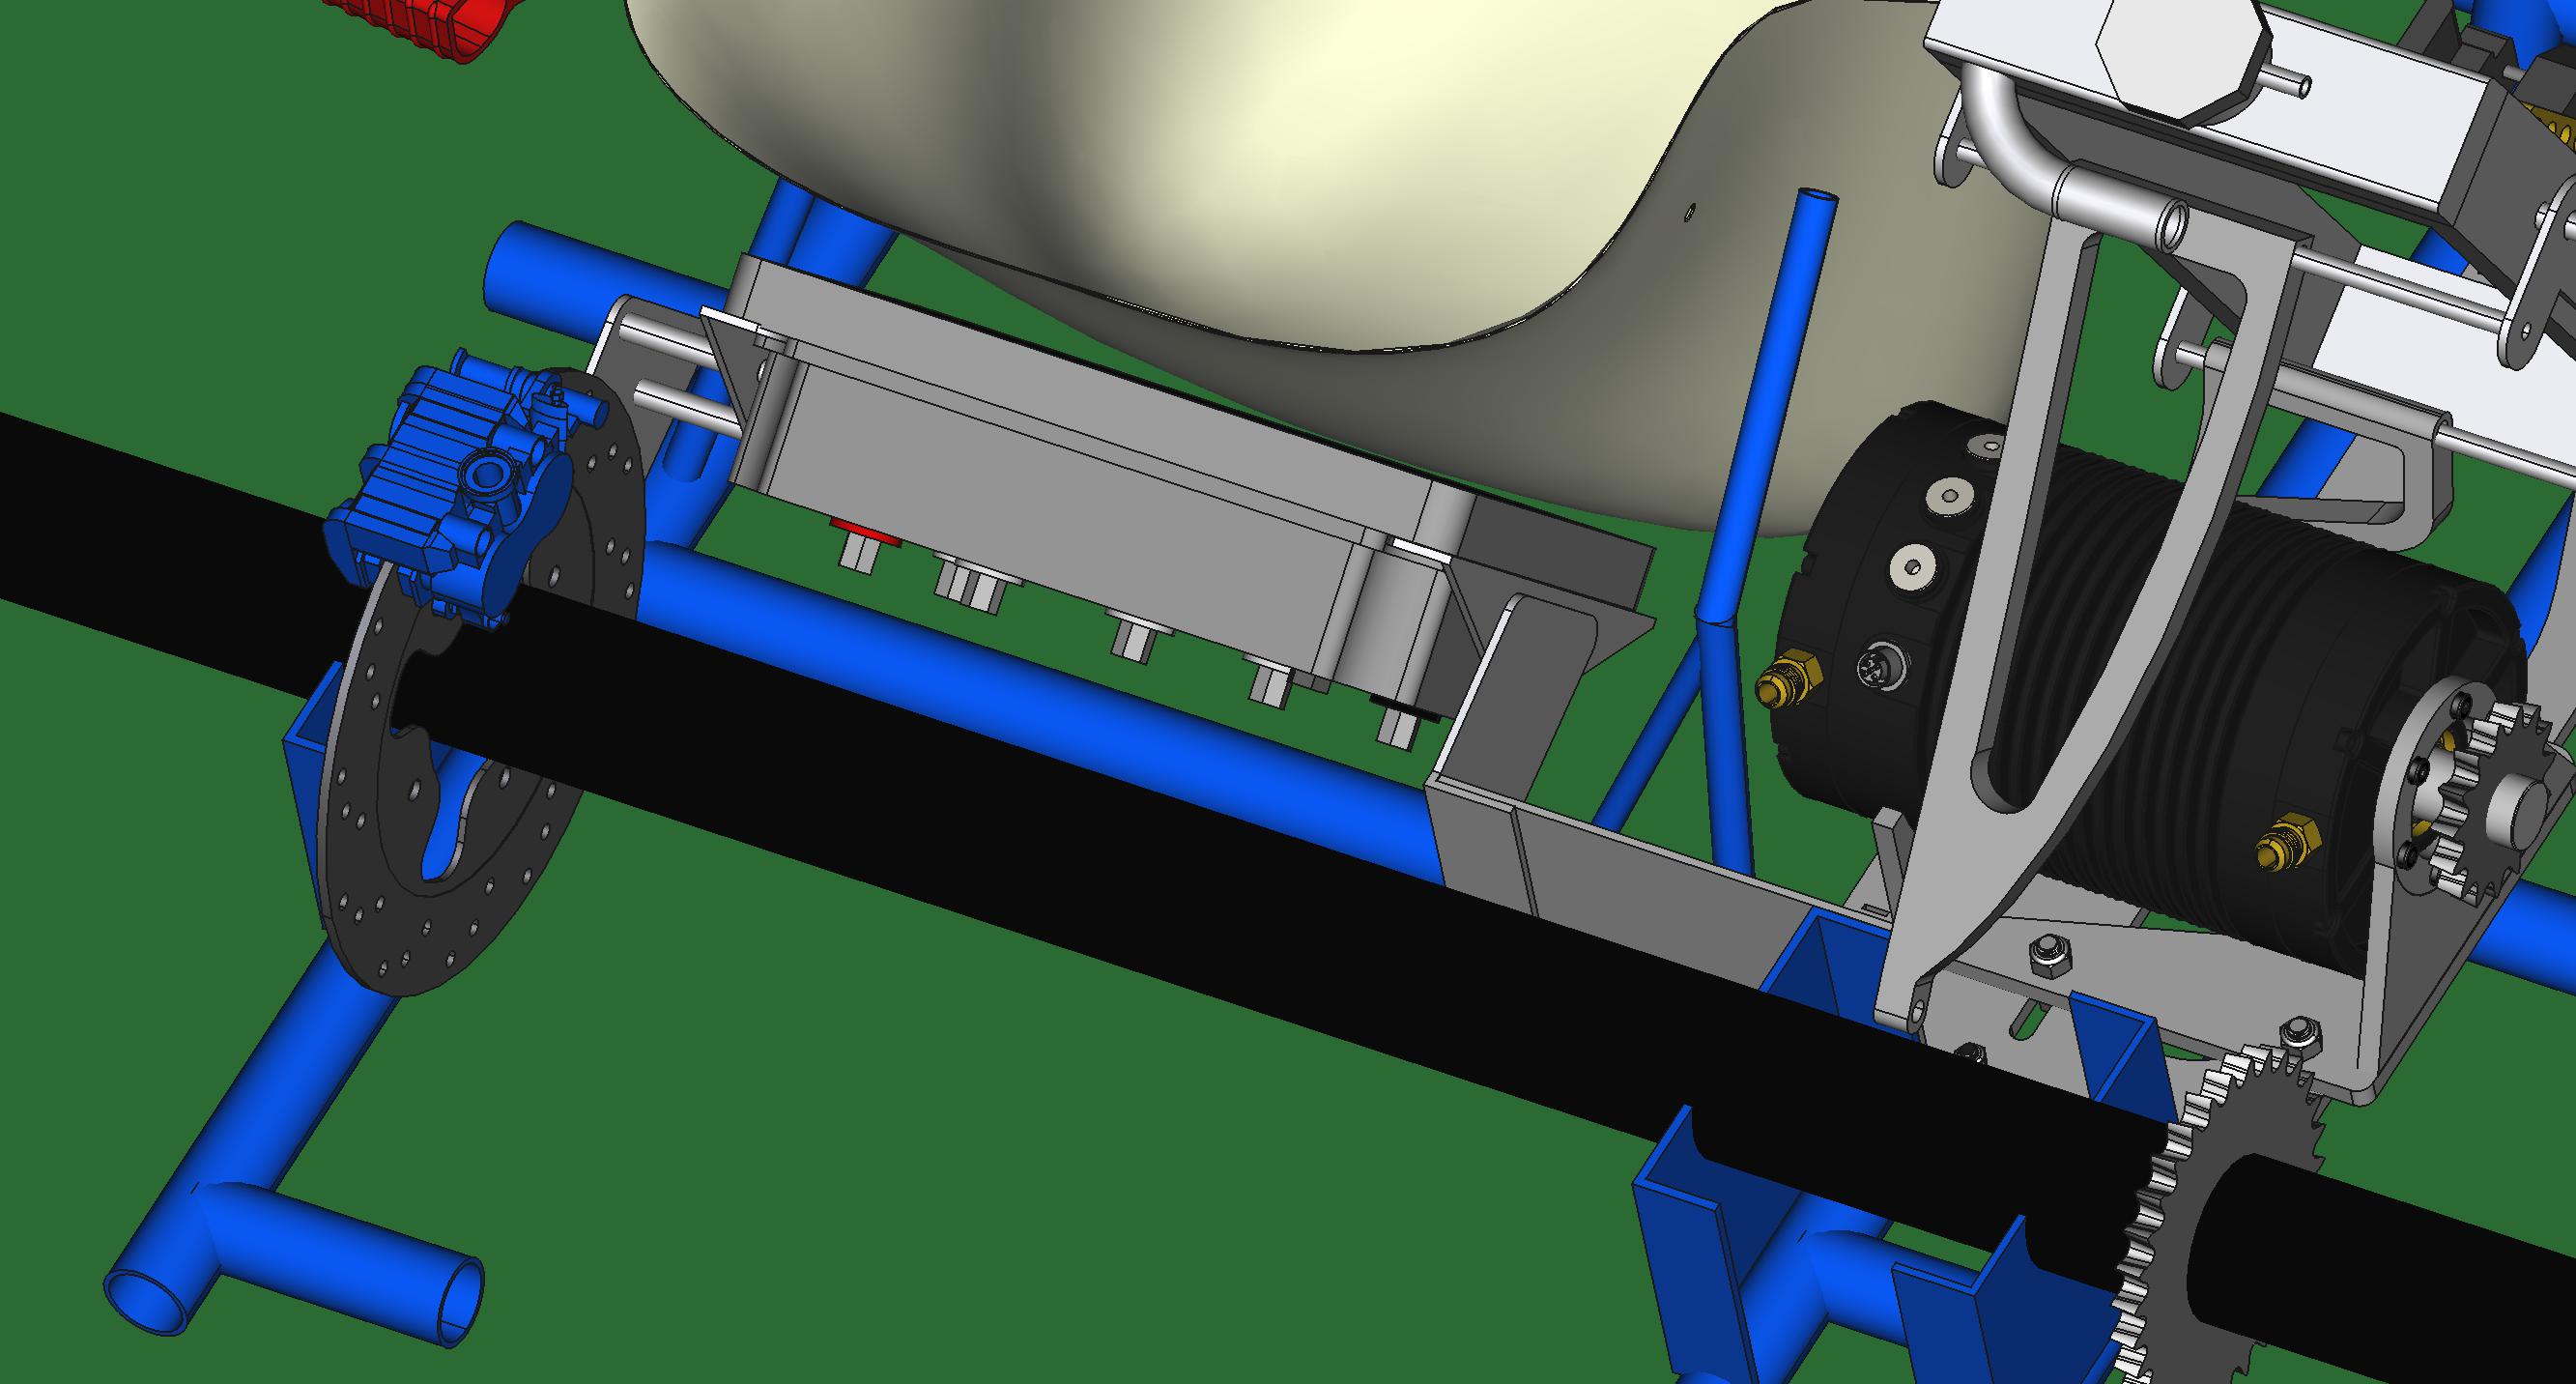
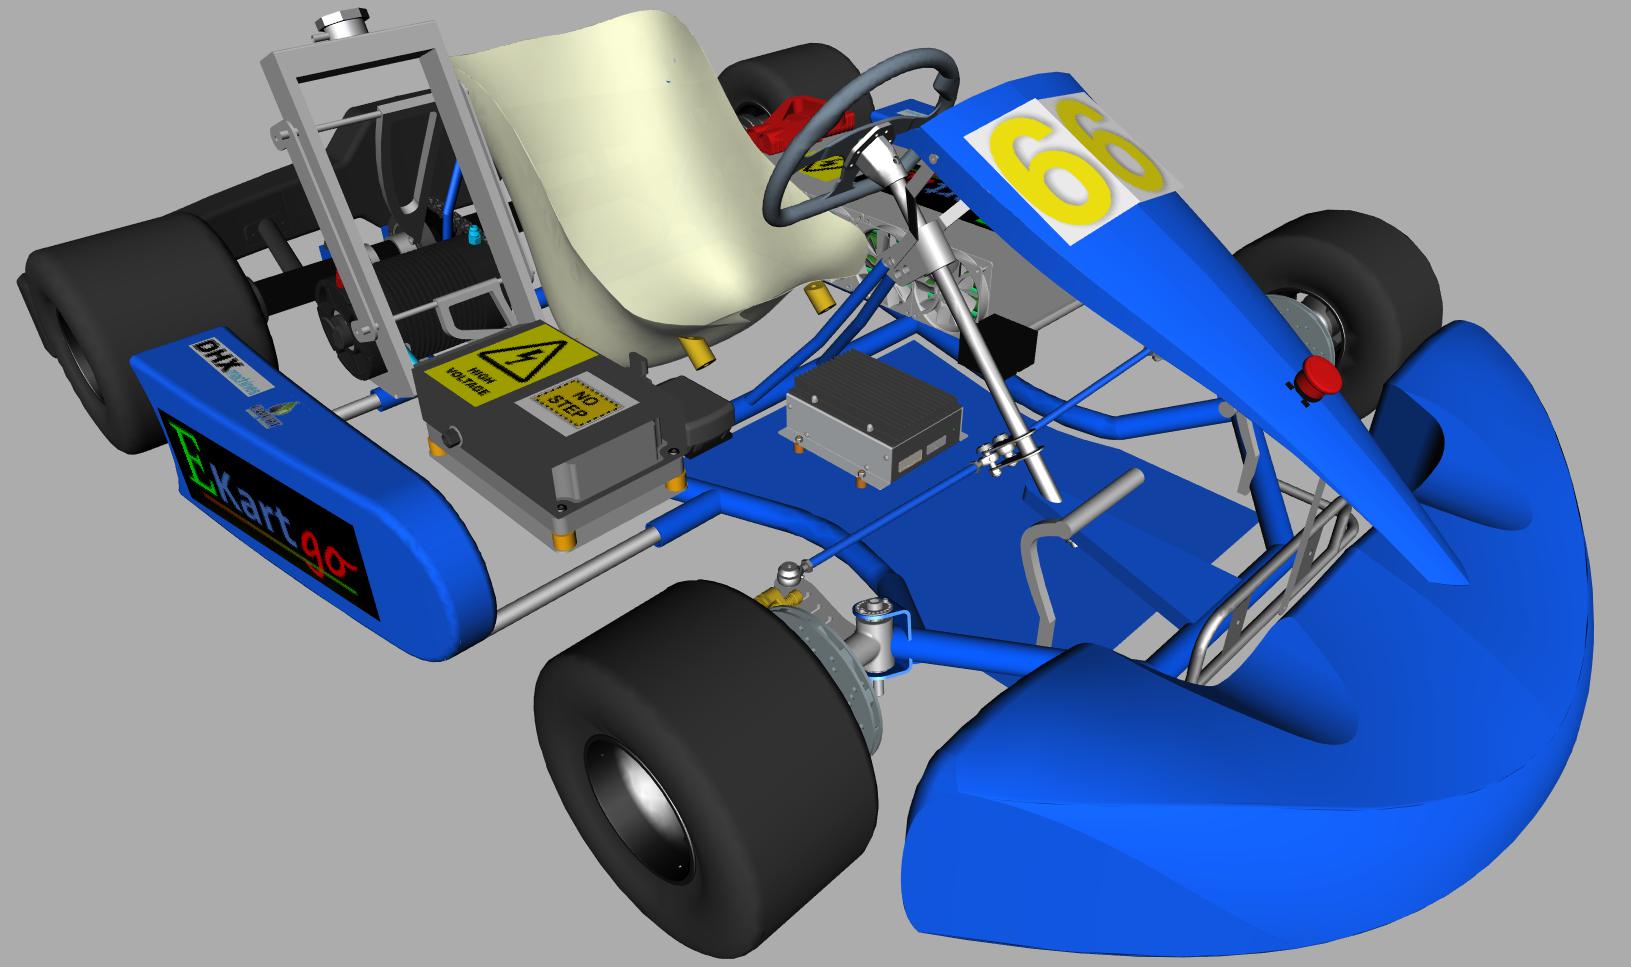
So since everything is a nice mess in the garage and the weather is very English like, here is the final design rendered in CAD.
3 Likes