I’m after some opinions on when you do your maintenance items. I’ve just had my second session last weekend and first in the dry. The kart performed great and I learnt a lot more about It and it’s performance. I have been accumulating spares as I see them come up on sale etc. When do you guys change the following items and what else should I look to do very soon, and what in the future?
Brake pads - Arrow X1, do I wear them down to the backplate?
Brake Fluid - yearly?
Brake Rotor - when it’s not straight?
Gear Oil - yearly?
Bearings - ever?
Coolant - yearly?
Spark Plug - only if fouled?
I run a pre-evo Rotax engine and so far I’ve changed the coolant because it had a glycol based coolant previously. I have purchased a spark plug, gear oil, coolant hoses, brake pads, brake fluid, a throttle cable and brake safety cable. Plus I’ve changed out a bunch of the old nyloc nuts and replaced some bolts. I’ve also replaced the fuel lines and fuel filter, and I replaced my air filter but haven’t re-oiled it yet.
I bought some as useful spares and some to do so I have a clean slate.
Brake pads, I’d replace them around when they’re 3/4 worn.
Brake fluid, either at the end or being of your season.
A dead blow hammer while on the kart can take out little tweaks out of the rotor, otherwise replace.
Won’t hurt the change the gear oil. Depending on your engine, 50 or 100 ml.
Clean the power valve, every weekend.
Replace the exhaust packing, every second or third weekend should be often enough.
Carb, disassemble and clean after every race weekend. A sonic clean is great if you have one. Do not spray brake cleaner on the needle valve.
Axle beatings, without a chain on, spin the axle. If there is any roughness, squeaking or grinding, replace them. It will usually be the right one but replace them both.
If your engine is stored anywhere where it could freeze, get every ounce of water out of it. Fill with antifreeze. Refill with water before racing again.
Plugs, we would run three different plugs during the season because of changes in temperature. Think they were a W27, W29, W31. The W29 got the most use. I’d retire them all at the end of the year.
Check the shoe thickness on the clutch and wear on the drum gear.
Be pro-active on anything you think might end your day at the track.
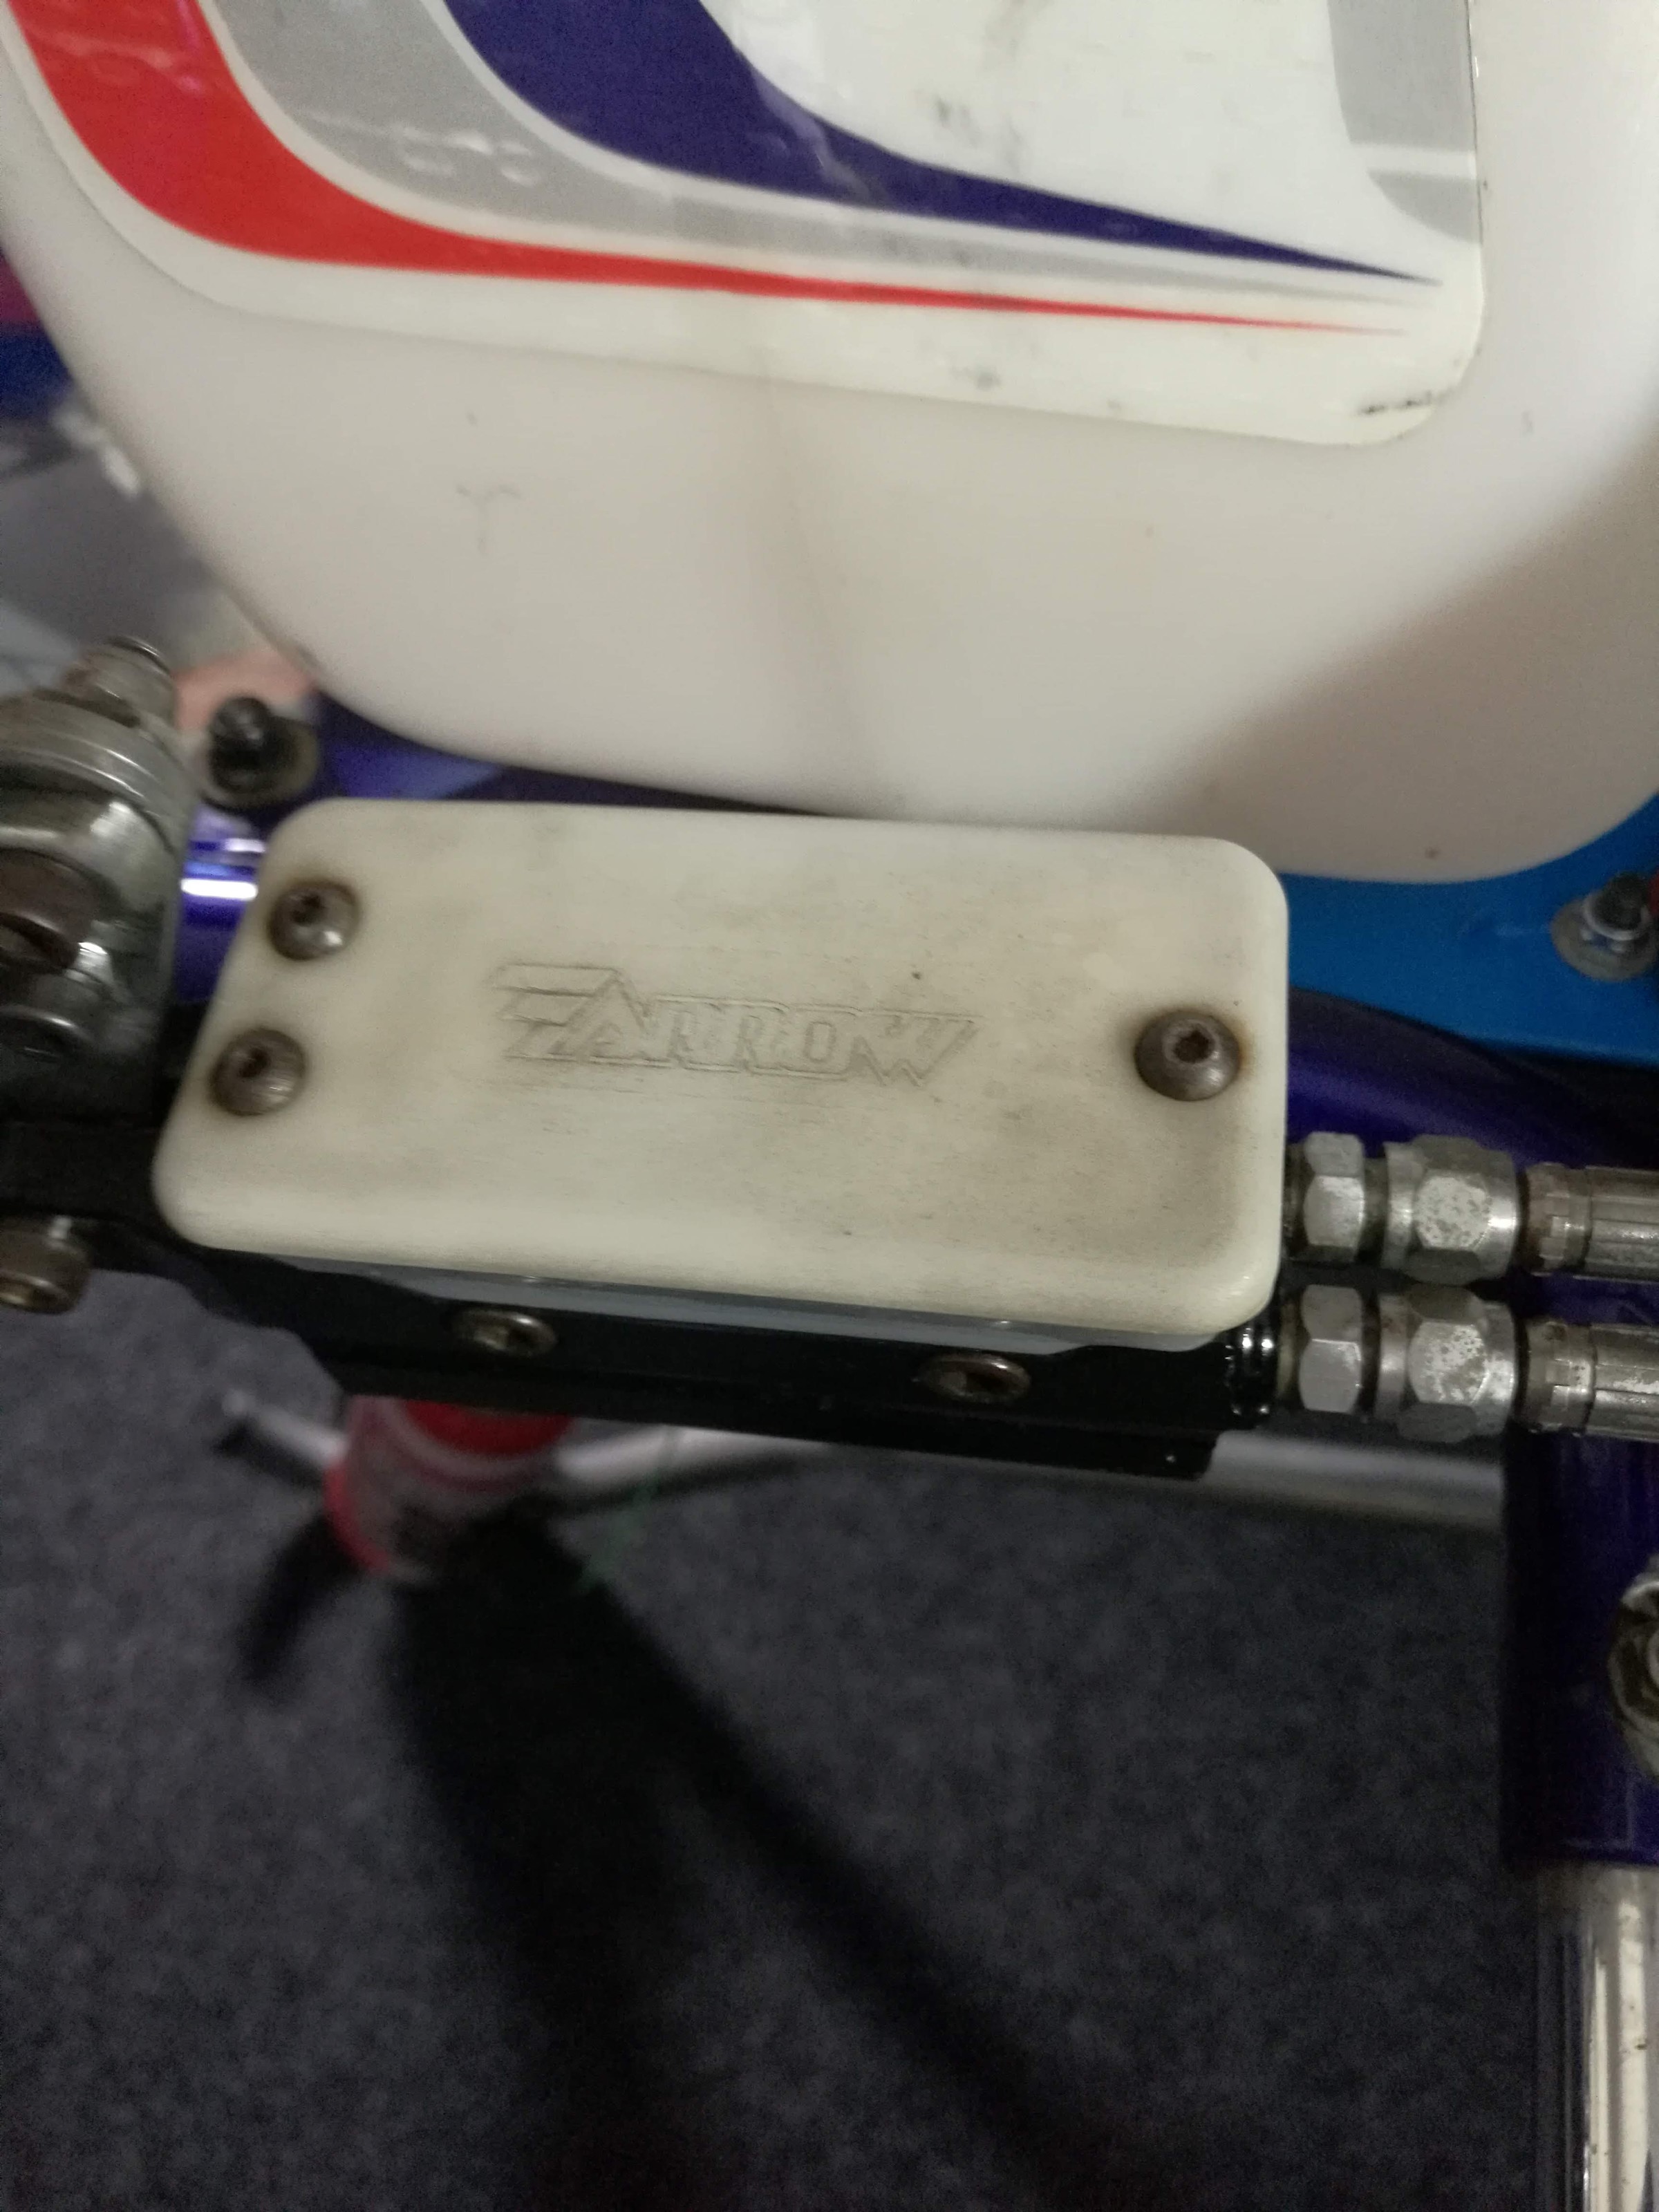
Has anyone changed the brake fluid on their Arrow kart (or any kart with a similar system, i.e. no fitting for brake bleeder in master cylinder)?
I was planning on flushing it by pushing it through, in one bleed nipple and out the other. Does anyone have any tips? Is it possible to over fill the system?
The dent brake system is IMO one the best there is. Super maintenance free with no special bleeding quirks.
Just bleed like a car.
Open lid, crack one nipple at a time on caliper, attached bleeding tube, pump away. Once happy you have flushed old fluid through, hold down brake pedal and tighten nipple. Repeat other side.
All done. You wont need to touch again until next service.
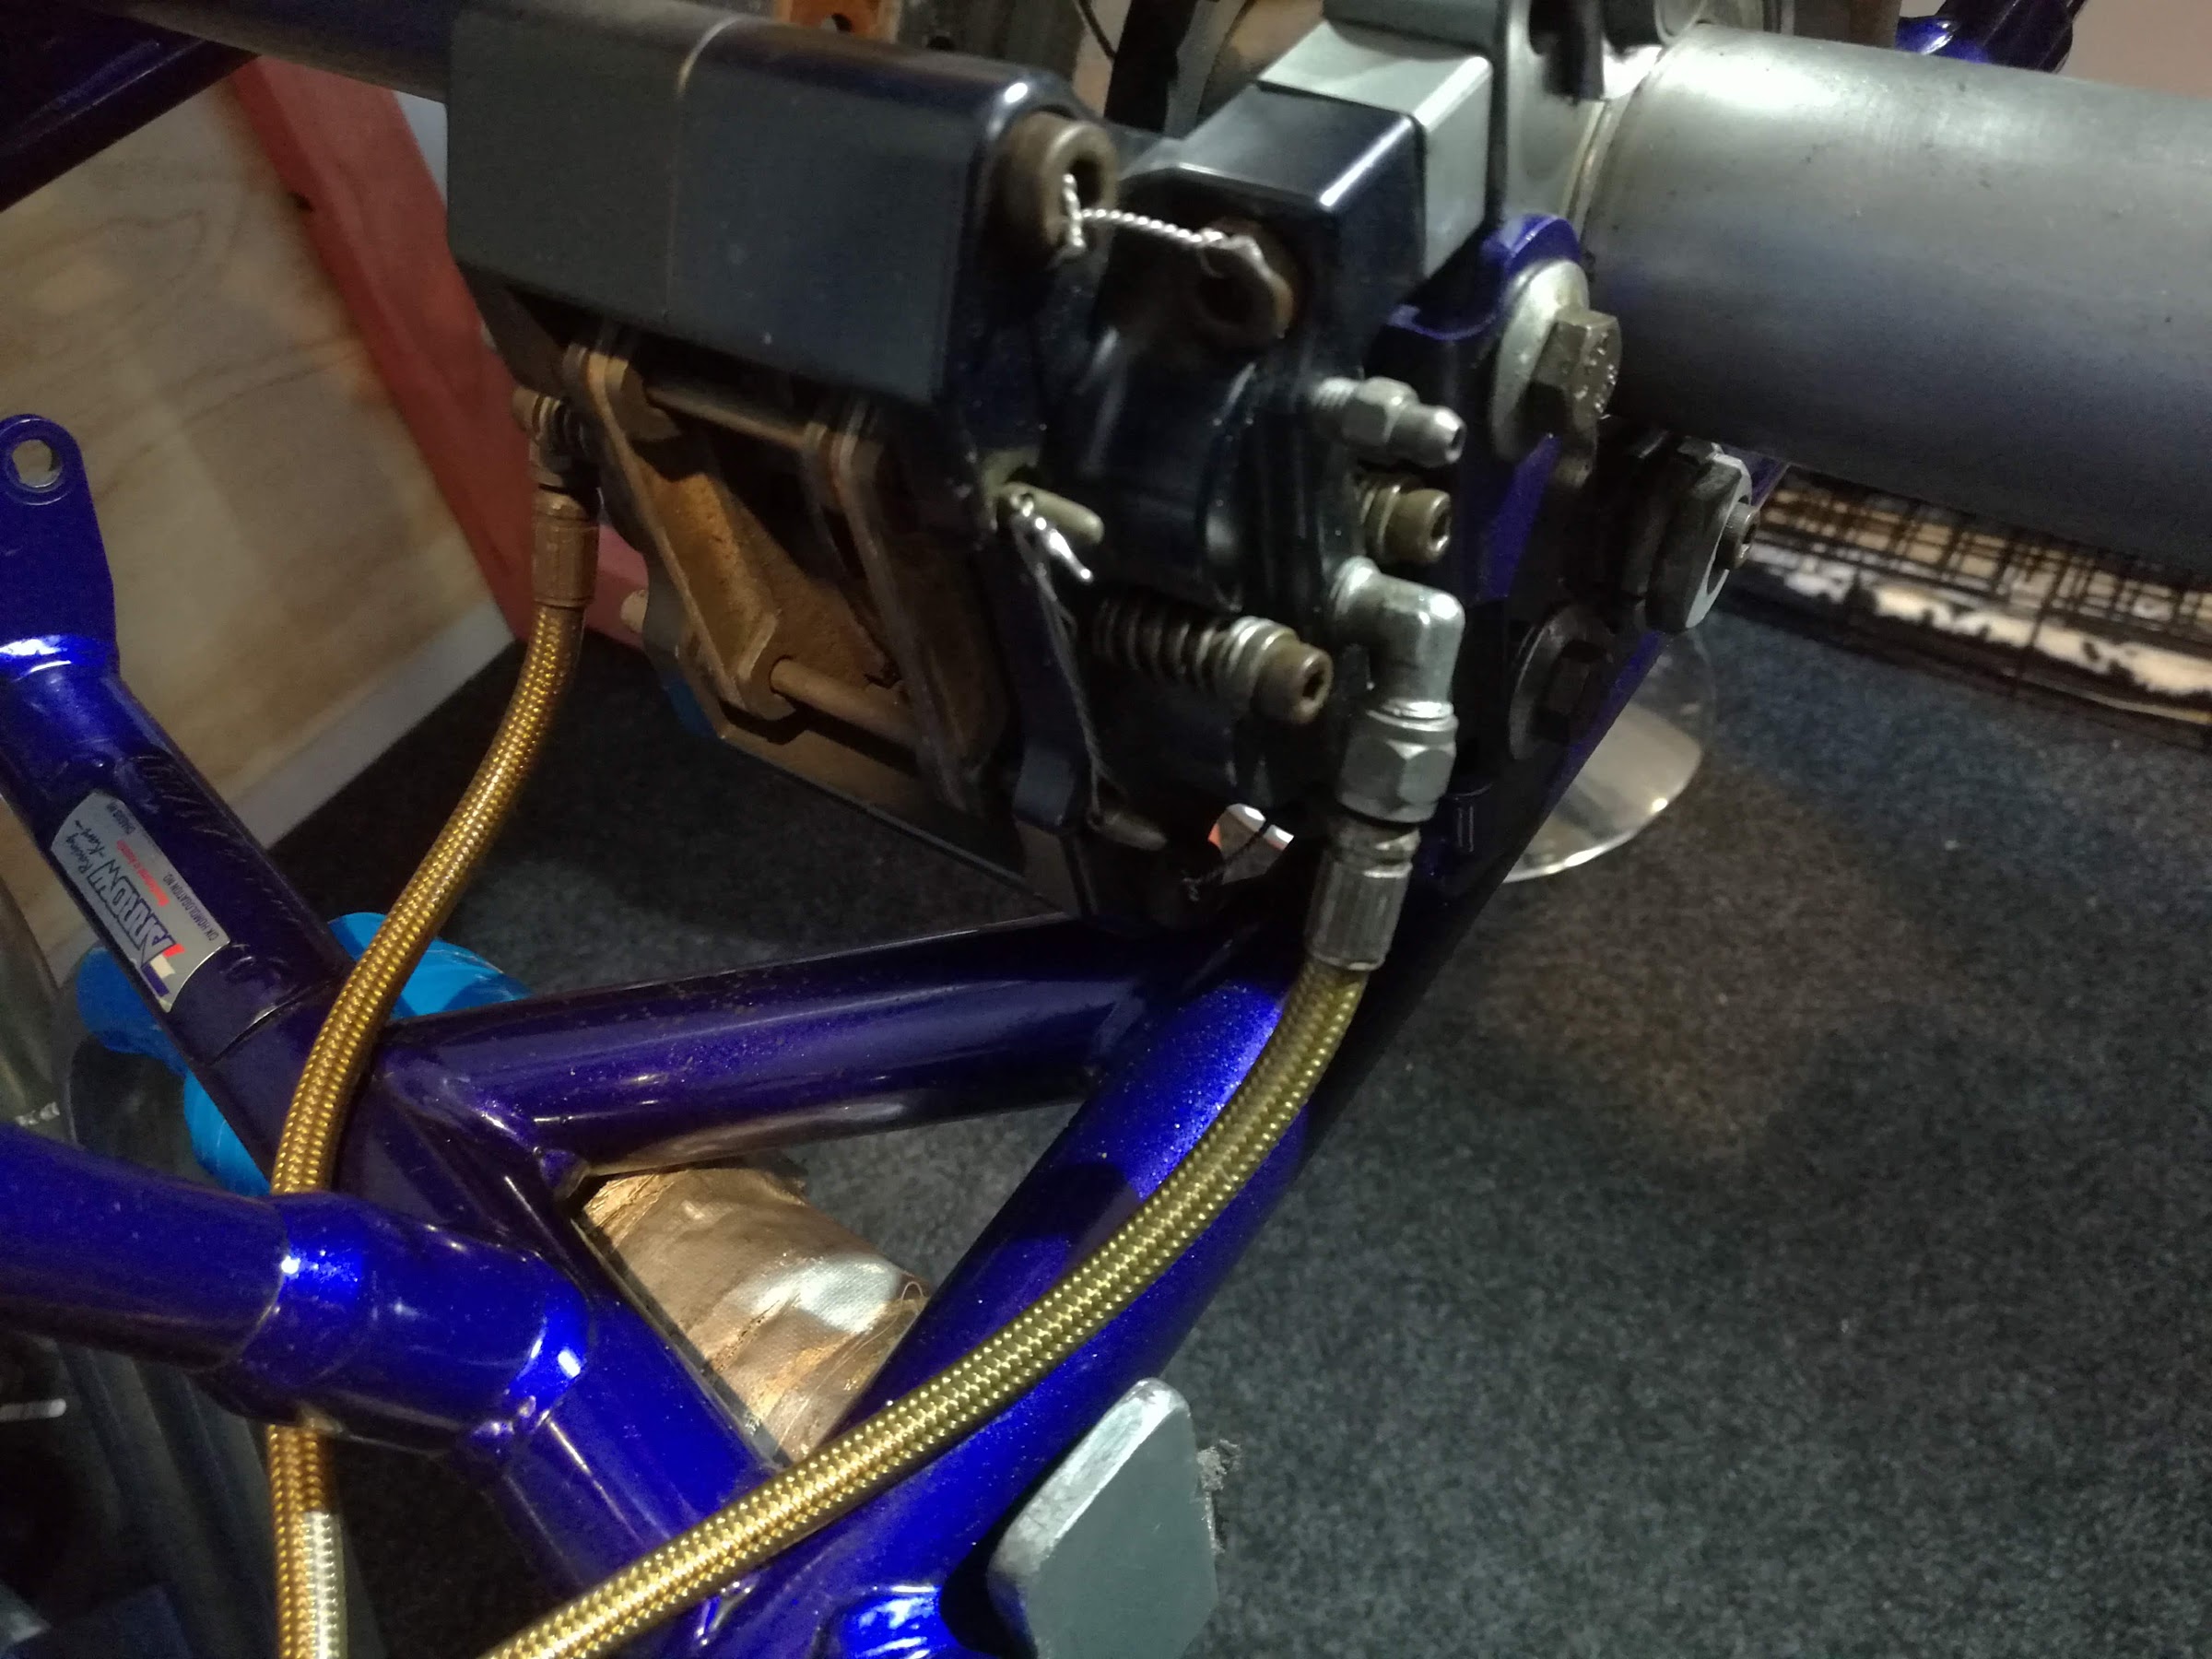
Bleed or flush by filling up reservoir in you first picture,
crack the top nipple in the bottom picture. should be one each side of caliper.
pump the pedal and fluid will come out.
Very important to close the nipple before the end of the brake stroke (ie while its under pressure) otherwise air will get into the caliper when pedal is released.
Also keep an eye on how full the reservoir is, because if the fluid drops too low you will also let air in the system.
Arrow brakes are very easy to bleed, once you have got the cordiatntion of pedal and bleed screw correct.
Do you think it’s worth trying my idea of leaving the system closed and letting the fluid flow through from one nipple to the other? Or should I drain it and refill it with the cover off the master cylinder?
I think would be easier to do it as described.
Don’t drain it, lower the level of the reservoir with out emptying it, by pumping the pedal. Then refill.
You cant over fill the system
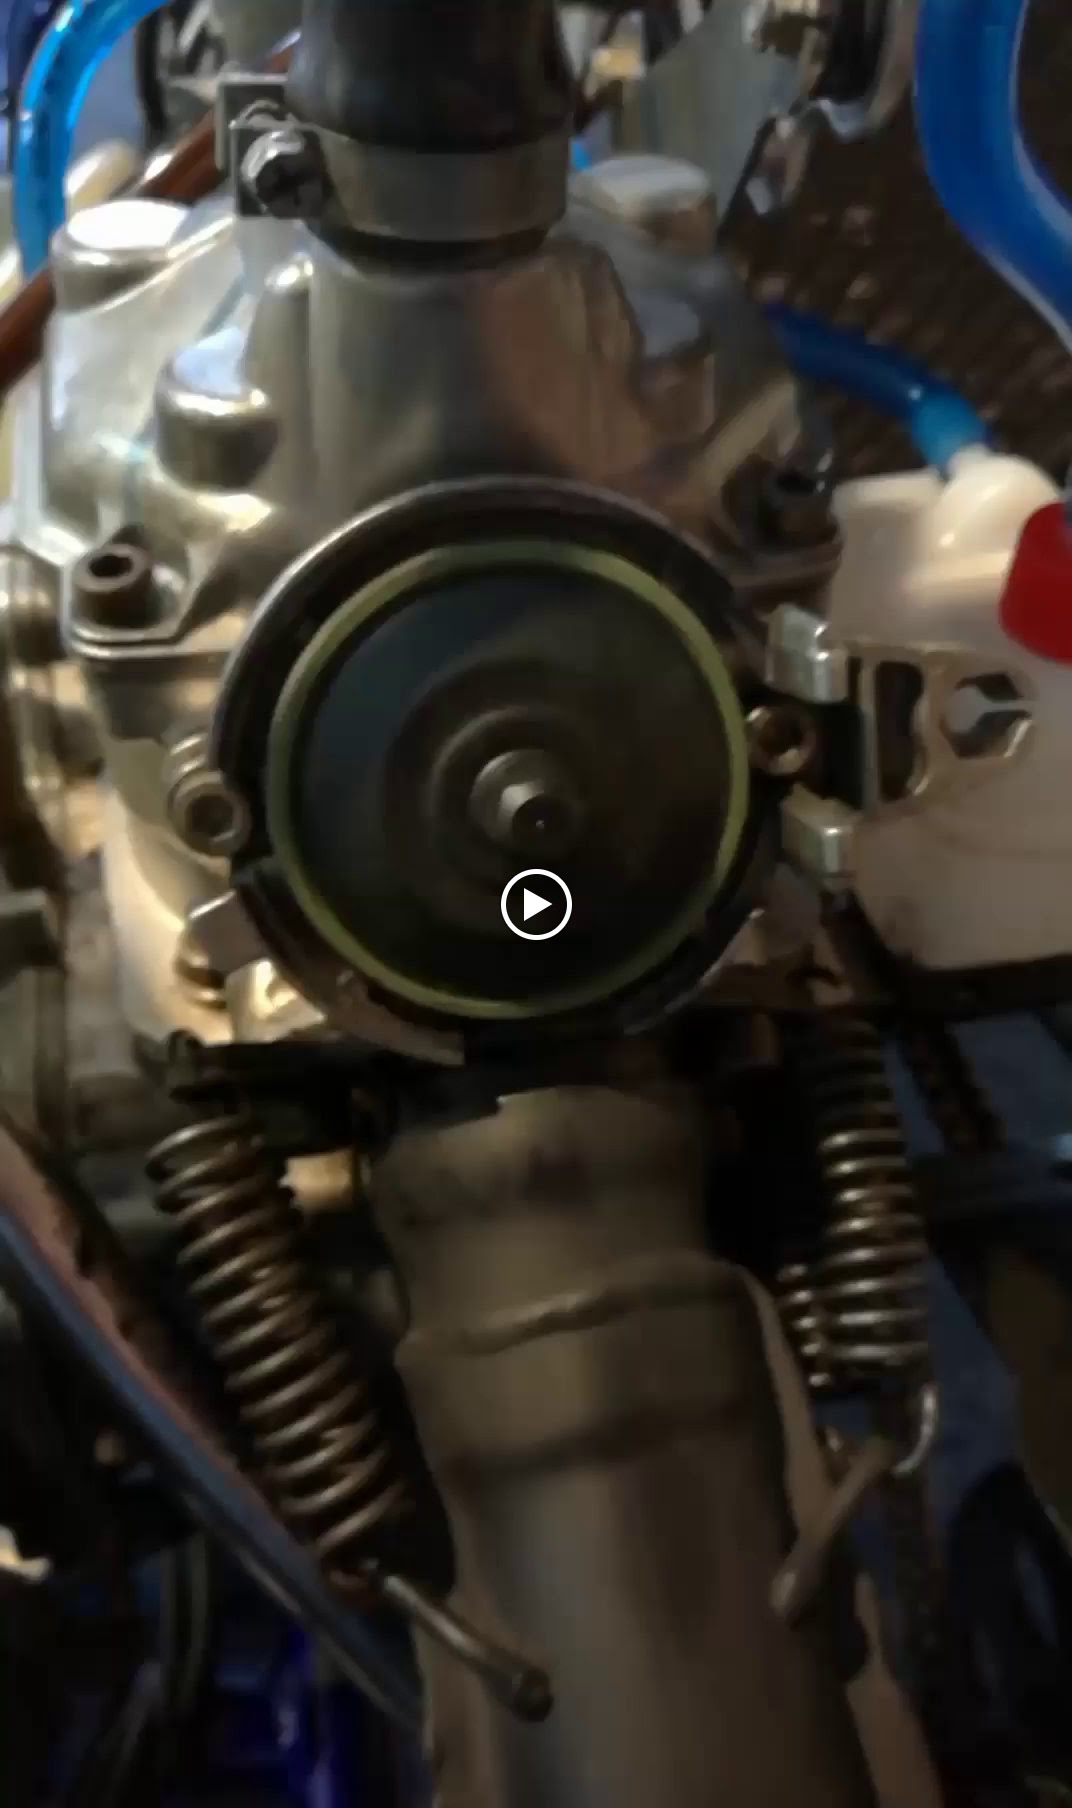
Can anyone explain to me how the Power Valve really works?
Does it matter that mine sits ‘in’ as it’s neutral position?
What affect does the change in length of blade/valve have? Mine’s (Rotax Max) ~72.5mm is that an issue? Is it good for performance? Or bad?
I found a recommendation of 73.5-74.5mm, but I can’t work out how you would lengthen it without leaving the blade rattling loose on the thread.
Liam, you should be able to get 1mm more without the blade rattling loose. The power valve helps your engine run better at low RPM and at high RPM by changing your exhaust port. It is a variable exhaust, similar to changing the cam timing on a 4 stroke engine.
Liam, remove the exhaust and your power valve cover and spring. Push the valve all the way in by hand and you should hear a metallic clang, also if you look in through the exhaust port the valve should be hitting the stops just before the skirt of the piston. Next release the valve until it is open 100%, again look in through the exhaust port and the valve should be flush with the upper surface of the cylinder head (it should not be protruding partially into the cylinder head).
Once you are able to achieve both of the above then the length setting on the valve is correct. This in fact is the entire reason behind shortening or lengthening the valve. If the valve isn’t full against the stops in the 100% closed position you won’t get maximum bottom end performance. Similarly if it isn’t totally out of the way and giving the maximum opening when im the 100% open position then you’d be sacrificing high rpm power.
The length of the valve isn’t adjusted by the stud and the valve itself. Thread this in all the way with high temperature loctite. The overall length measurement is made by turning the black cap on to the top of the stud and measuring using a vernier. Use the common lengths 73-75mm as a starting point, but visually confirm the valve is fully closing and opening and adjust the length as necessary. This way it will be 100% optimized for your particular engine.
Some more important things to check when it comes to power valve
-change the gasket between the power valve and cylinder head and ensure it is correctly aligned with the bleed hole.
-with the valve fully assembled in place and bolted down, remove the cover and spring and push the valve in by hand, it should spring back to the open position smoothly and quickly with absolutely no resistance. If it does not come back up or comes back sticky then there is misalignment of the blade in the cylinder head (this is very common). Undo the screws and remove valve and make small adjustments to the blade alignment such that it aligns 100% perpendicular to the slot/opening. It’ll take a couple iterations to get it perfect.
Do NOT store the kart with the cover and spring installed to the PV. Always remove the spring so the valve is in the open position while stored. Place a short piece of fuel line below the bellows to keep the valve fully open. You can then put the cover and clip back on then tie strap the spring to the clip, this way you’d remember to put it back in before running the engine again.
-Once you get the valve working 100% properly moving in and out smoothly, don’t constantly disassemble the valve between race meets. Just keep removing the spring while stored and it’ll be fine. You can strip and clean every 4 race events or so and always change the gasket when you do. Be sure you’re using proper oil in your fuel mix, the best oil is a 100% ester based fully synthetic. I use bel-ray H1R.
-A proper seal between your exhaust and cylinder head is vital for proper operation of the PV. Anytime you change sprocket or shift the engine you need to slacken the exhaust mounts and ensure there is proper alignment as well as sealing. Use a thin uniform layer of high quality high temp silicon when installing.
Once you follow all the above you’d be good to go. The last step is setting the red adjuster on track. The optimum setting can only be achieved from testing. Make big changes (10 click increments) and use your stop watch as well as feeling of how the engine pulls to narrow the to the optimum range. From here you can repeat the above with smaller click increments to get it spot on. Do this every time you’re at a new track.
This is what my power valve does both before and after cleaning. Definitely not what you mention about resting in the open position. What would the possible issues be here do you think? Is it an indication of a non-functional PV?