Great video TJ! I like how you do your designs with the illustrator program as well. My biggest issue is that I’m only using a Cricut machine to make my masks which limits me with what I can do. I need to learn more about the Cricut program to give myself more options.
Going back to the video there are parts in there that remind me why I like painting helmets. The first is taping all the lines out after base coat, so satisfying seeing the design take shape. Then second is laying down the clear and seeing the gloss appear ![]() I do worry about runs though when doing the clear!
I do worry about runs though when doing the clear!
Again I appreciate all the help and tips you have given me along the way with the other helmets I’ve done.
2 Likes
I used a Cricut for years as well. I believe they had a plug in for it to use with Illustrator but that was many versions ago so I’m sure it’s different now.
I have a really nice Roland GX24 plotter for cutting masks and it has a really great plug in for plotting direct from Illustrator.
The design part is my favorite part. I’m a designer at heart so that’s where my passion/skillset has always been, the painting process is painstaking for me. But it’s the only way to get the result to follow my vision; wraps or other graphic production just aren’t never going to be as good as something hand painted, for helmets at least.
2 Likes
@tjkoyen Do the helmets you paint come in ‘kit form’ (like bare shell & main liner, but no rubber around the shield opening or base, and ho hardware), or do you have to disassemble a ‘stock’ helmet before you paint it?
Your video, and your work, are awesome; thanks for sharing!
So for any normal client it’s all just off-the-shelf helmets so they come as-is with hardware, visor, padding, trims intact and I have to disassemble and reassemble.
For factory-sponsored drivers it depends on the manufacturer, as the helmet then just comes direct from the factory. Most of my pro guys are on Bell, so they will just have Bell send me a bare shell, which then has to go back to Bell for assembly. Arai usually just sends full helmets for their sponsored drivers.
But 90% of the time I’m painting ‘normal’ drivers so I get to do the tear down and reassembly. One of the most relaxing parts of the job tbh.
5 Likes


7 Likes
I wouldn’t really enjoy it if I couldn’t do the final assembly with the visor and visor strip on! I know you are doing it for a living and it must be awesome to see the Indy car drivers on tv wearing your helmets:+1:![]()
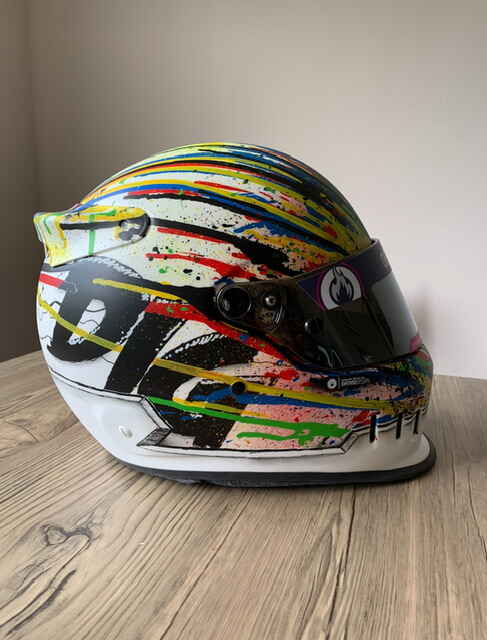
I really like this because it is so different. IMHO a lot of the custom helmets I see look like they could be a stock manufacturer design!
1 Like
Well my son is dragging his feet on approving the design ![]()
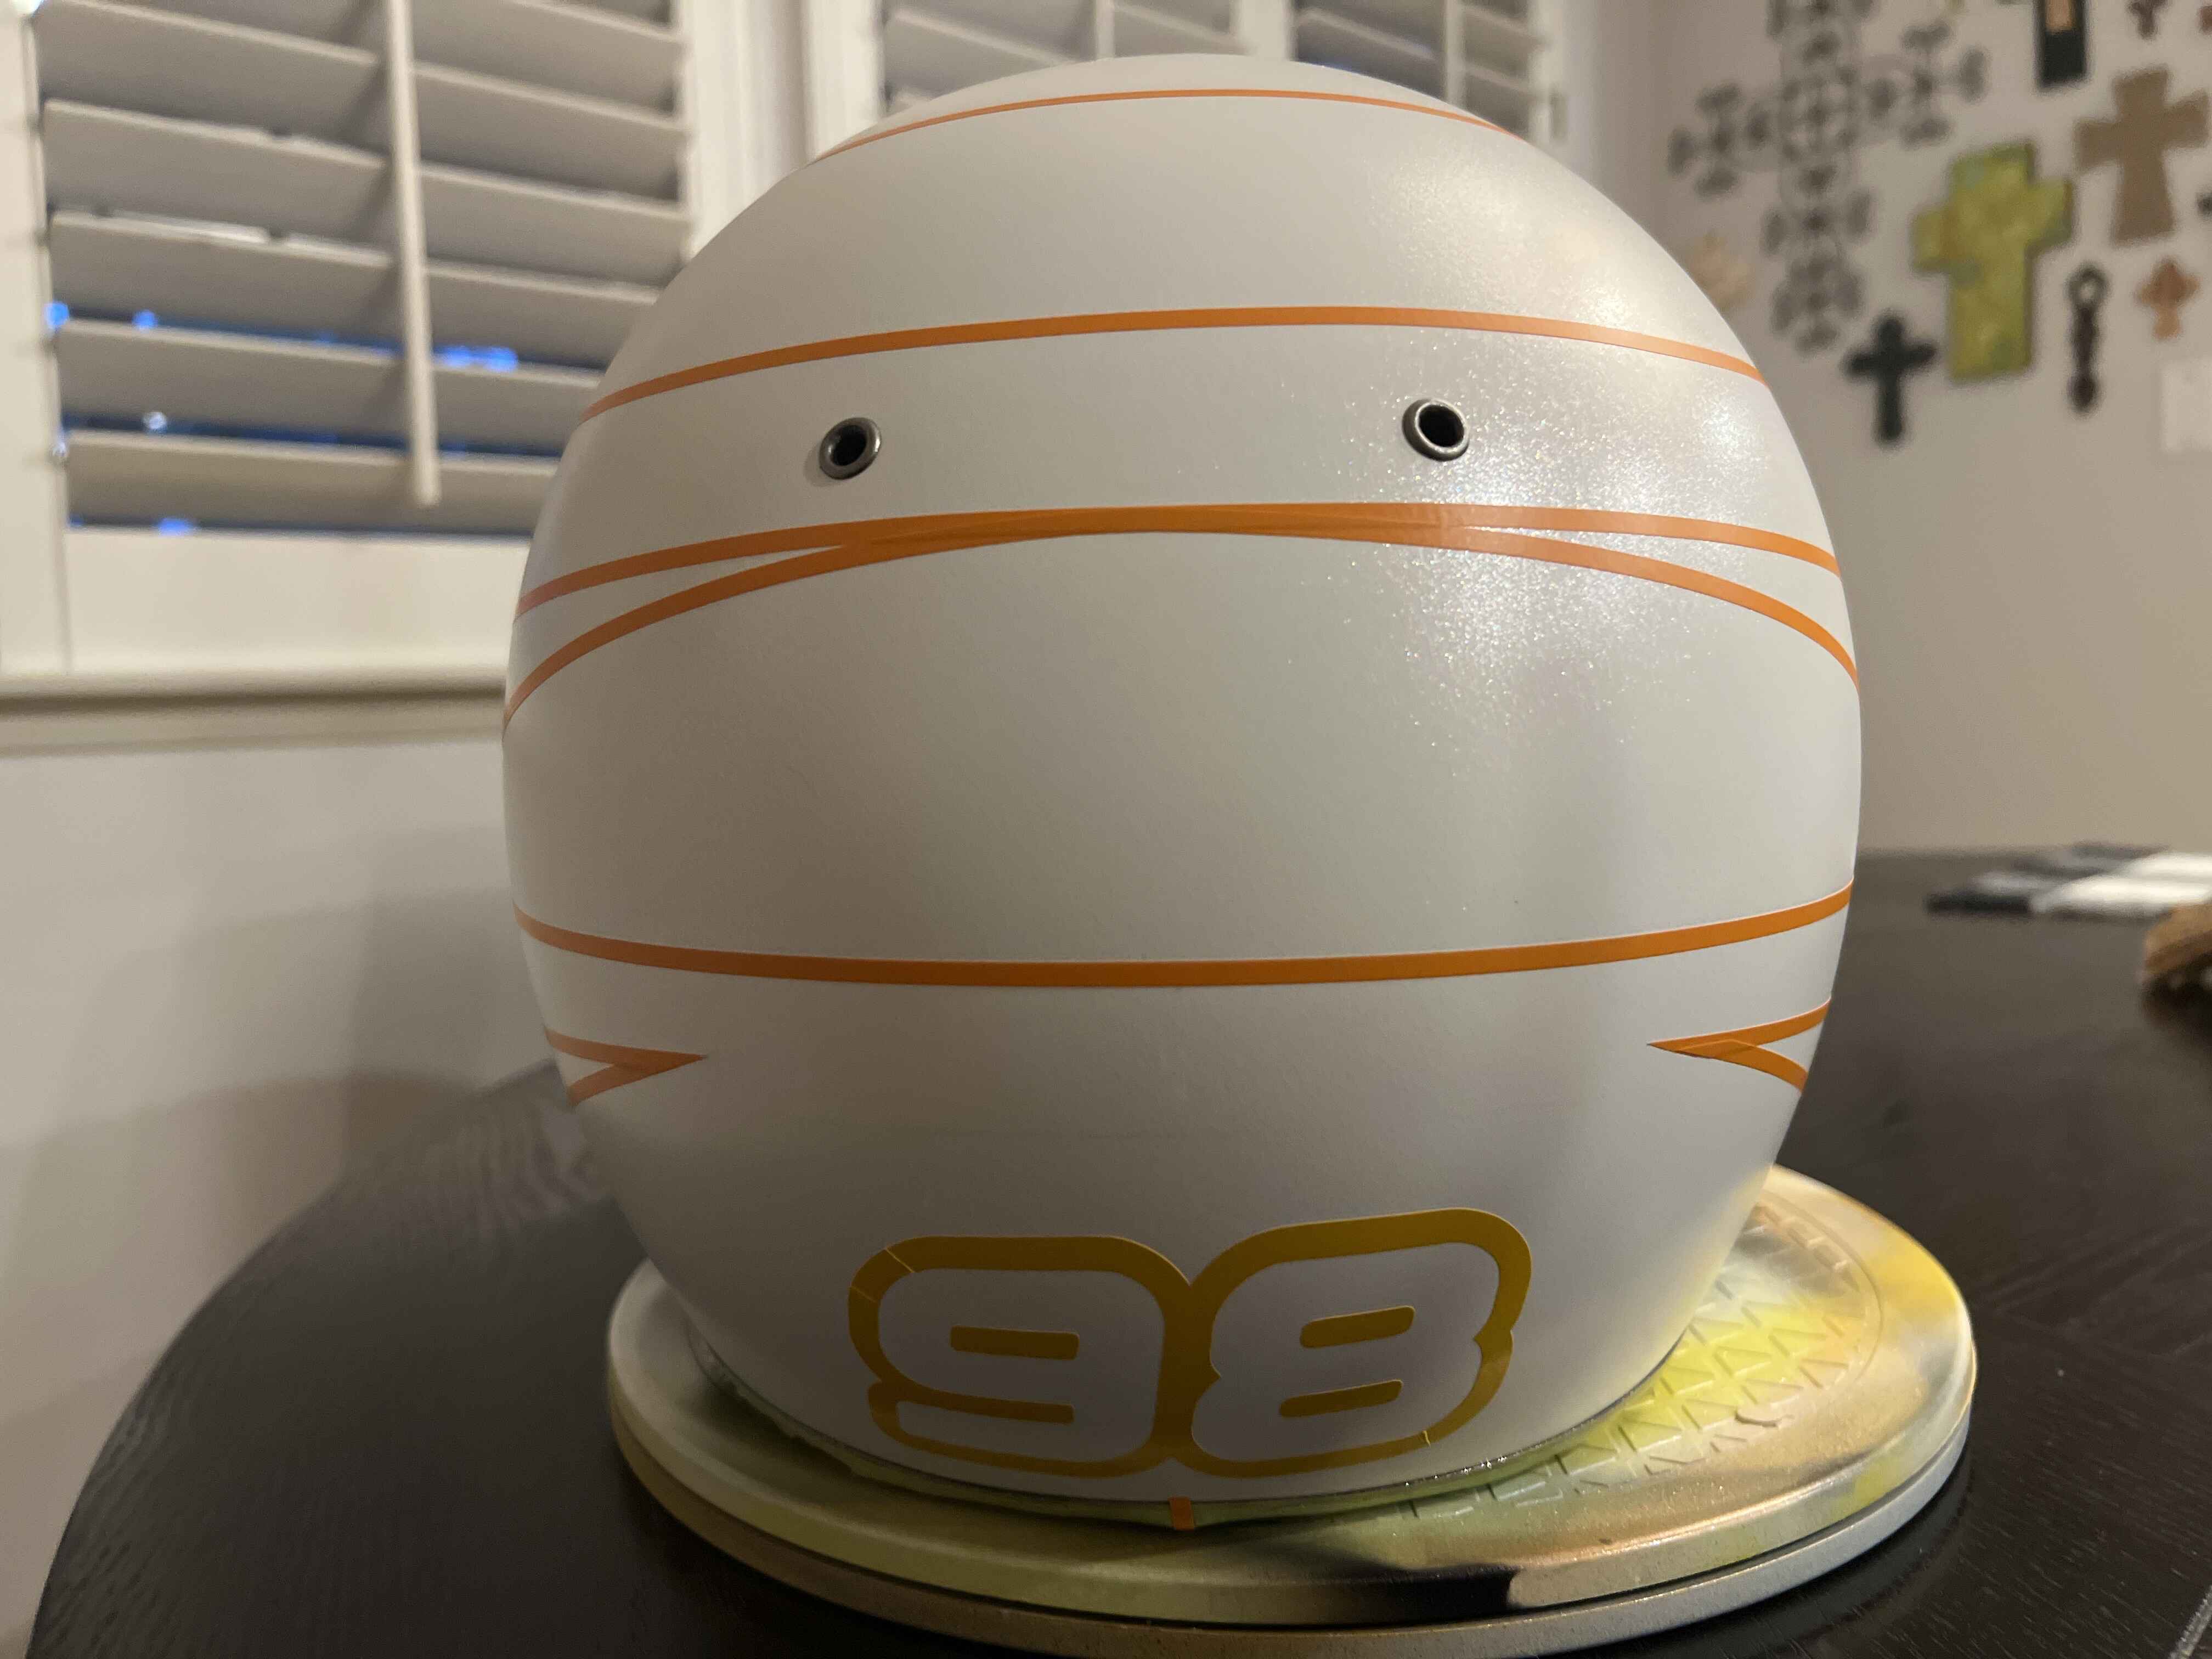
I will be putting his racing number on the back of the helmet and was wondering if anyone could tell me the font name in the picture. This was Ian’s front number plate when we were racing supermotos.
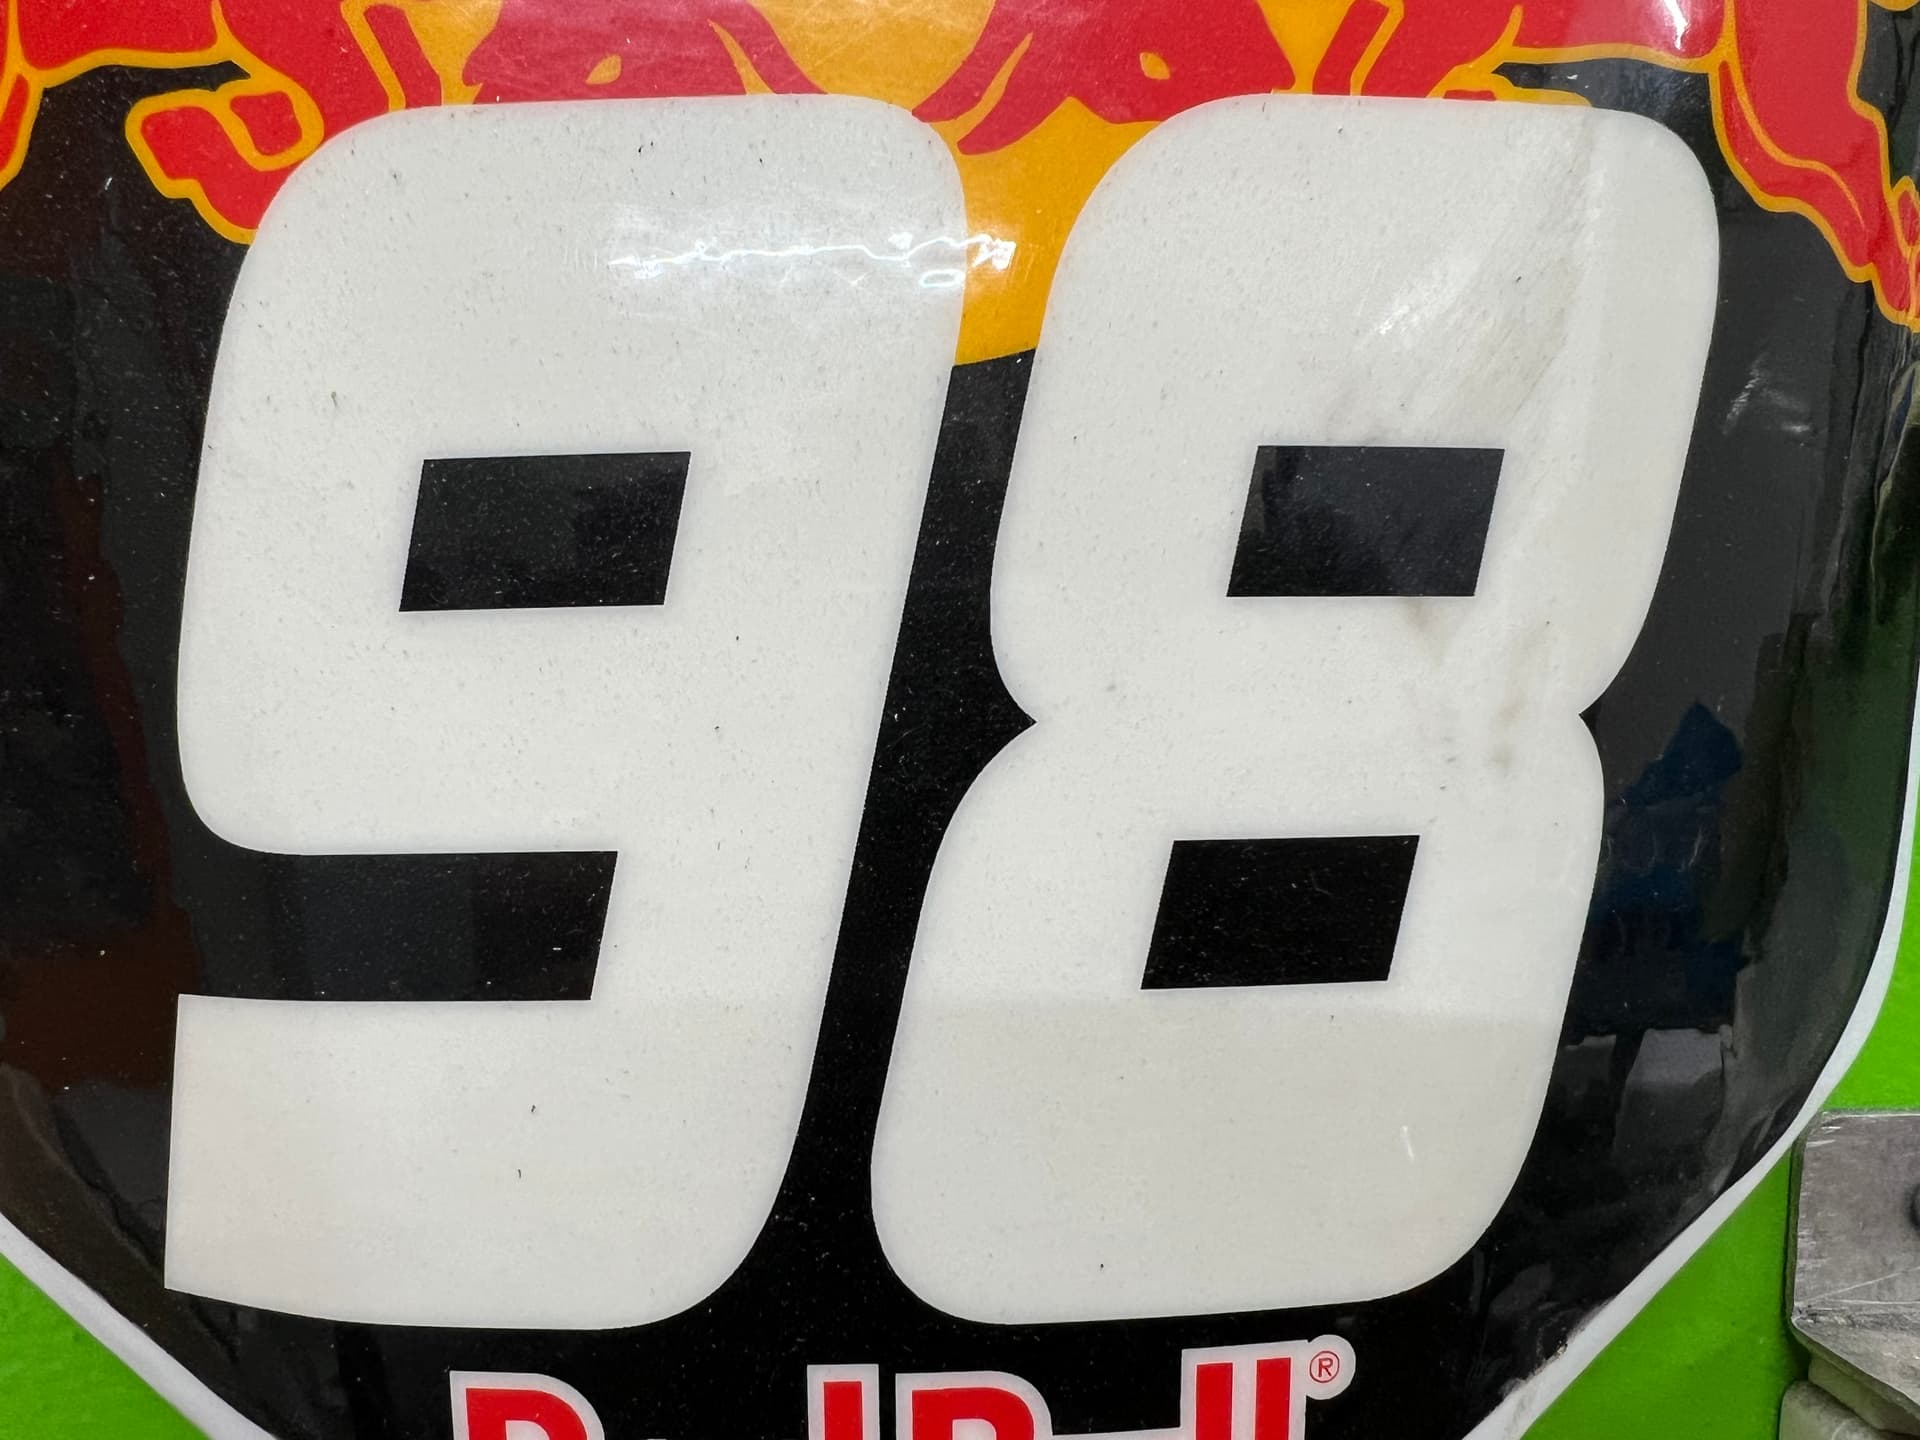
Try something like this:
1 Like
That’s great, thank you!
1 Like
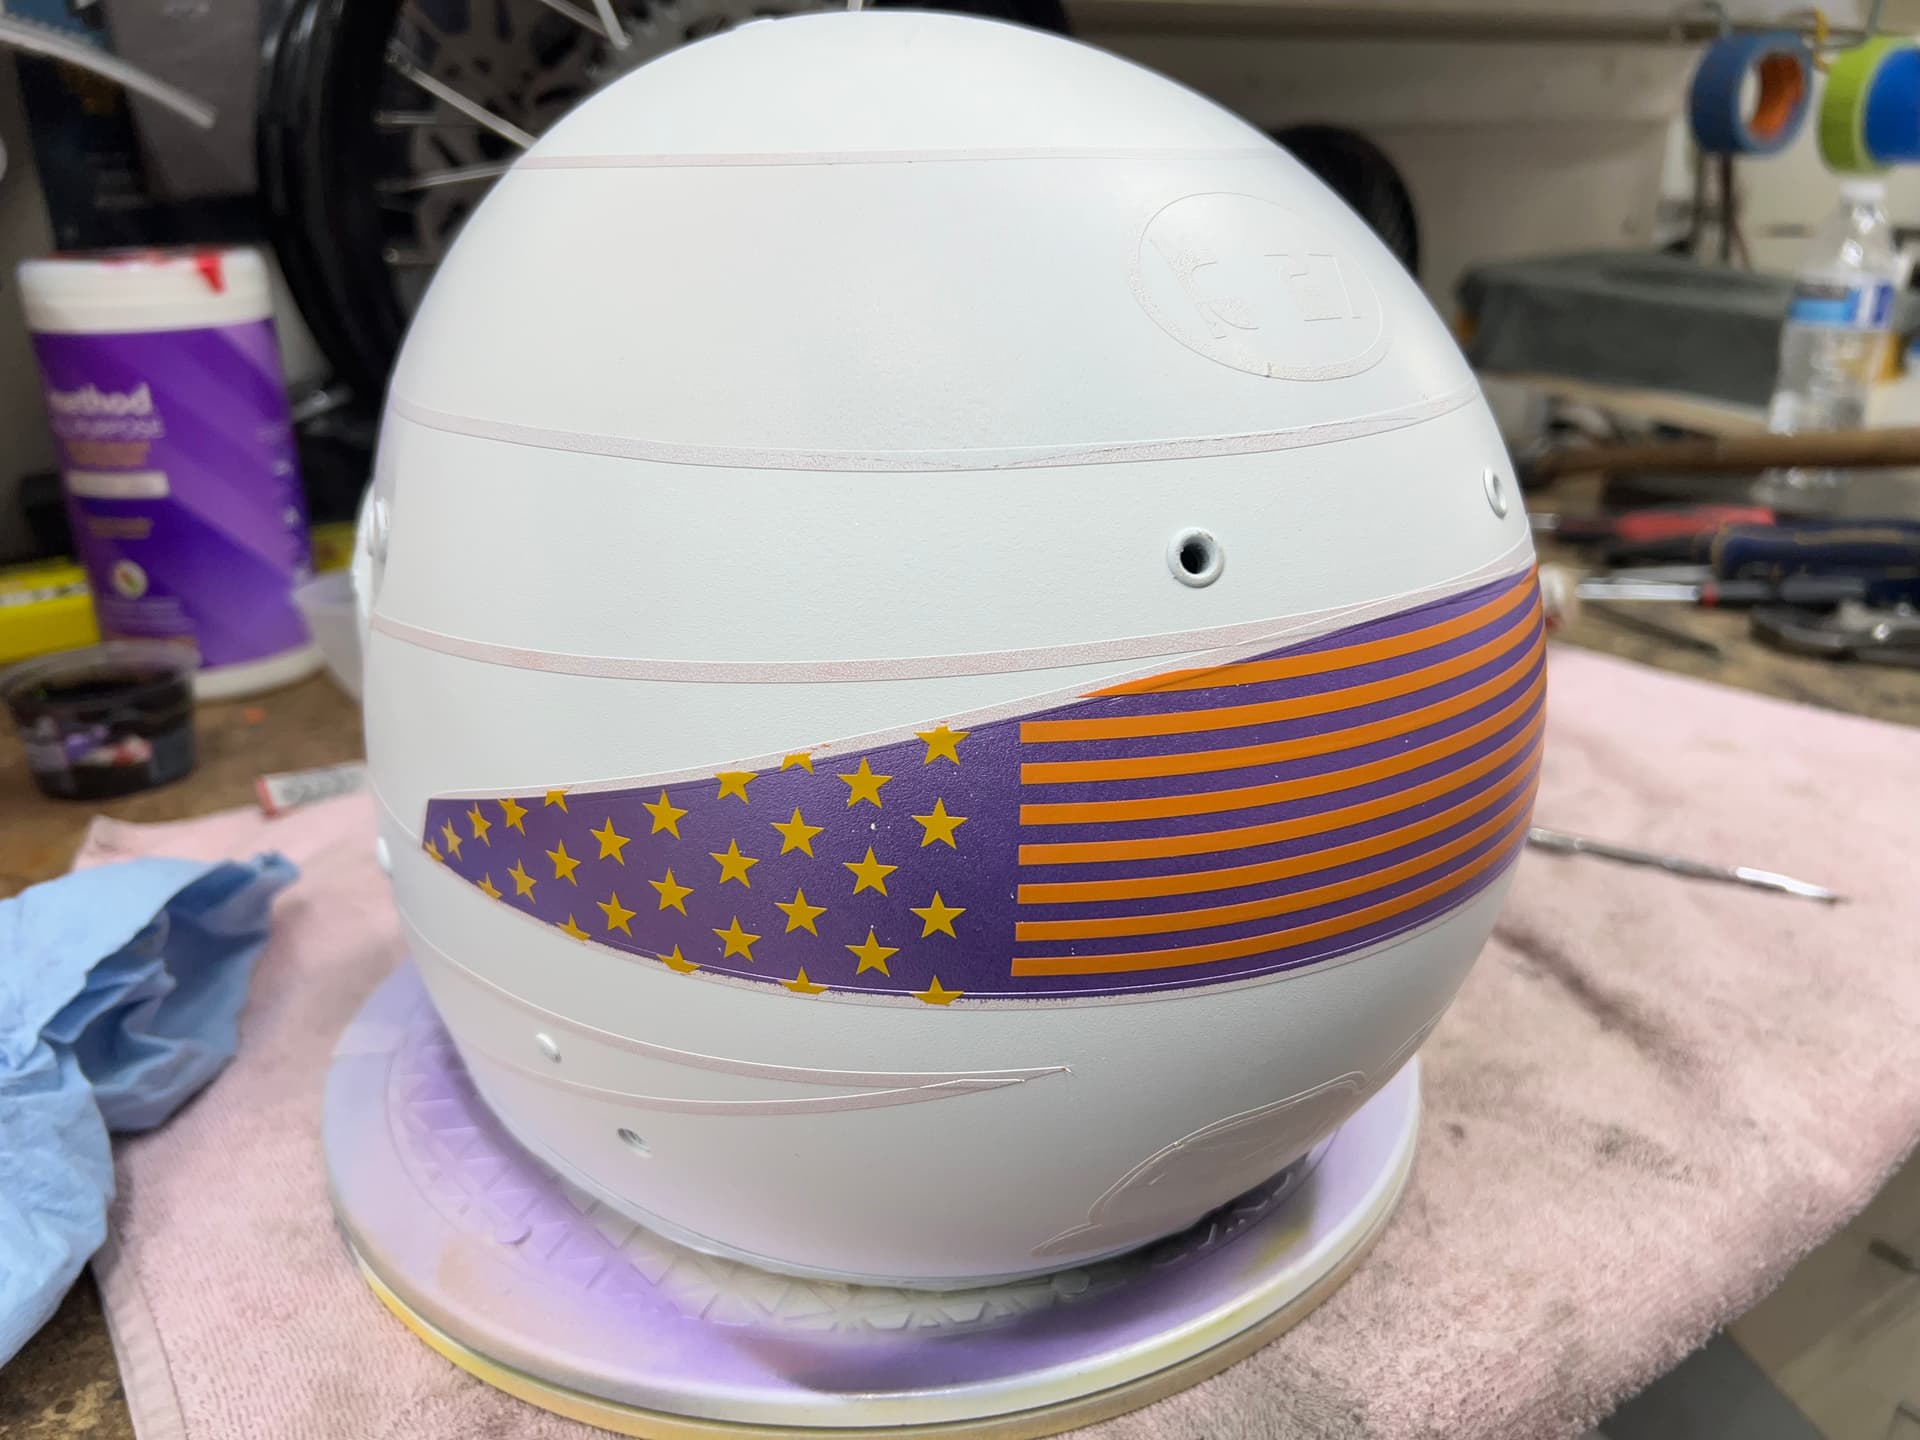
Well I finally got approval for the design so I will get started next week. Still going to be mostly purple and black with white mixed with cosmic sparkle pinstriping. I did convince him to let me add some gold into the design too but it will not be anything really significant.
1 Like
It’s been a while but it was too cold for painting in the garage the last couple of weeks. Actually had a 70* day today so I was able to spray the base (hotrod sparkle spectrum). This will be the color for most of the pinstripes. Now I can start masking out the design and hopefully get some more color on this week.

1 Like
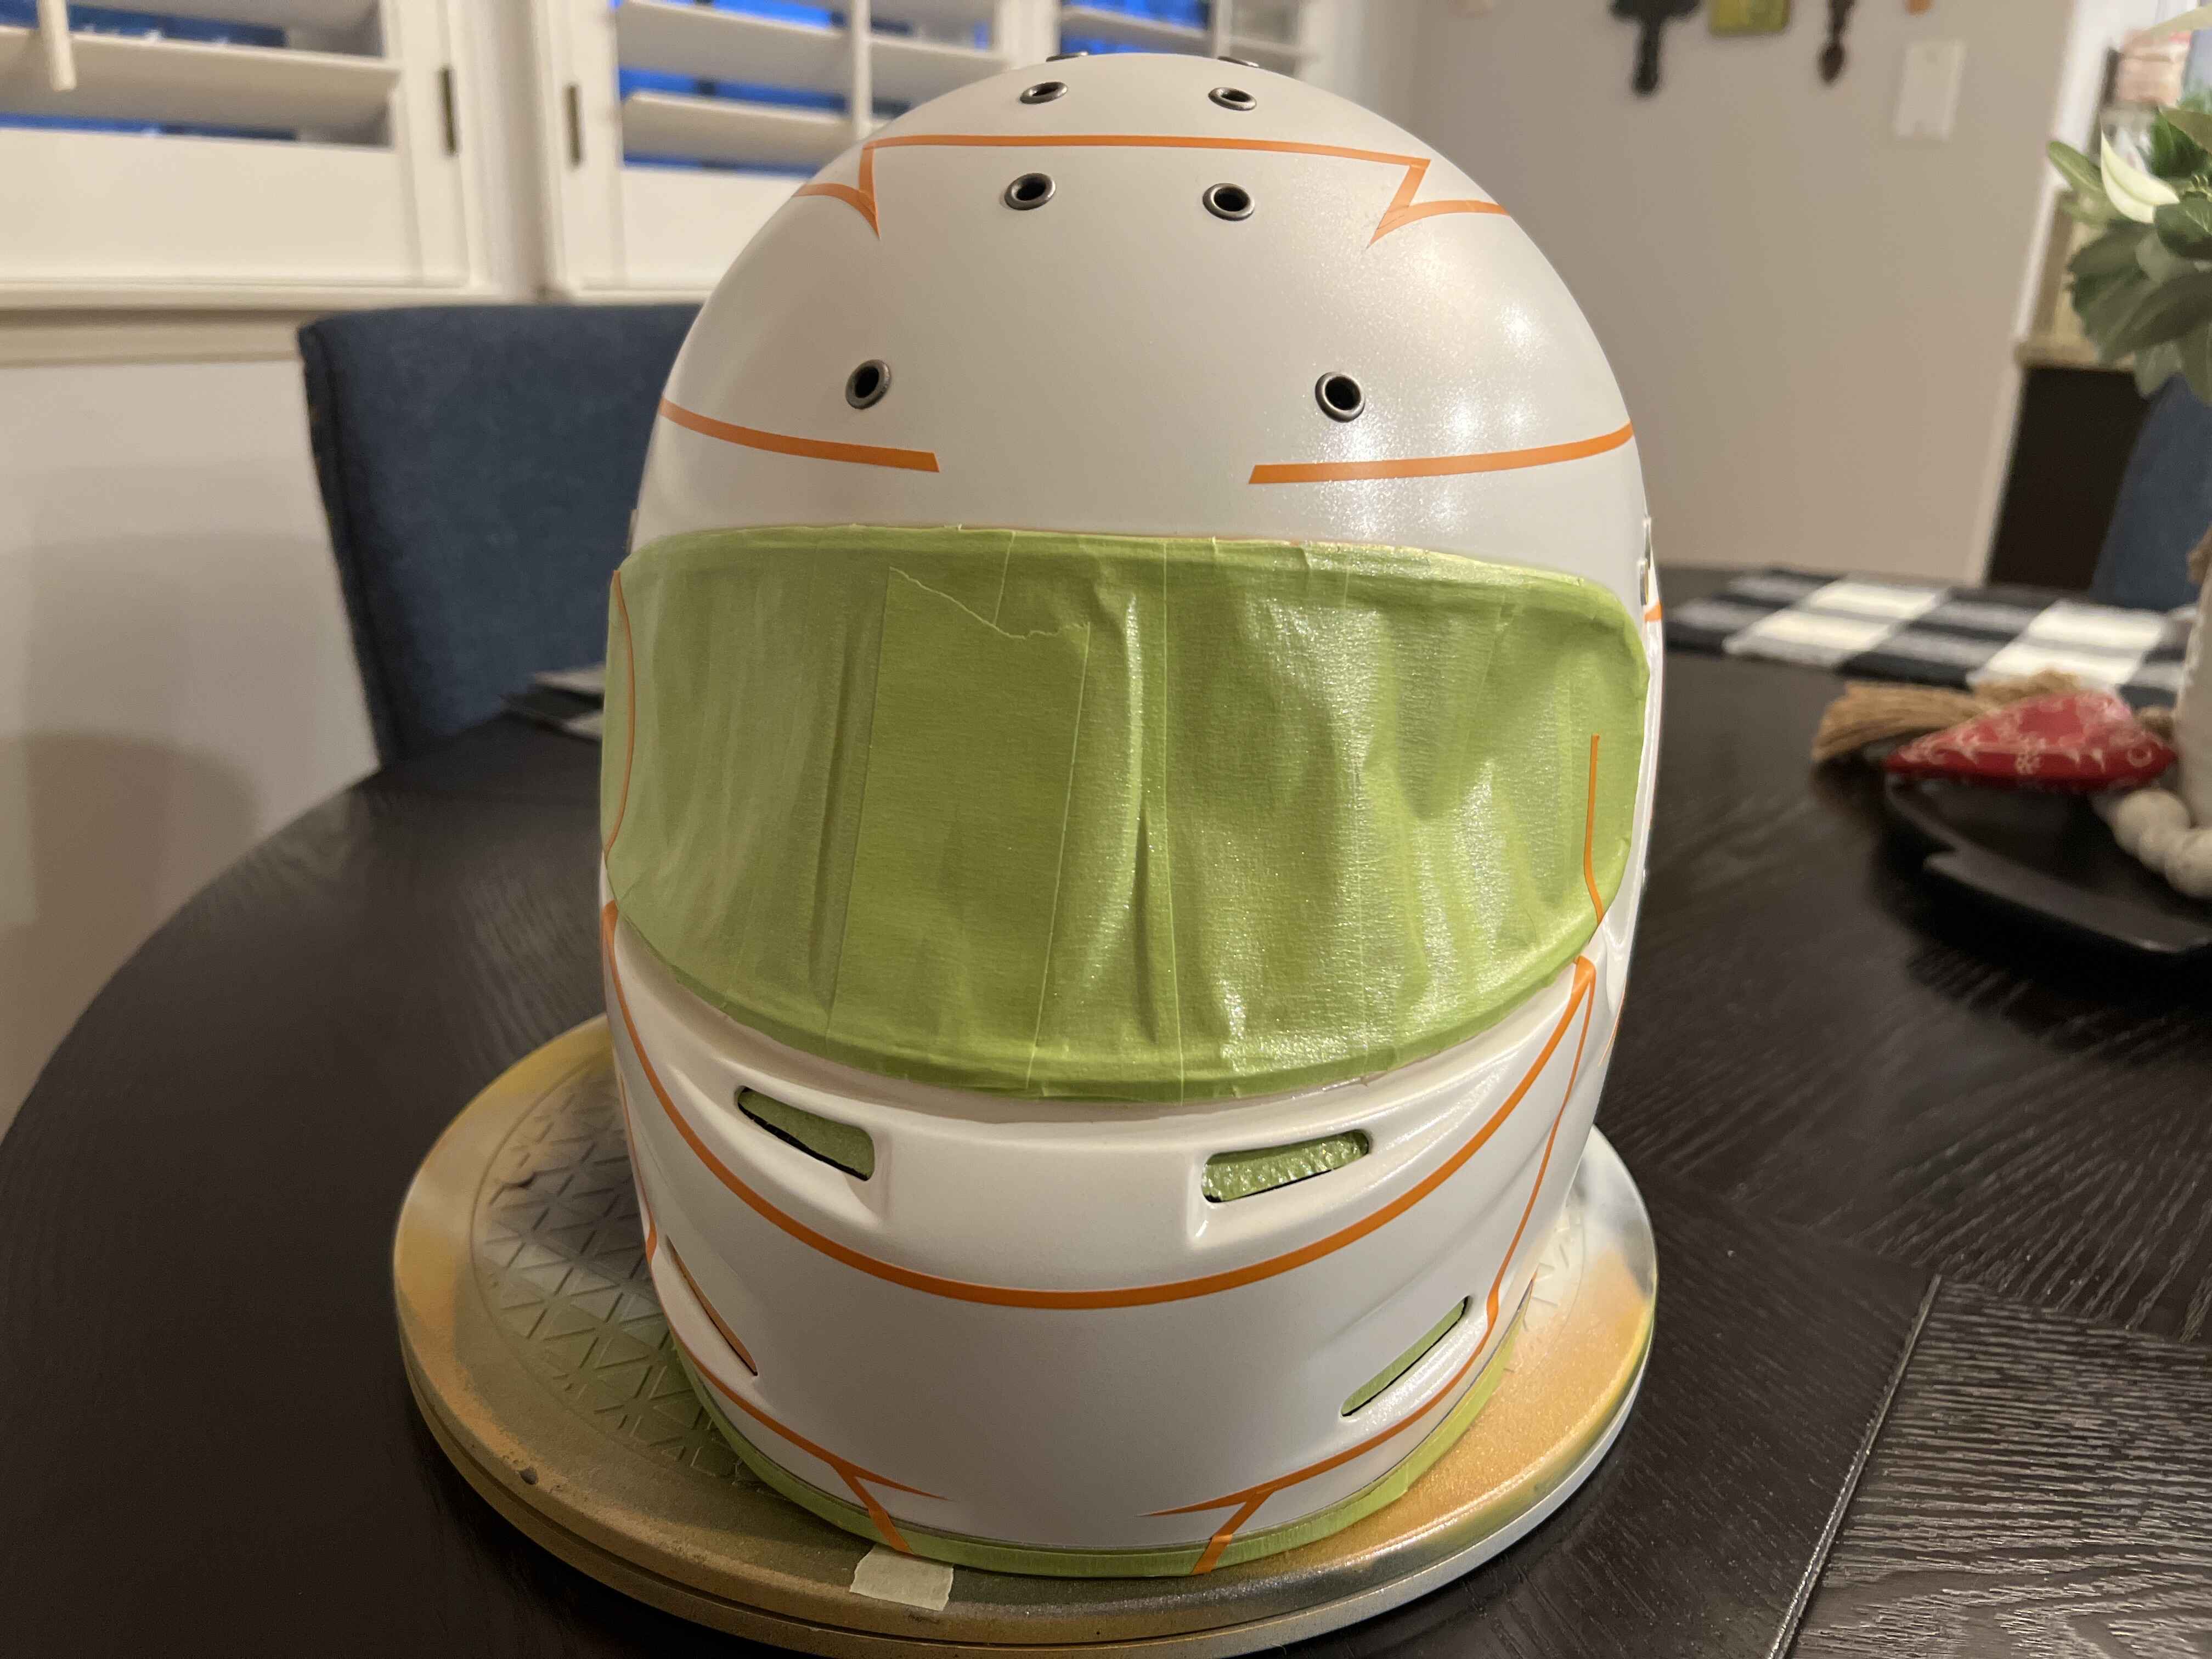
Just a question on masking technique…
When you are masking the visor area, do you tape from the outside like in the pic above or the inside, so the edges receive a coat of paint?
Also, I used to enjoy painting RC Poly shells back in the day. At first I was using tape to mask things off, but later found it much easier to use a liquid masking material. Have you or TJ ever used liquid masking on a helmet?
For RC Poly, you paint the inside so its backwards from a helmet as far as color layering (dark colors first), but otherwise the process seems very similar.
I am eager to see the process as you go John! Keep those pics coming!!
1 Like
Got the masking done ready for the next color (purple). Where there is tape now will remain hot rod spectrum white.


2 Likes
Looking at all those paints, I want to have a new helmet from @tjkoyen now
1 Like
I mask from the outside, the rubber seal is still on the helmet as they are almost impossible to remove without a big mess.
I’ve never used liquid mask.
I’m just an amateur at this, TJ is the pro he has helped me a lot.
I don’t really use liquid masking. It has minimal usefulness for me and the designs I typically do.
1 Like
Well I’m moving forward but at snail speed due to the garage being too cold to paint. Hoping to do the black today then just shading after that.

5 Likes
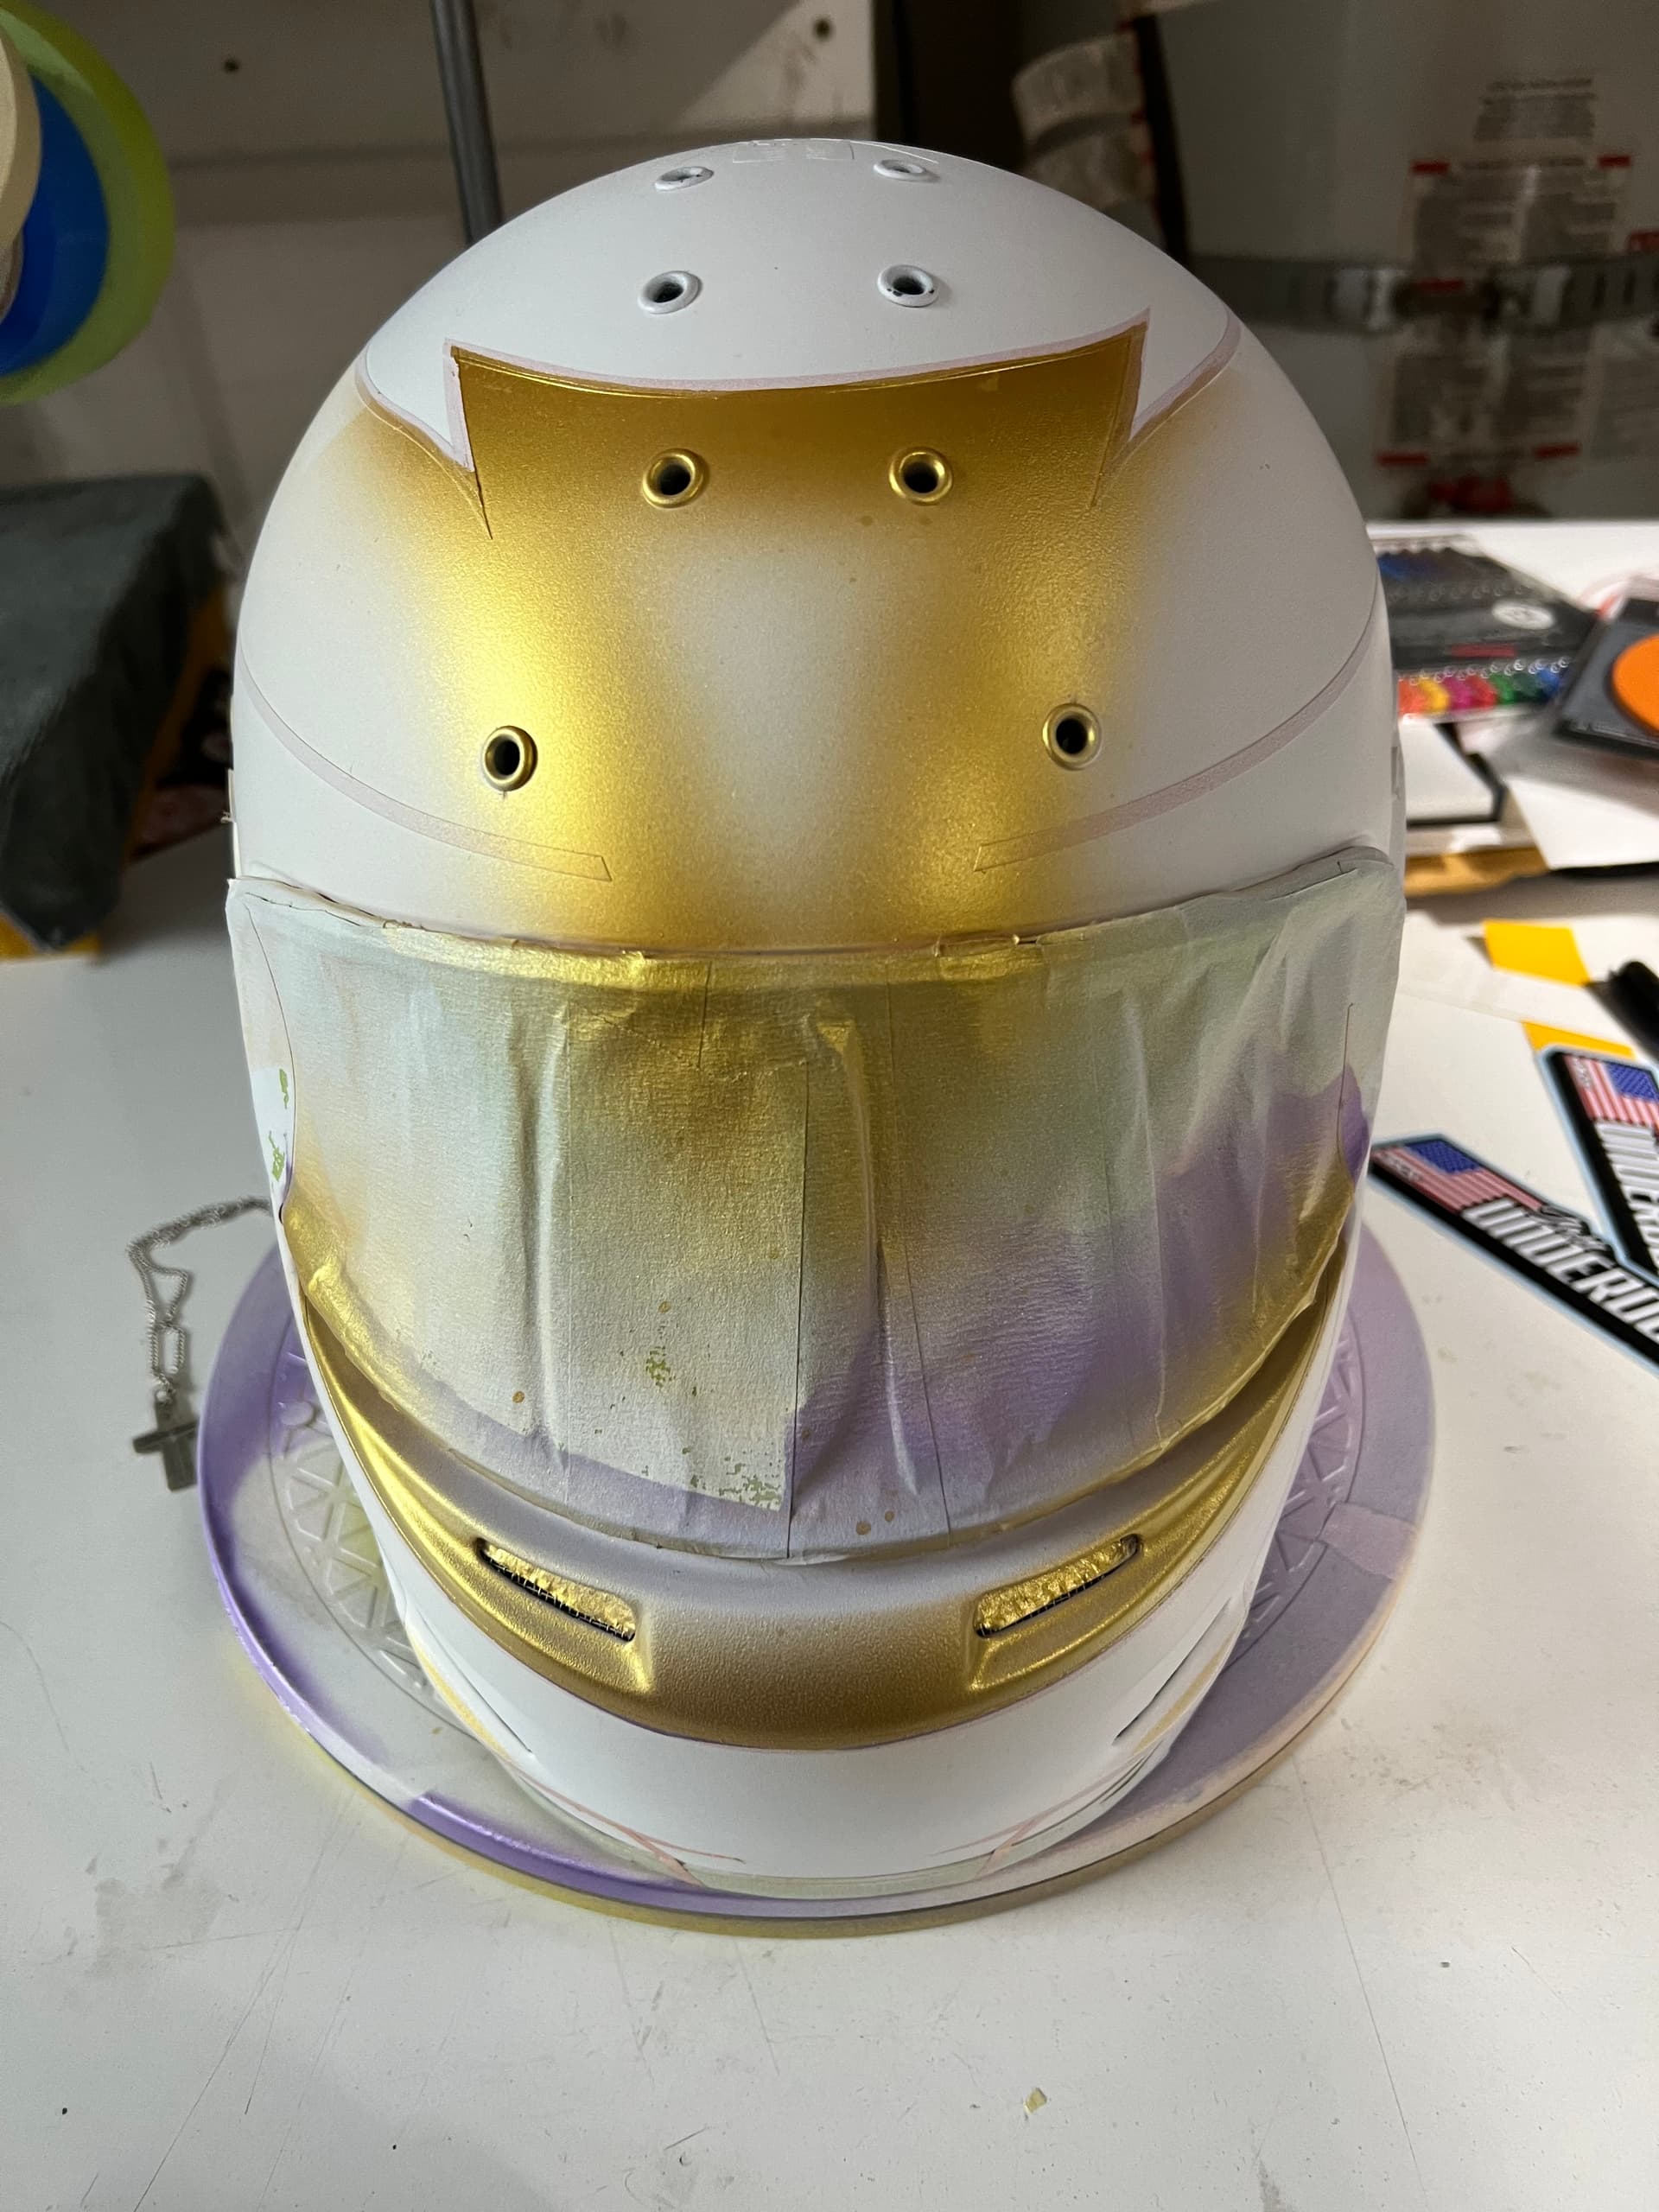
I hope you intercoated over that gold fade before masking. Metallic can sometimes have adhesion issues when you mask over the raw paint, and you might pull some off that metallic off when you peel the tape off.
1 Like
Appreciate the heads up but unfortunately I already taped over it and you are correct about the tape pulling some of the paint off. I seem to be having more problems with this helmet than any of the others I have done. I suppose at least I am learning as I go. I should probably have waited until I could see some warmer weather in the forecast as the helmet has been sitting with tape on for too long.
Thanks again for all the tips helping me to understand the process.