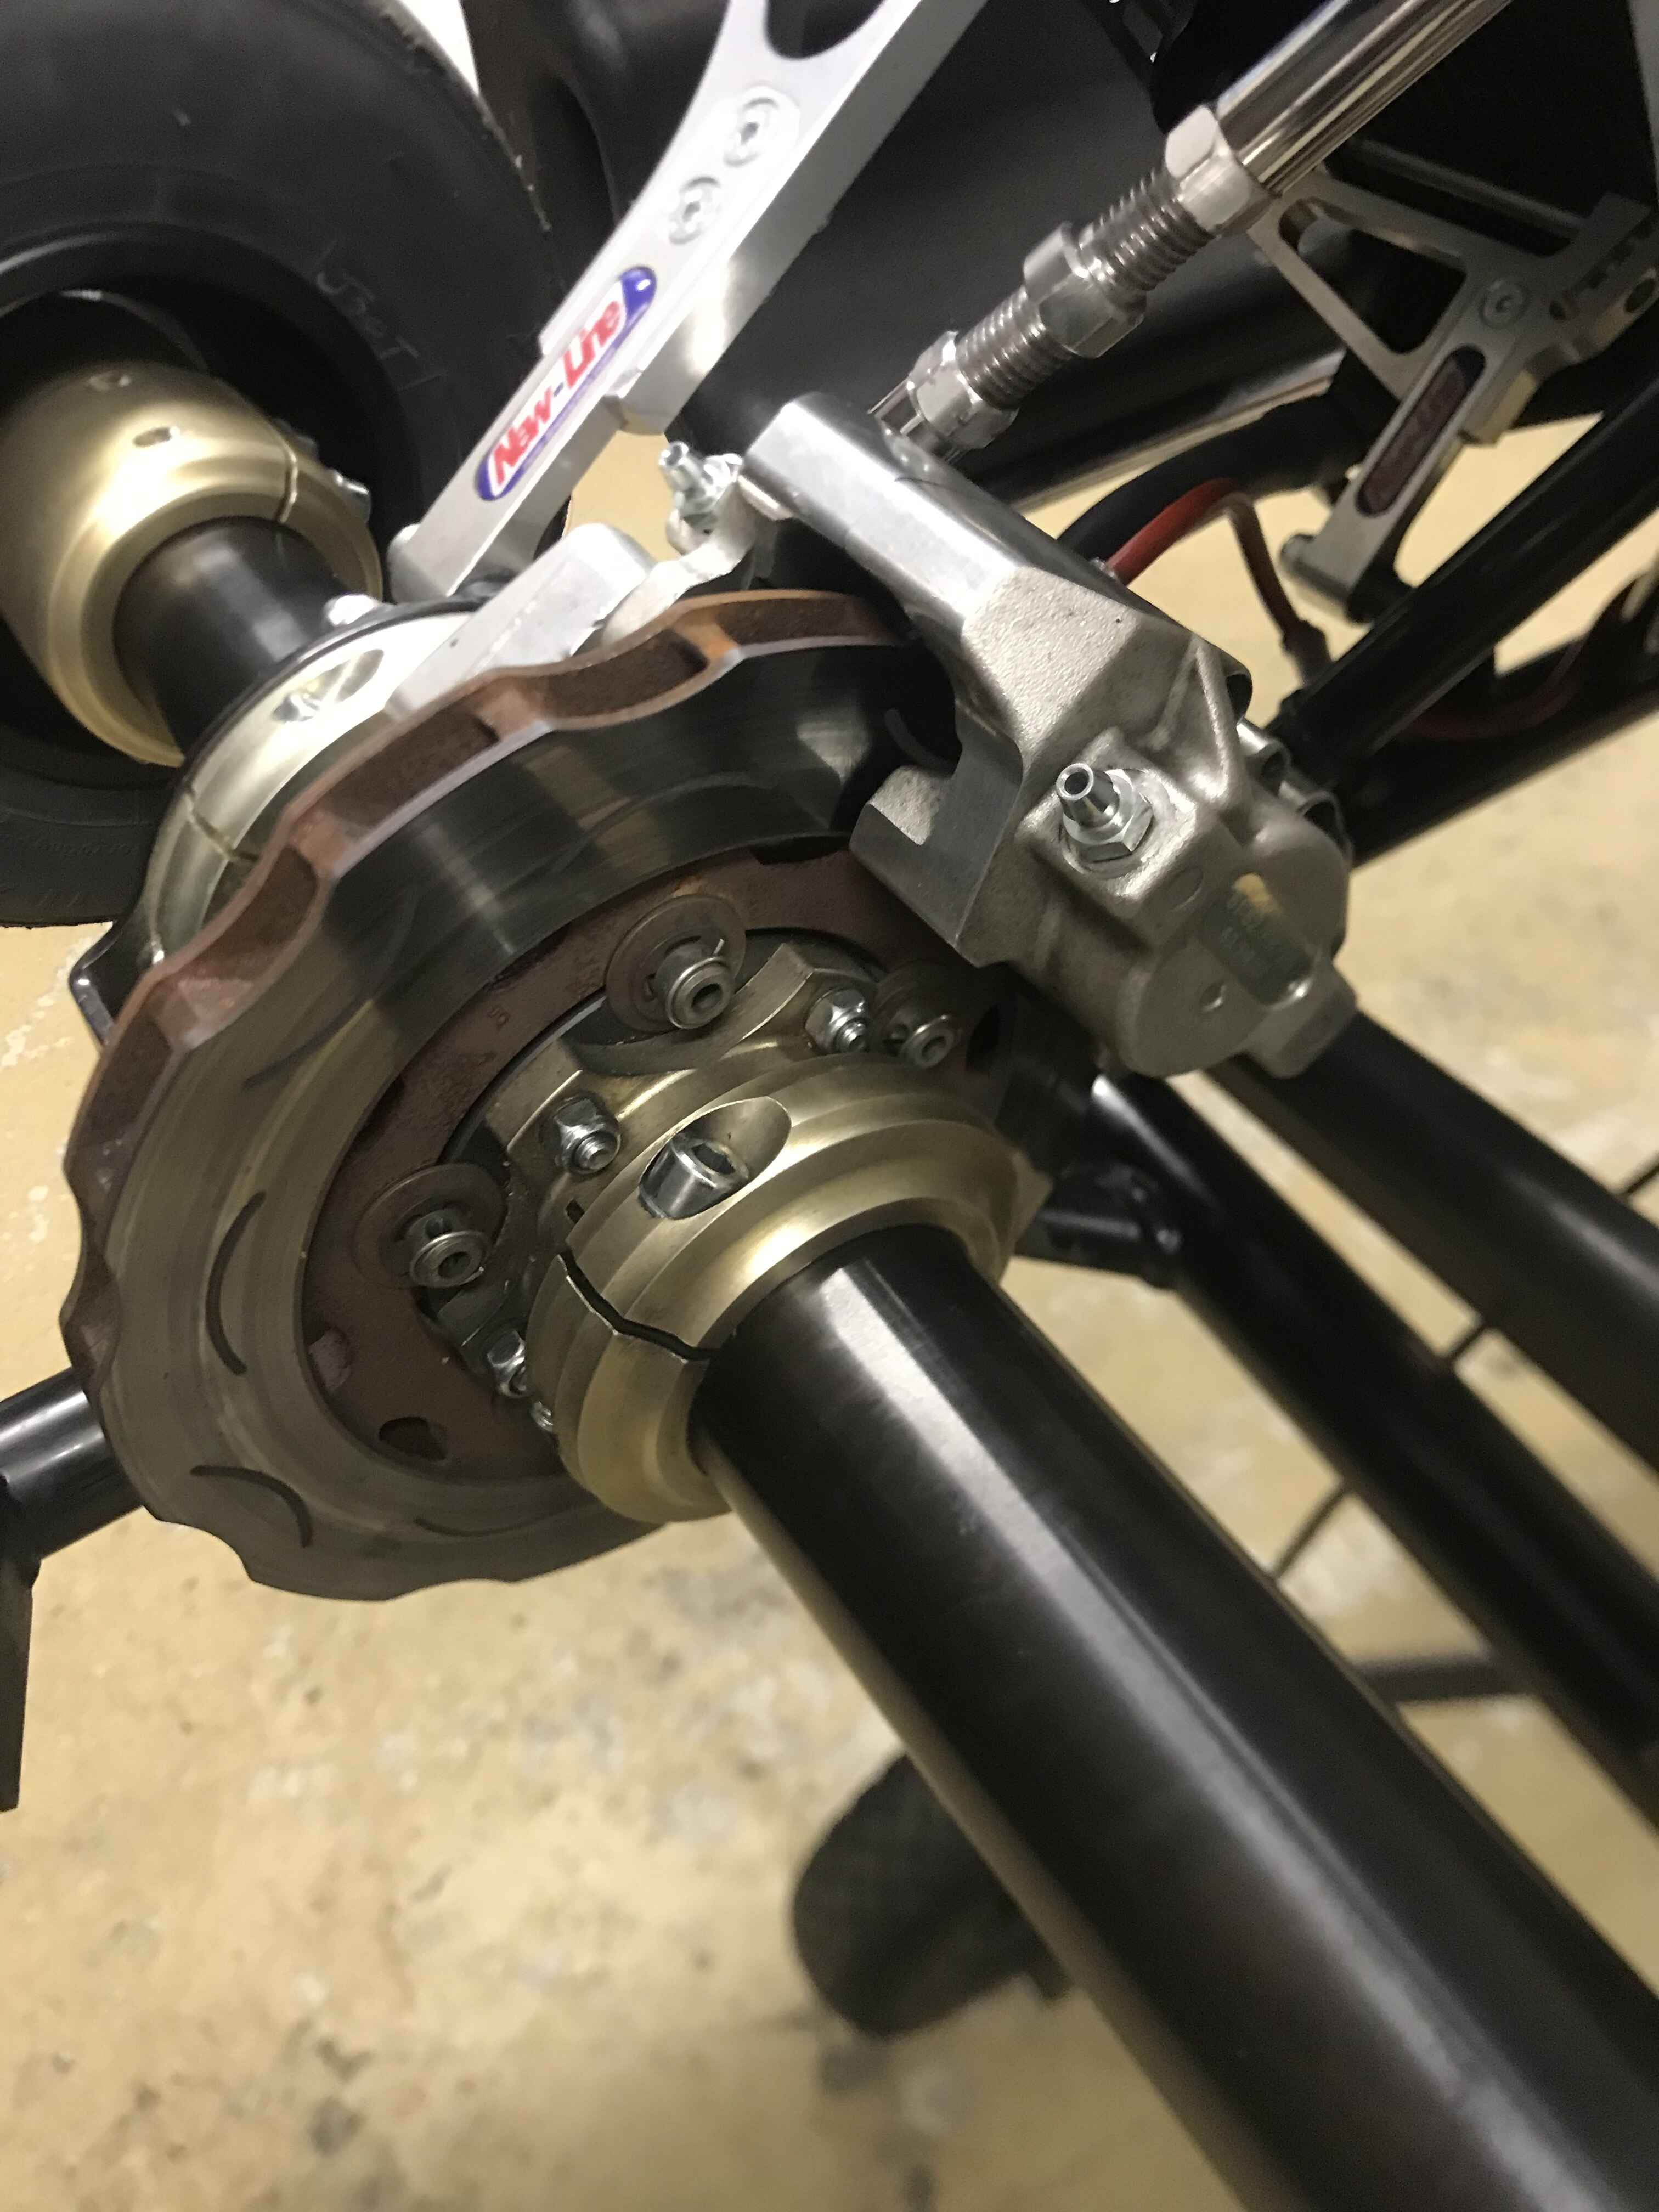
Heres how I get more life out of brake pads, driving a crg road rebel with V11 brakes. The new pads cost around 50 - 65 euros per caliper - the costs quickly ad up - specially if using soft pads
I have used brake pad shims on my karts - they push the piston back into the bore but its not a perfect solution to the problem in my mind, heres why:
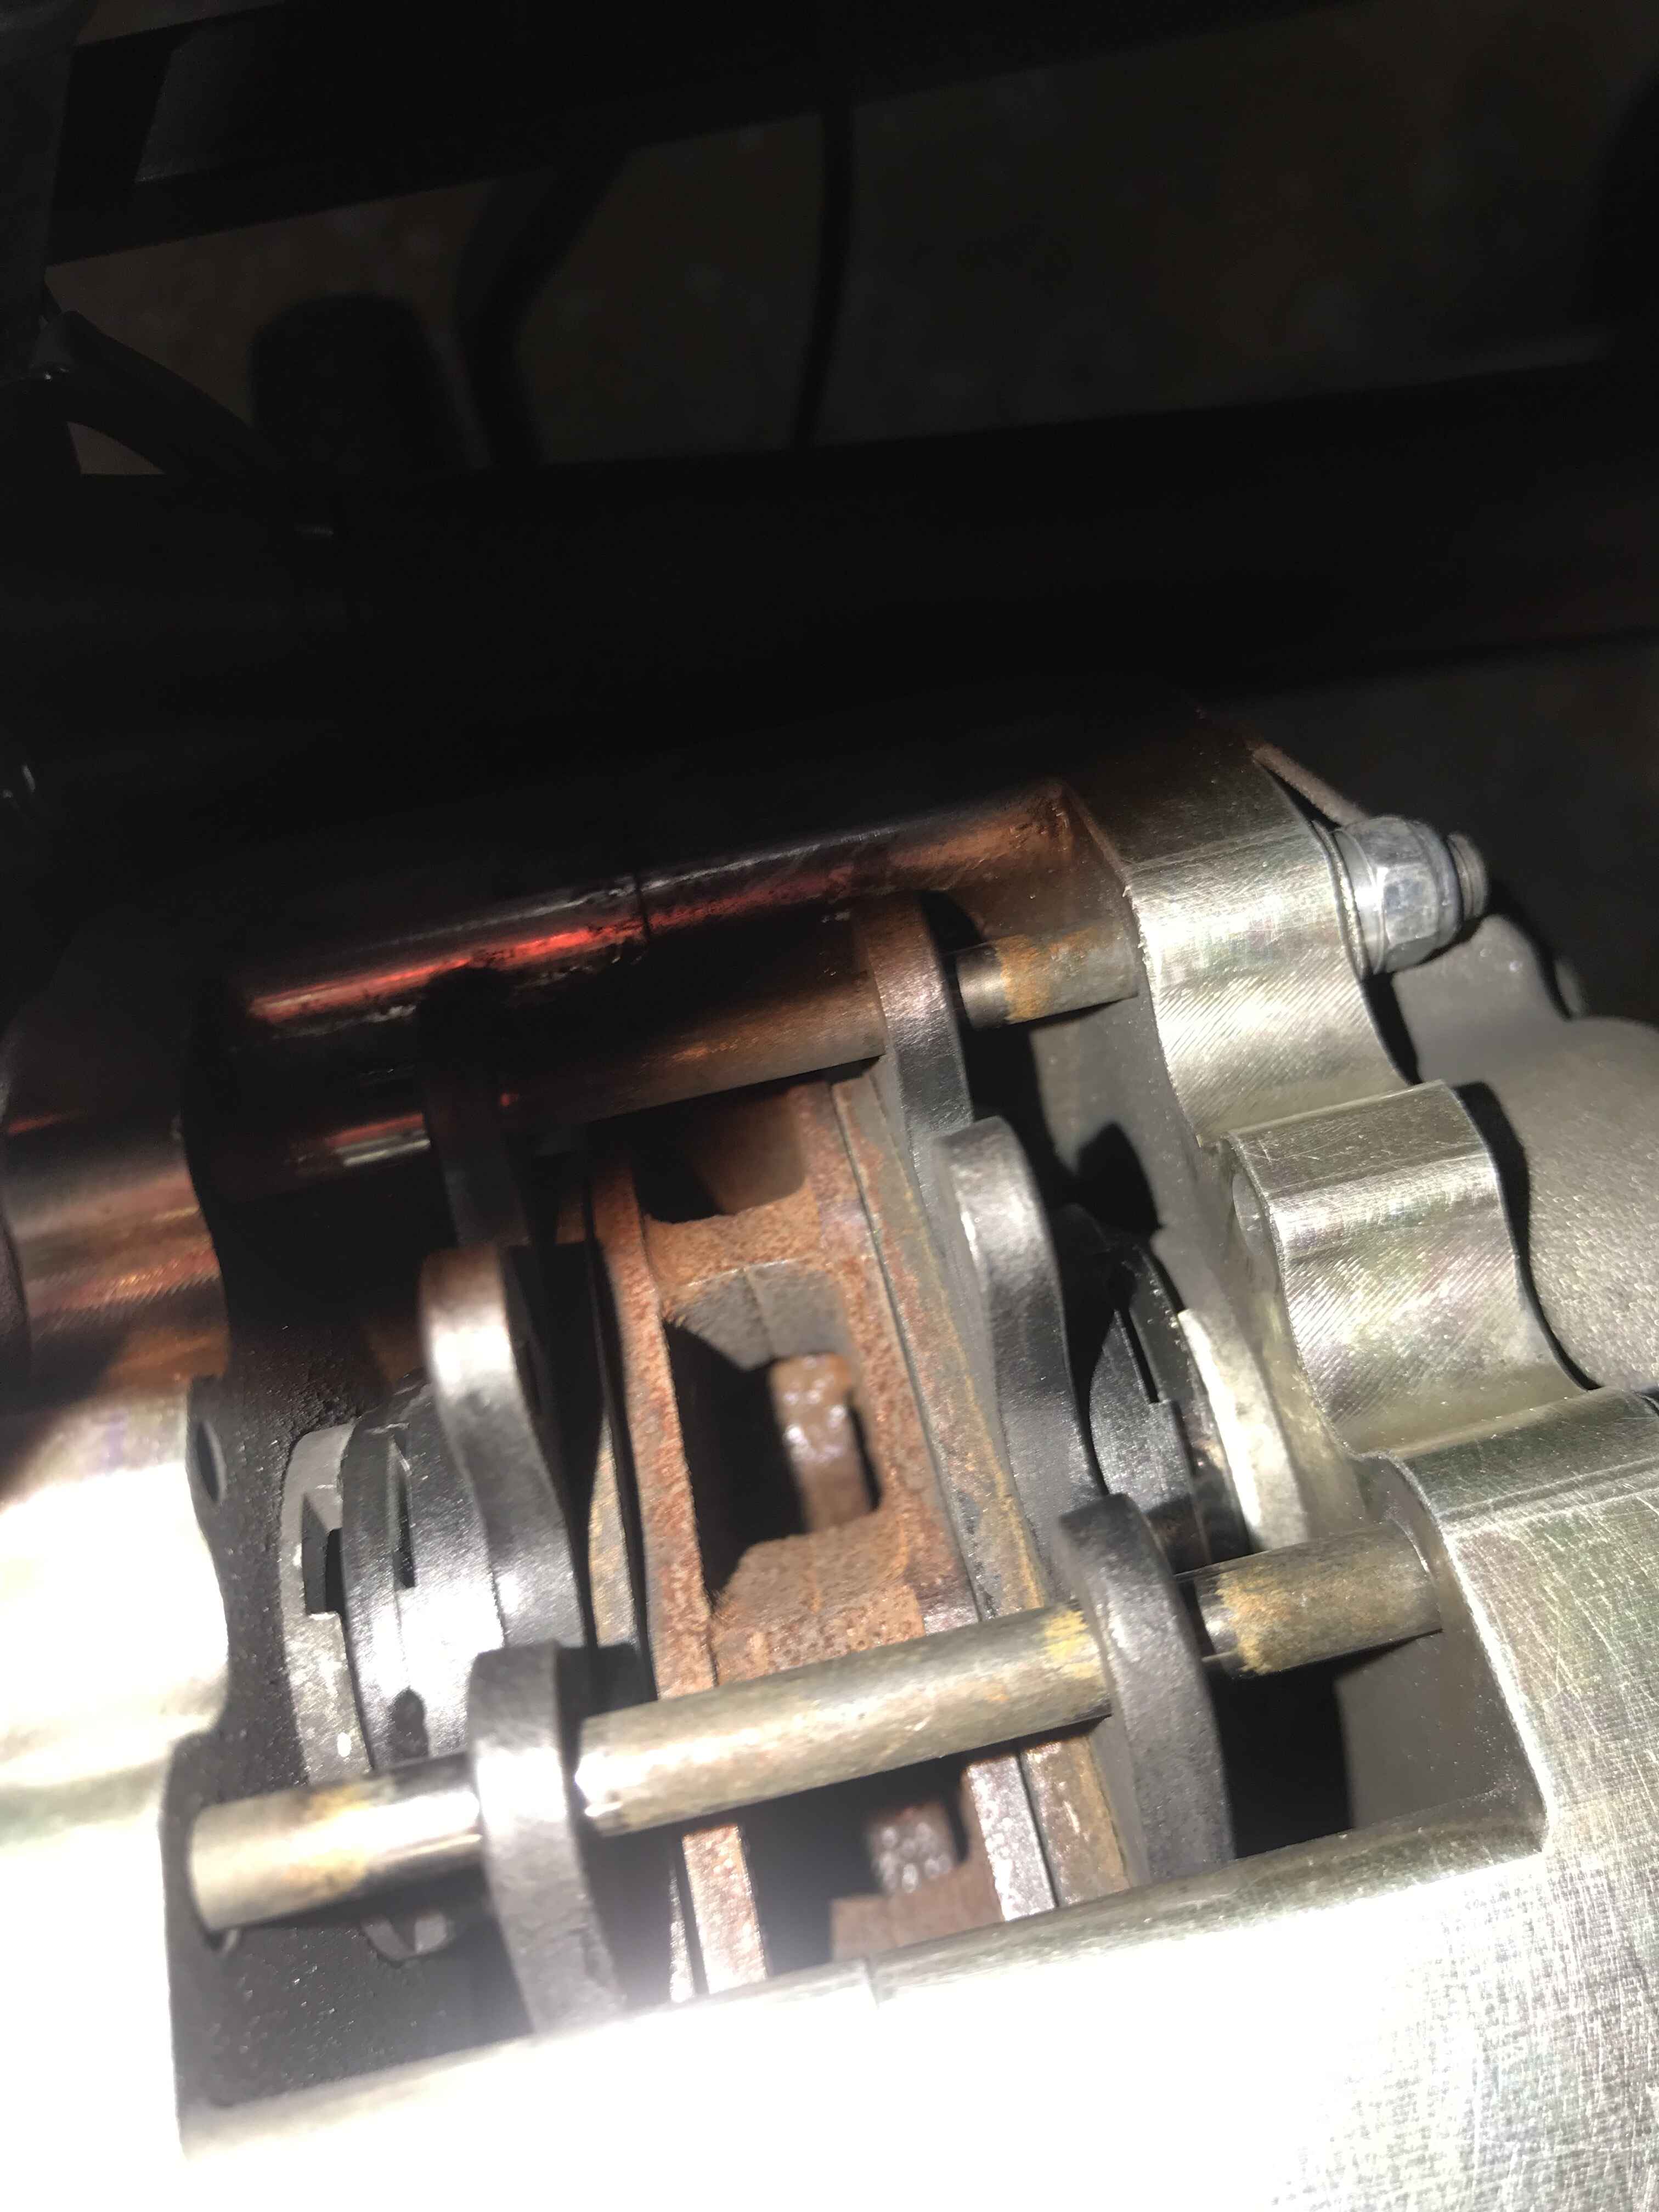
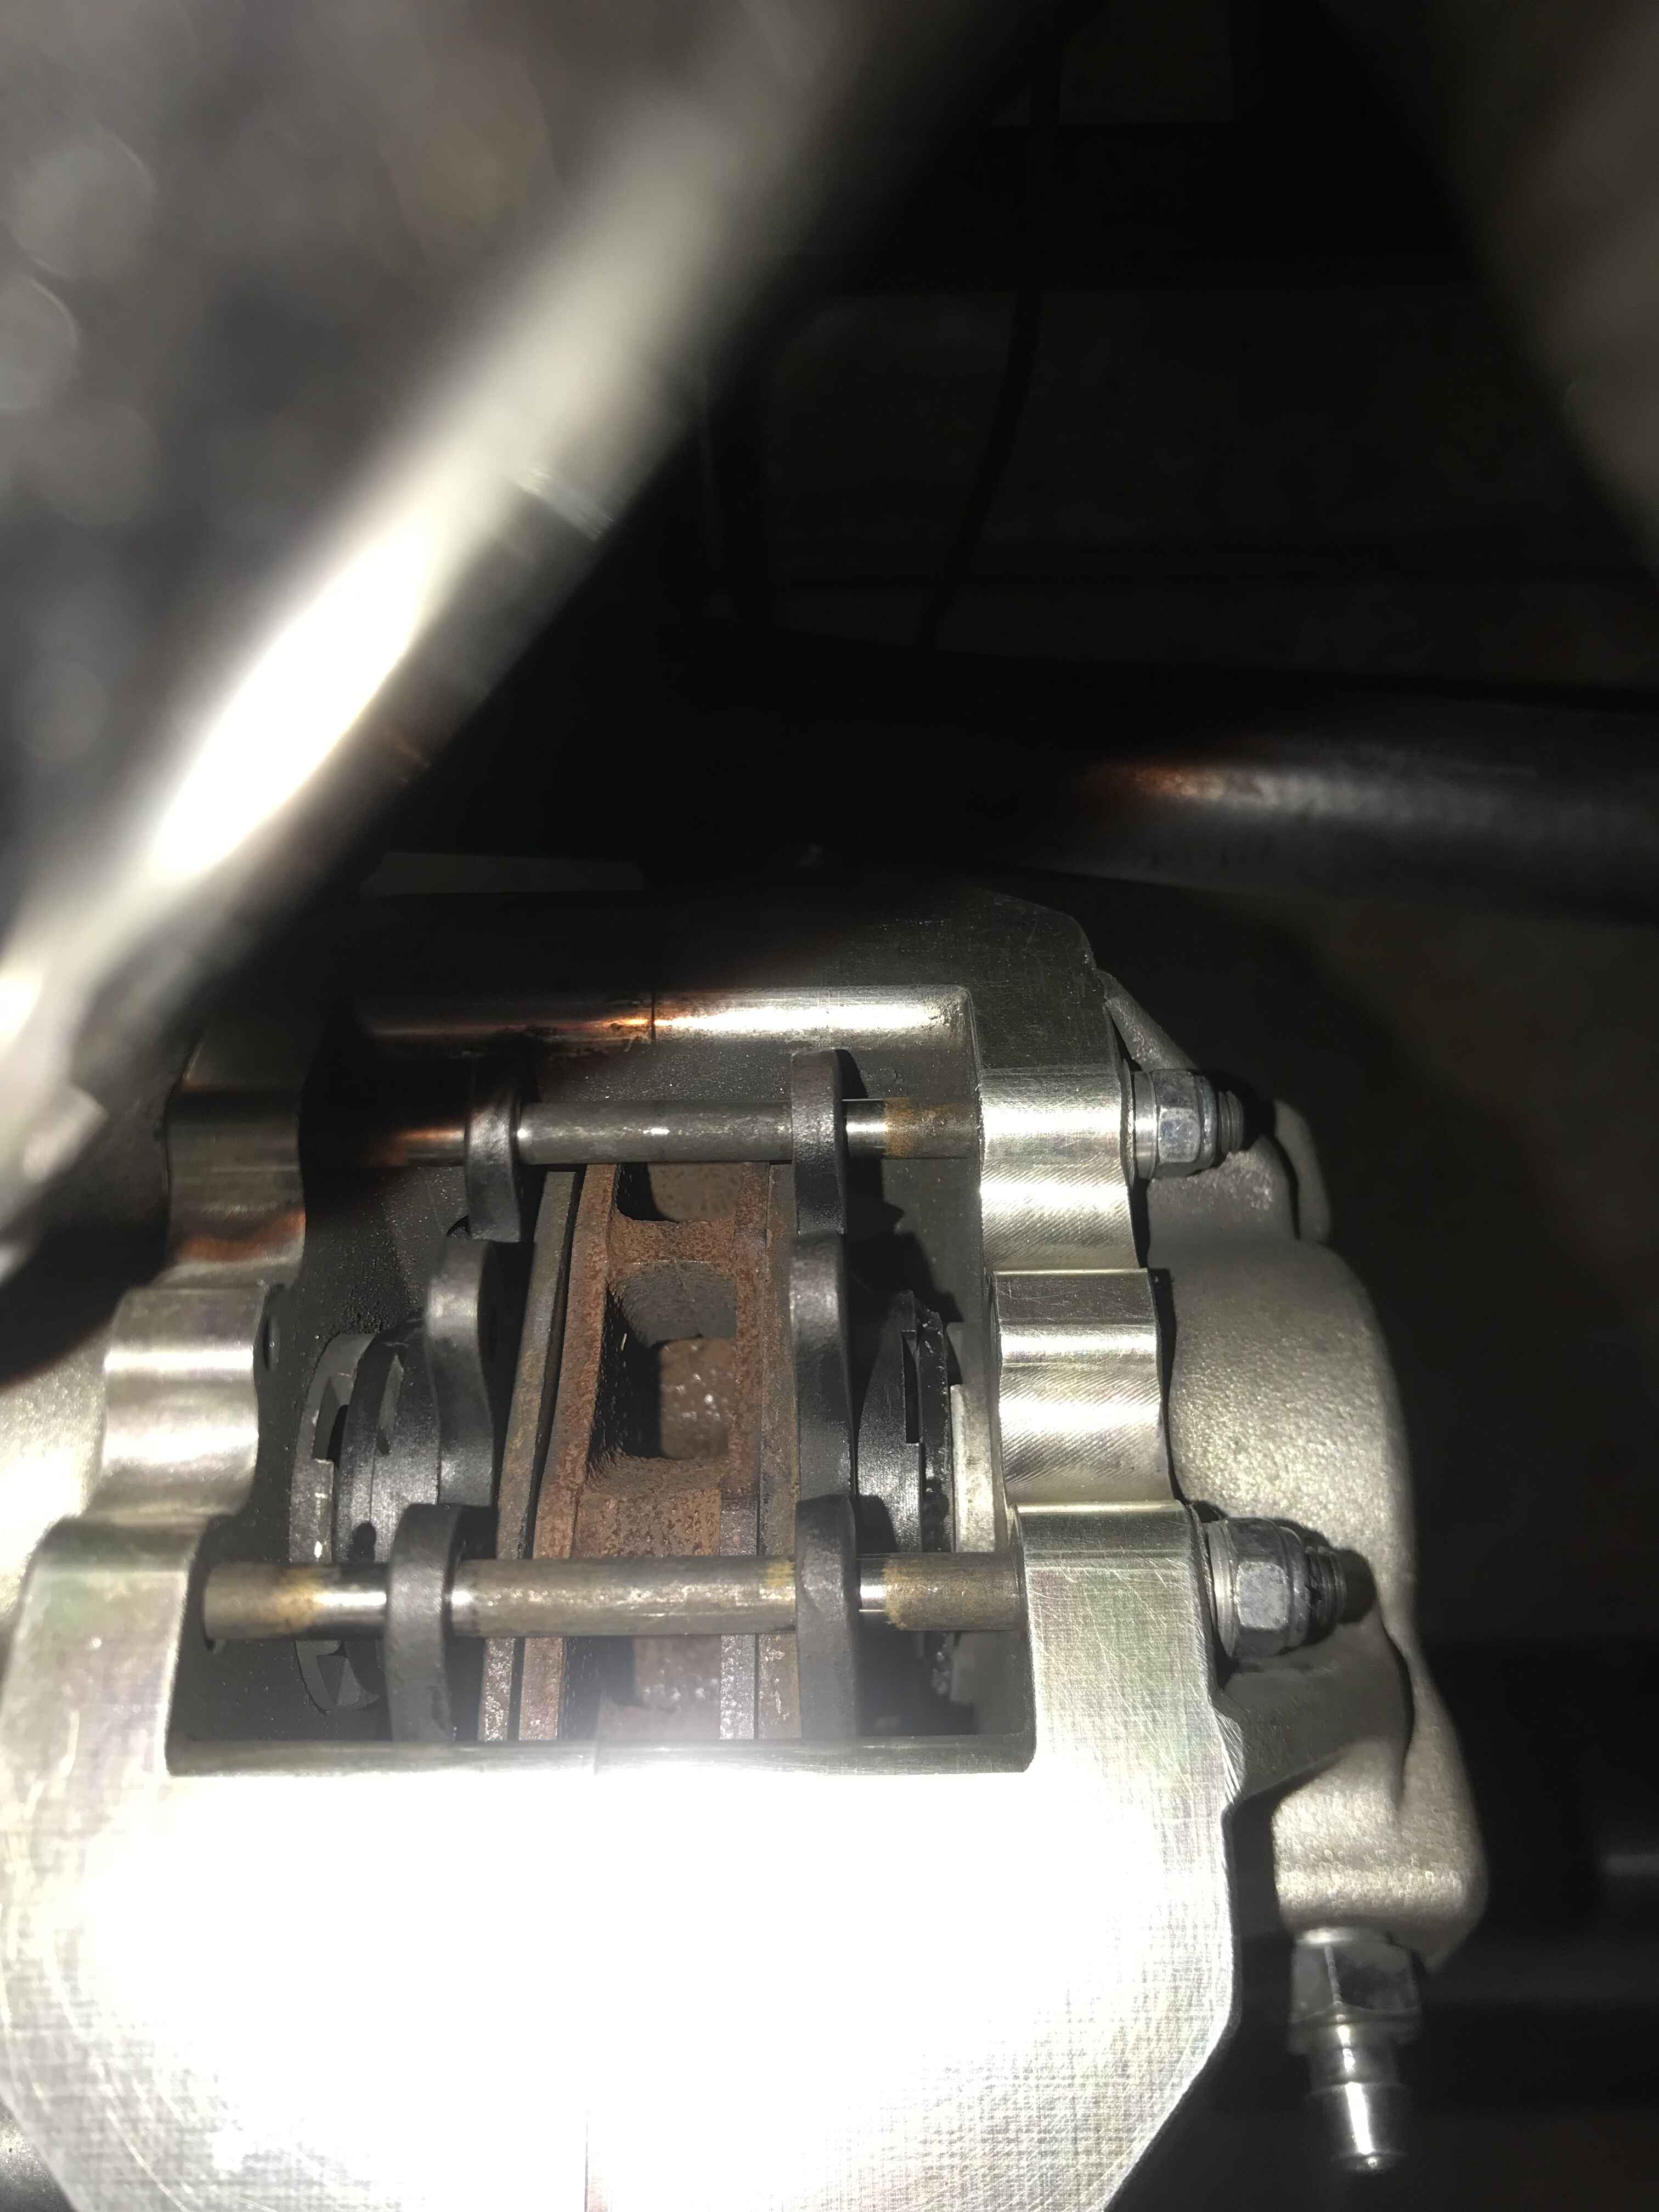
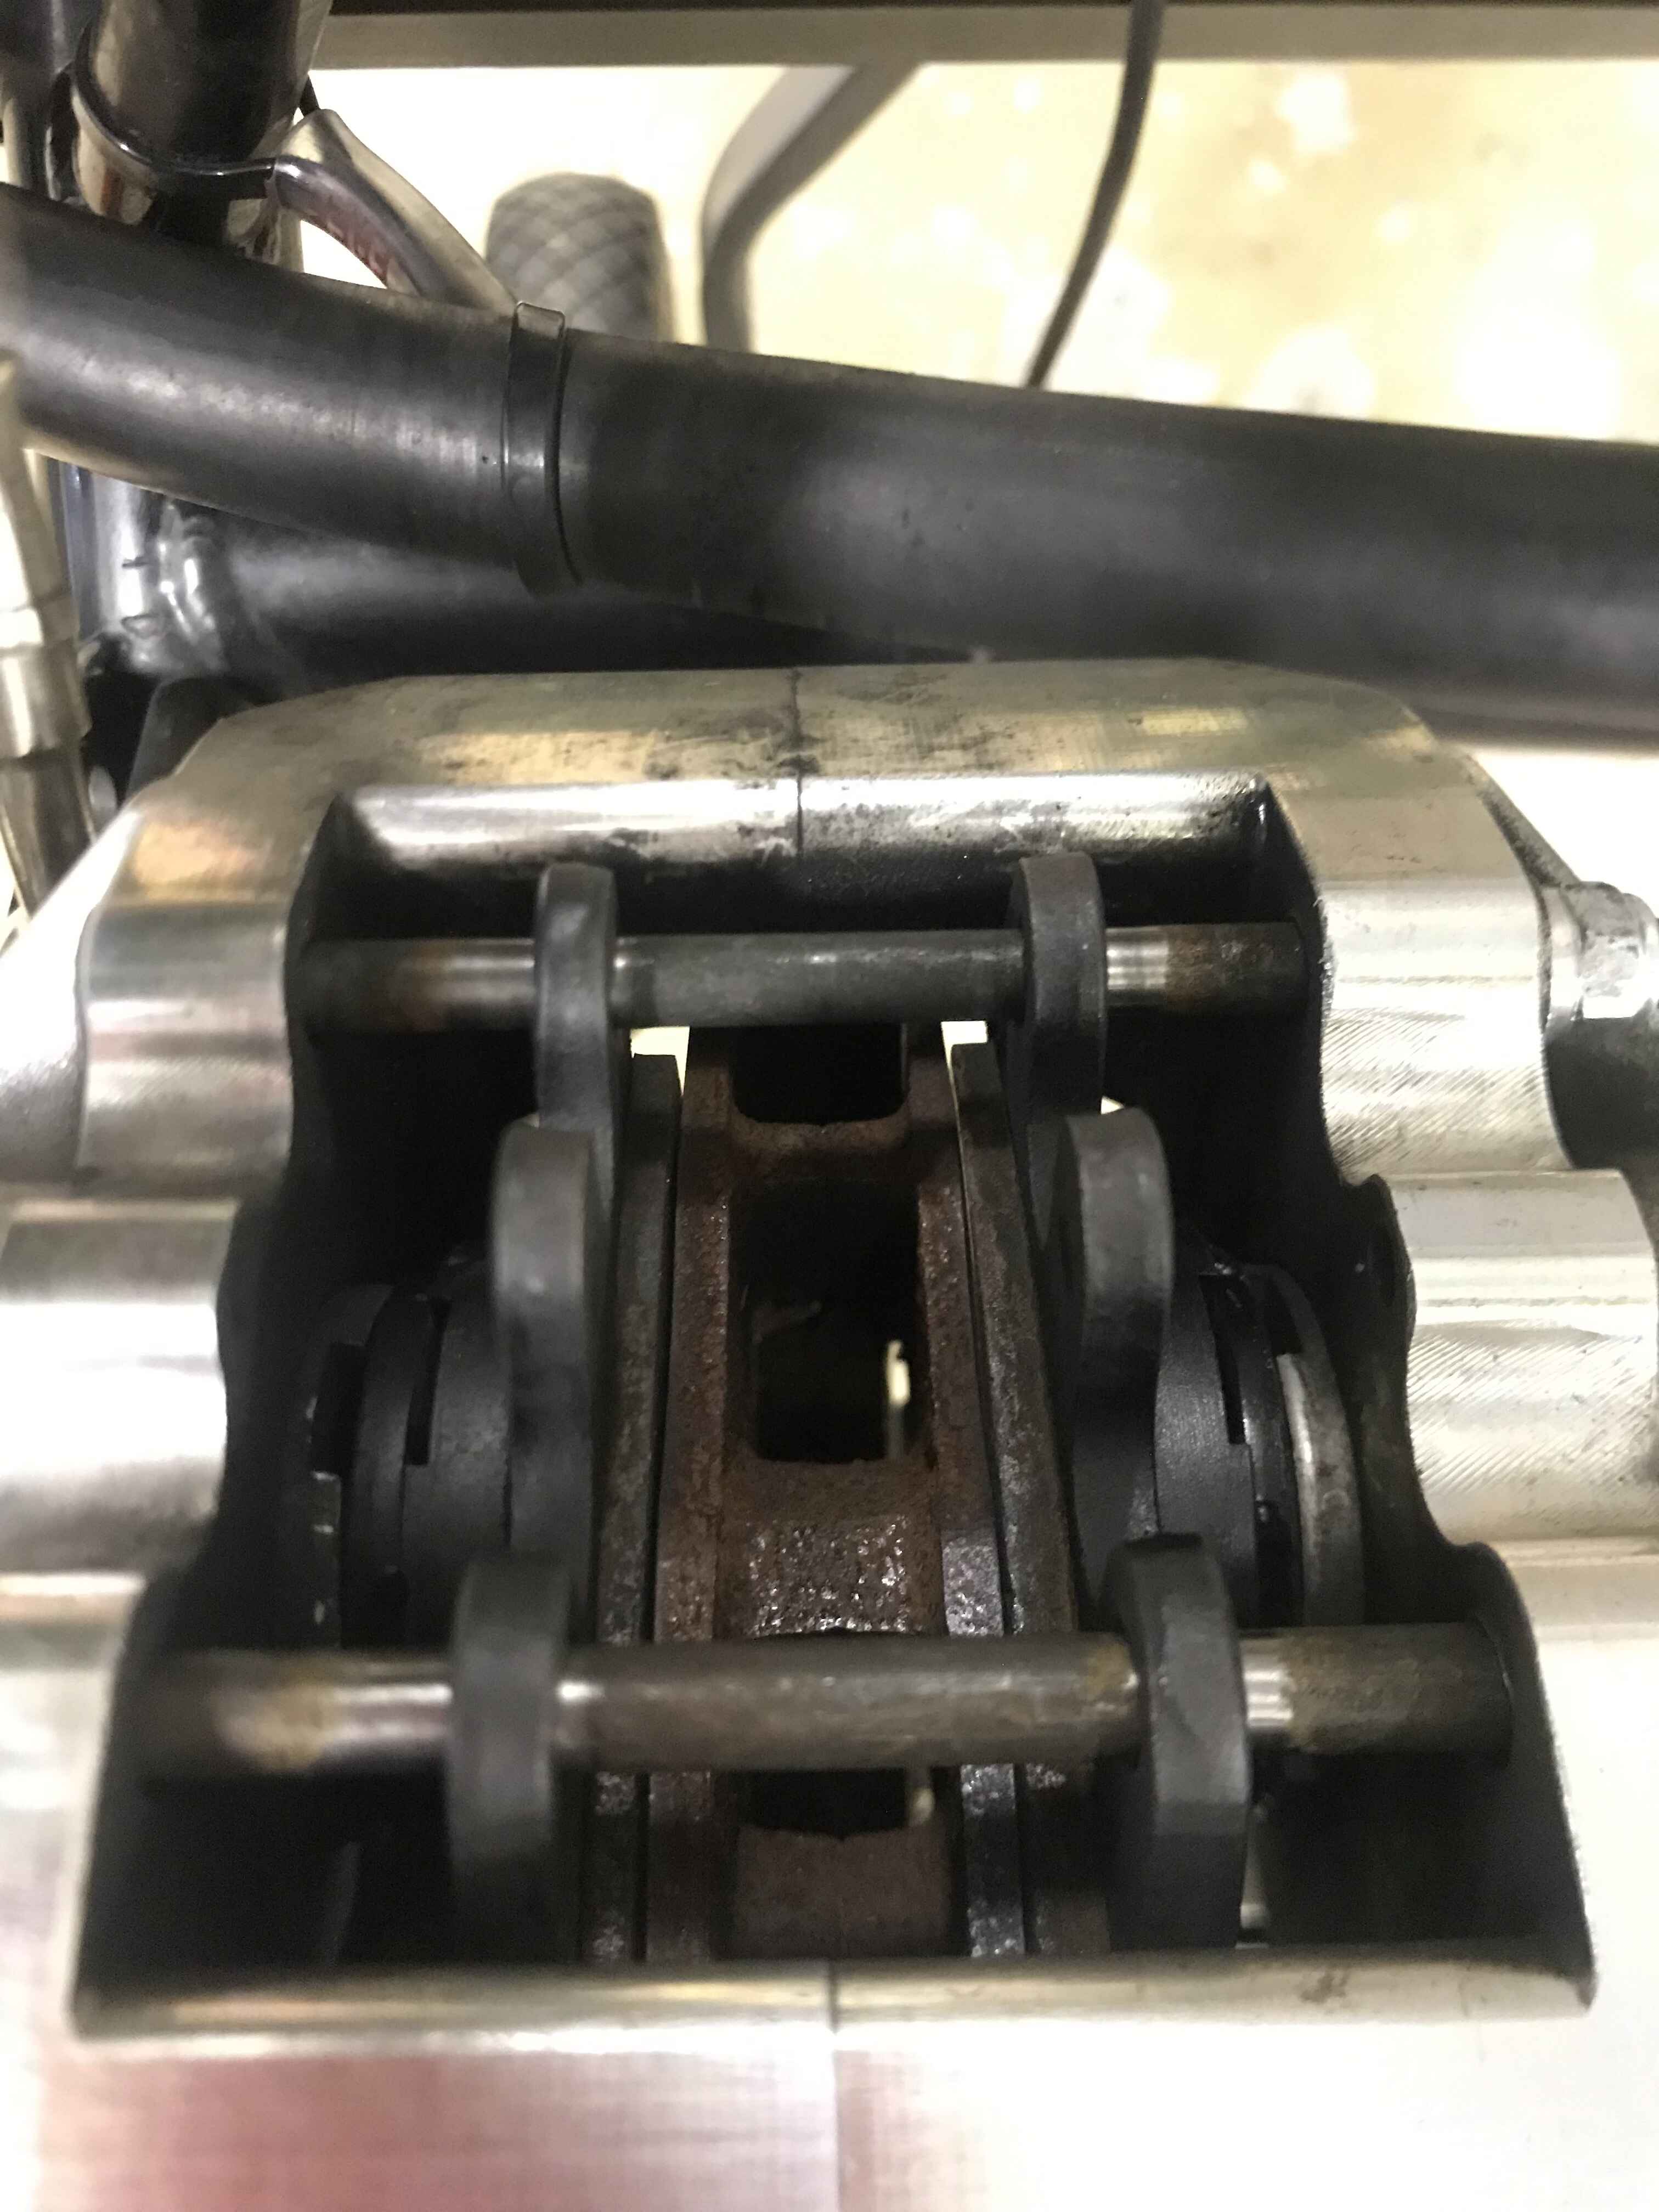
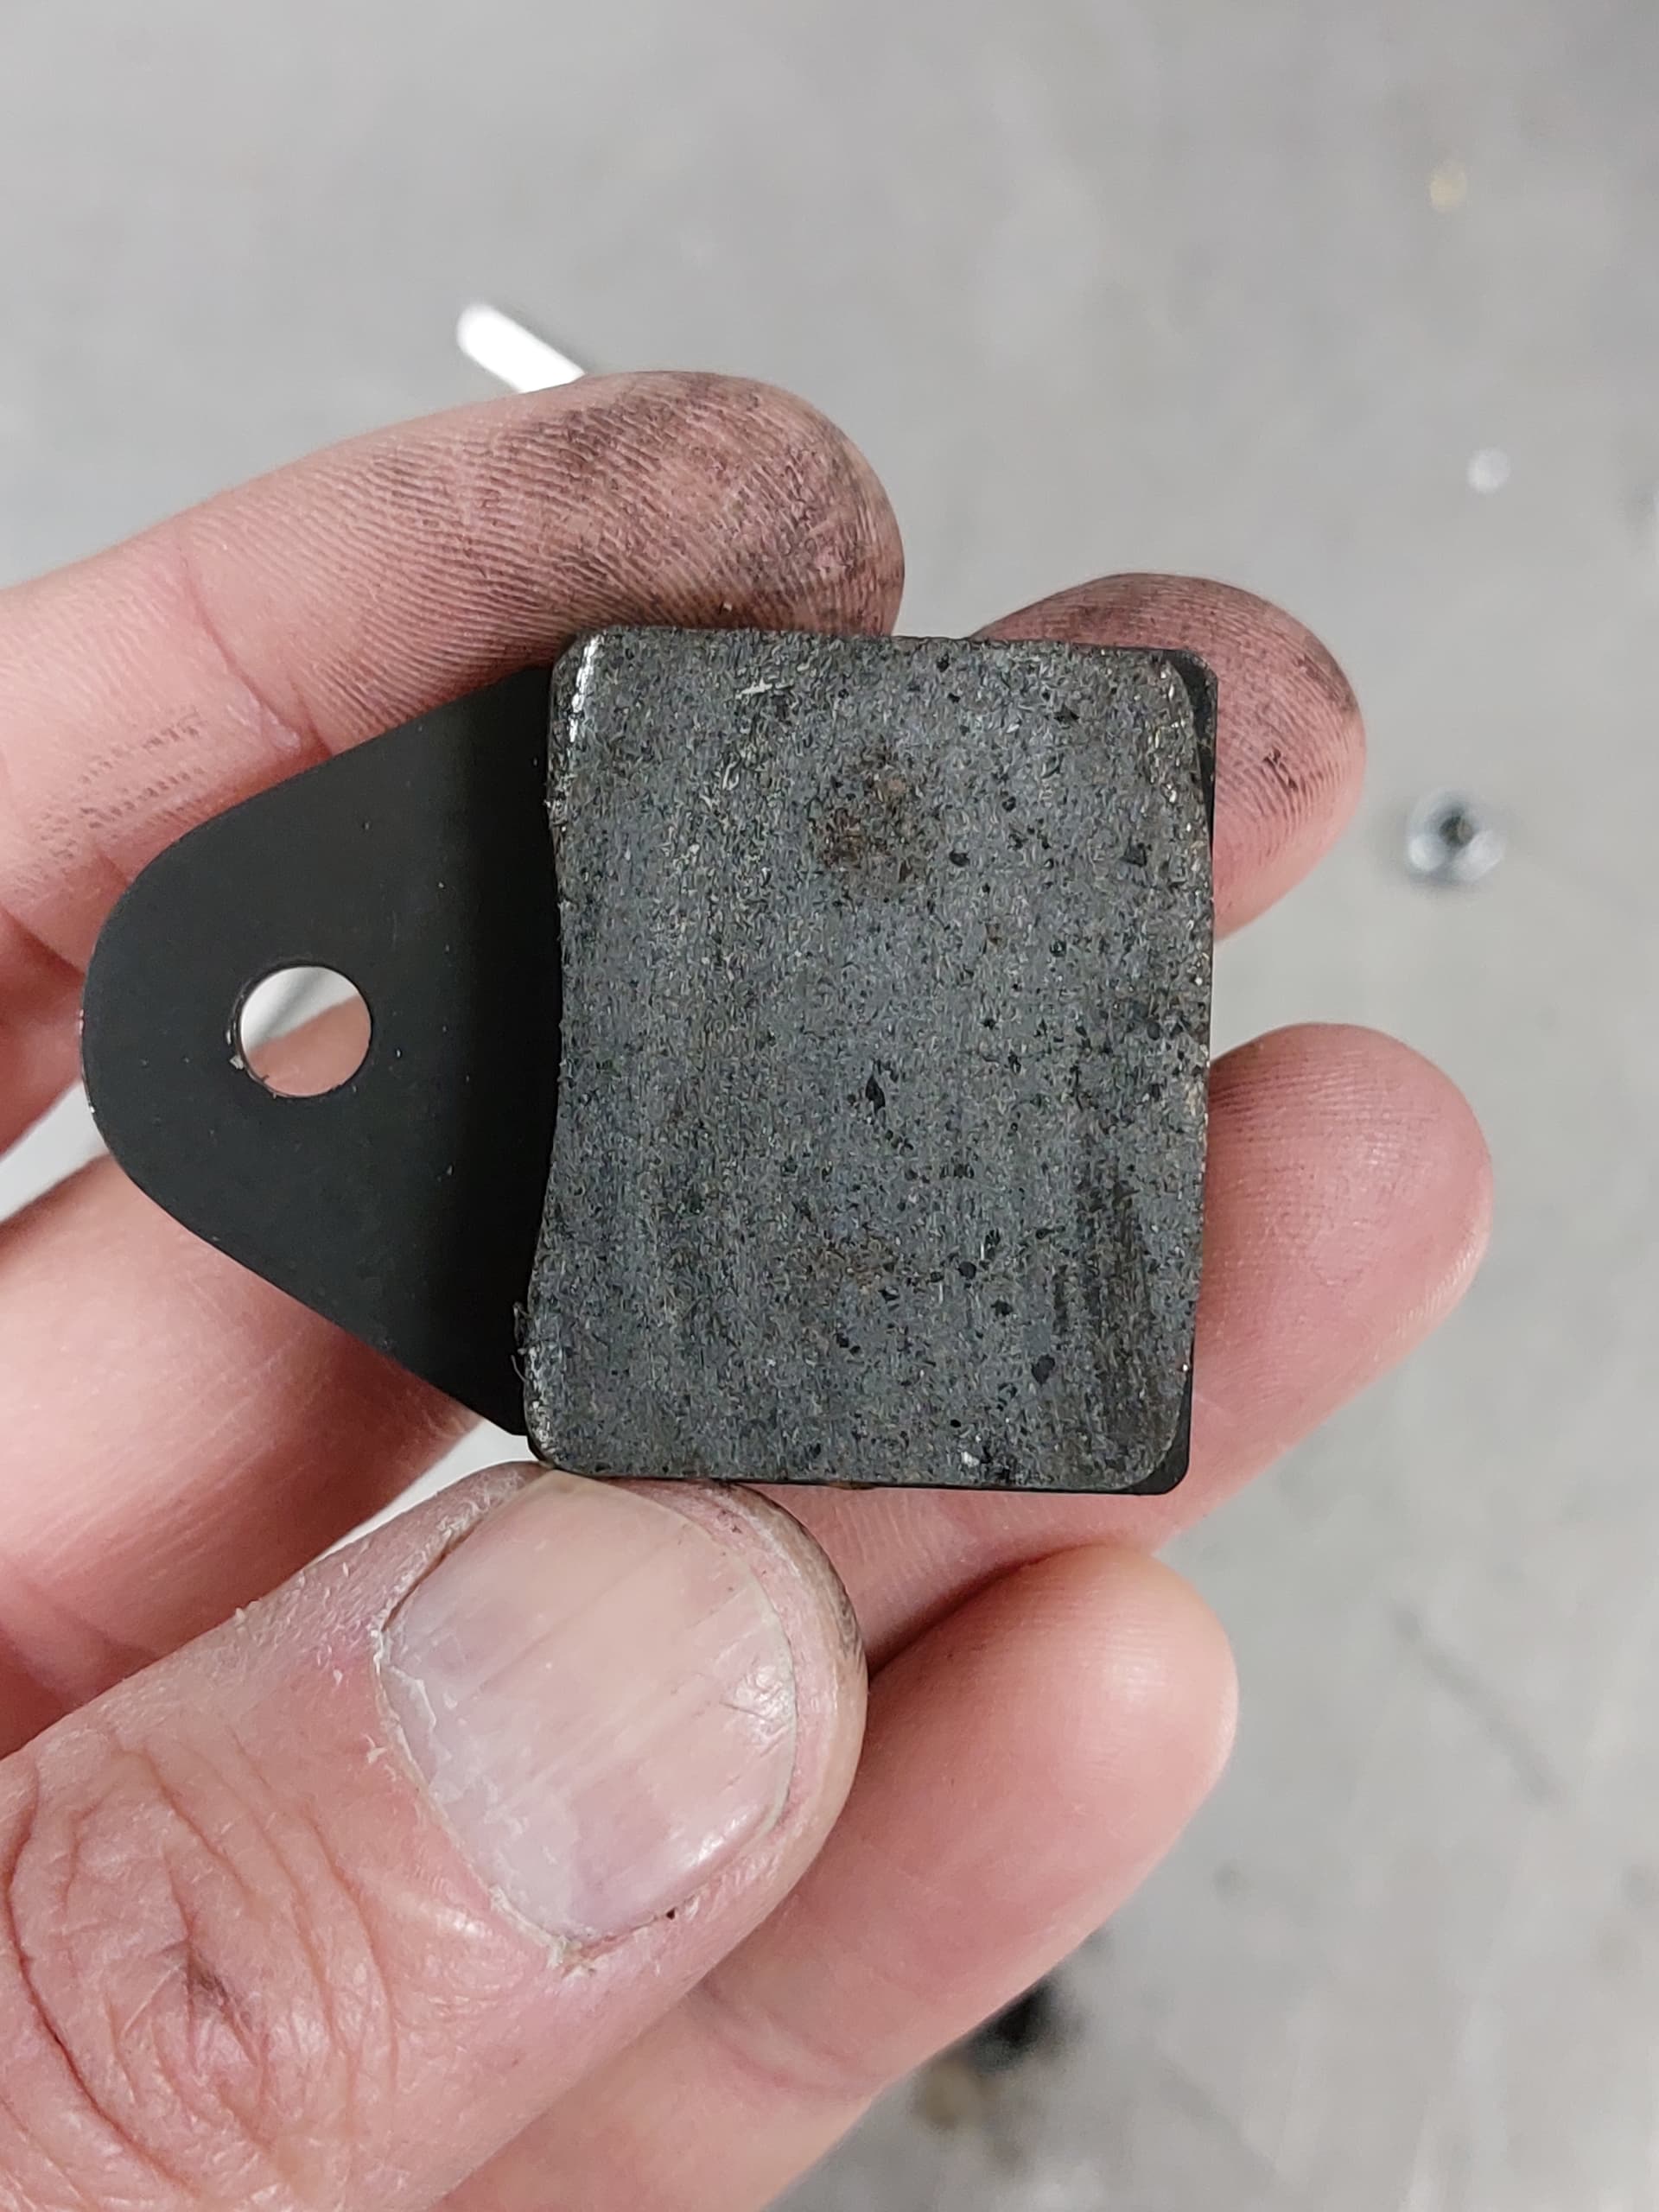
The karts I have had have worn the pads the similar way - the pad develops a wedge shape in use, gradually the wedge gets steeper and steeper. The pad gets thinner and thinner from above but stays thick and meaty closest to the hub. Cause of this, I believe, is that most calipers arent stiff enough - they open up. Or they cant stand against forces if pistons are allowed to come out too much. They deflect when brake pressure/piston is pushing against the wedge -->open up and system becomes a loop accelerating pad wedge formation
By shimming the pads, the traditional way, you cant get rid of the angle if the worn pad has developed one. So the piston is forced to tilt more or less when hydraulic fluid is pressing it agaisnt the backing plate thats in an angle. This eats the caliper bore, causes brake drag and so on
The shim stack has a flaw in itself as it is being kept in place by pad pins - the pins move, the holes in shims arent tight, pins arent tight to the caliper - so in effect by pressing the brake the shim stack has a chance to move, to be pressed little bit here, on the next corner little bit there and so on. The shims are thin sheet metal - its easy to dent or form sheet metal with hand tools. Now consider hydraulic piston pushing the shim stack - you are in effect forming it with a ram. It becomes a bit springy stack , like a belleville spring if shims dont stay perfectly straight
I like to have as firm brake pedal as possible - I try to eliminate any flex / delay from the system, the moment I hit the brake I want reaction
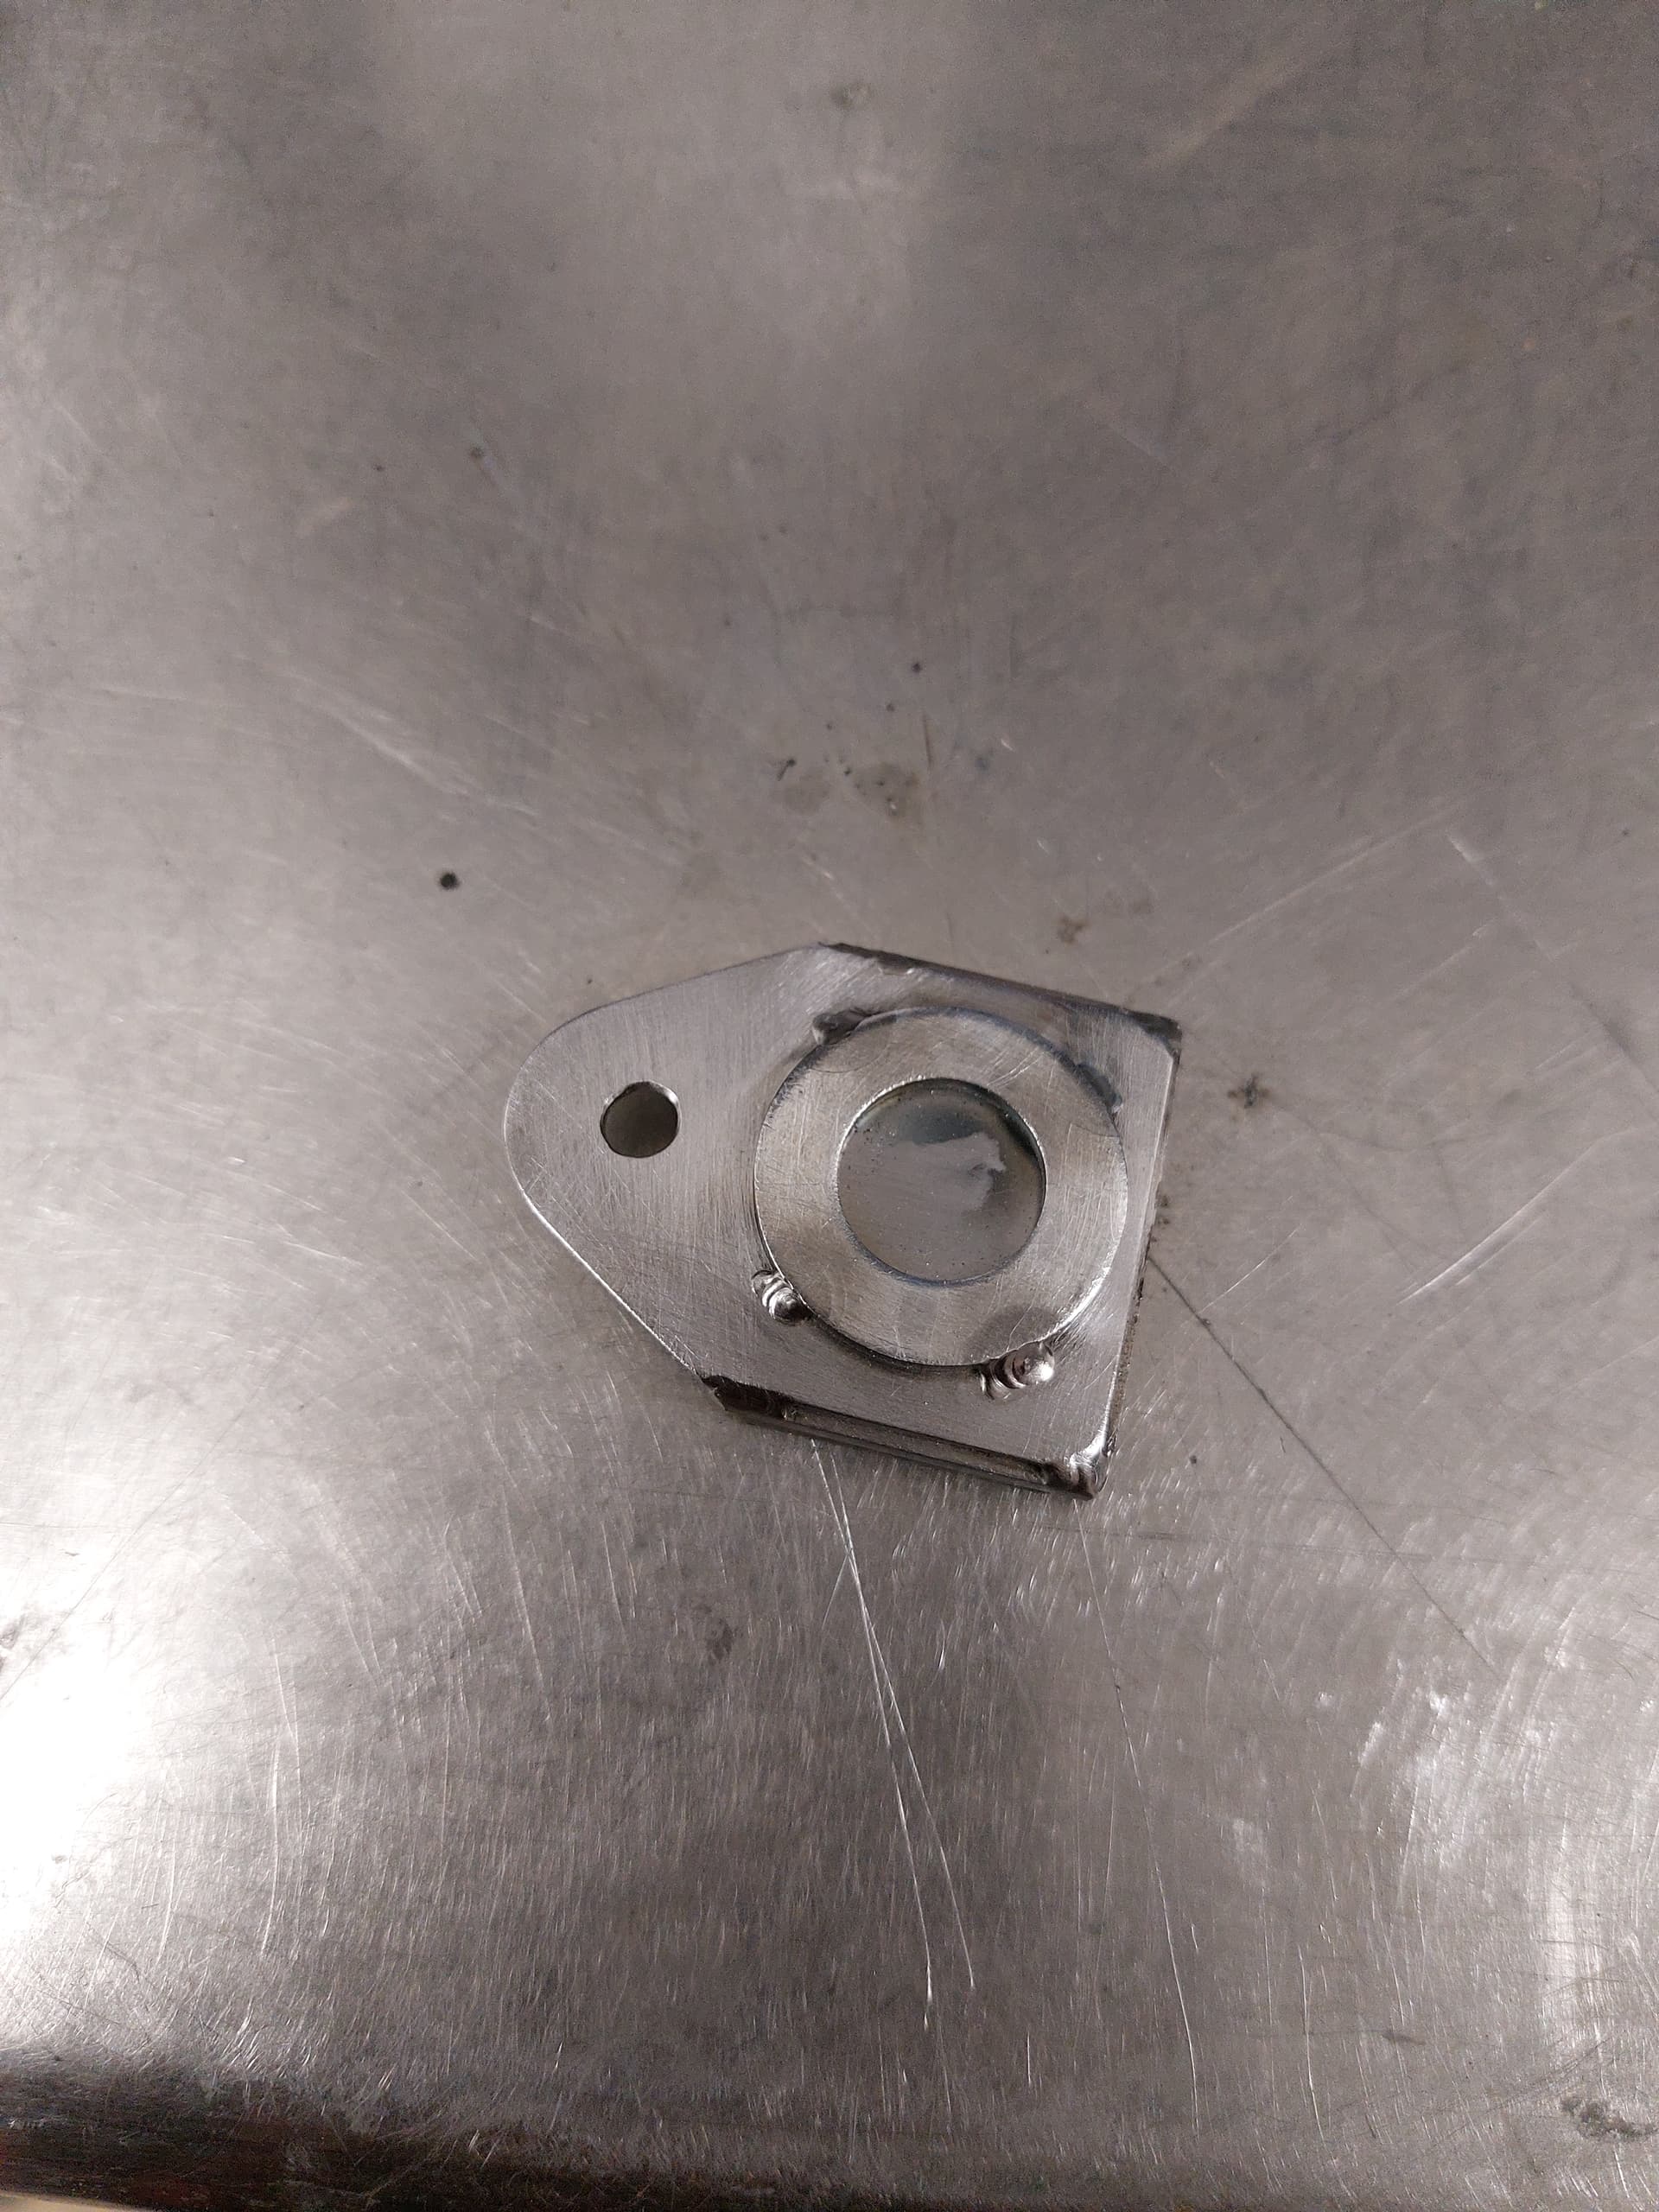
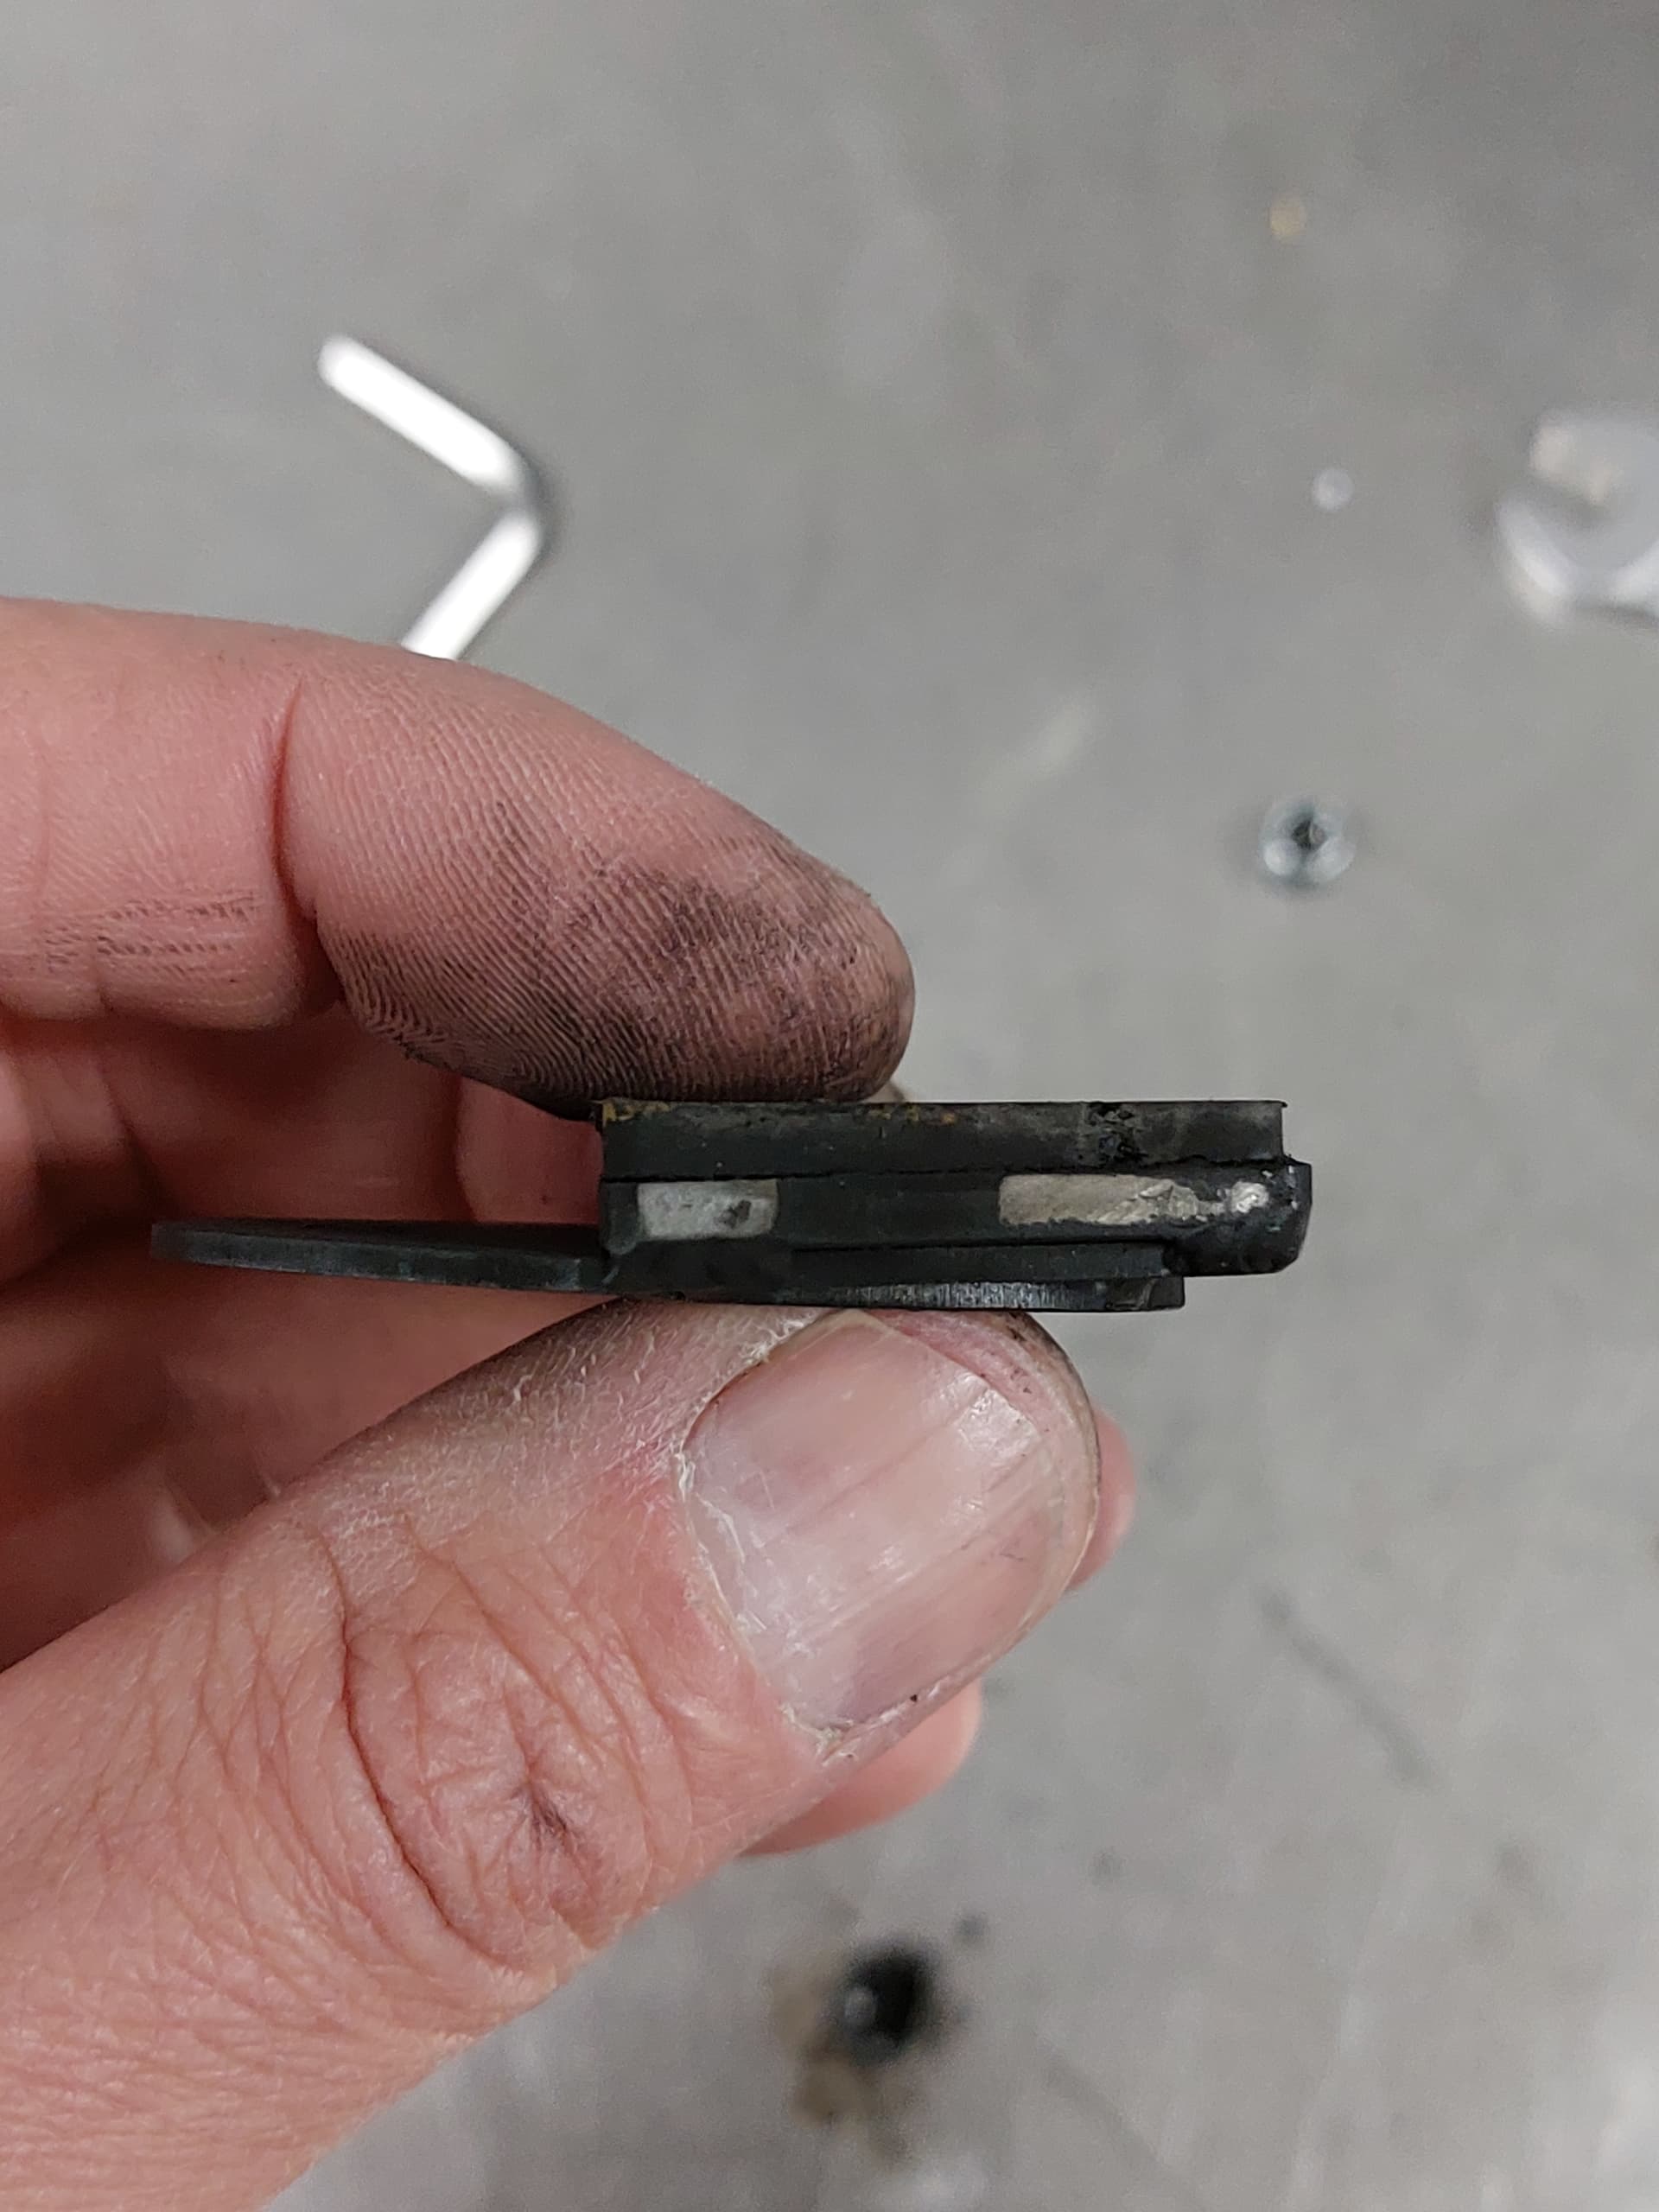
So I experimented a bit and just welded a washer to the backing plate. I wasnt sure would friction material delaminate from the backing plate because of the heat etc but didnt have issues. I use TIG and only weld 4 short seams on each washer, 4-5mm long. I have done this to several sets, front and rear pads, and have had zero issues. Wouldnt dare to weld all around as the heat would go sky high, long weld distorts the backing plate a lot = most likely prys the friction material of the plate
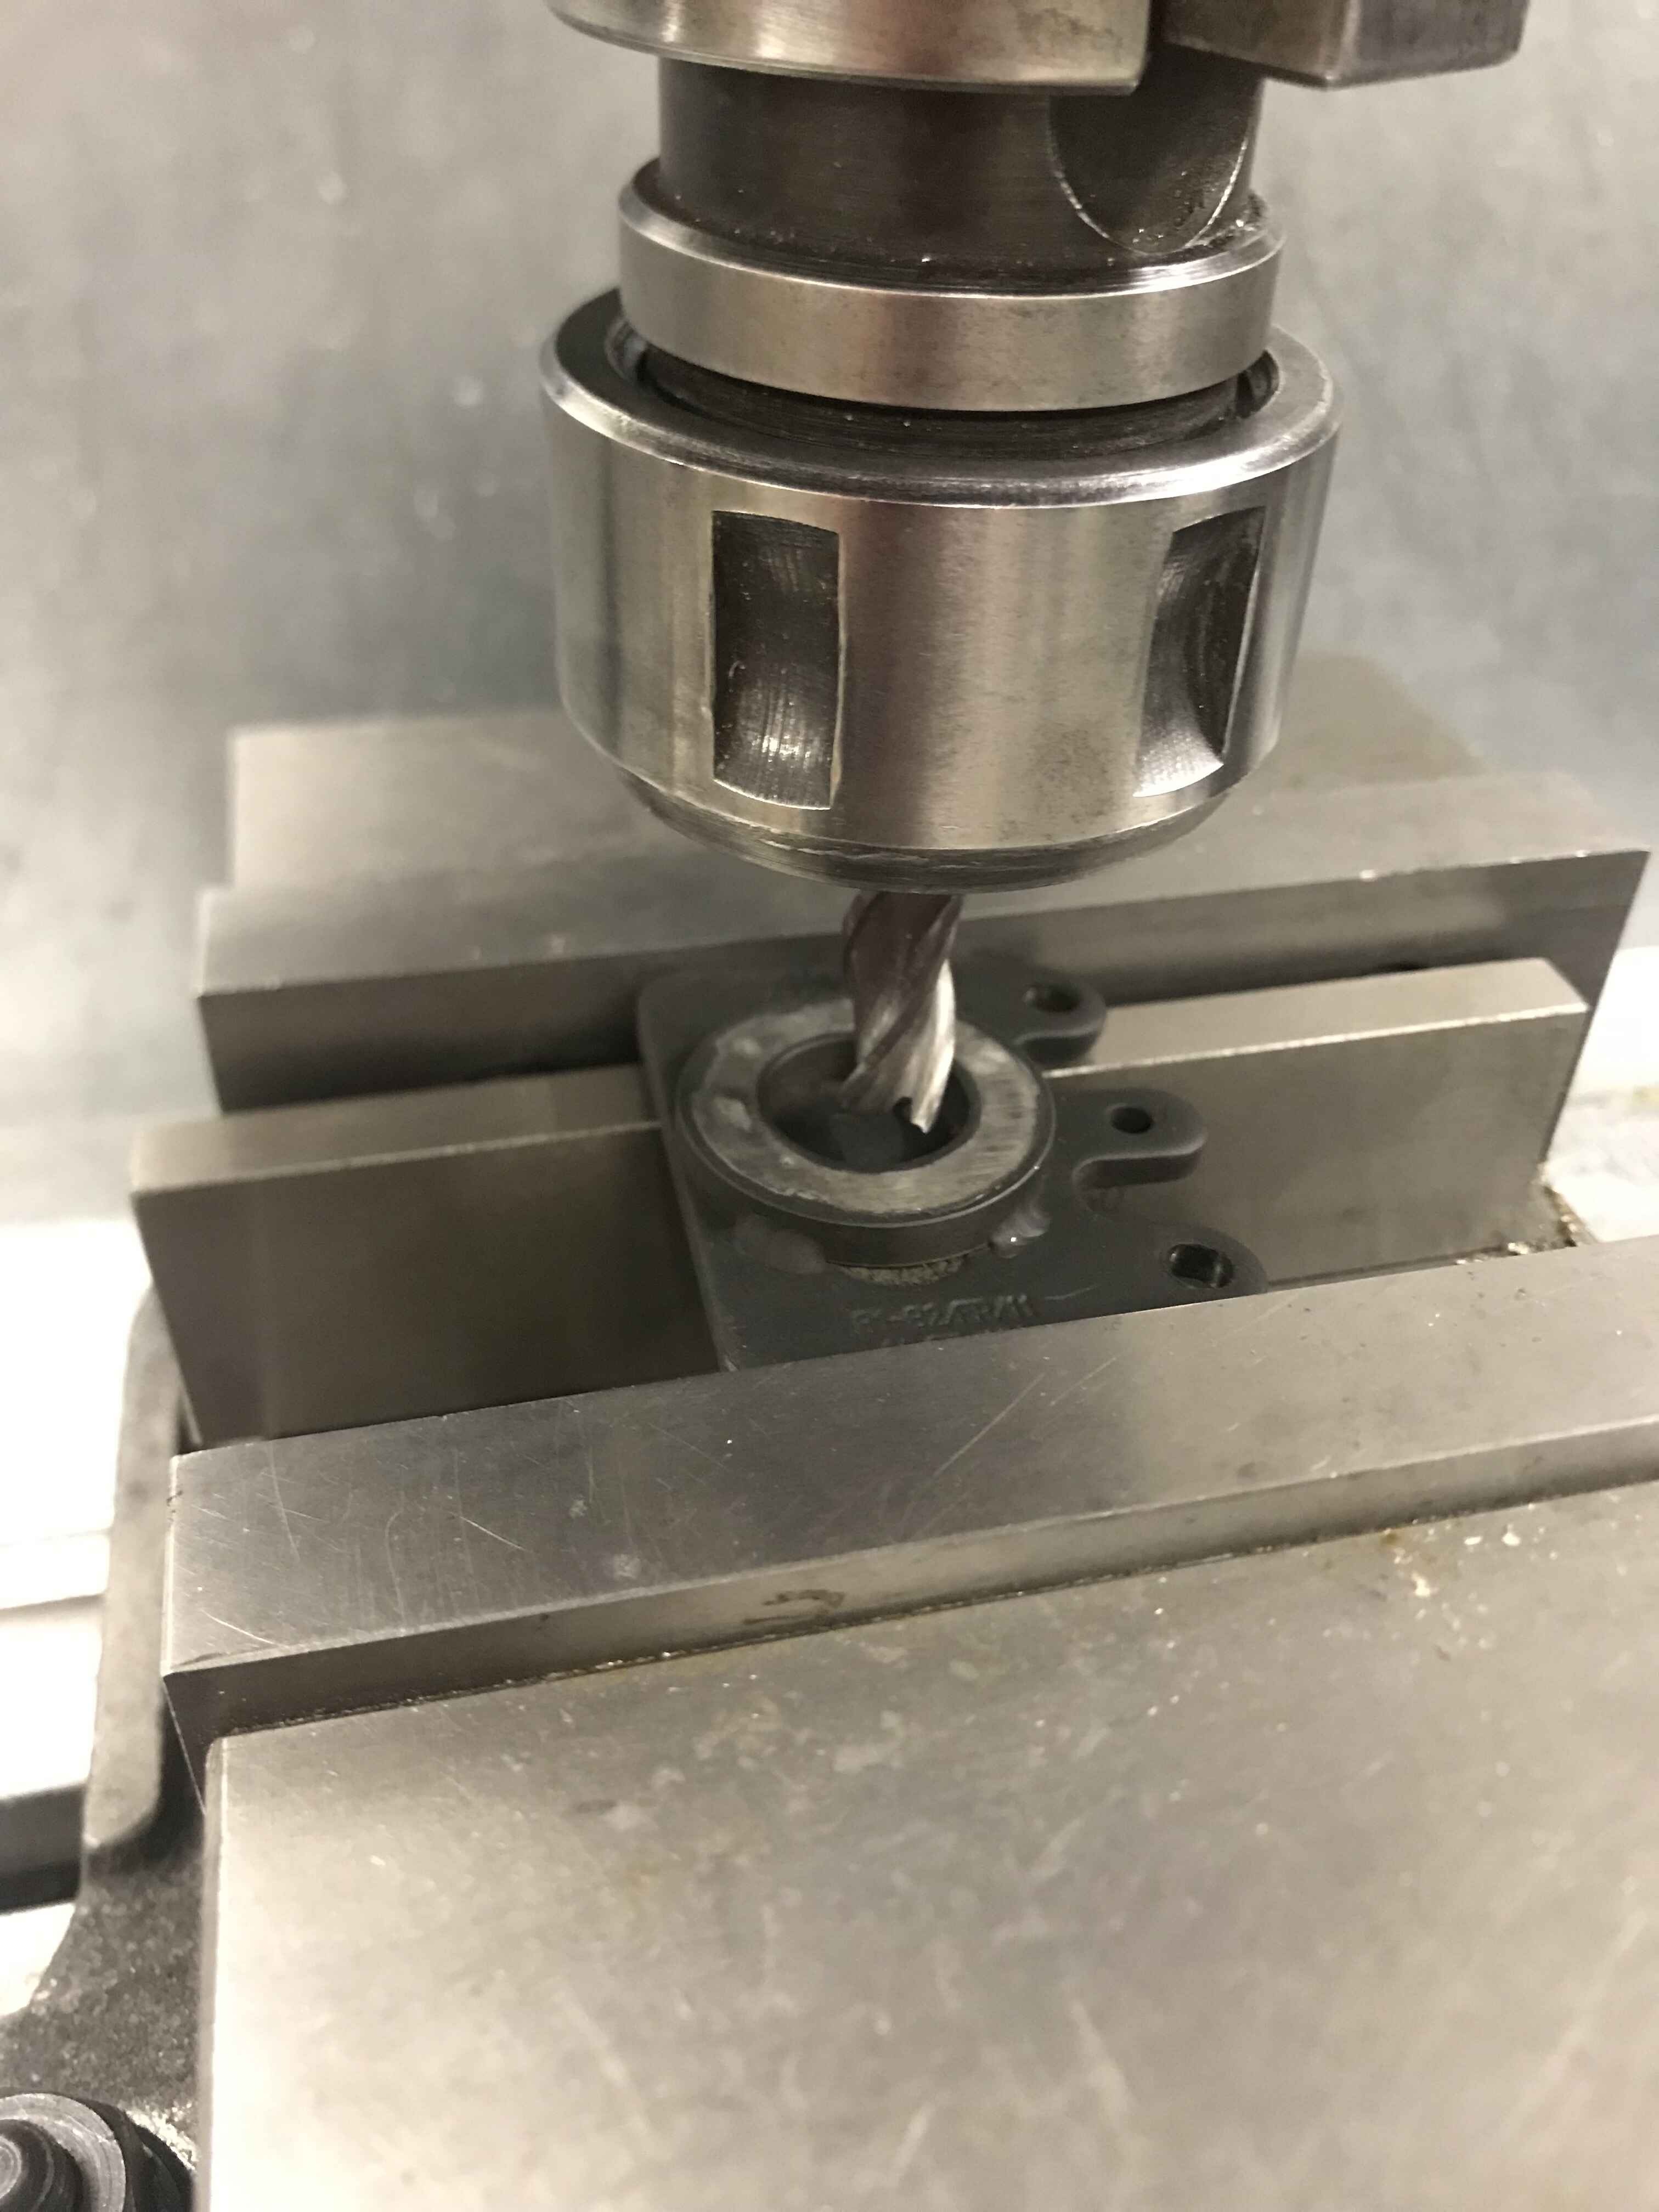
Heres how I do this :
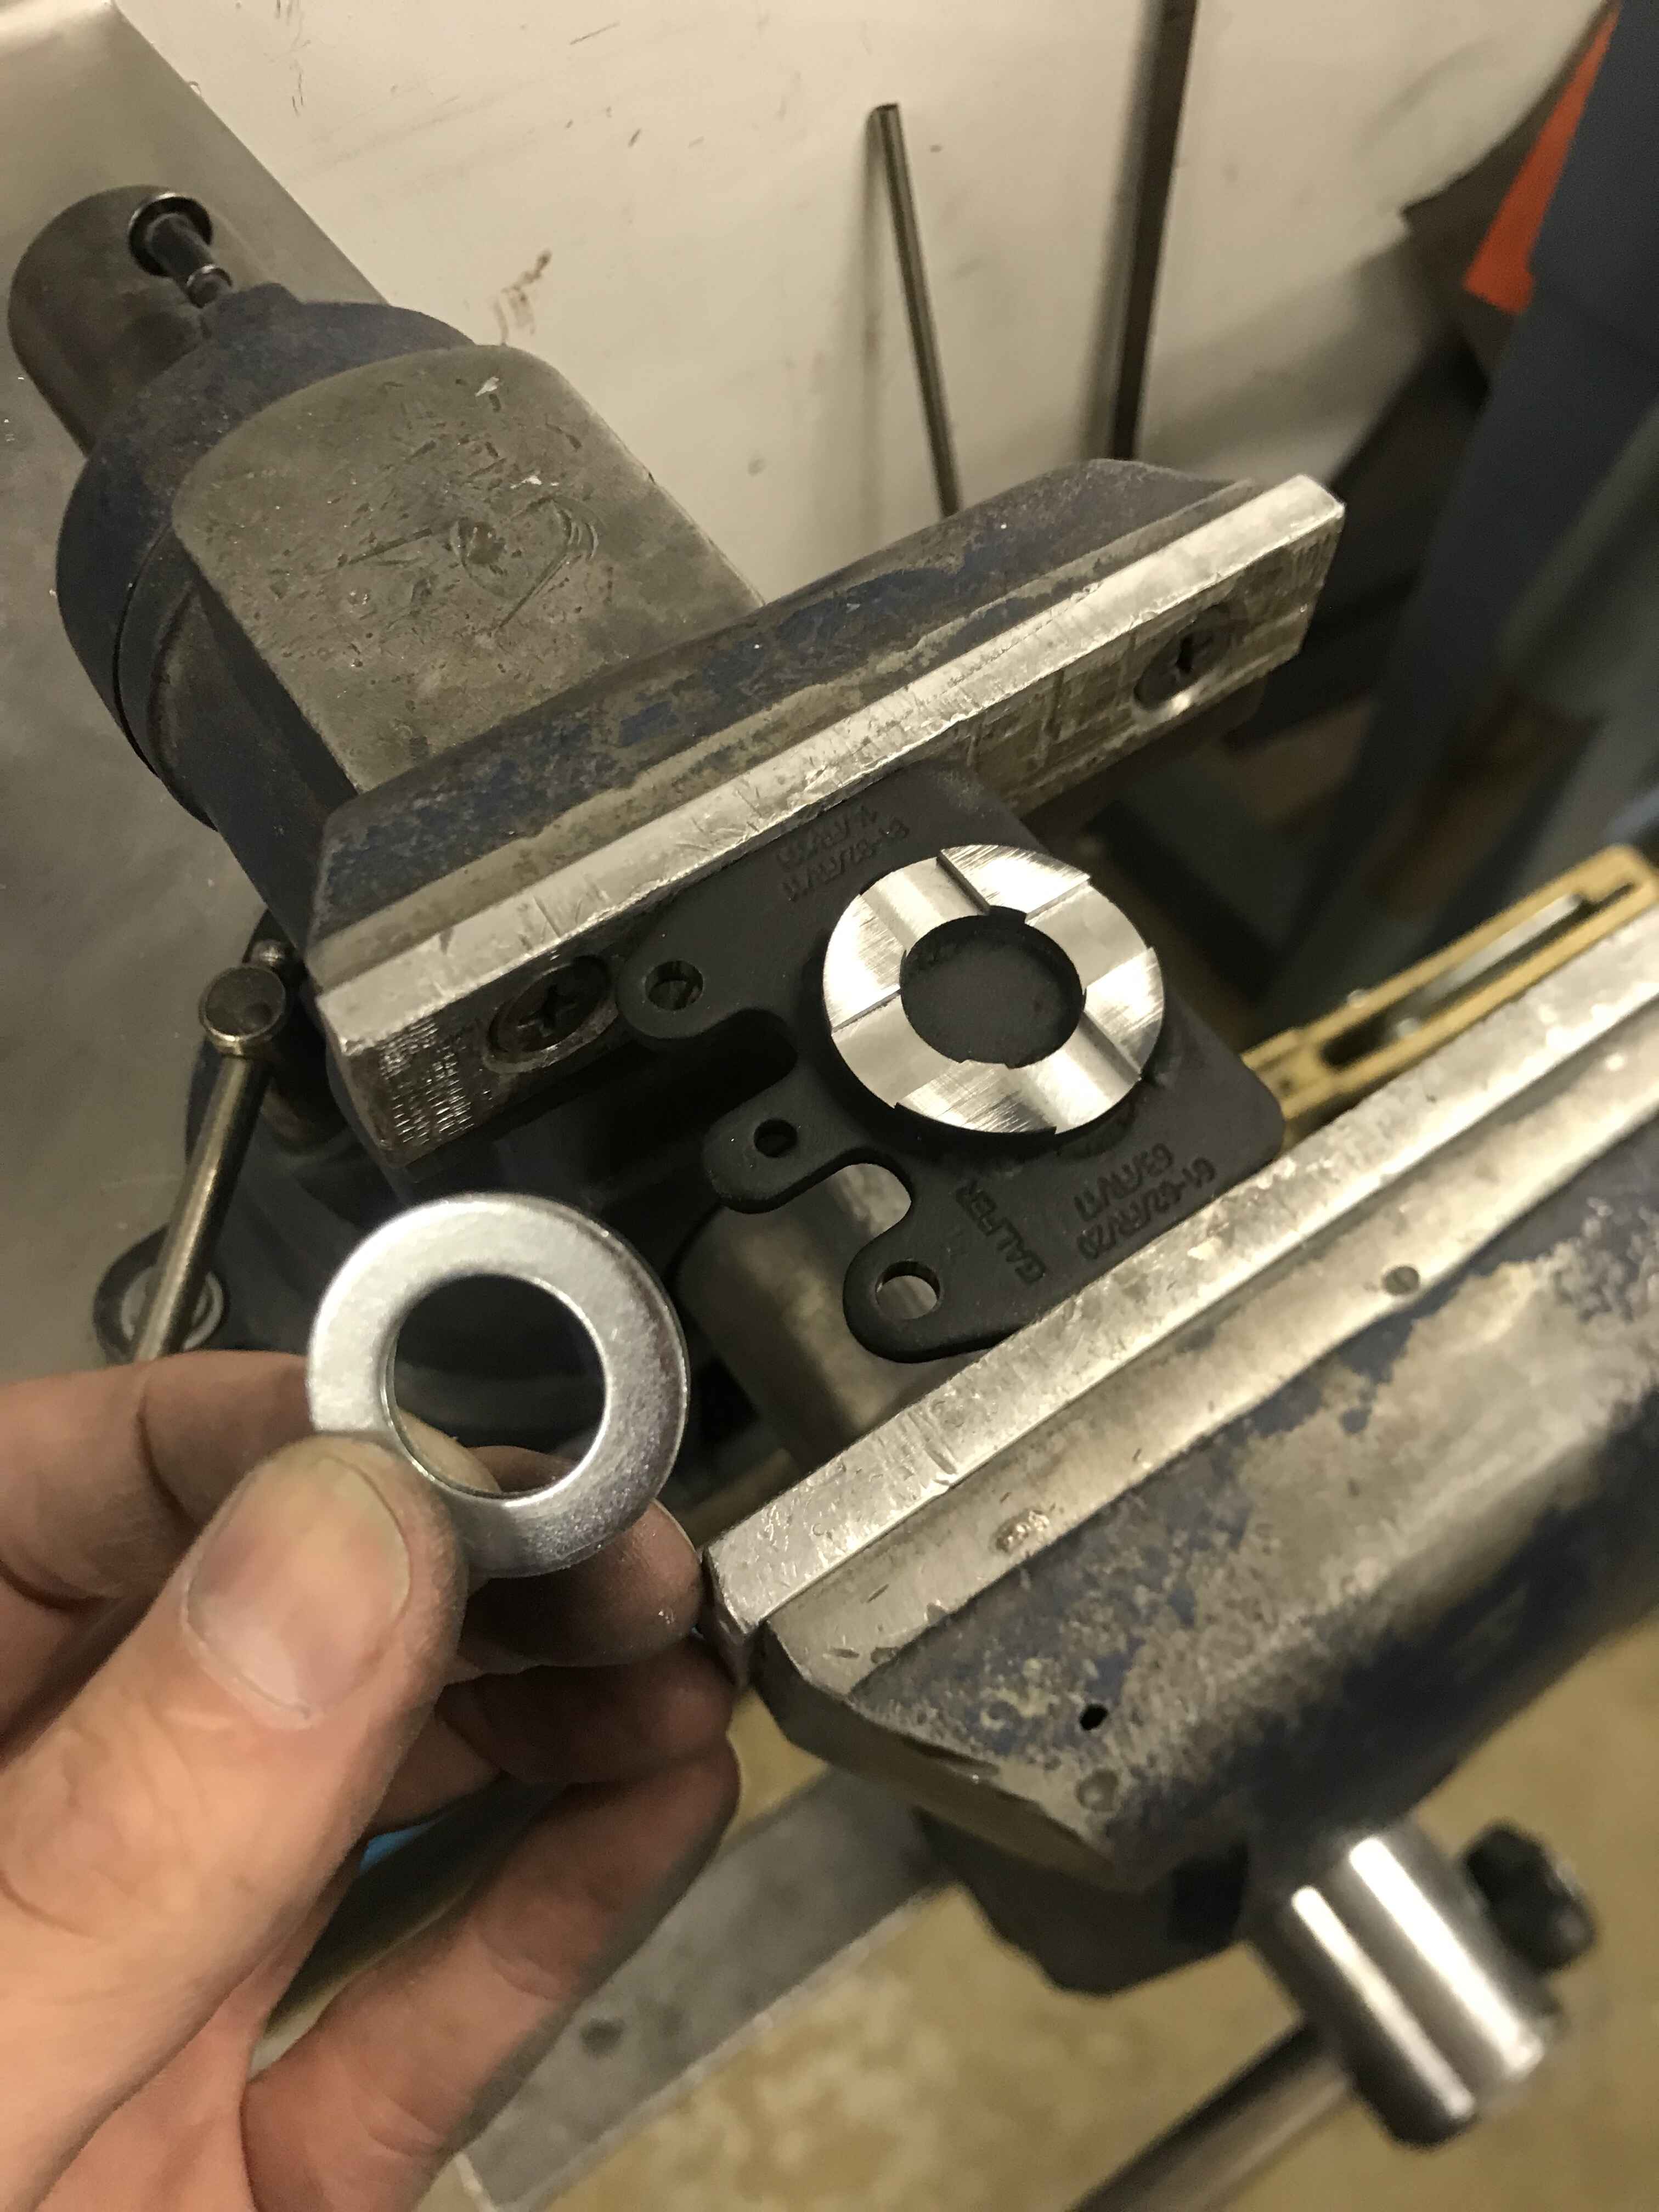
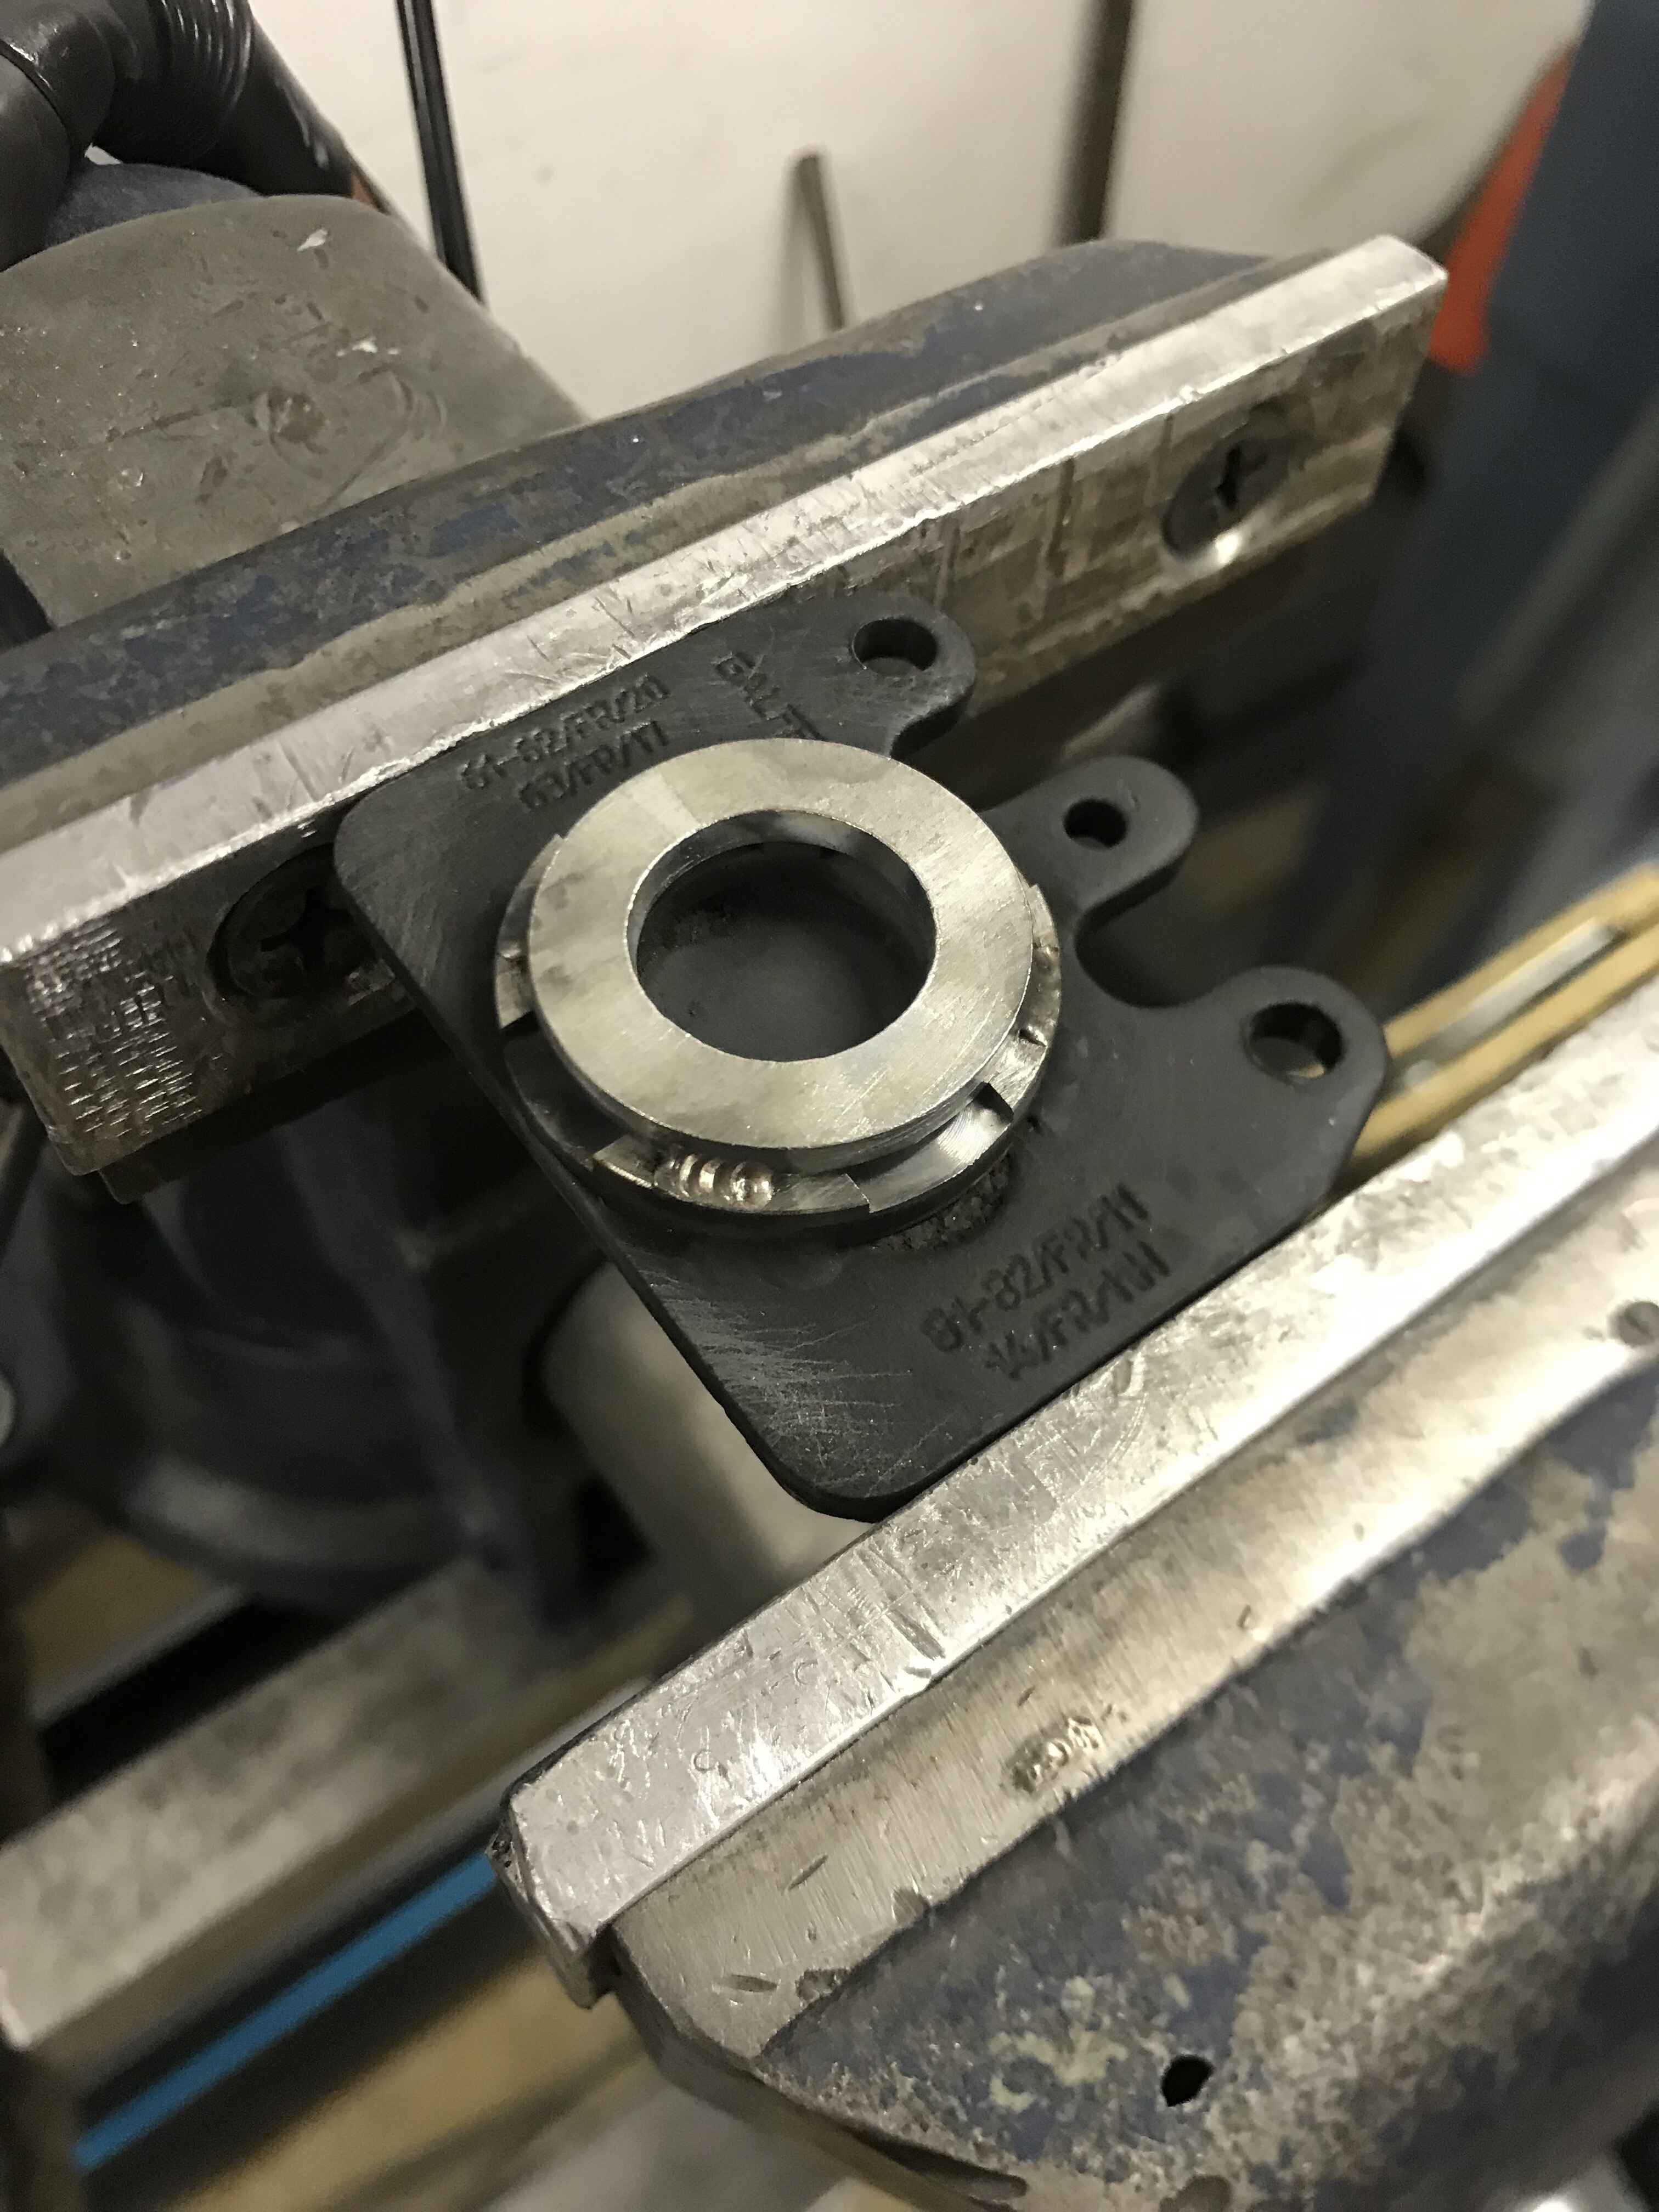
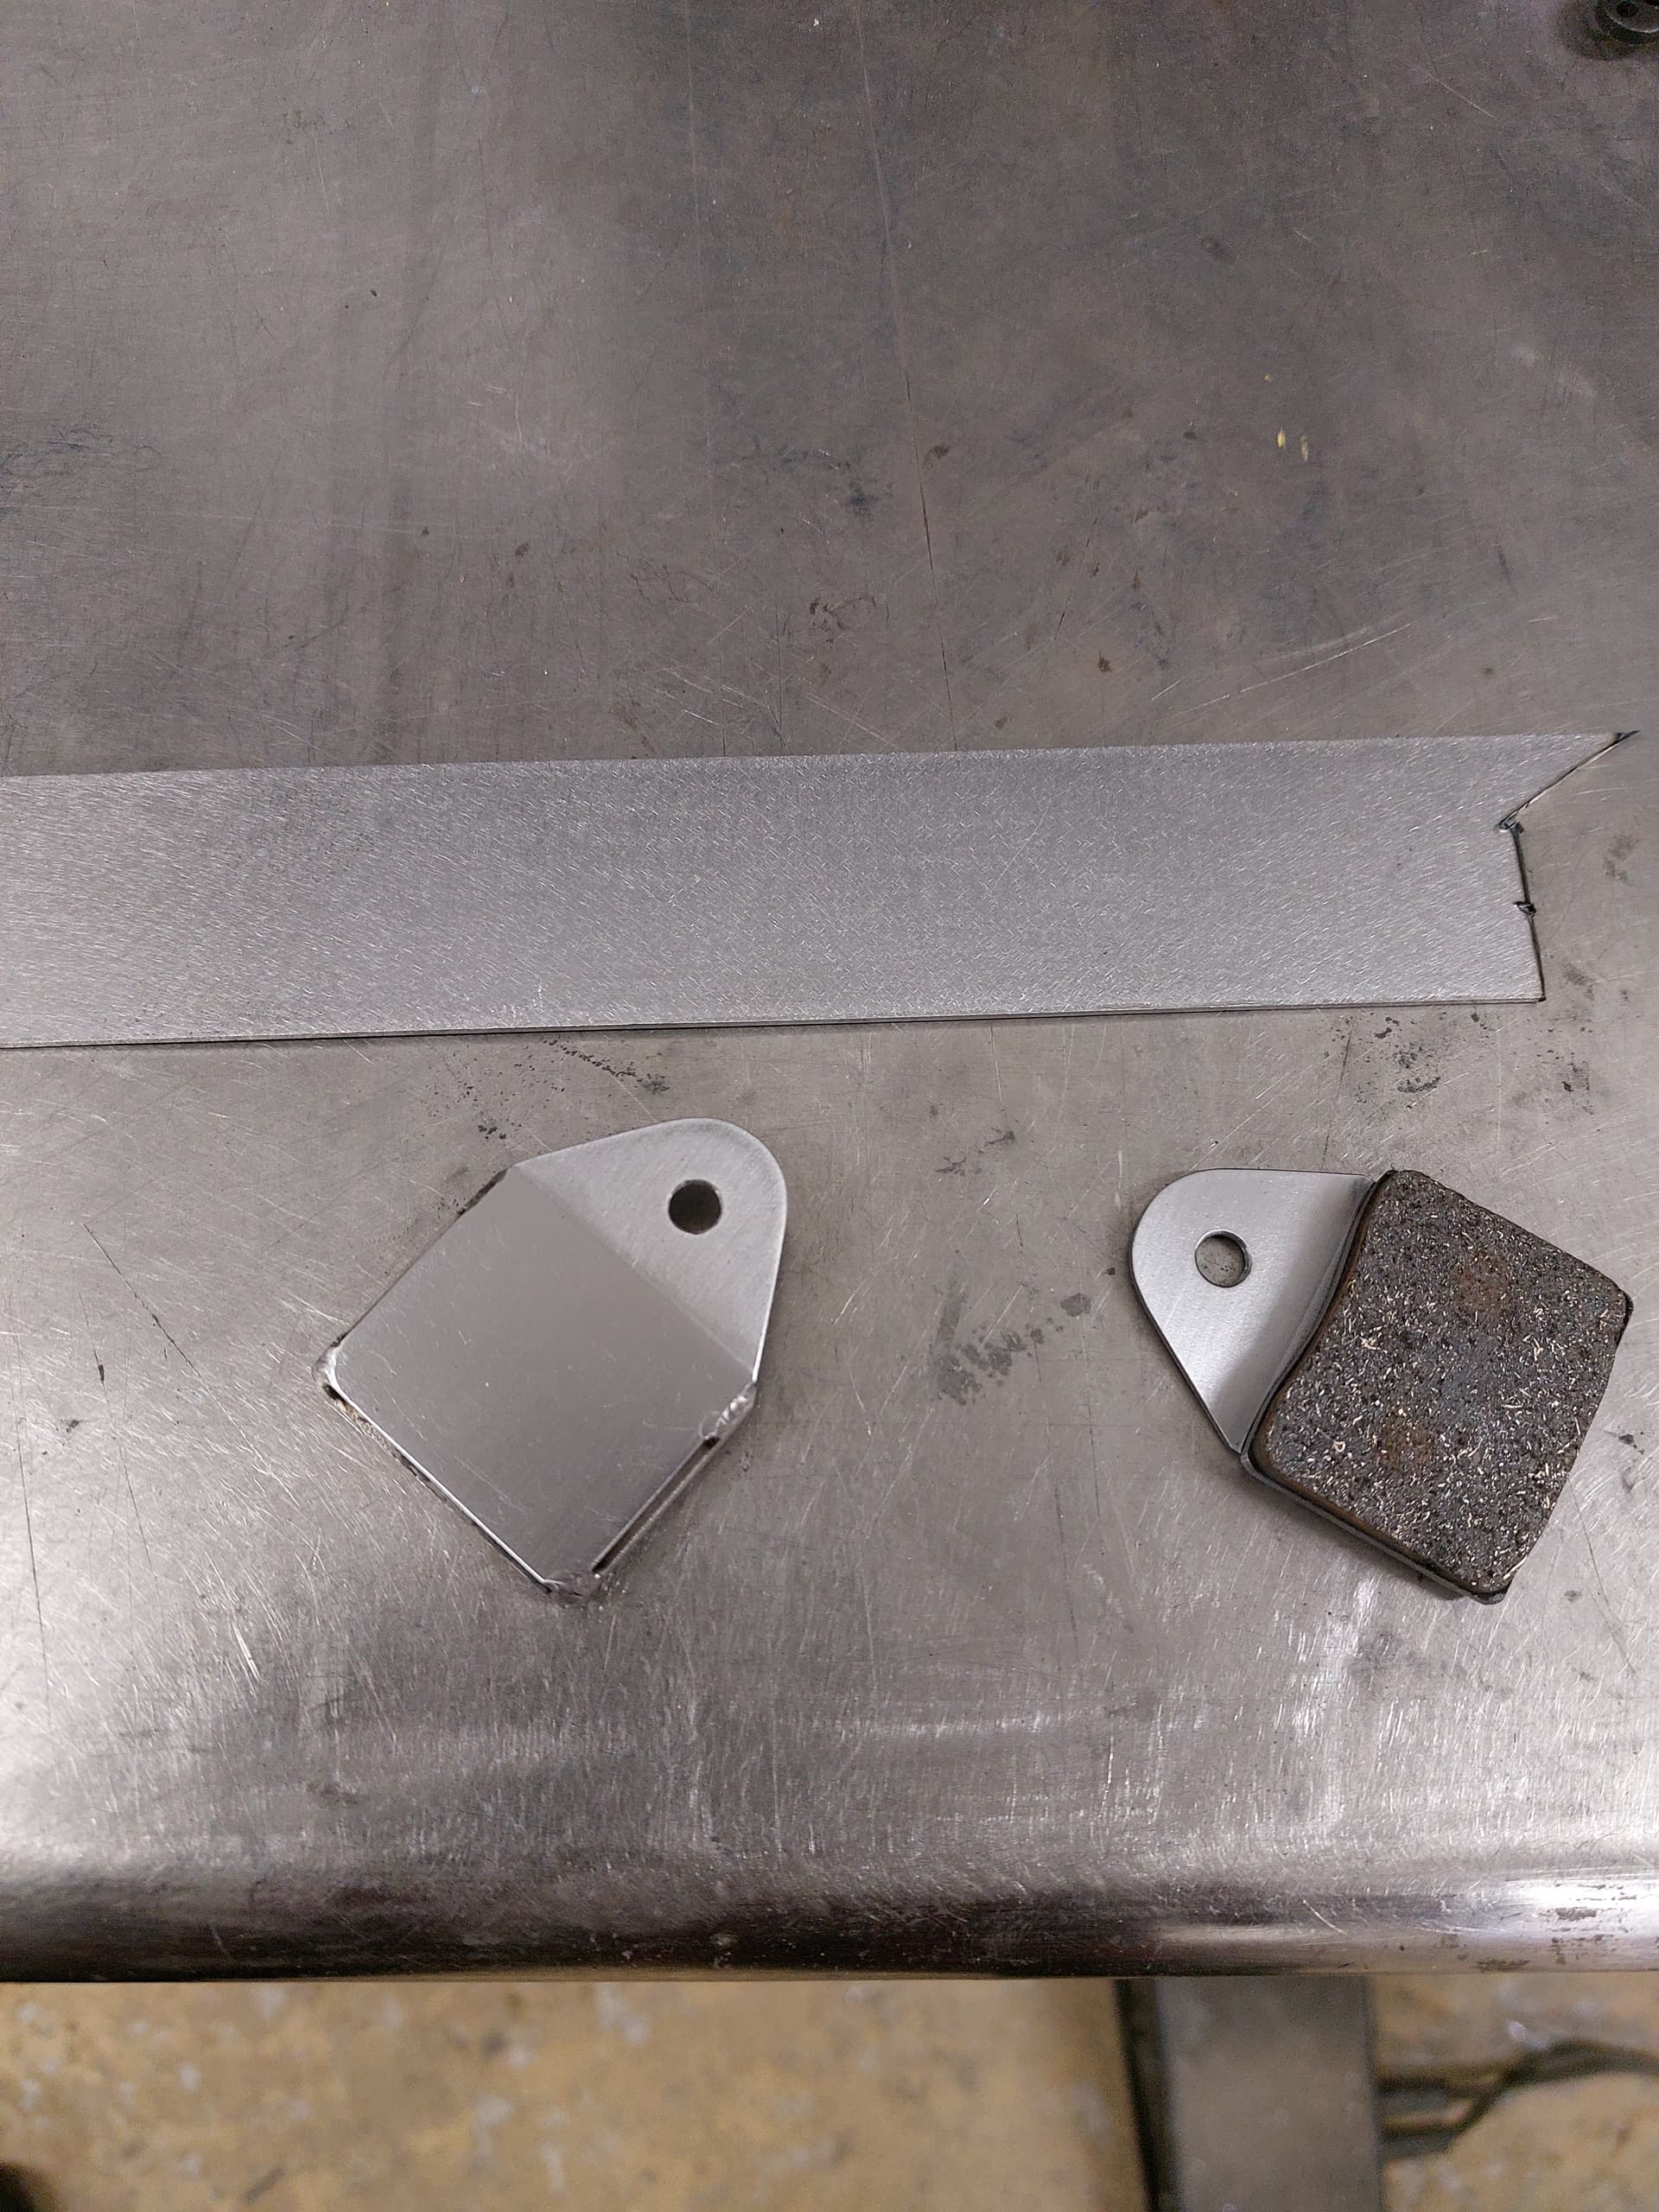
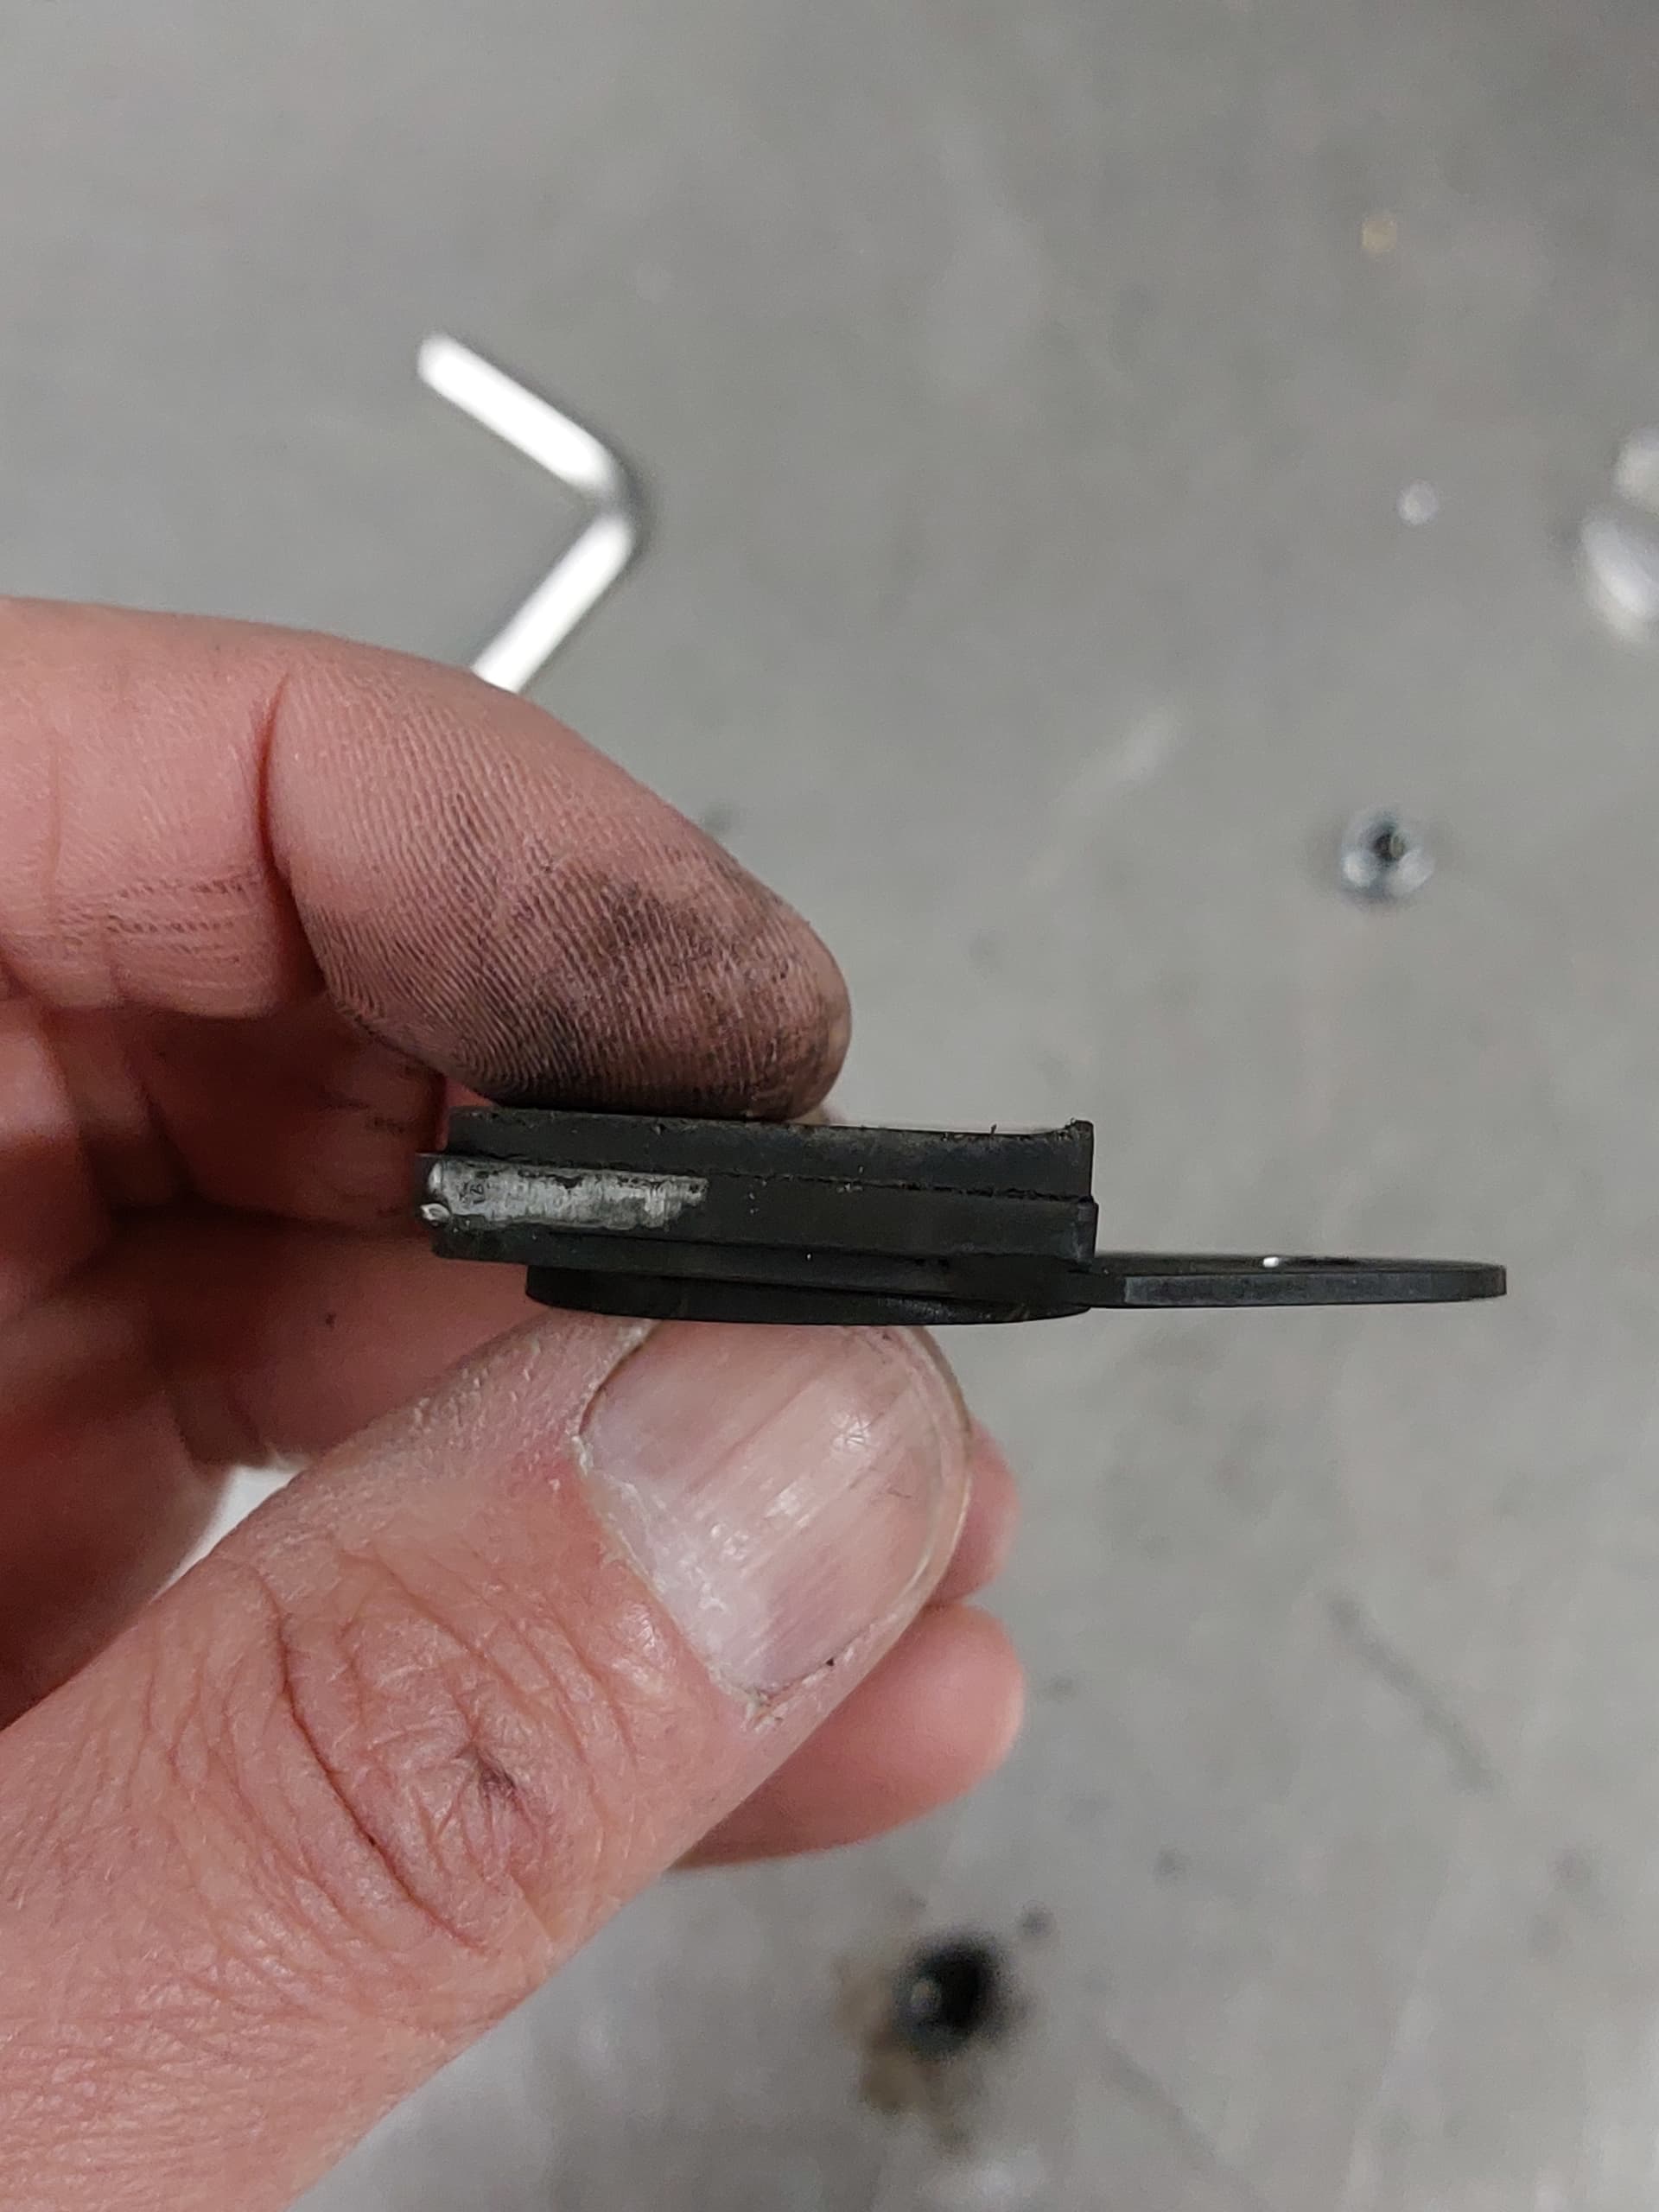
The used pad has a wear mark on the back side where the piston has been pushing. I measure the diameter and source a bit bigger washer or cut from thick walled pipe or machine from solid. The washer should have slightly bigger diameter than piston - the pins, pads have play , piston should always be on solid surface all round - not on edge of the washer. The washer needs to be few millimeters thicker whats needed - to have enough material for truing after welding. I place washer on wear marks - eyeball the perfect place - write down measurements and grind the backing plate clear ready for welding
I tack the washer to the backing plate at couple places - making sure theres zero gap to backing plate. I want to keep overall temp to a minimum - to play it safe - so I only weld one seam, then move on to other brake pad. I keep jumping around untill all of them have 4 seams, 4-5mm long.
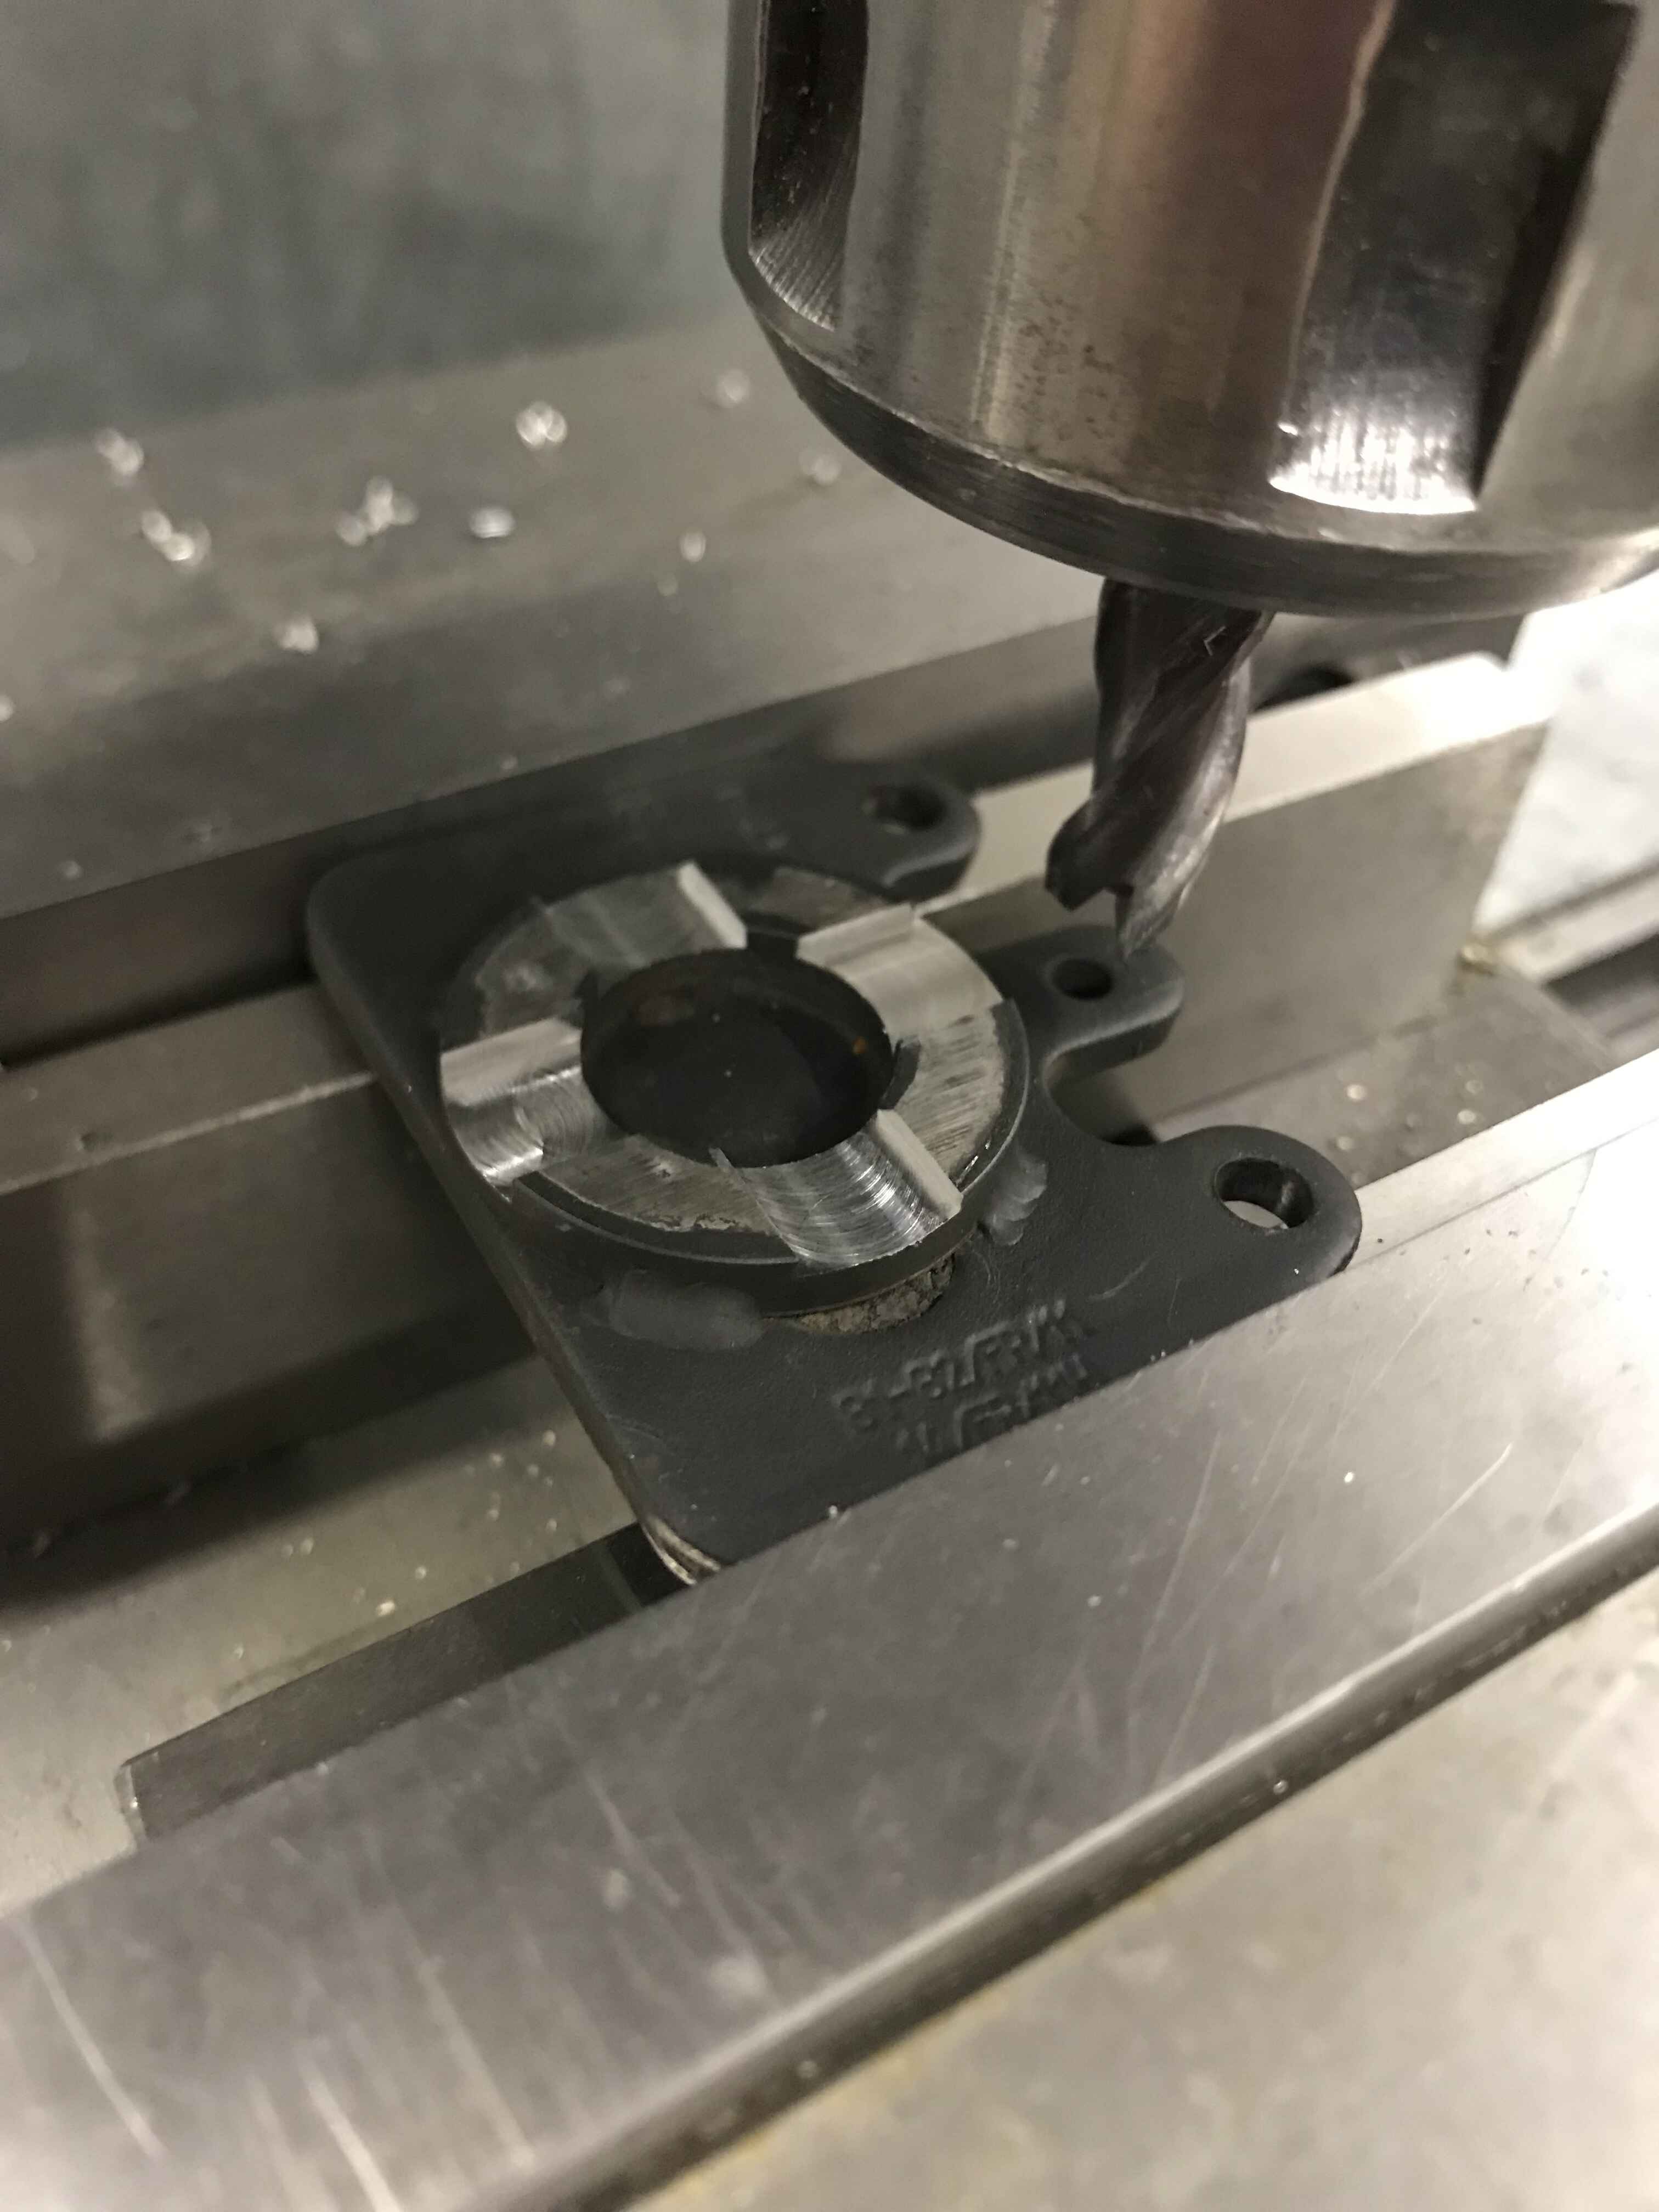
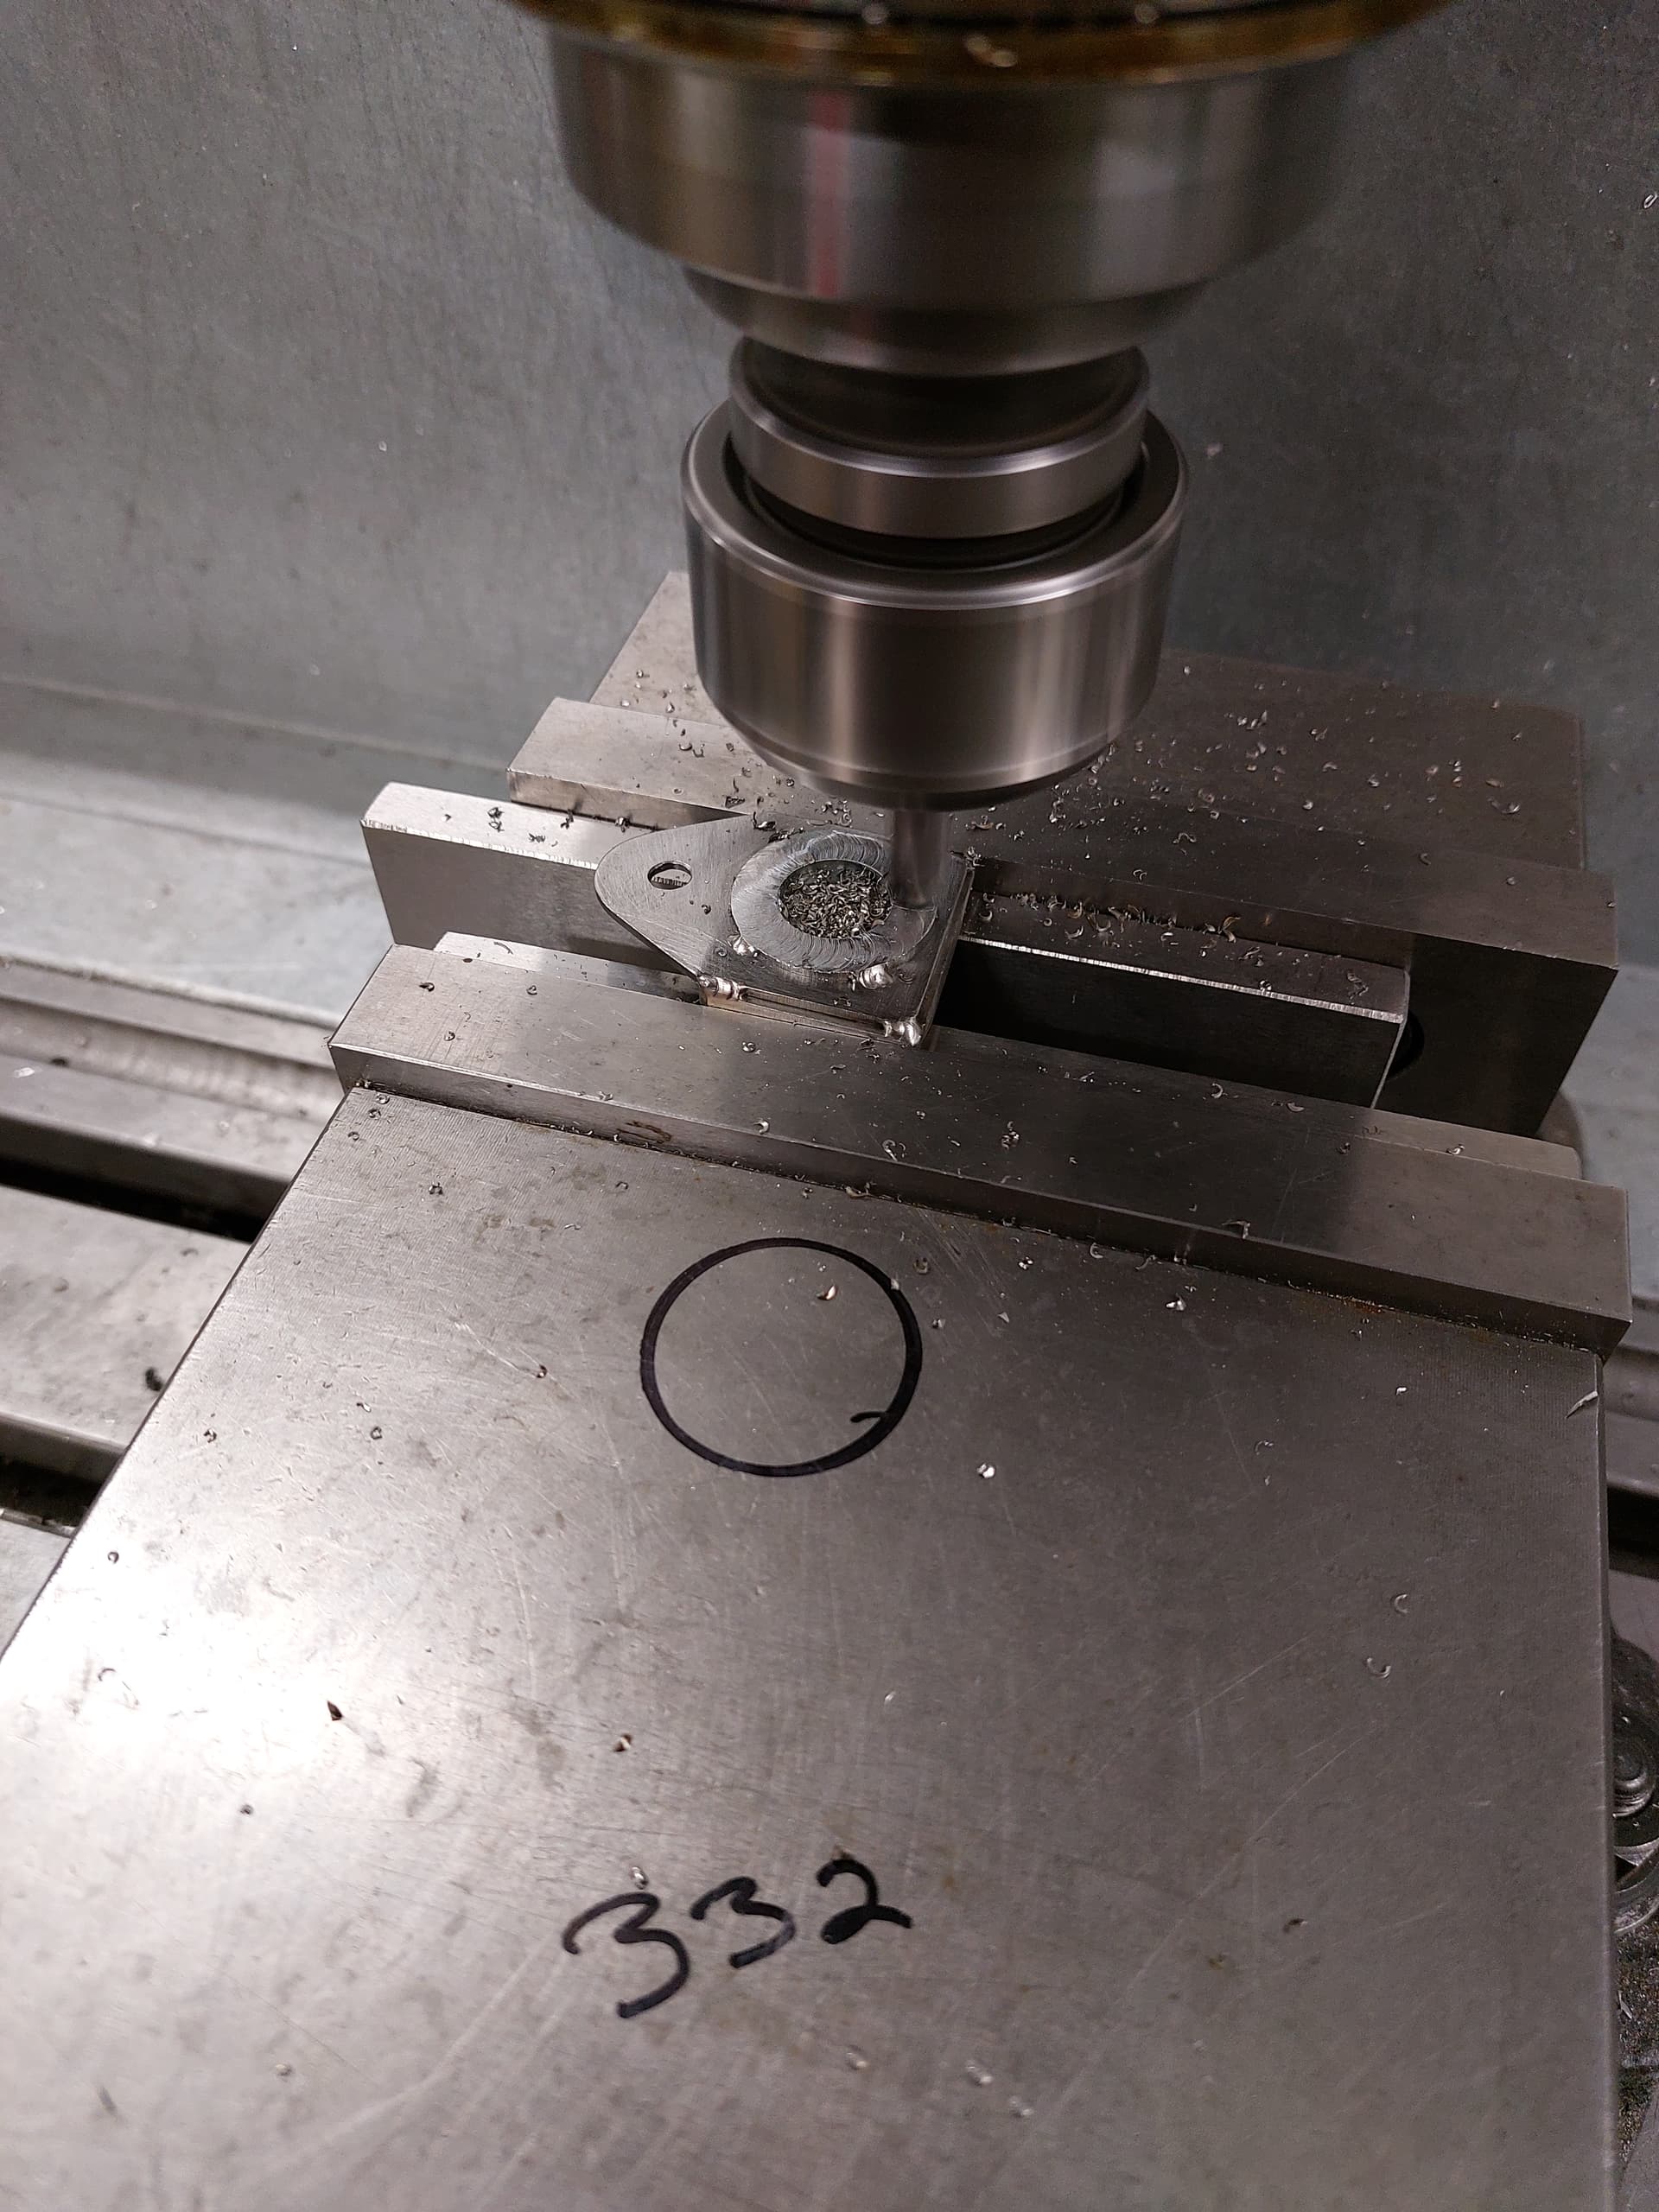
After welding - the washer needs to be trued to the friction face. I have done it by file, angle grinder, belt sander or in a milling machine - what ever way - just using dial caliper and continuously checking that washer comes true with the friction material. I prefer milling machine and parallel bars as its fast and true
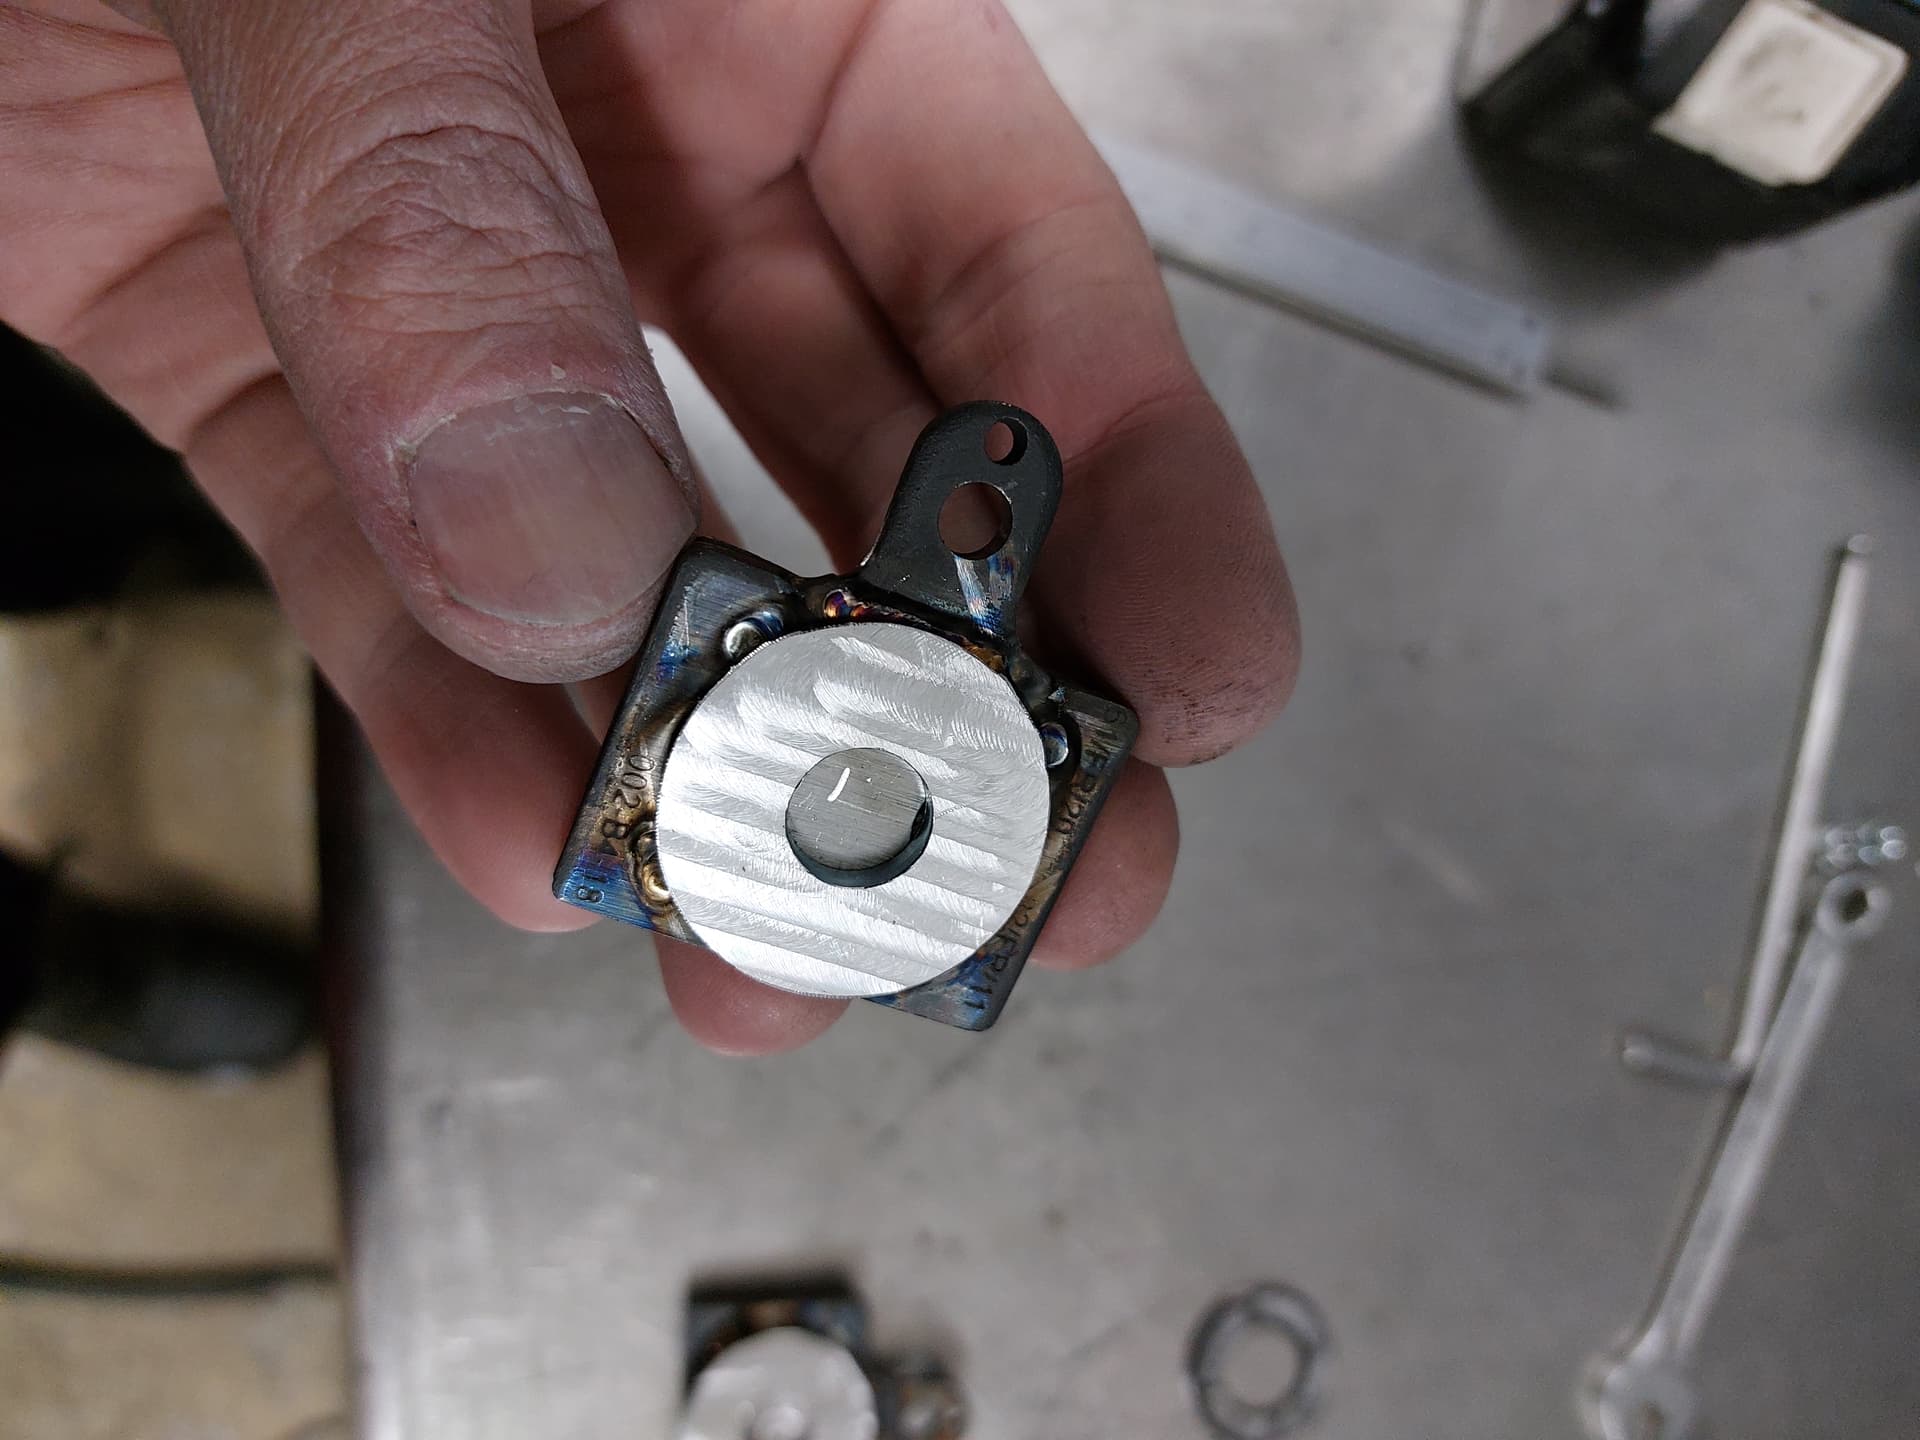
As the washer is now welded on - it doesnt move, its rigid, its true —> perfect for firm pedal, no drag and 0 wear to caliper bore
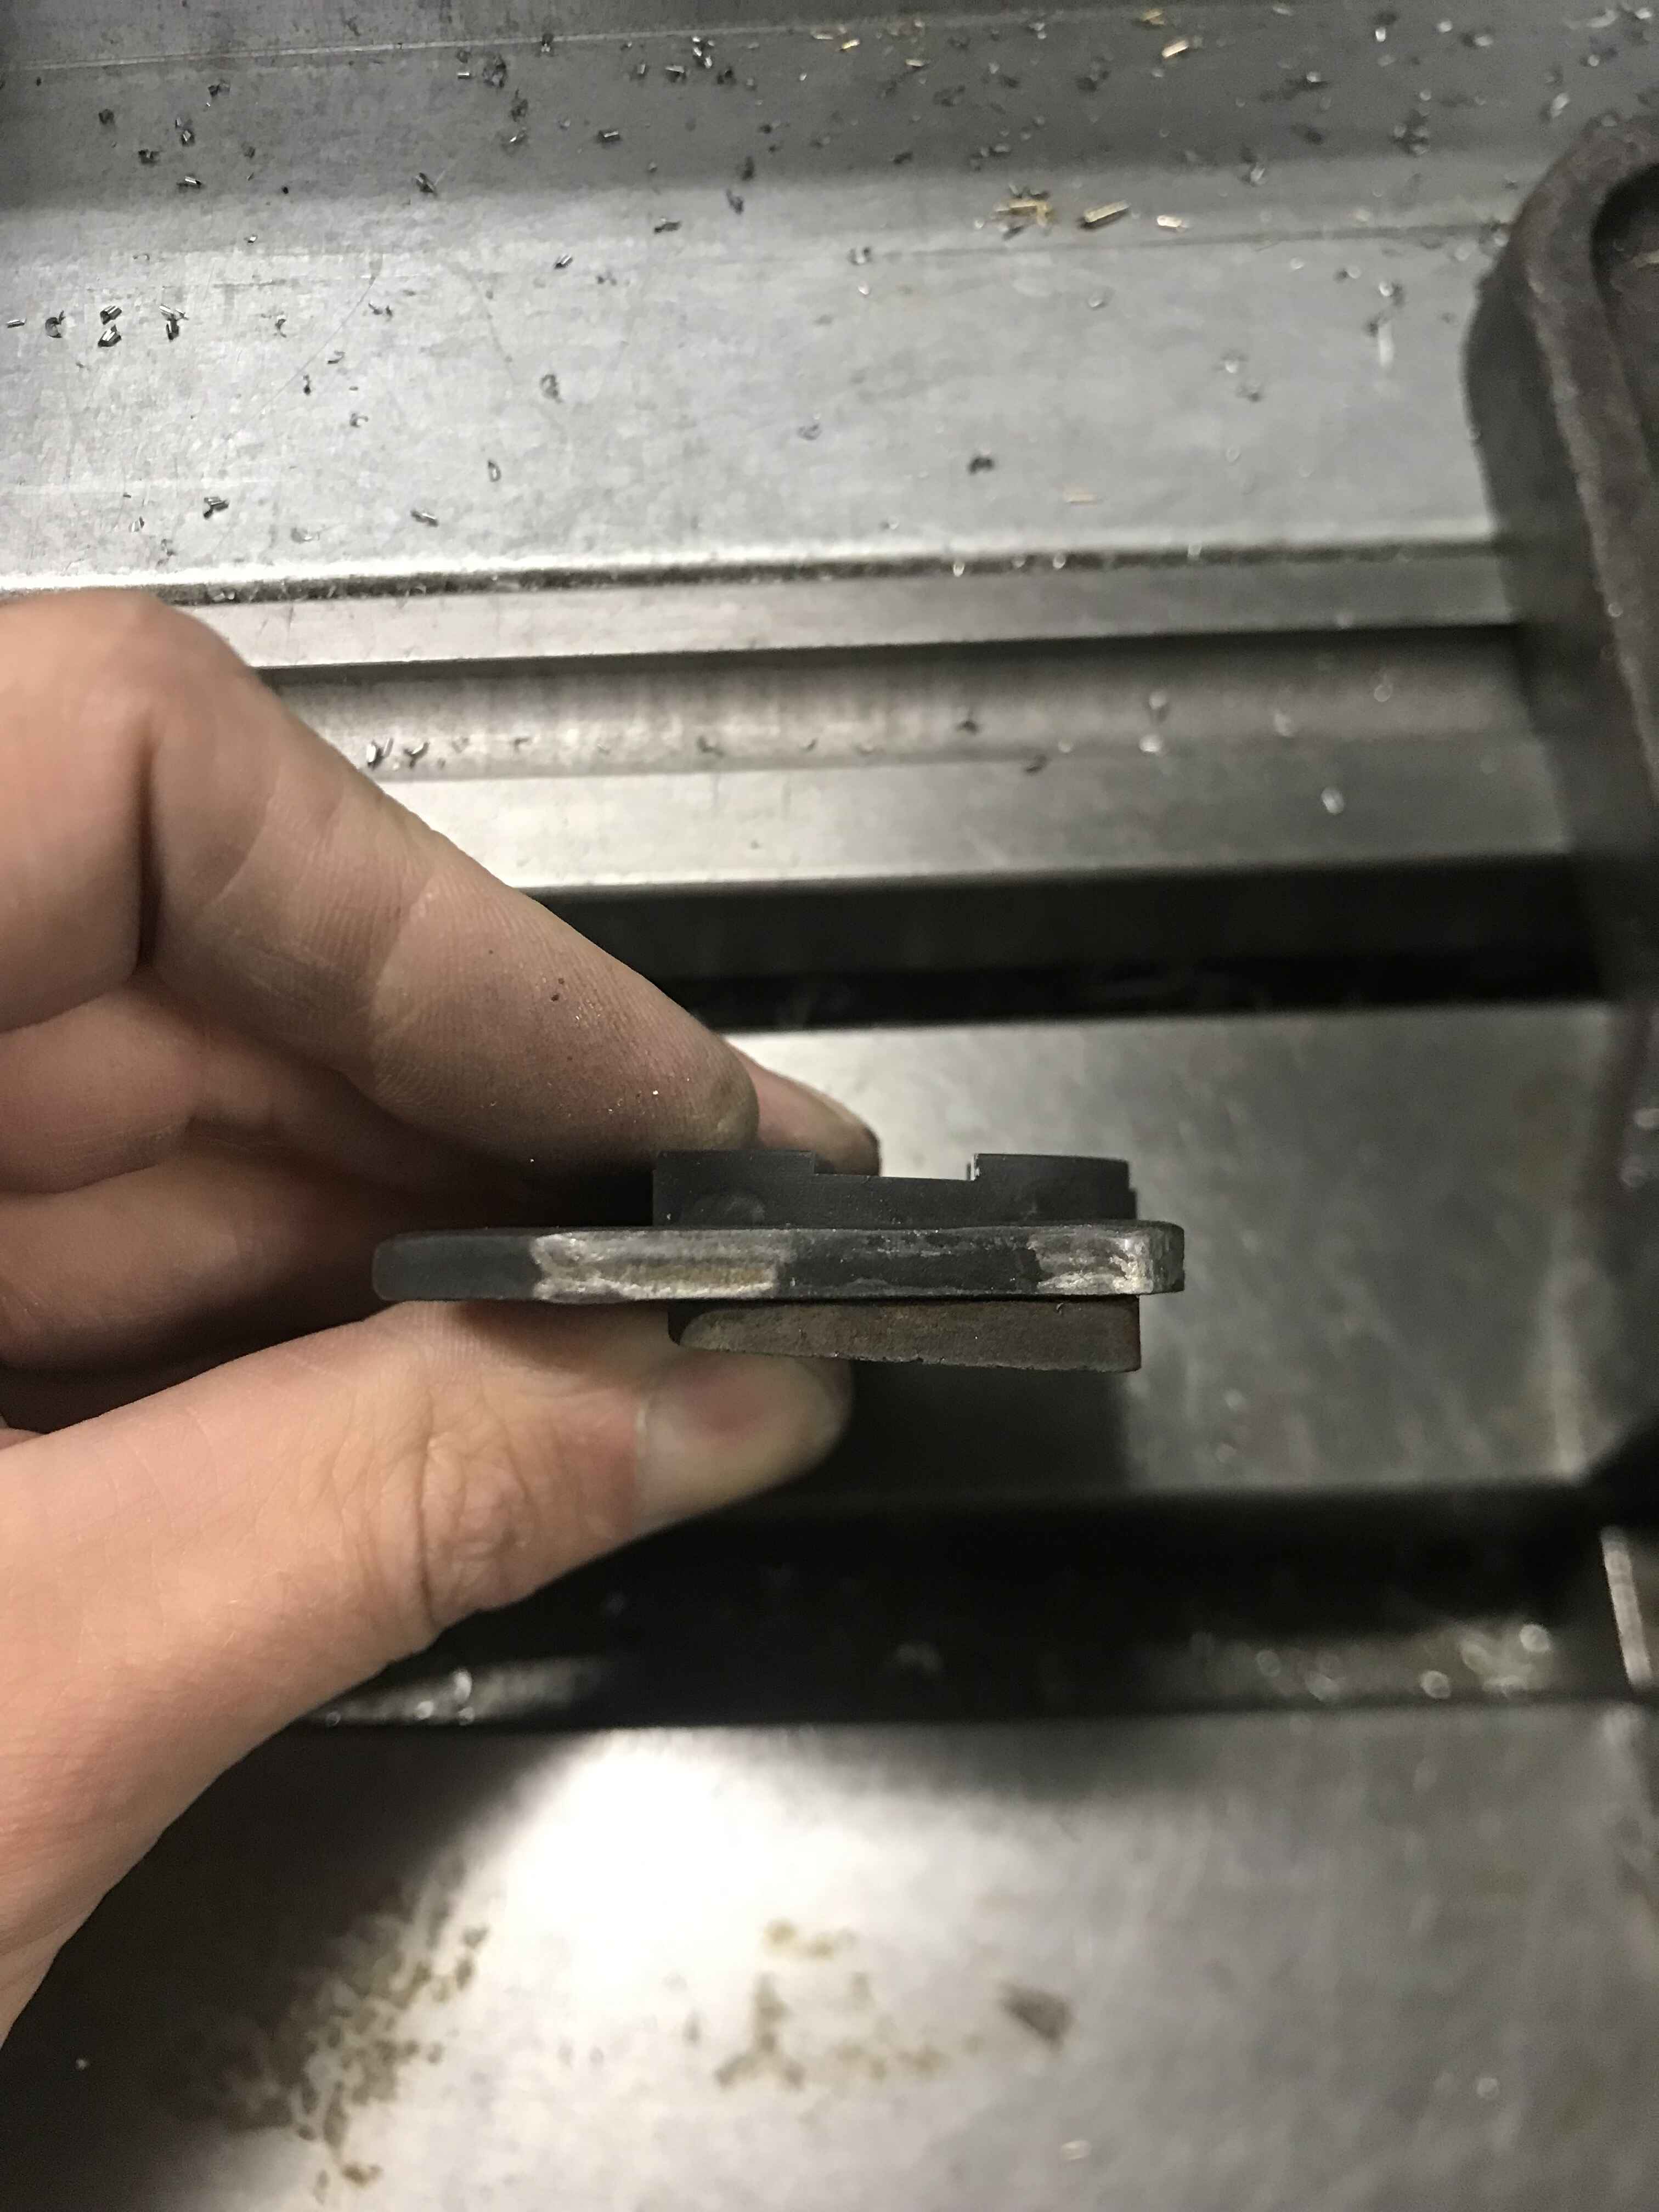
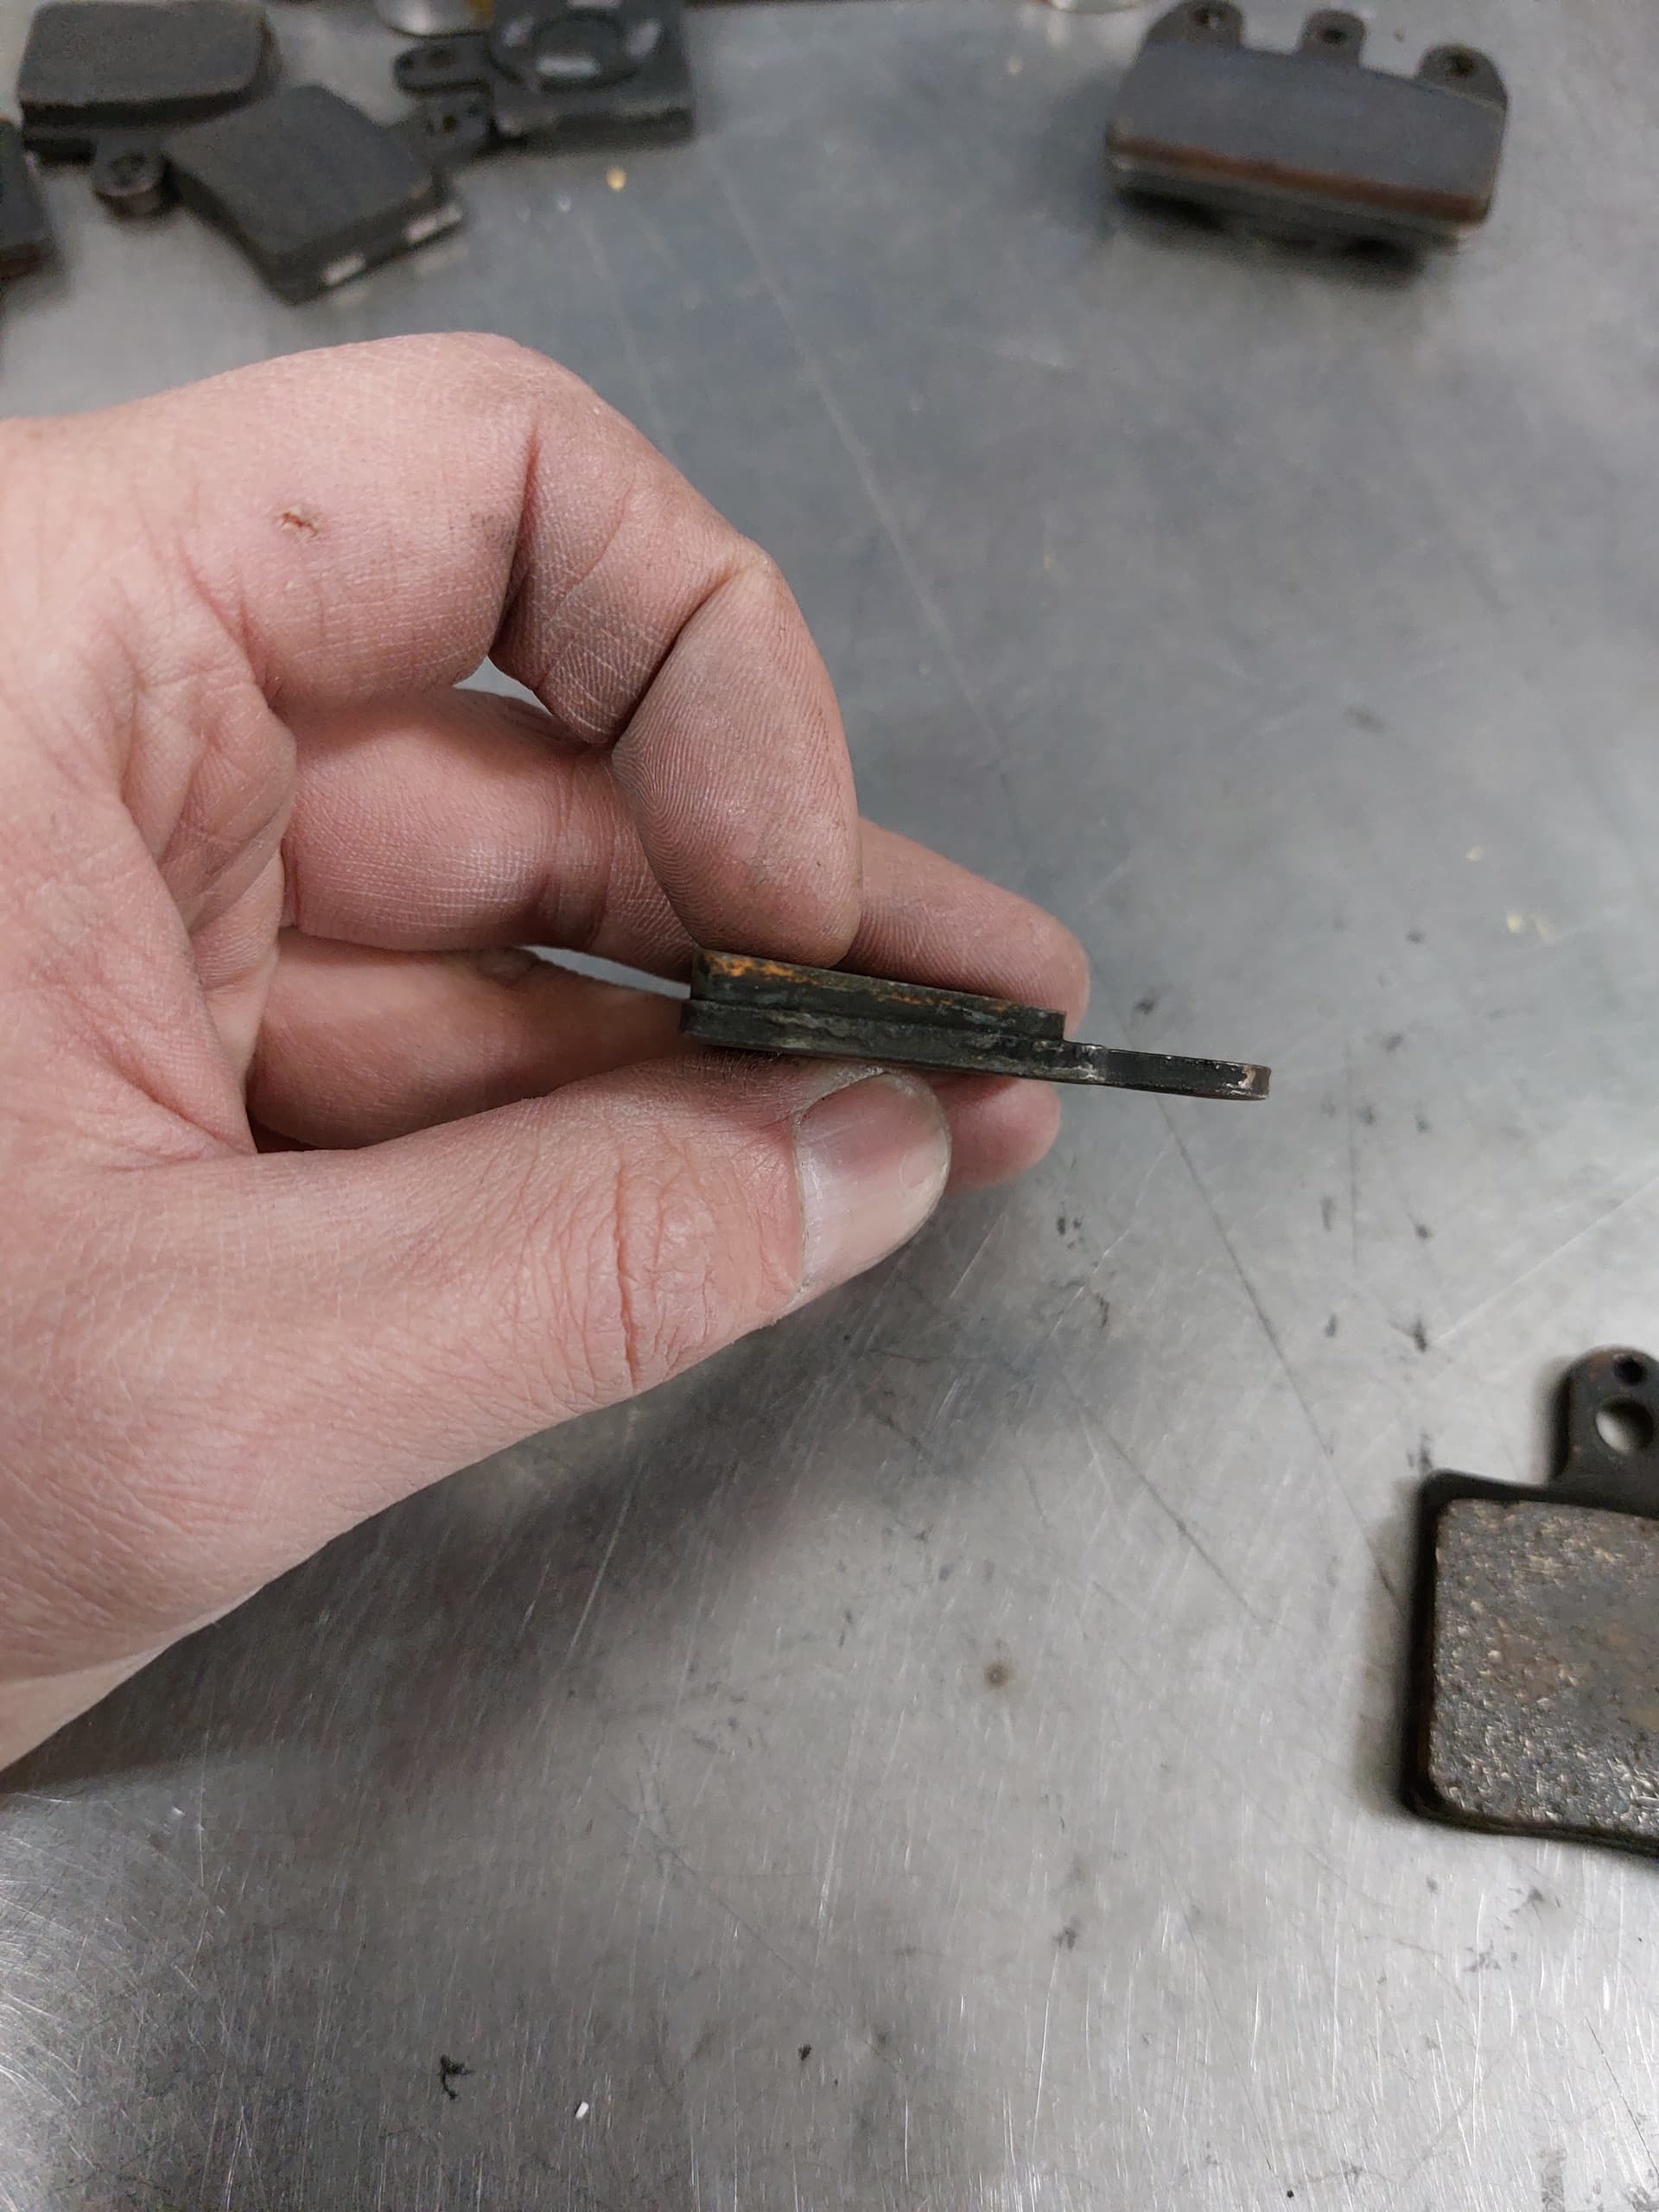
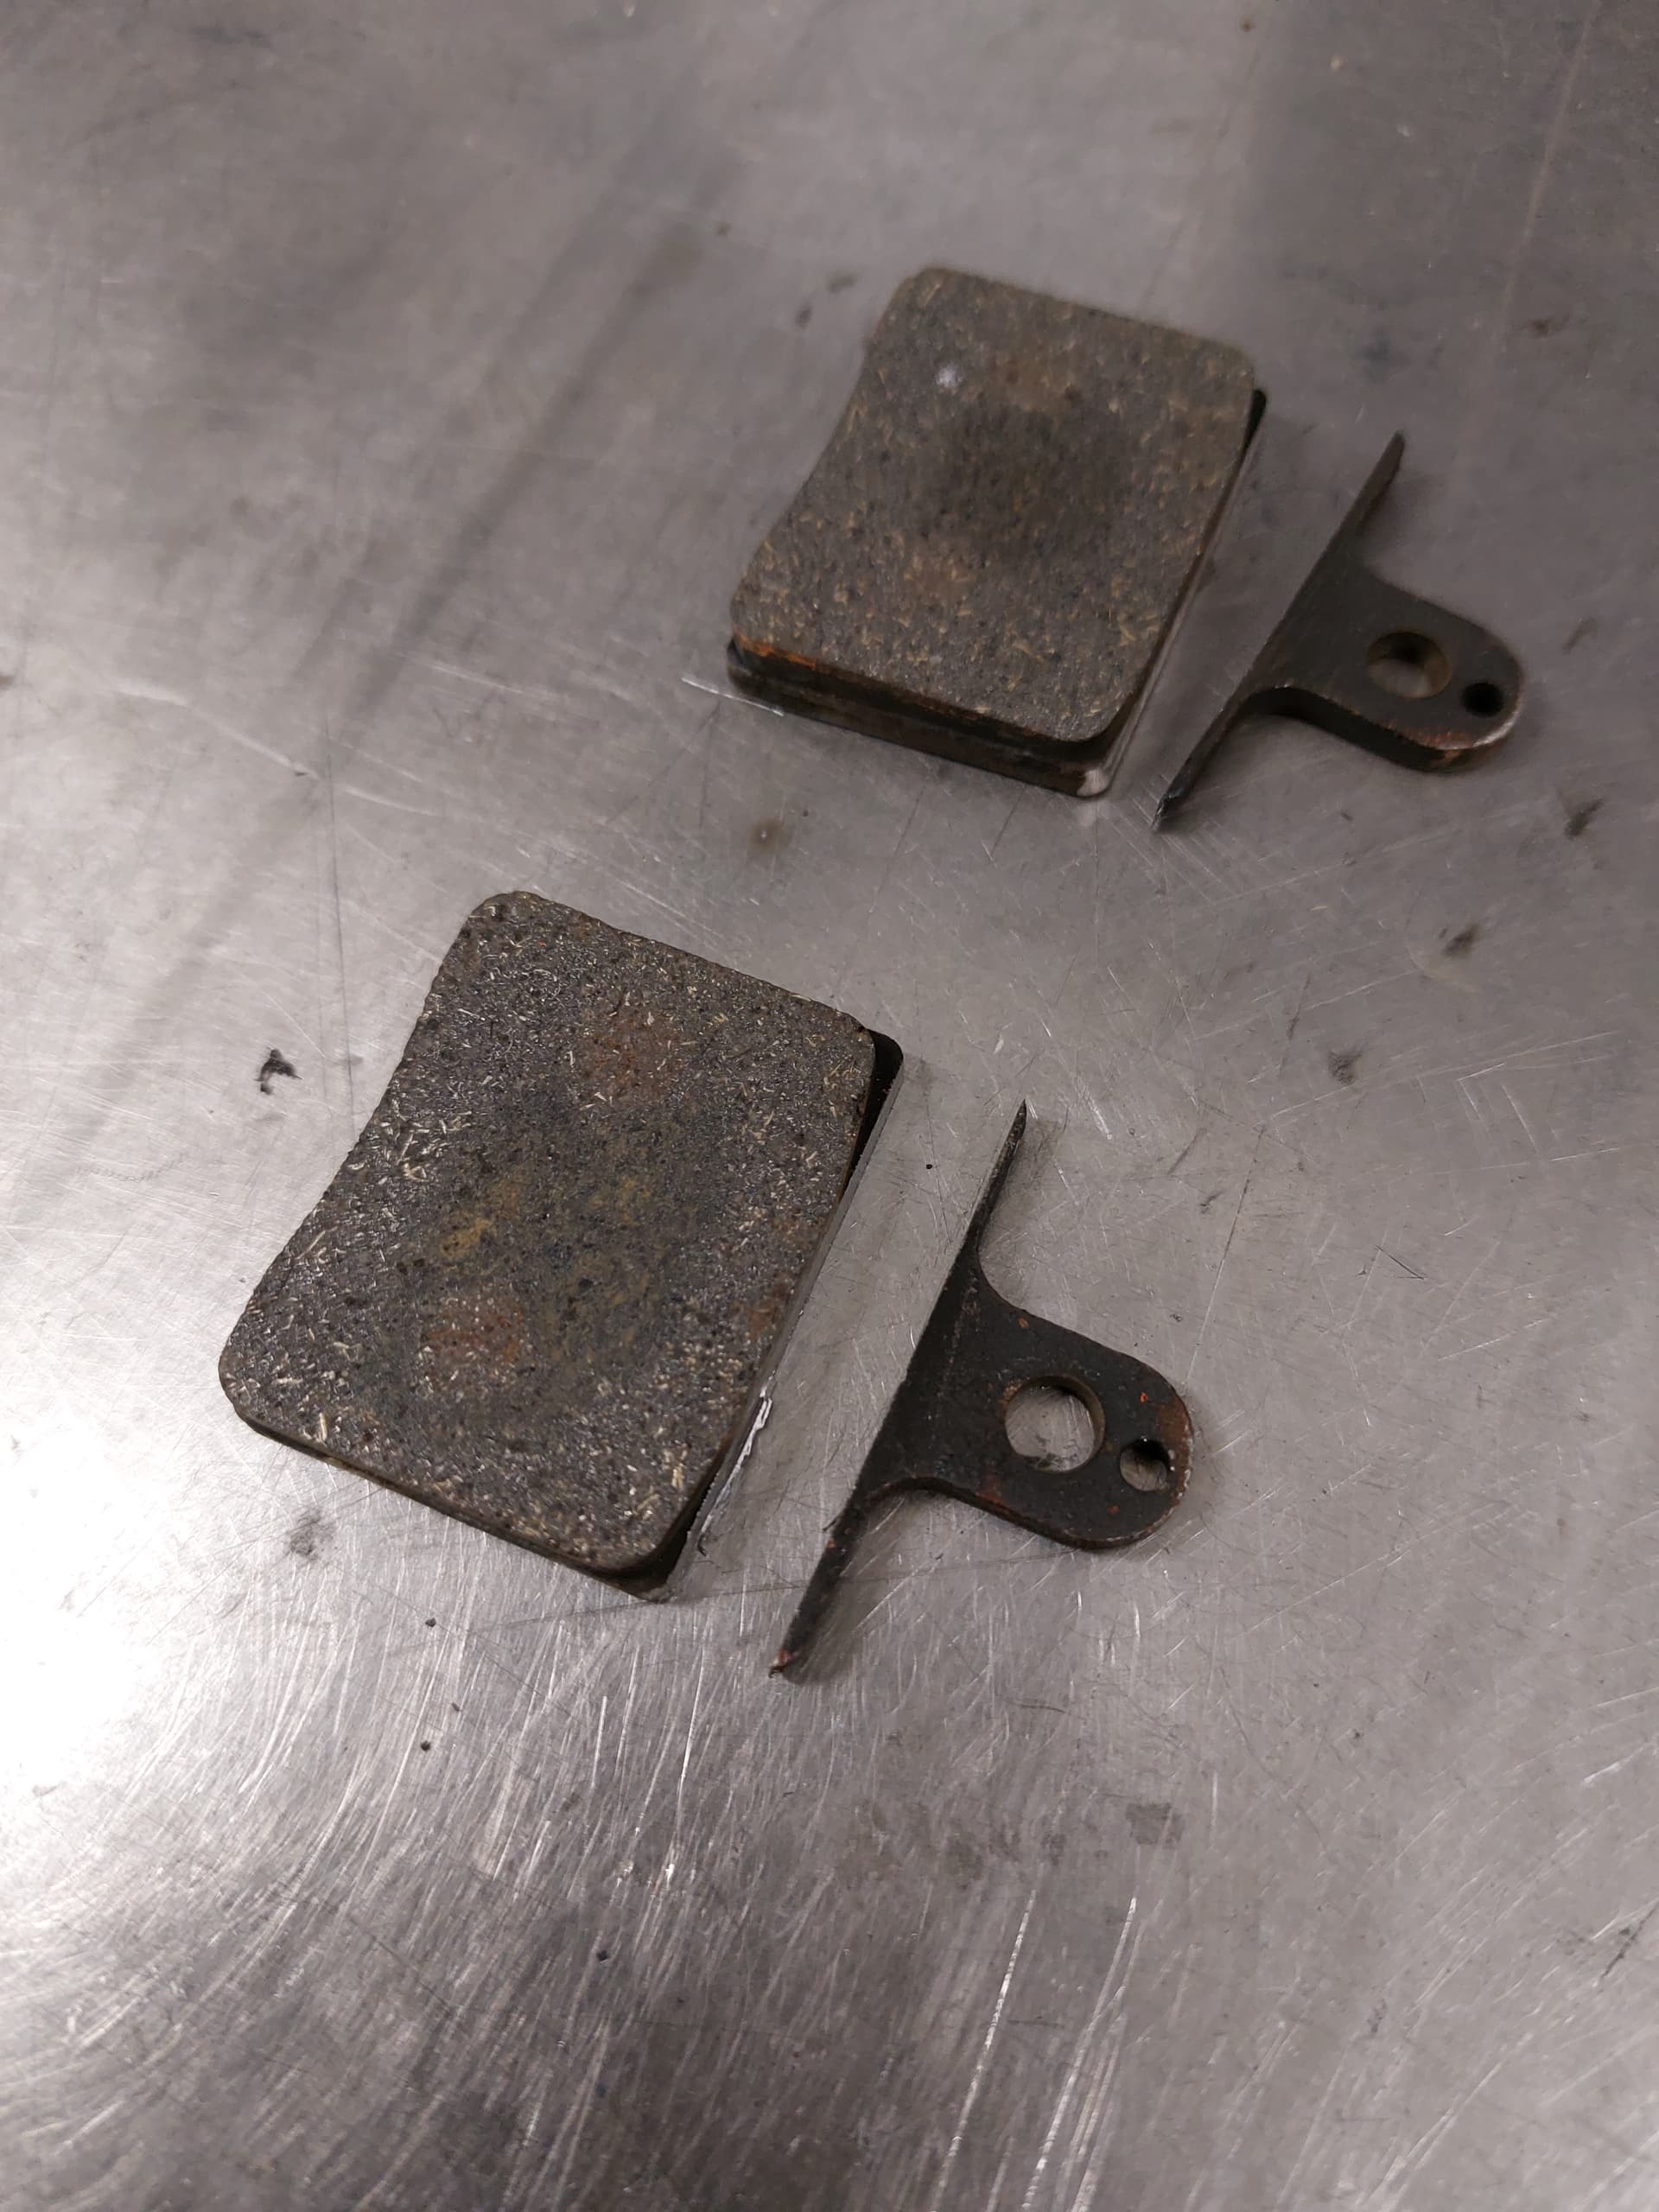
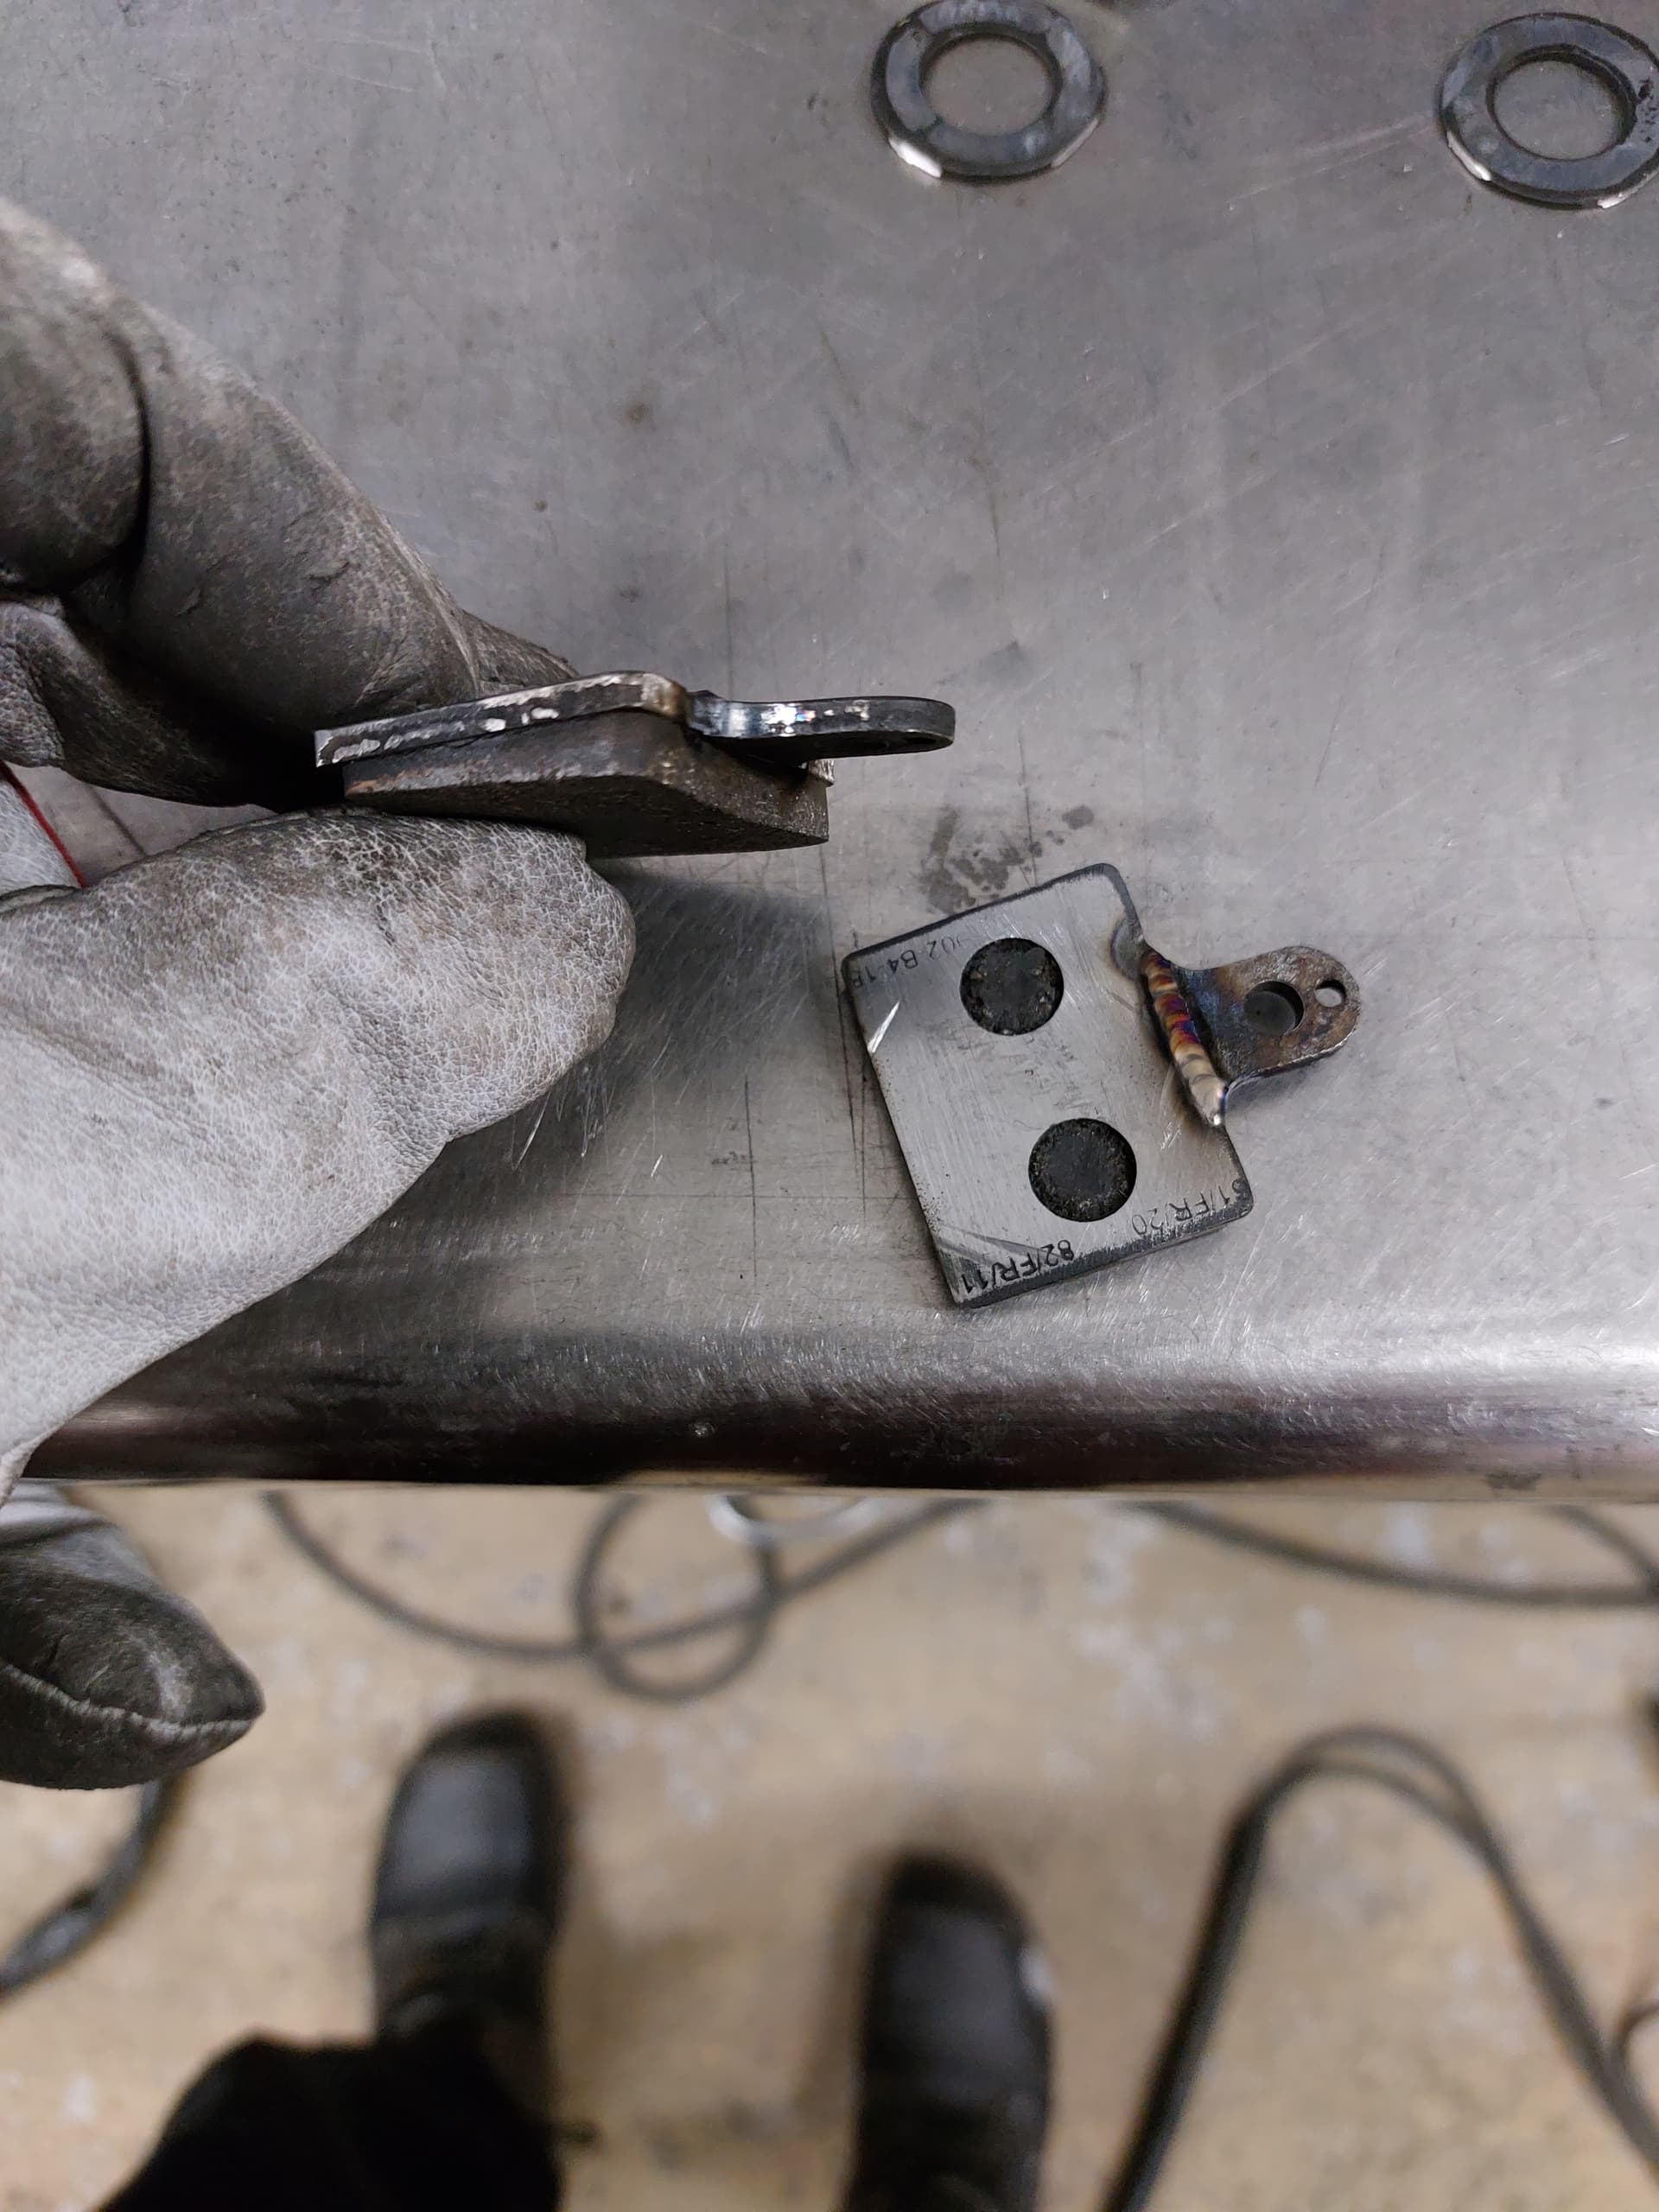
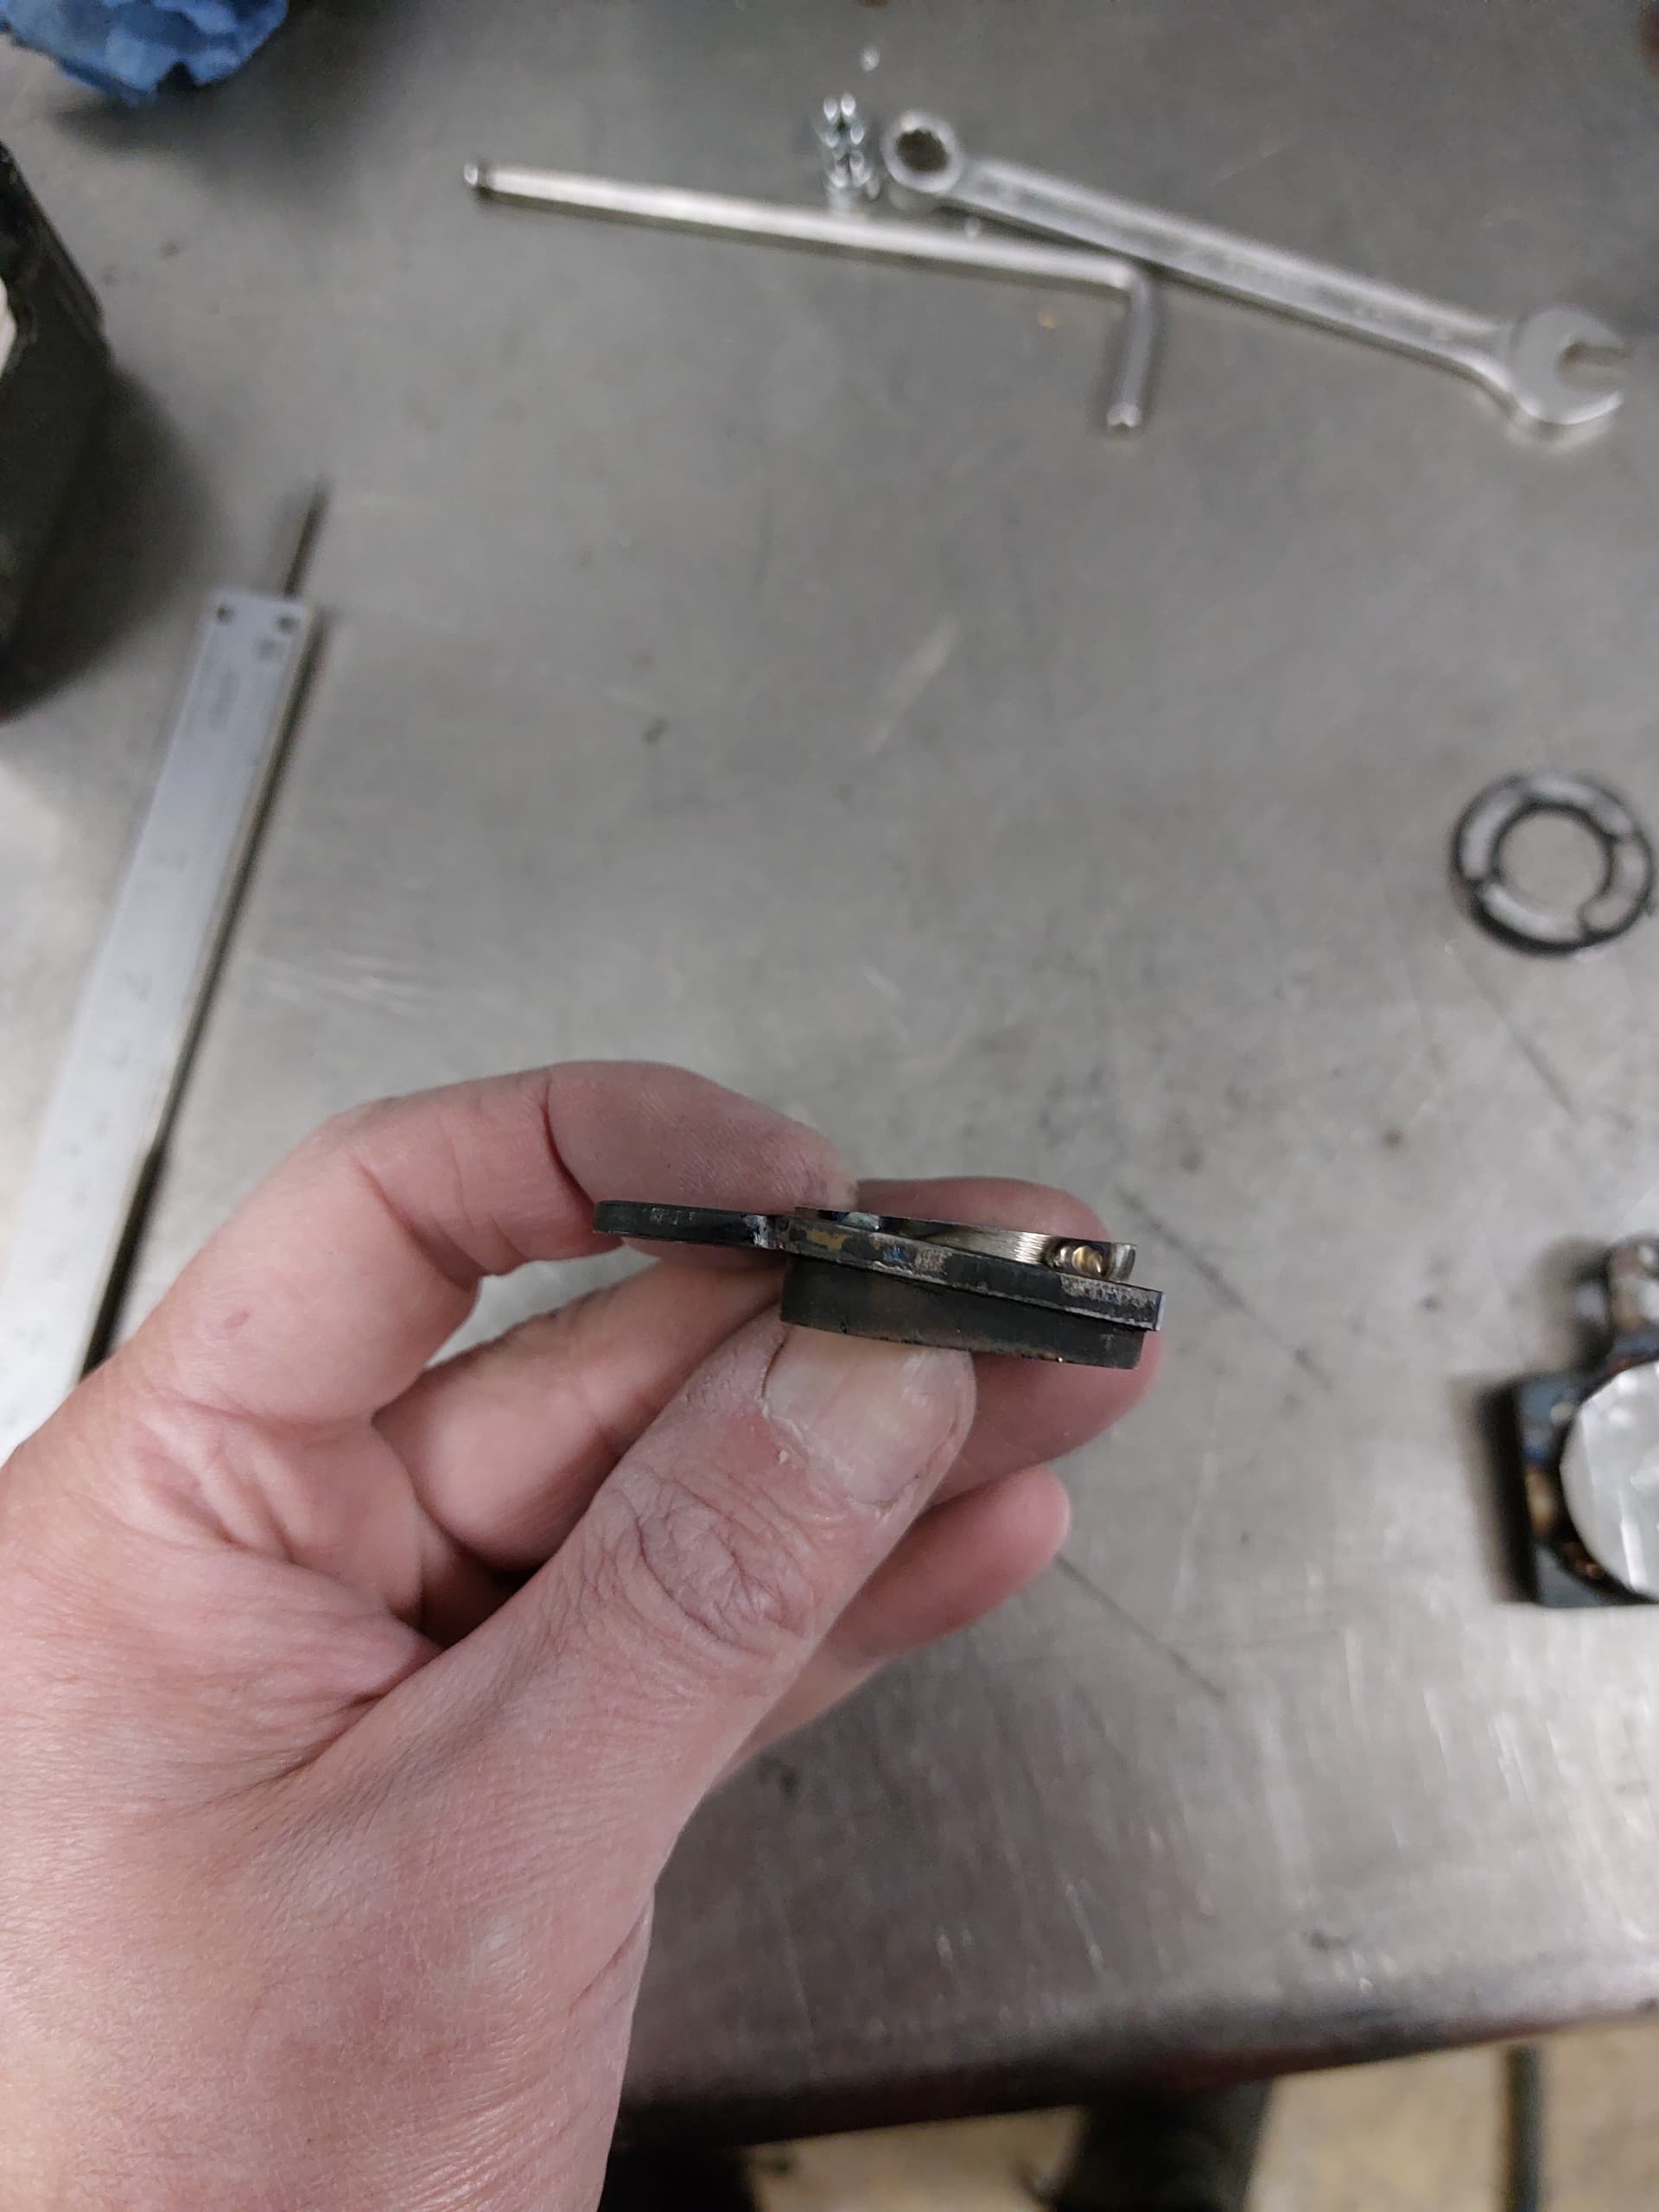
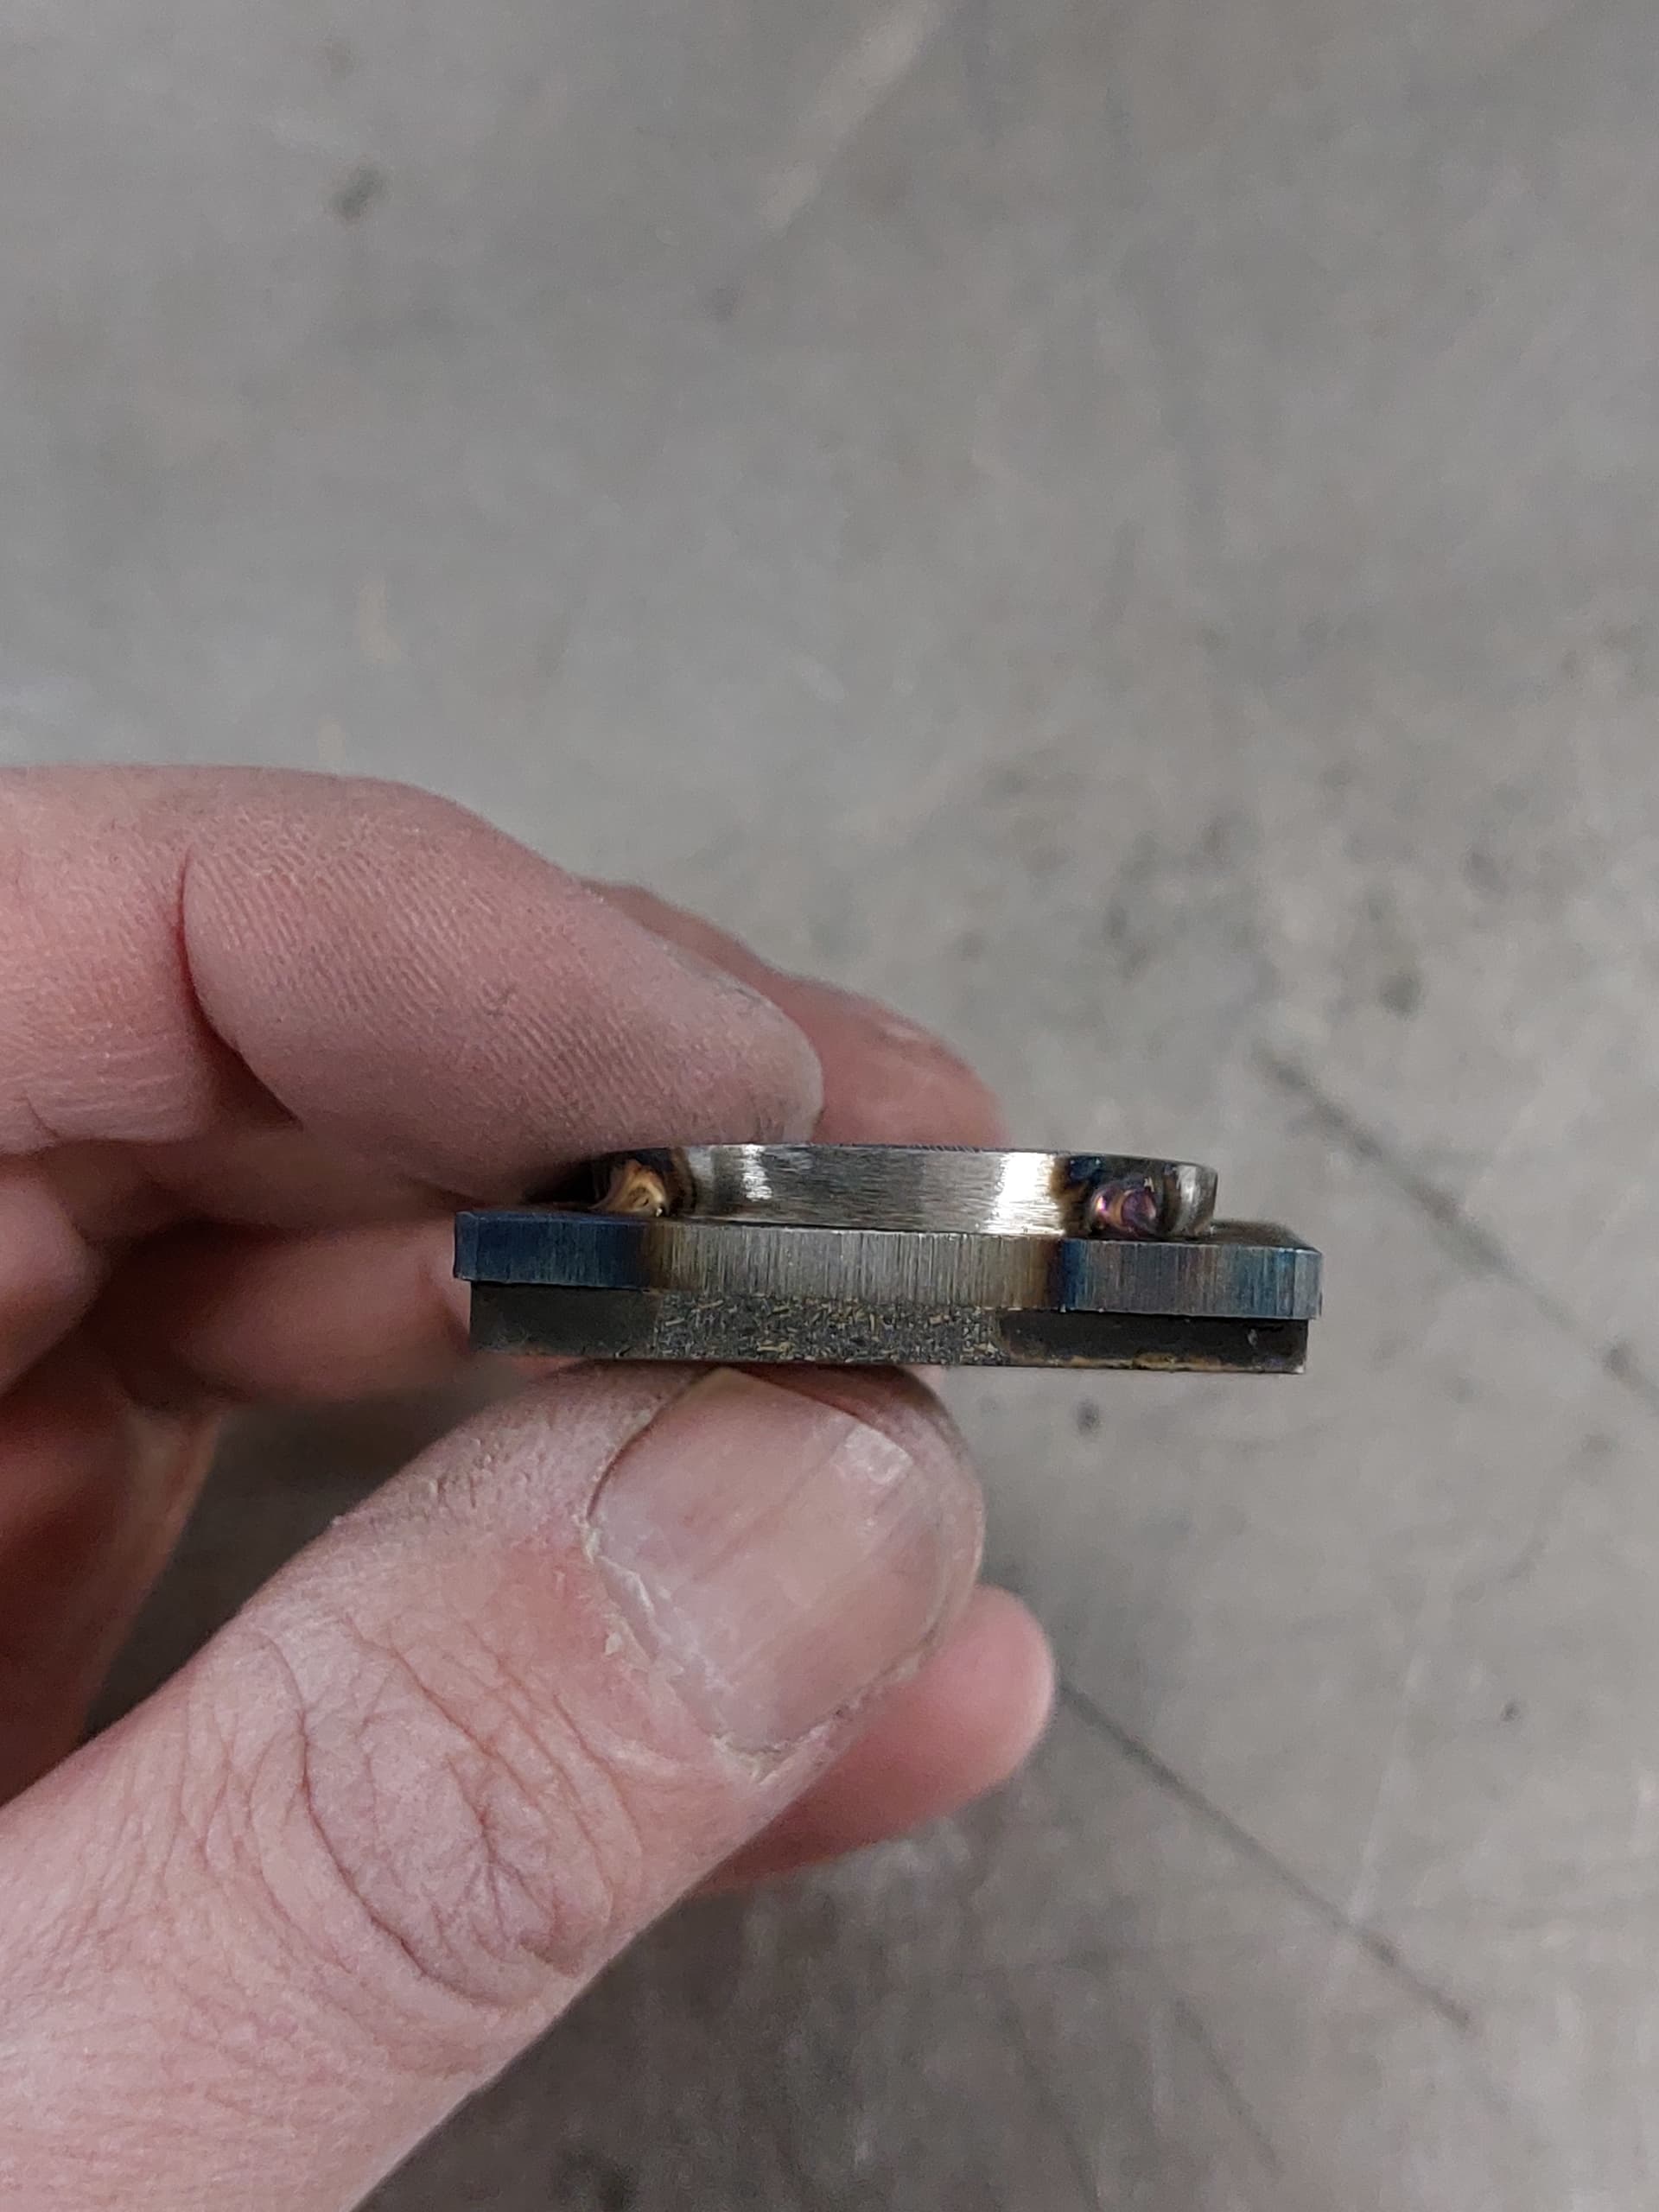
In the photos I have old pads from last season. The washer is still within 0.5mm compared to friction face but was in need for shim - the piston had come some 3mm out of the bore. Just welded new washer on top of the old one- I am only after one more weekend from these pads. Before welding milled some ventilation channels to the old washer. I feel they are not doing any harm - just keeping the piston little bit cooler
Its easy to see from the photos how canted the backing plate vs pad was before the washer, several millimeter difference in thickness across the pad. Thats a lot for piston to handle
I have run oem crg pads right to the metal - havent had issues with the pad material coming a part or anything like that.
This is what I have done and it has worked for me. Its a mod that might cause serious consequences if something fails - its brakes Im messing with - but Im also driving flat out to a corner at over 100km/h kart skippin and sliding so its a risky sport to begin with 
Use your own judgement if deciding to try this out. Most likely banned mod in races, by rule makers and so on