65cc Cadet Shifter Build

About two years ago I promised my son that if he won a national race I would build him a cadet shifter. That hasn’t happened (yet), but he won the TSRS regional champion for mini last year and some other notable accomplishments. So I said screw it and lets do it before he gets too big. I have zero shifter experience, so this could be interesting.

The major goal for the project was to make him have to think a little bit more while on the track hoping that when going back to single speed competition, there would be a little extra bandwidth for race craft, feeling the kart, etc. Another goal for the project is maximum brap to dollar ratio. A Factory kart would be great, but not in our budget. So I figured I would build it. I have a pre EVM/EVS roller sitting around the garage a slew of used parts. Being this will never see competition, and will mostly server as a training aid , it doesn’t need to be 100% maxed out from the performance side. So an older chassis will do.

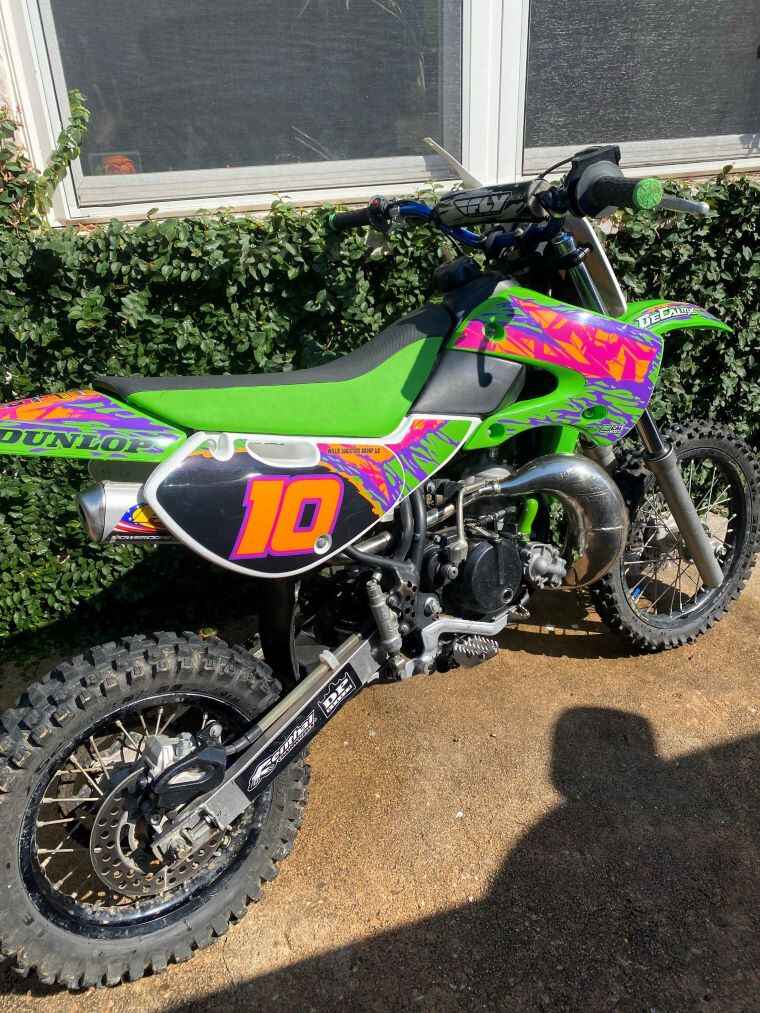
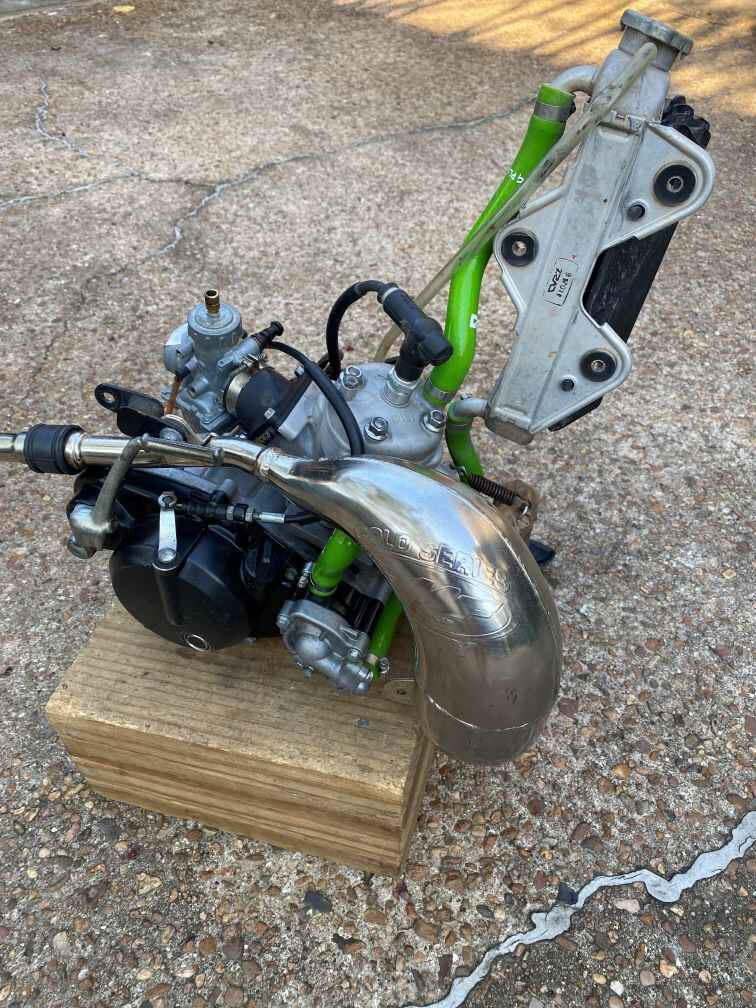
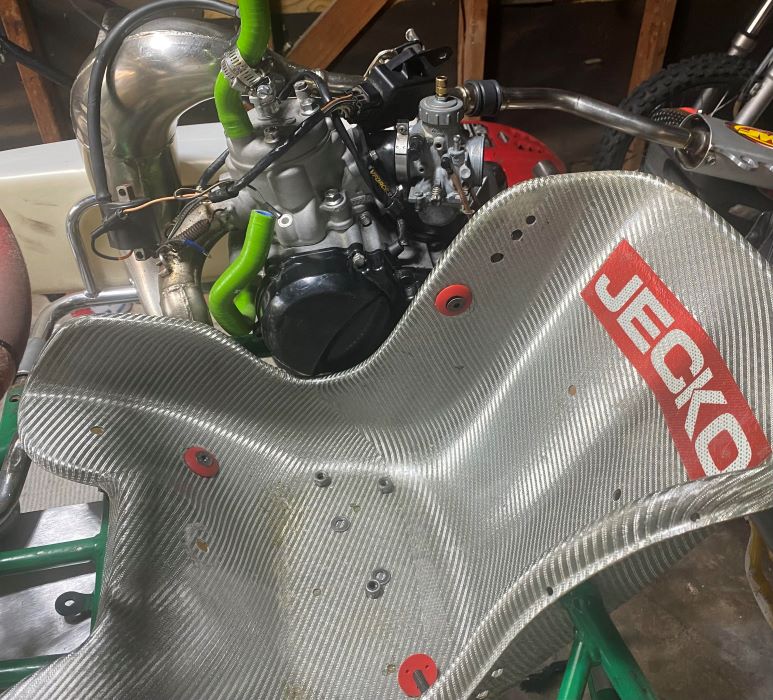
I grabbed a 2012 Kawasaki KX65 for $1200 and pulled the motor. I was going to work with our team owner to build it, but he struggled to find the time. So I took it back a few weeks ago and got started.

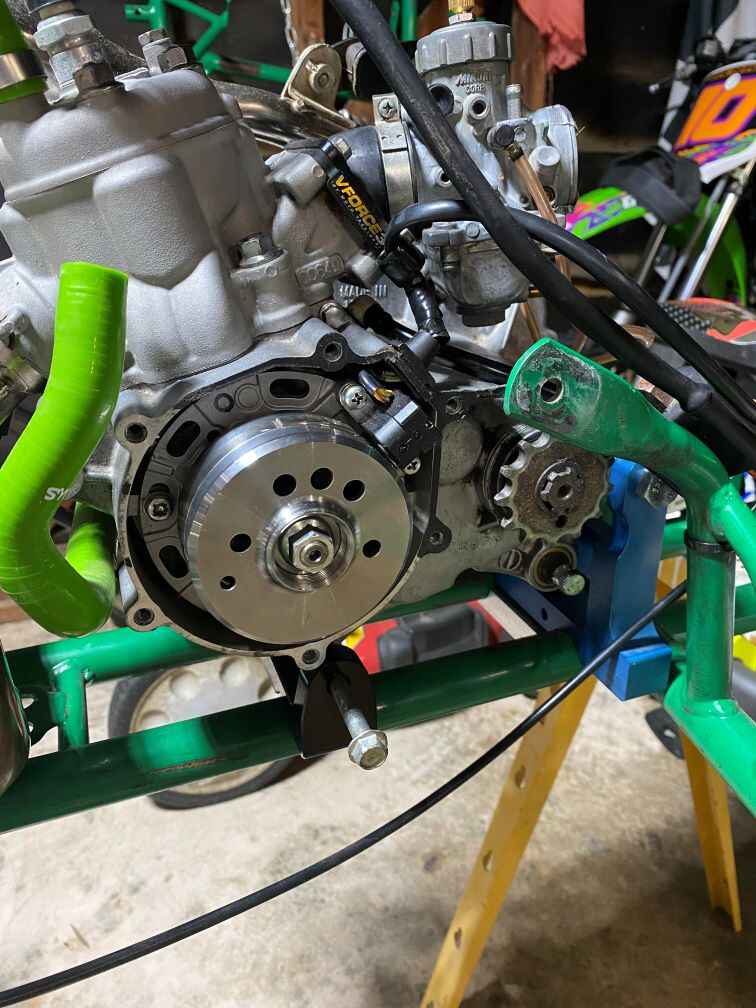
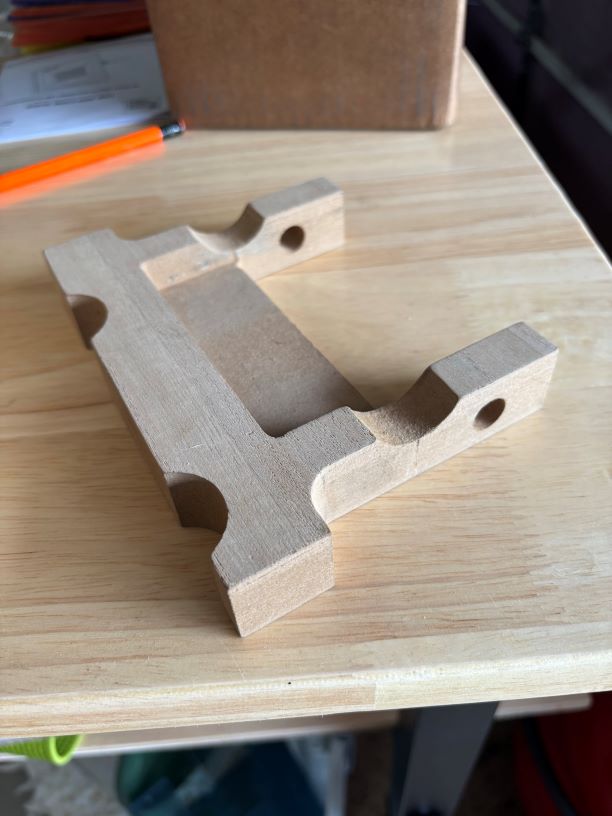
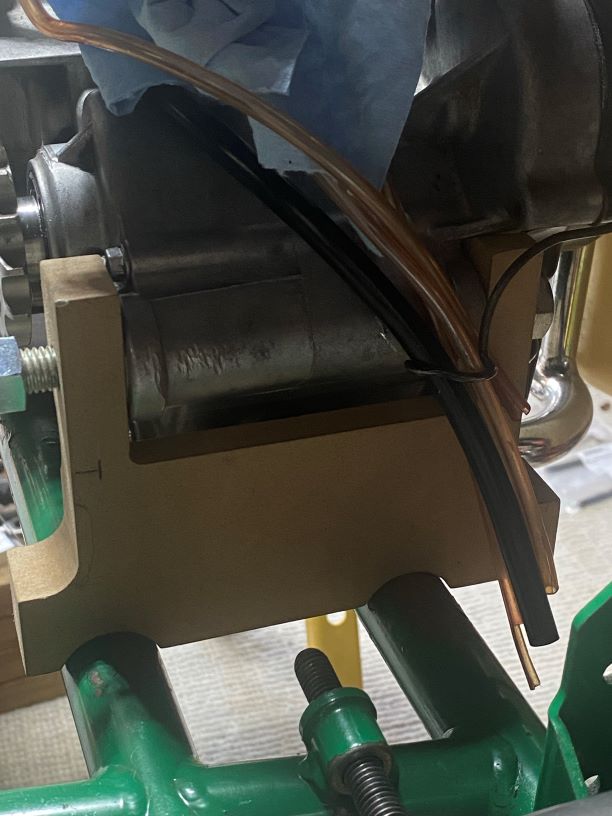
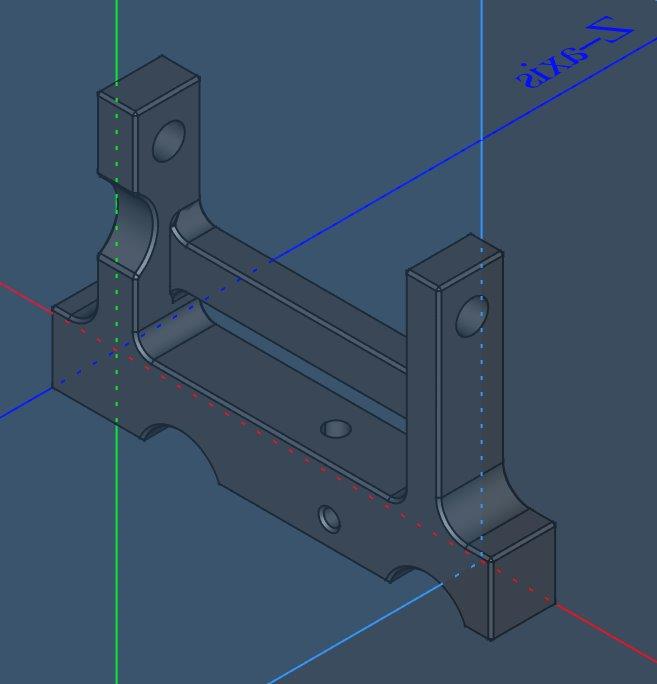
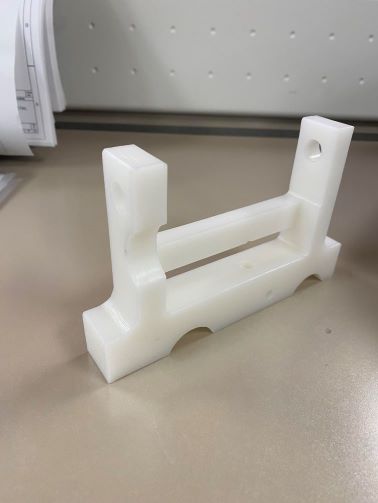
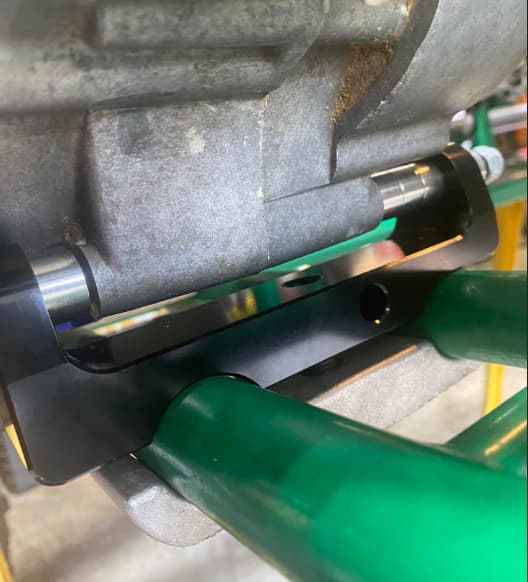
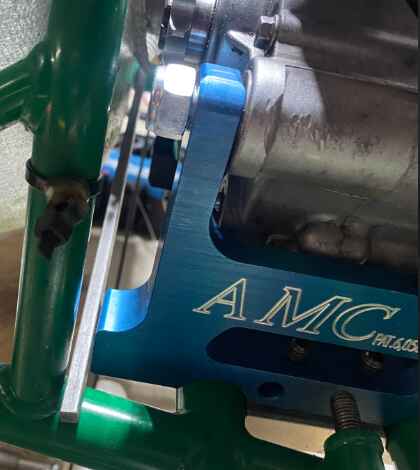
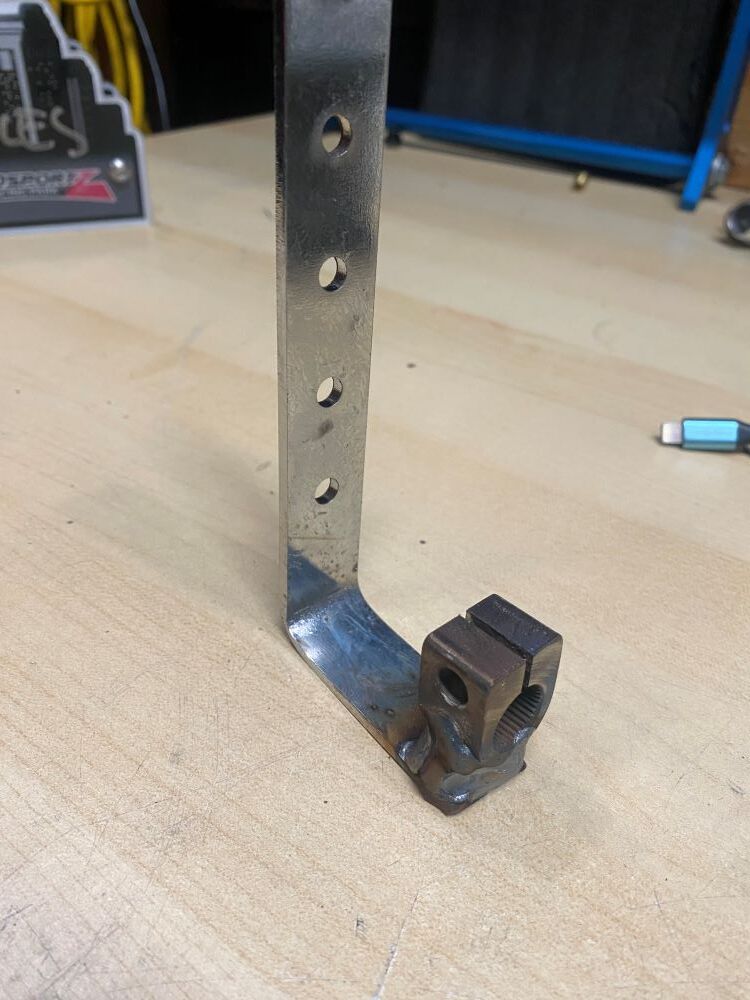
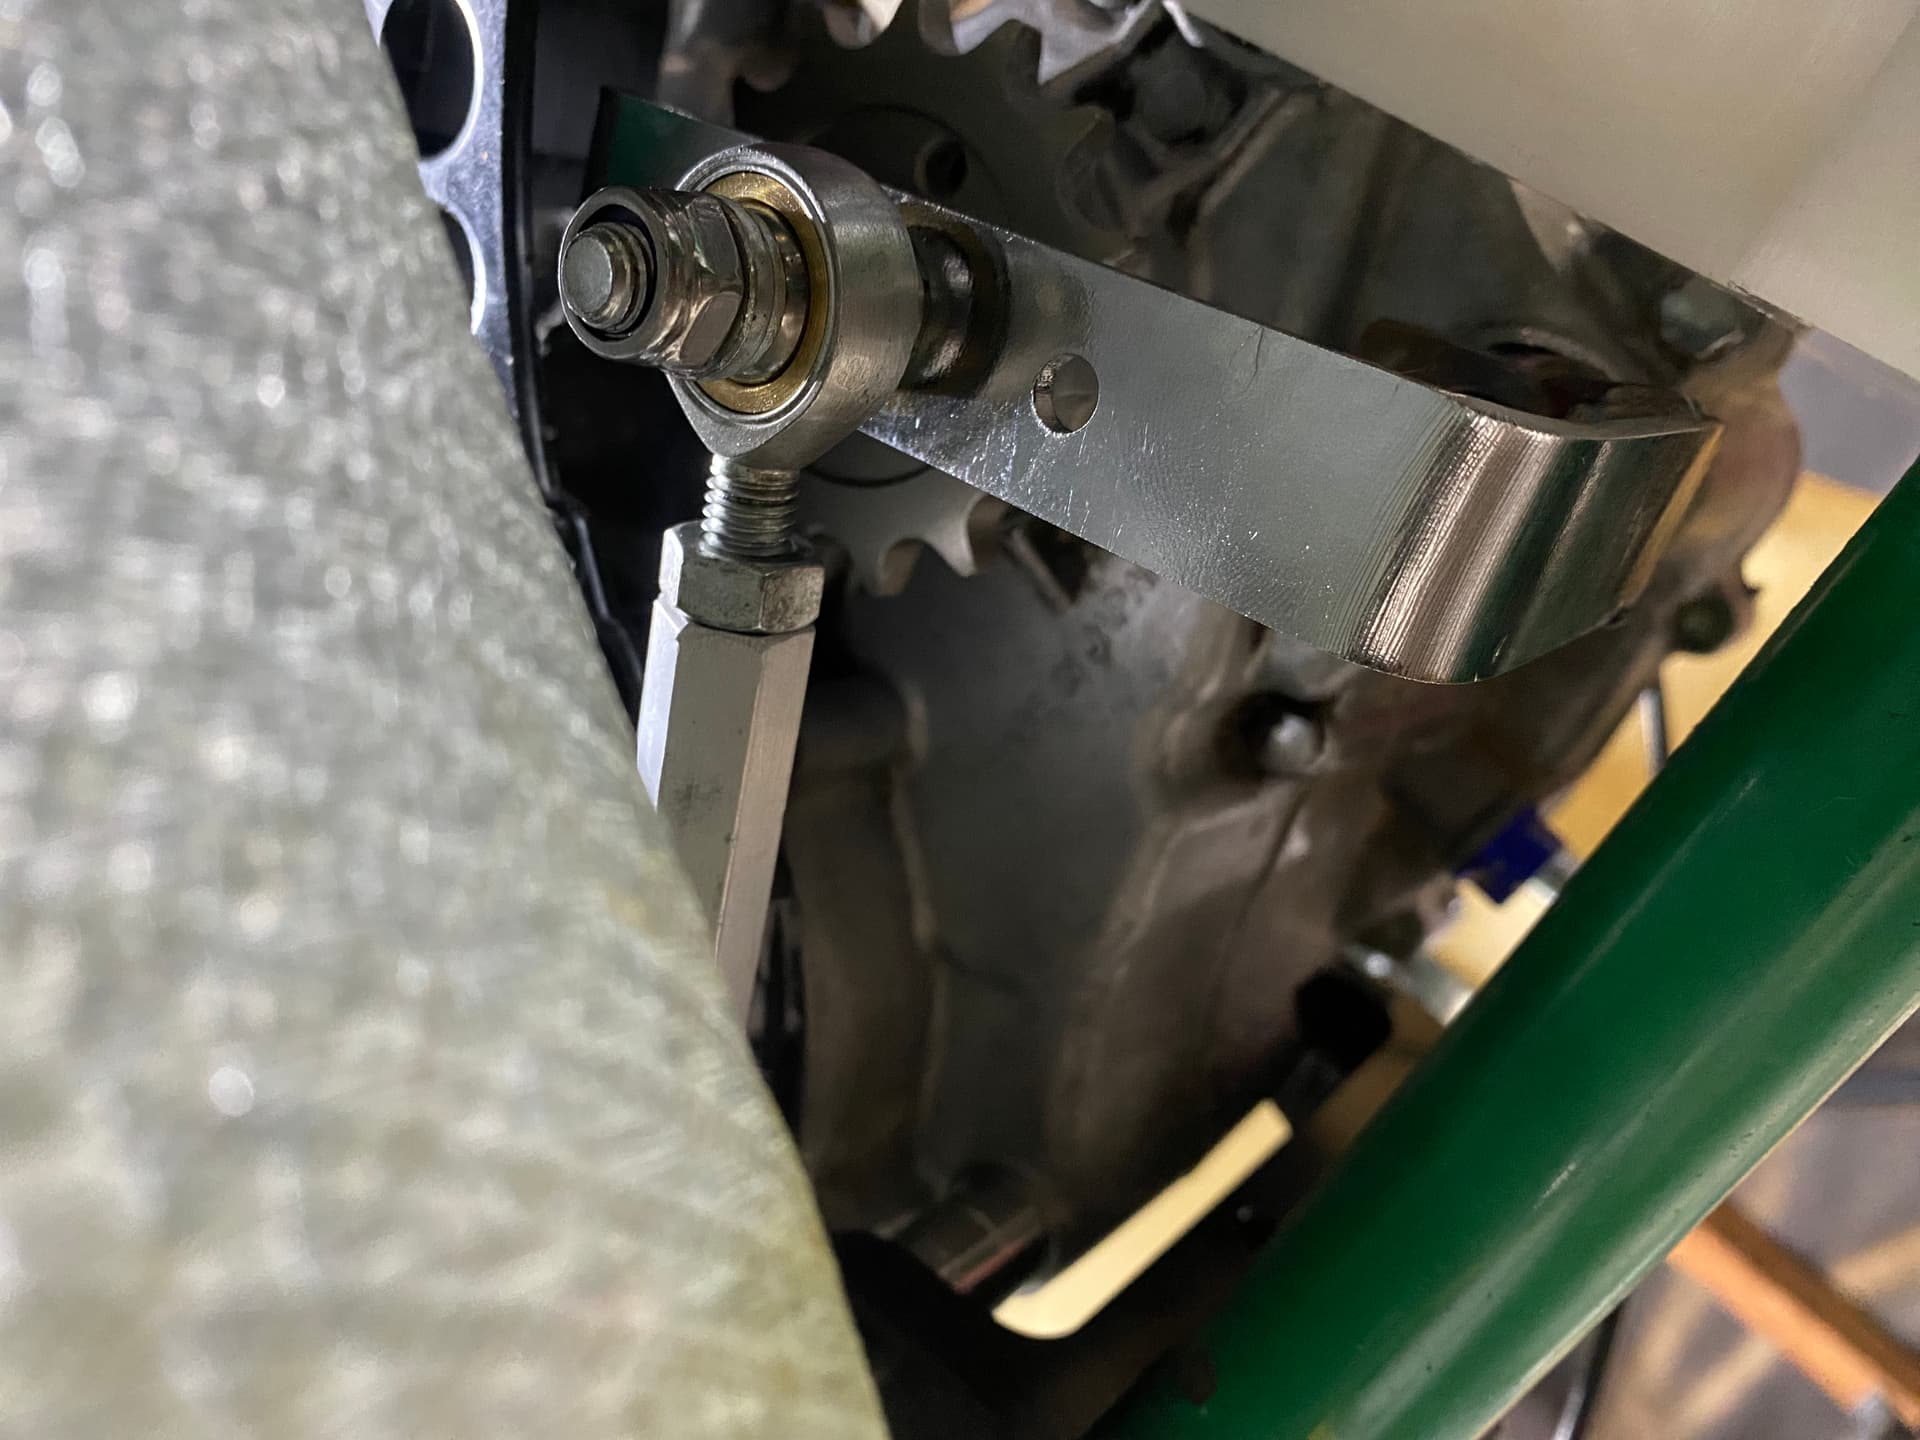
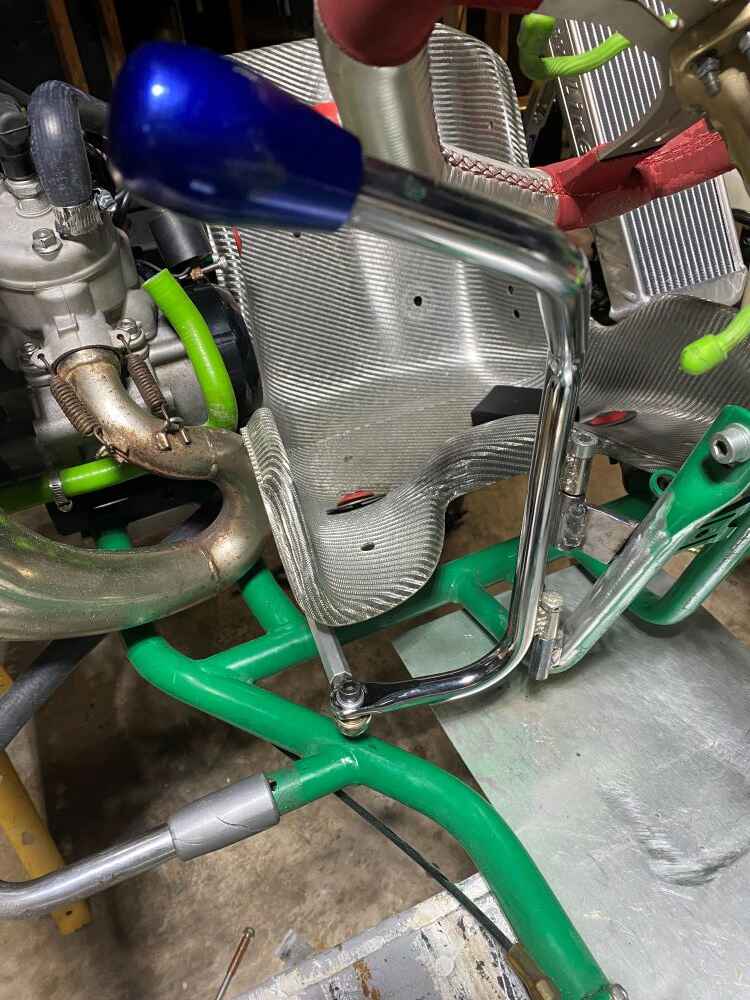
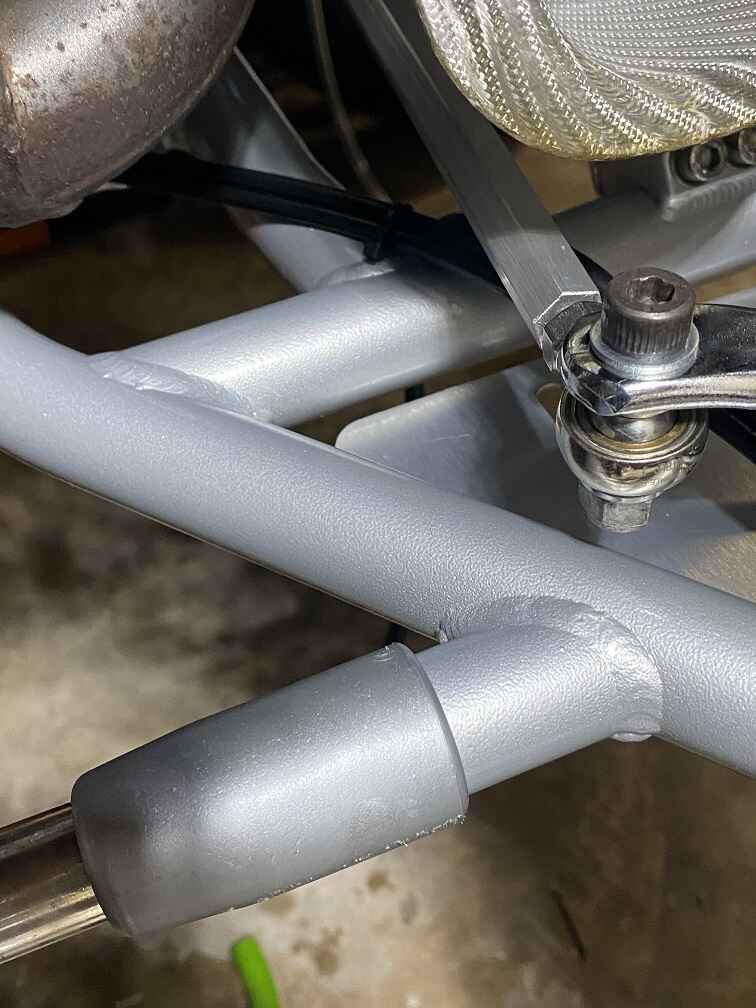
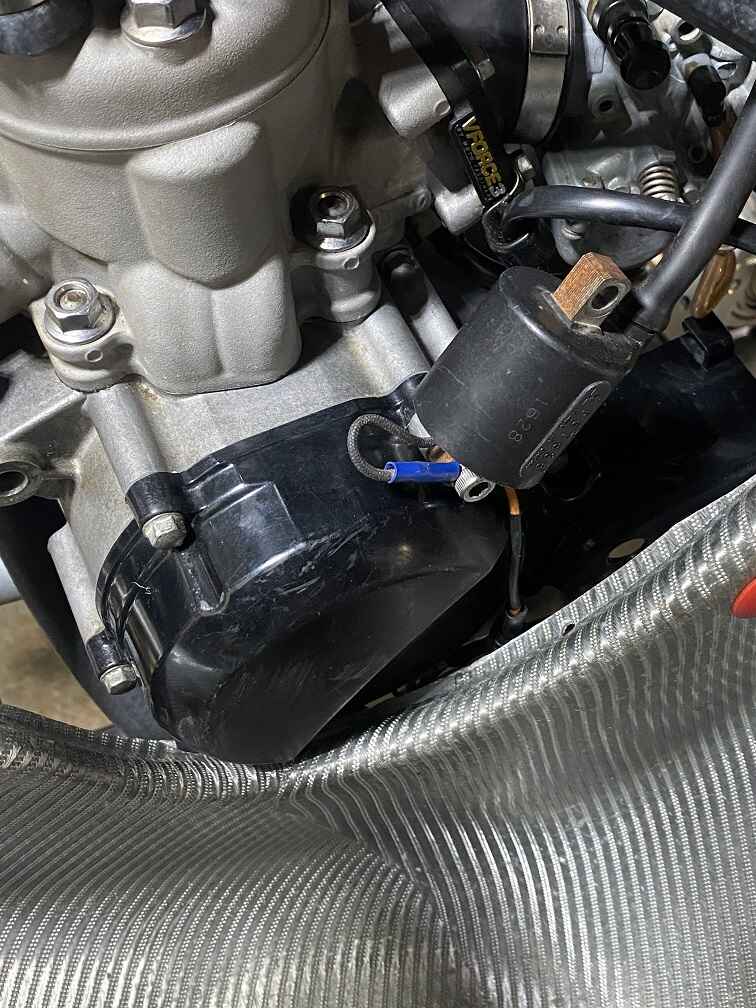
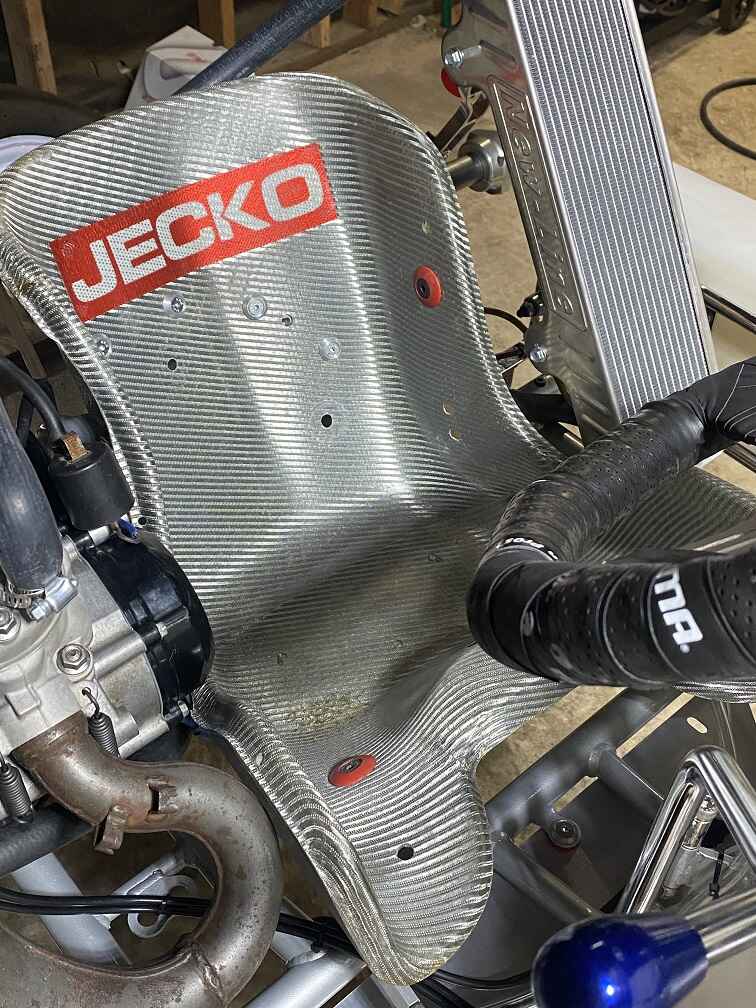
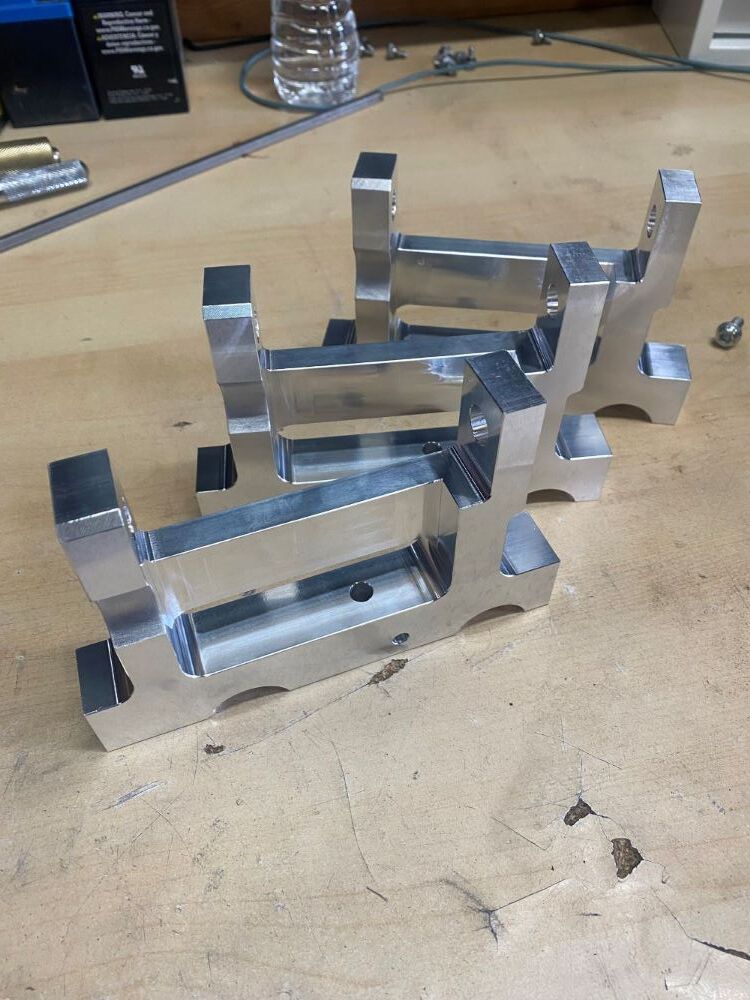
First order of business - the mount. KX65 mounts are not readily available. I contacted the fine folks at Sharkshifter and they referred me to AMC racing which used to make these parts. They had one rear mount for a kx60 on the shelf and sent it to me at no cost. It fit, but the motor was sitting up so high in the rear that the pipe was contacting the frame. It was also placing the motor so far inboard it would not be possible to put a seat in without moving the seat posts a lot. I couldn’t figure out how to make that work so I had to set it aside and figure something else out…


6 Likes

Love this. Looking forward to seeing the progress!

The lack of a proper mount made things difficult. But I got a bit lucky when I found out a work buddy had a hobby CNC mill in the garage. I downloaded a copy of Freecad and modeled up a little something. We ended up with this -

It pushed the engine far enough outboard for the needed clearance for the stator cover to the seat. It lowered the rear enough to pivot the pipe off the chassis tubes, and it allowed all the clearance needed for a linkage rod. I tweaked on it a little bit more to add a few features and correct some dimensions and ended up with this.

Work bro will make one more prototype in UHMW, and verify the changes before getting sent to the machine shop. Here is what is neat, Freecad can save as an iges or step file. Drag and drop to a place like Xometry and instant quote for an aluminum one.

3 Likes

Radiator from Mondo came in. They call it an OK -Light. We are at SKUSA this weekend and I met Billy Musgrave and talked cadet shifters. Oddly enough, I think it is the same radiator Factory Karts chose for their yz65.

2 Likes

Something awesome happened yesterday, on the way back to California, the Factory Kart crew and GR2 Motorsports (TX dealer) decided to stop by our home track in Katy, TX. The kid got to rip one of the karts for a couple of sessions. He was smiling like crazy!

6 Likes

Sounds awesome! You’re in trouble now though.

My buddy finished up the UHMW mount - Looks pretty good with the changes. Just needs a small clearance. Now the sprocket is perpendicular to the axle and he chain clears the interior post. Now to get the quote from xometery and wait for a while.

I stuck a 15t on the front. The Factory Kart had a 15/22 on it. I bought a 21t and 23t rear sprocket. Righetti Ridolfi makes these for the 30mm axle.


3 Likes

Is the motor secured on the front end? I’m just wondering if there’s sufficient structure in your mount for the twisting force that it’ll have to sustain. Did you put it through a basic finite elemental analysis?

As a non-engineer, was just curious…

Great question! My knowledge of FEA extends to understanding what it is and that red is bad! :rofl: Mostly just the basics from oilfield mechanical engineers.

The answer is no I have not, but I think FreeCAD can do this. The front mount I currently have in (which I am considering remaking the same way), is from Sharkshifter. It is for a 125 engine. I had to bush down the bolt holes and get a few more spacers. I don’t really like all of that extra bolt length, but otherwise it is secure.

I based the design off the AMC mount that was produced at some point for the KX60. I know they made one for a KX65, but could not locate any information on it. The problem with this one is that the posts are too high and too inboard. Most of what I did was lower the engine and move it outboard to fit between the seat and sidepod. All of these block type mounts have a tie rod that connects the front and rear to maintain proper spacing. I liked the factory kart steel mount, but I don’t like the prospect of trying to put all that together in the garage trying to to keep it all straight.

If there is something you see that is screaming “red flag” let me know! I am all ears!

I worked for a polyurethane manufacturer for the automotive aftermarket for a few years doing some CNC machining (operating sadly, not programming). We made poly engine mounts, trans mounts, and other bushings your car might need to go on track.

One of our competitors was famous for making their mounts out of UHMW. EVERY time we would see one of these engine mounts, it would be deformed, squished, and wouldnt return to its original shape.

I’m thinking the UHMW won’t have the structural integrity to withstand the twisting force. Now, I’m not an engineer, but someone who has seen real industry examples of failed parts and that’s just my 2 cents.

Ohh - I guess I was not clear. This is just another prototype after the original changes. Without having a model of the kart, it was basically measure by eye, and update the model for the mount and see how close I got it. My buddy wanted to make it out of UHMW for whatever reason. When I get it manufactured through xometry is it going to be aluminum.

OKAY WONDERFUL. I was afraid there for a second lol. I love the way this build is coming along with all the effort you’re putting into doing things the right way it seems.

If it’s at least as chunky as the AMC mount in the same locations, it’ll probably be fine. If you start seeing cracks, then something’s up.

Definitely, the same thickness. Just moved around a bit to fit the engine in better. Still eyeballing it as I work around everything, but will probably order in a few days.

Got a few more things put together. Bought some hollow hex rod from McMaster and cut and bent it. Drilled and tapped for the common M8 rod eye. Still waiting to weld in the shifter lever before cutting and tapping the front.

Made the gear lever for the engine but not really stoked on it. I welded one of the adjustable fairing brackets to the stock spline coupling, but I think it will start to bend after a few outings, so that is on the list to replace. Same for the front of the radiator bracket. I didn’t want to take the time to do these 100% right now because I wasn’t sure where everything else would land. I was able to get the radiator in a good spot in between the side pod and seat, but will probably adjust based on driver complaints.

Cool thing about the shift lever - the wrist pins from a Mini Swift are perfect for completing the hinge on the kart side. I test welded some up on an junk set of tubes and they held up to some hammer whacks. So that’s promising. I had originally cut up some old side pod tubing, but it was not stout enough.

Once I get the hinge welded up to the tubing and the thing appears to shift, I will tear everything down to get it powder coated. At that point it is just fitting things in, no more mods to the chassis. Still struggling with the pipe, but will probably ebay a stock one since this one is very close to the seat and the exhaust is angled towards the tire and not straight back.

Tacked in the hinge and cut the other end of the linkage rod. I put the kid in the seat because I thought the hinge stuck out a little far, but there is enough clearance for his leg. The position was good too of the knob was good too.

2 Likes

After I finished “welding” up the hinge for a shift lever, I took the kart to a powder coater and week later, we had some nice silver on it. At this point, I don’t think it can be called an OTK anymore, maybe a MTK (modified). :smile: There is a slight sparkle to it, but difficult to see in pictures. The kart looks very monochromatic with the greys, silver, black and gold. Then it has these little pops of red. While it was at the powder coater, I polished a lot of parts with chrome polish and aluminum polish. That cone shaped drill attachment you can get from autozone makes quick work of that job.

I ended up using one of the brake linkage pins to hold the clutch cable in place. I will replace the clip with something more substantial later.

I stuck with the CRG clutch handle as it played nicely with everything else in the area. A buddy runs the collars on his, but not really sure if this is necessary for what we are doing. I assume its a safety against the body sliding up and down the shaft during a start. Since this isn’t a local class, that is not a big deal for us.

Stop button mounting from the bike. I used a surface conditioning tool on the floor pan. It is great for creating a nice brushed look.

I got some of these cheap 3d printed cable holder things from Mondokart. Lets see how long they hold up. Got a new gas tank too since they other one leaked at the vent fitting.

Fuel pump and ignition on the back of the seat. I was trying to fit the pump near the engine or fuel tank, but didn’t want the hassle of making a bracket, so it goes on the back of the seat for now. Maybe a different pump would work better for that. I also like the idea of wrapping the fuel lines around the left side of the kart to keep them away from the exhaust.

Gears were a PITA to find for the 30mm axle. I ended up buying from a shop in Germany since everyone I contacted in the US did not have the 21t in stock. I will end up drilling the axle out for the key so I don’t need buy a new axle. I have a 22t and 23t as well.

Mounted the coil on this cover, I hope it is OK here. I am thinking of bending some other material to support it on top so a stray elbow does not knock it off. There is minor interference with the stator cover and seat. Easily solved.

I did end up getting a cheap stock exhaust from ebay for the purpose of improving clearances with the tubes and seat and it is light years better than the FMF aftermarket pipe that came with the bike.

Only a few more things to get put together and waiting on the mount to come back from the machinist…then it is time to rip!

4 Likes

Looks like packaging is a bit of a pain but you’re working through it. Heat shield between the seat and exhaust for warranted or sure.

Something like this? I have never wrapped an exhaust, but there seems to be a lot of negativity towards the normal wrap because it retains moisture. I already put some heat tape on the seat because I had it sitting around, but I doubt it will be very effective. Another thought was to just bolt a plate to that side of the seat using some spacers, but I don’t know if that would be effective either.