How do (or do) you folks repair scratches to the underside of your chassis? I know many just upgrade to a new chassis, but if you like your current one, and you just want to repair it, what is the best path forward?
In my mind, I would just weld in new filler medal, and keep the heat in check my taking frequent brakes and laying short beads.
When you say “scratches” to me that would indicate that the tubing is still round and is missing paint, If so, a little sanding, clean up, prime and paint with a rattle can in something close in color. If however, the tubing has flat spots that would mean the metal has been ground away and if I understand you correctly you would like to weld the steel to " fill in" the missing material. If this is the case I would be reluctant to do that. I would install chassis protectors where its hitting and keep the chassis as is. If it has significant wear then it probably doesn’t matter as it will need to be replaced.
@Charles_Kaneb I disagree wholeheartedly on wore through = toast!
Last time I saw it done, it was worn through the middle cross bar and cracked the frame in half. Grabbed flat stock from Rural King, flux core weld it on at the track, go out and win… It’s all I’ll fast as shit to this day a few months later. We affectionately call it Skidplate.
When I say worn through, I mean WORN THROUGH.
Frame repairs, even extensive ones, are perfectly fine at the local and regional levels.
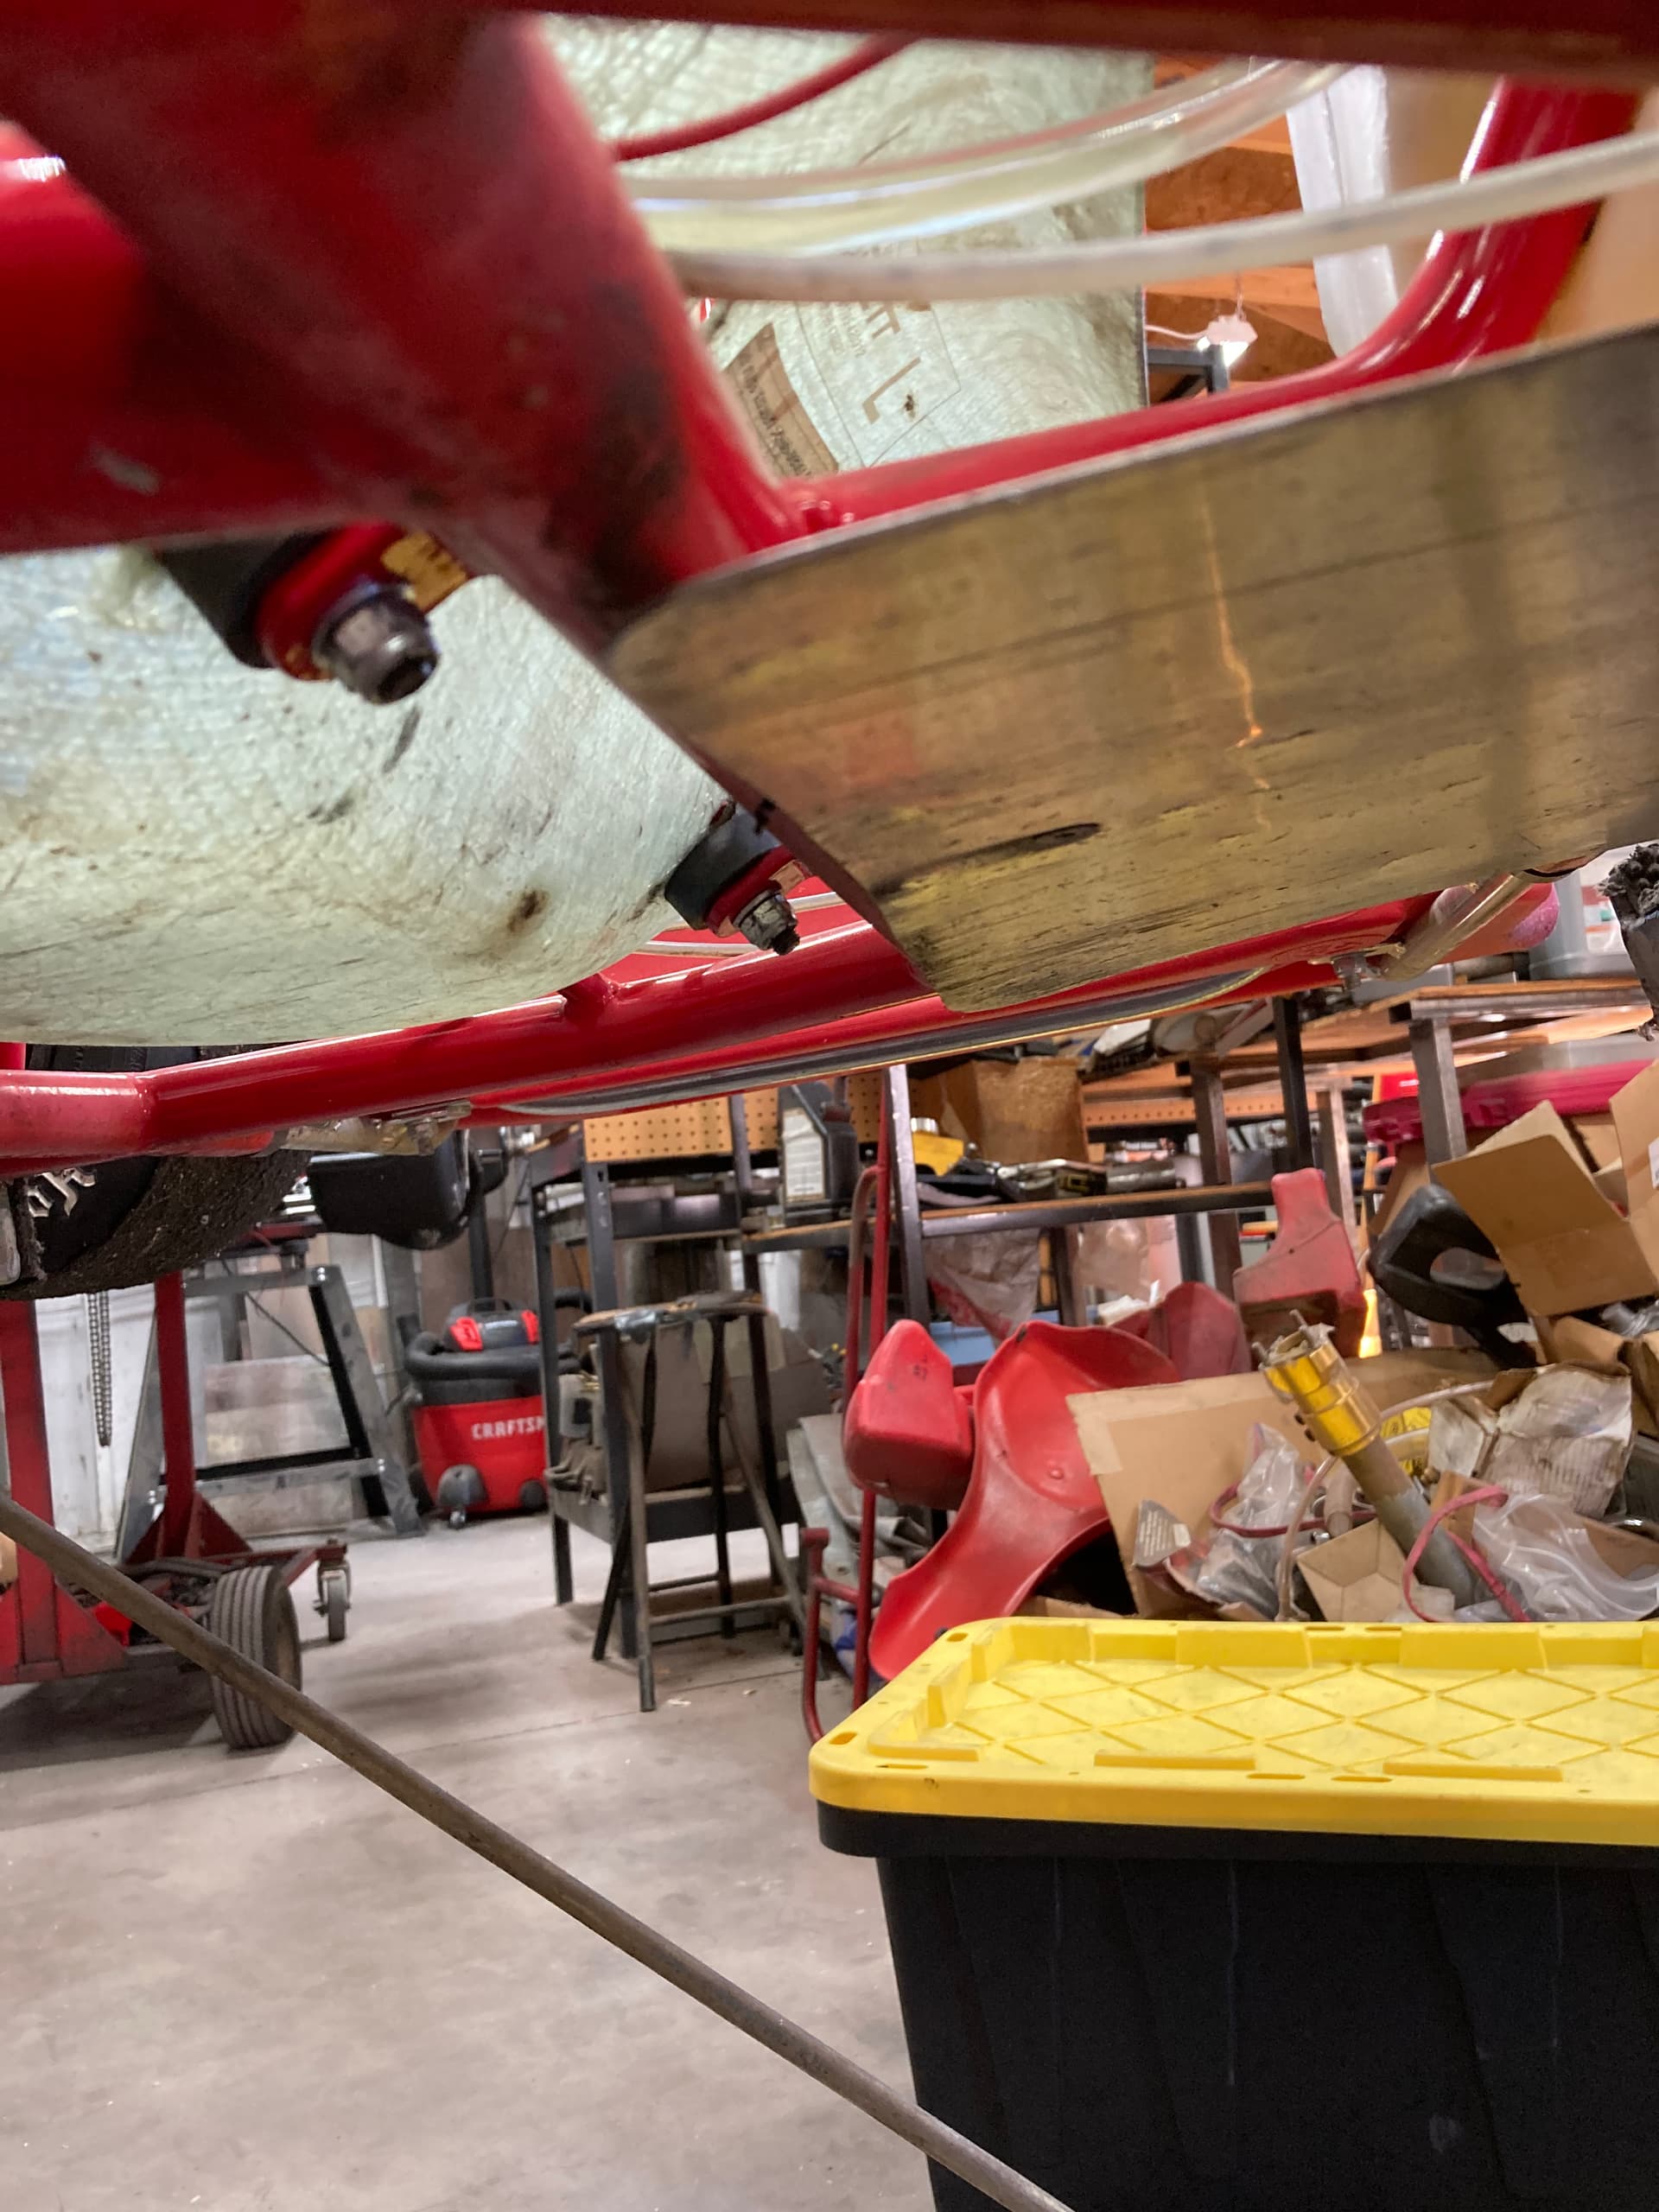
Tubing is still round except in two spots that are worn flat (not through, yet), the front cross bar and the middle cross bar. Both about 8-14 inches long, not worn through, but worn flat; but thats what I’m worried about is it evenly wearing through. I figured there is still metal there to adhere to, and I have some skills behind a welder (and the welder itself) that I use on WW2 Jeep projects. I was a novice paint and body guy in my youth.
My reluctance, is being the frame is like a giant spring, adding too much heat could weaken it or take the “springiness” out of it. That is what I don’t know so I’m outside my wheel house a bit.
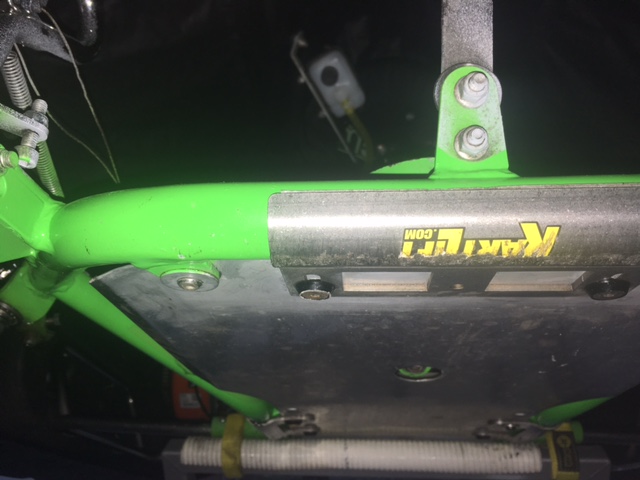
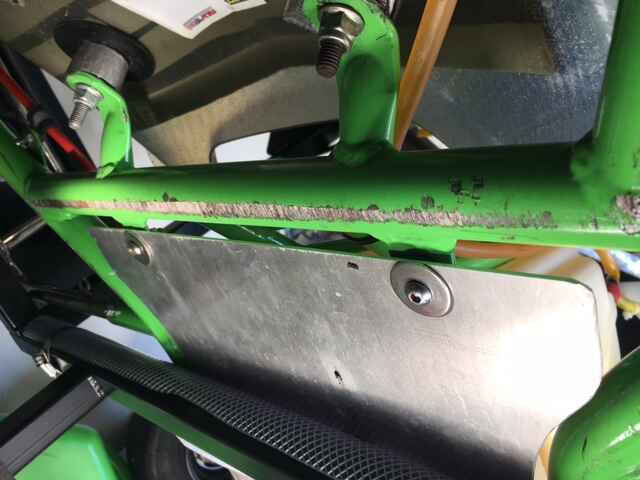
Which is what prompted this question. I have a set of Kart Lift metal chassis protectors that I just put on last week, but I’d like to (if possible) preserve the frame as much as possible. I want to lay a bead over these spots, grind it back circular, and then touch up the paint.
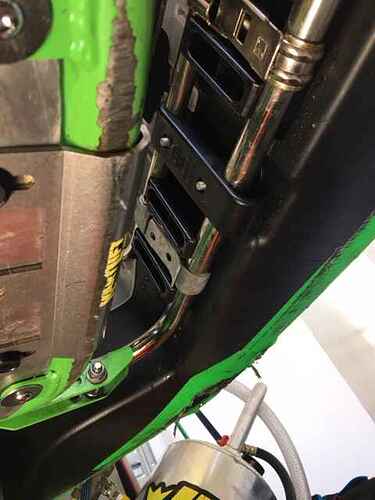
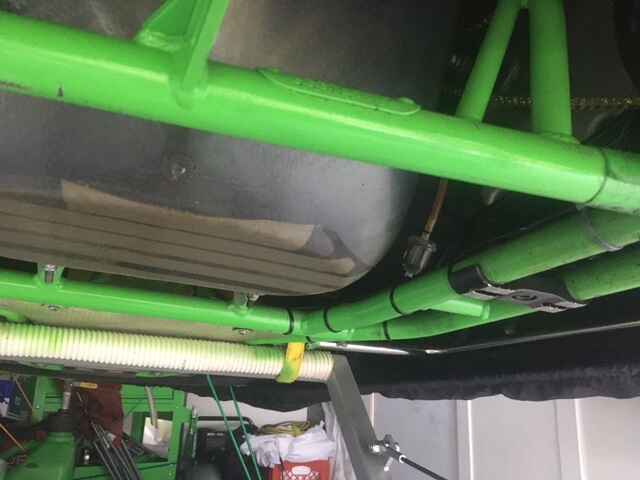
Middle Cross bar:
Front Cross Bar (with the new Kart Lift Chassis protectors):
If it was mine I would leave it. Maybe brush a little paint on to make he feel better. The frame protectors will limit future wear. As you know welding will add a ton of heat that is best avoided when possible. If it drives good leave it alone.
I’m with everyone else, its not that bad, especially for the cross members (the seat tube is barely through the paint) If the side frame rails look like this too I might be a little more concerned but would probably still keep it as is. I think you risk damaging it more trying to fix it.
So I have some buyers remorse…I bought a kart without fully examining the bottom. The owner said they ran plastic protectors. However, on closer examination (at home, after I paid for it) I realized the frame protectors were worn through and the chassis has some significant wear just in front of where the frame protectors were. This in the narrow “waist” of the chassis under the fuel tank area. It is like this on both sides and I estimate just over 1mm of material is gone.
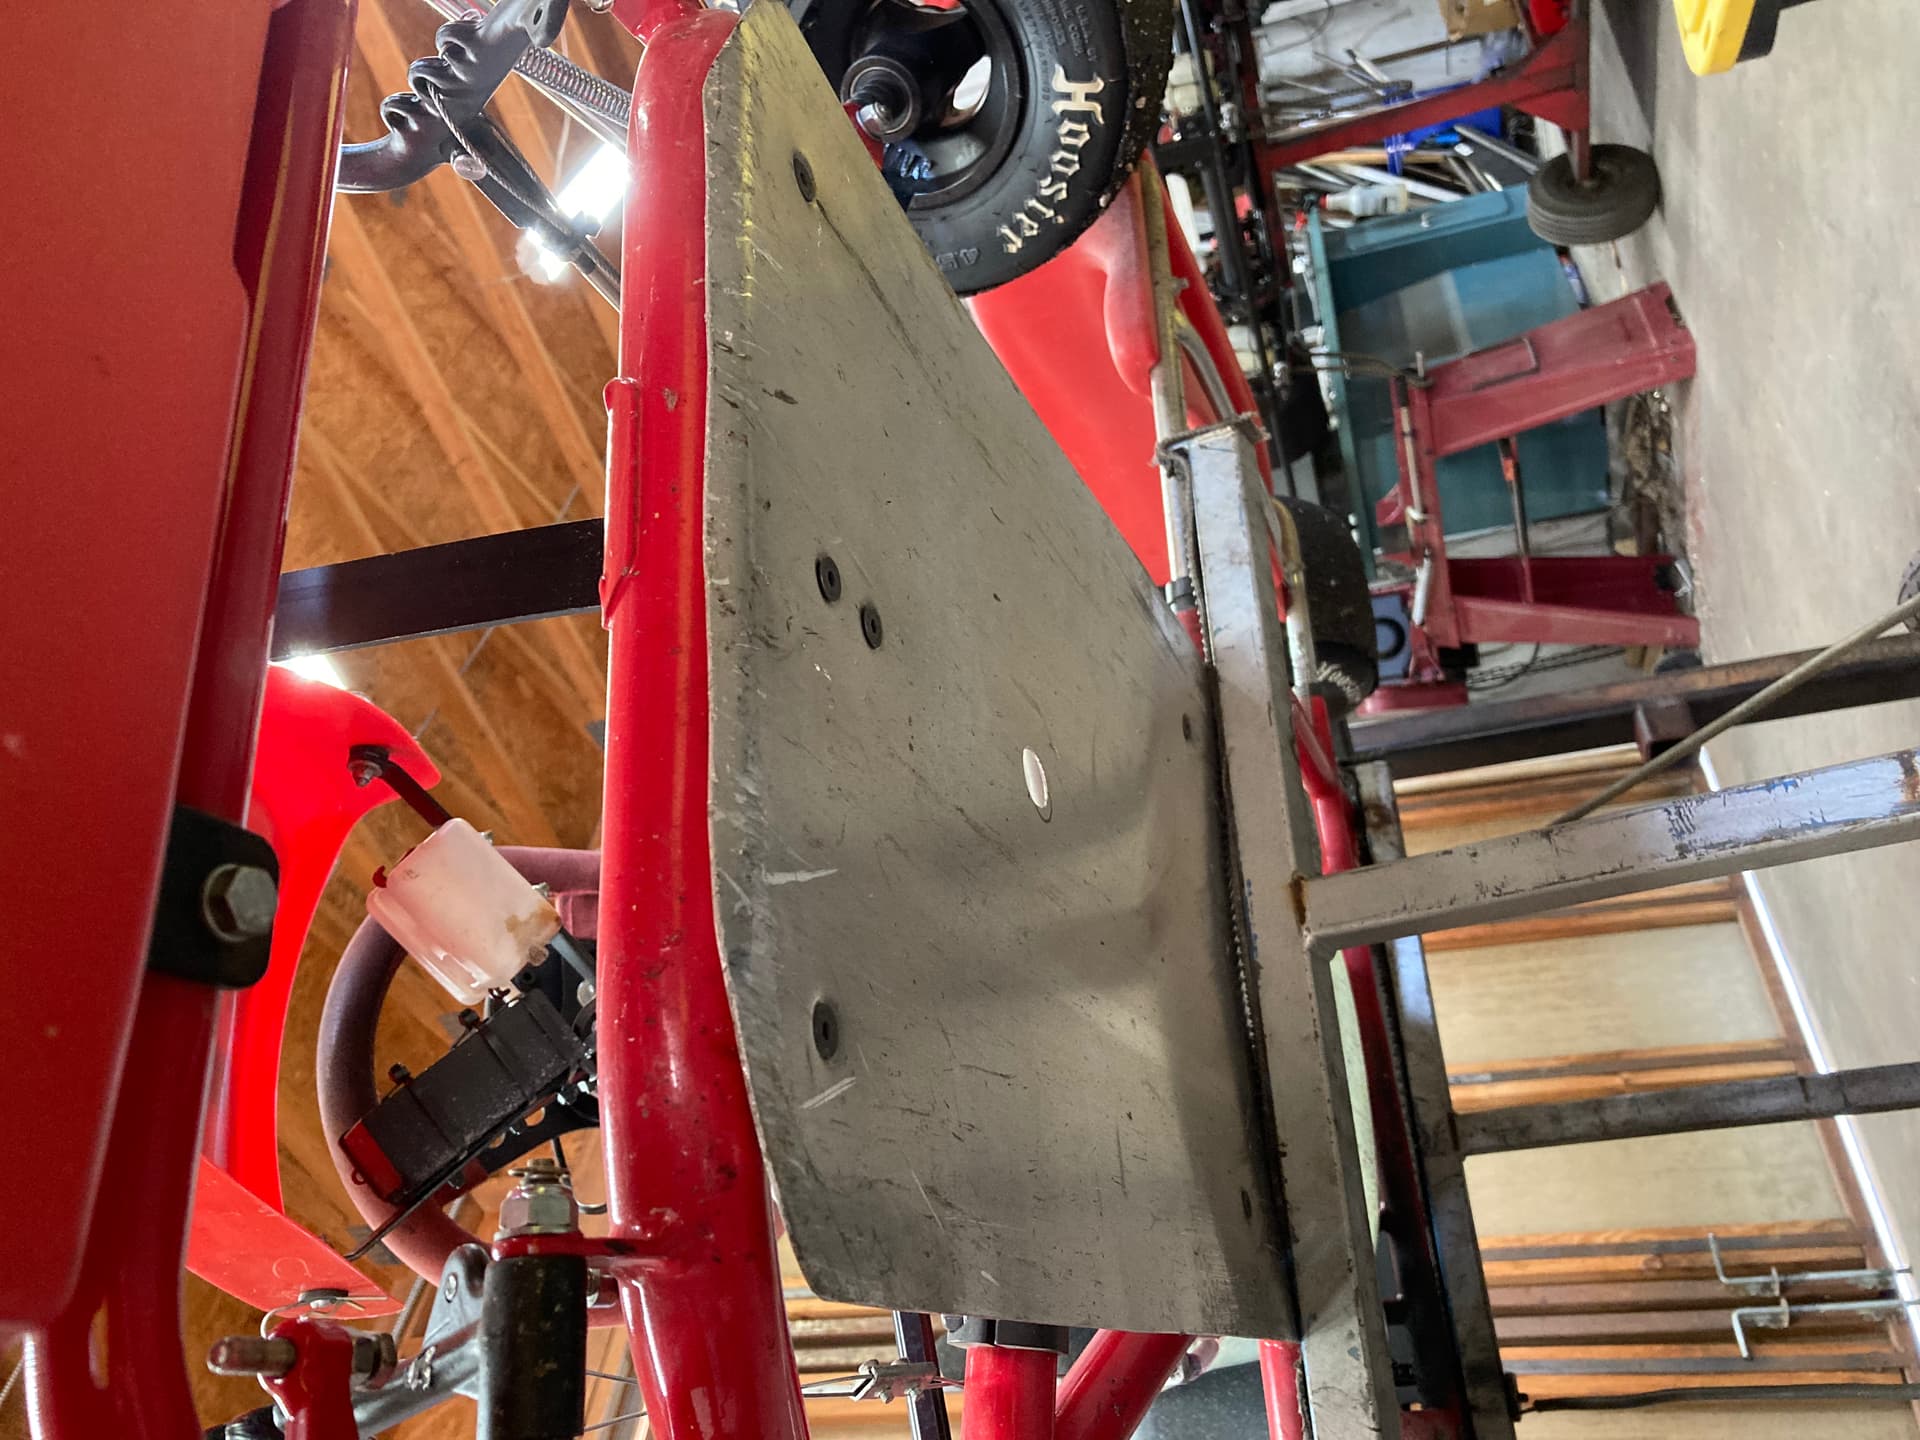
I prefer the larger area coverage of the Kerb rider style frame guards, since they cover the entire tube length on the front & waist. I also use the “donut” guards on the front seat tube & disc protectors under both L/R outboard bearing cassettes on the back axle.
I know I didn’t do a good job at updating this thread, but I’ll tell you what I ended up doing. I have a welder and I thought about adding in metal to the flat spots, but being the frame is like a spring, I thought adding heat to it might have some unforeseen consequences so I decided not to go that route.
Instead, I mixed together some JB weld and added it to the flat spots of the frame. Once dry I sanded it down like Bondo, primed and rattle canned it the closest green I could find (Kawasaski green). I think it turned out well, and now I have some more real estate to grind off if I eat a curb or cut the grass, and at least I’m no longer losing metal when doing so. Then I put my new chassis savers back on and away I went!
Keep in mind EVERY underside bar seem to have some level of road rash, so it was a two afternoon project.
Used 80 grit to get the overall rough (round) shape of the bar, then finished sanded with 220 grit. JB Weld sands down suprisingly well and takes a self ethching primer just fine.
One tip is to sand the JB Weld within 24 hours of initial hardening, if you wait longer than that, its very difficult to sand. I learned this trick from some WW2 Jeep restoration folks back in the day. As some of those folks are dead set on restoring original WW2 parts and pieces that seriously need Jesus, lol.
I wouldn’t be afraid to weld on the frame, after all, they welded it when they made it. Keep the heat down and don’t burn through. Build it up big and grind it down to round-ish. It’s already messed up, you can’t make it worse! I prefer to put on full coverage floor pans on my karts. Helps it “toboggan” over things with out frame wear.
I wouldn’t be afraid to weld on the frame, after all, they welded it when they made it.
But they do not weld where OP is referring to. When karts are assembled, they are welded at the joints where the tubes meet, not in the middle of the bars.
If this was a kart frame that needed to be spot welded at the track in order to finish the race weekend, I would say go for it. But otherwise, if you really need to be laying beads on the non-joint portions of the tubes, it is probably time to replace.
That being said, the photos OP posted are not nearly bad enough to warrant repair/replacement IMO.
Not sure if you are refering to my chassis or the first posters but the sentiment seems to be the same…run it. I was thinking if it could be repaired better to do that before something bad happens, but there hasn’t been a suggestion on repair that seems like it would work. As you said welding in the middle of tubing vz at a joint are two different things. Probably will run it and hope for the best.


 One tip is to sand the JB Weld within 24 hours of initial hardening, if you wait longer than that, its very difficult to sand. I learned this trick from some WW2 Jeep restoration folks back in the day. As some of those folks are dead set on restoring original WW2 parts and pieces that seriously need Jesus, lol.