Just wanted to start a thread around how to assemble a shifter chassis. I’ll start from new but this will also be useful in case you buy used, always a good idea to strip down and rebuild, checking every part.
There are plenty of videos online already so I won’t do a step by step but I’ll rather focus on the stuff that is typically not covered or that people don’t tell you. Not all of us can have shops nearby or friends in the industry…I got very lucky, so I thought I’d share some of the stuff I learned from all of them
9 Likes
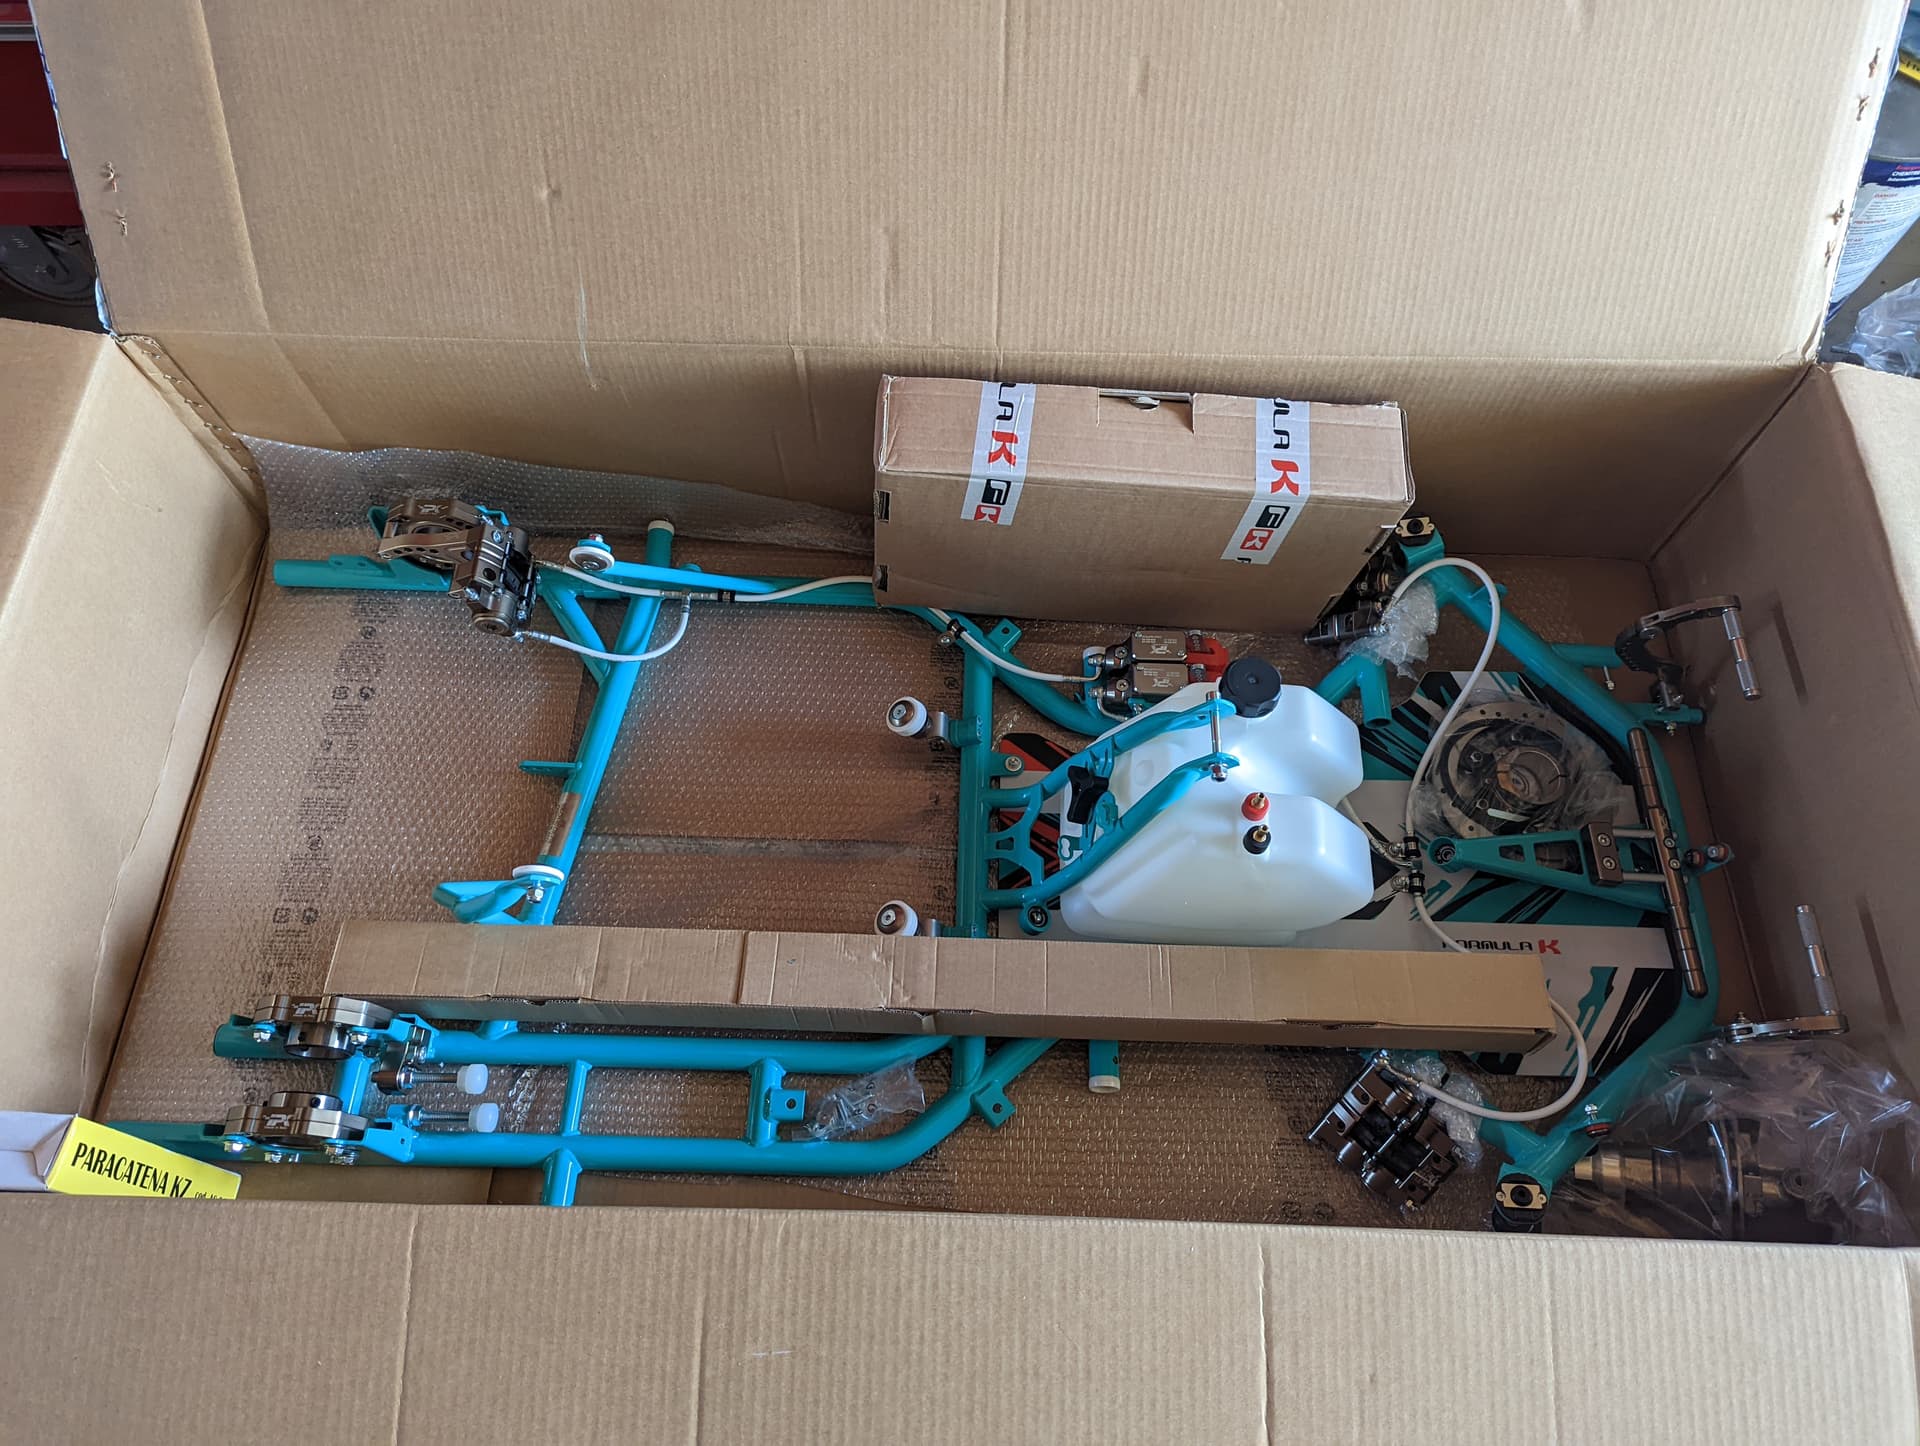
Now this is your best scenario, new chassis fresh out the box. If you are starting from a used kart instead, first step you should do is to verify there are no cracks, especially around the Cs, seat stays, front seat tabs, steering support. Second step is take the chassis to a shop to verify straightness, it’s pretty common to see some twist in it, it can be easily rectified.
1 Like
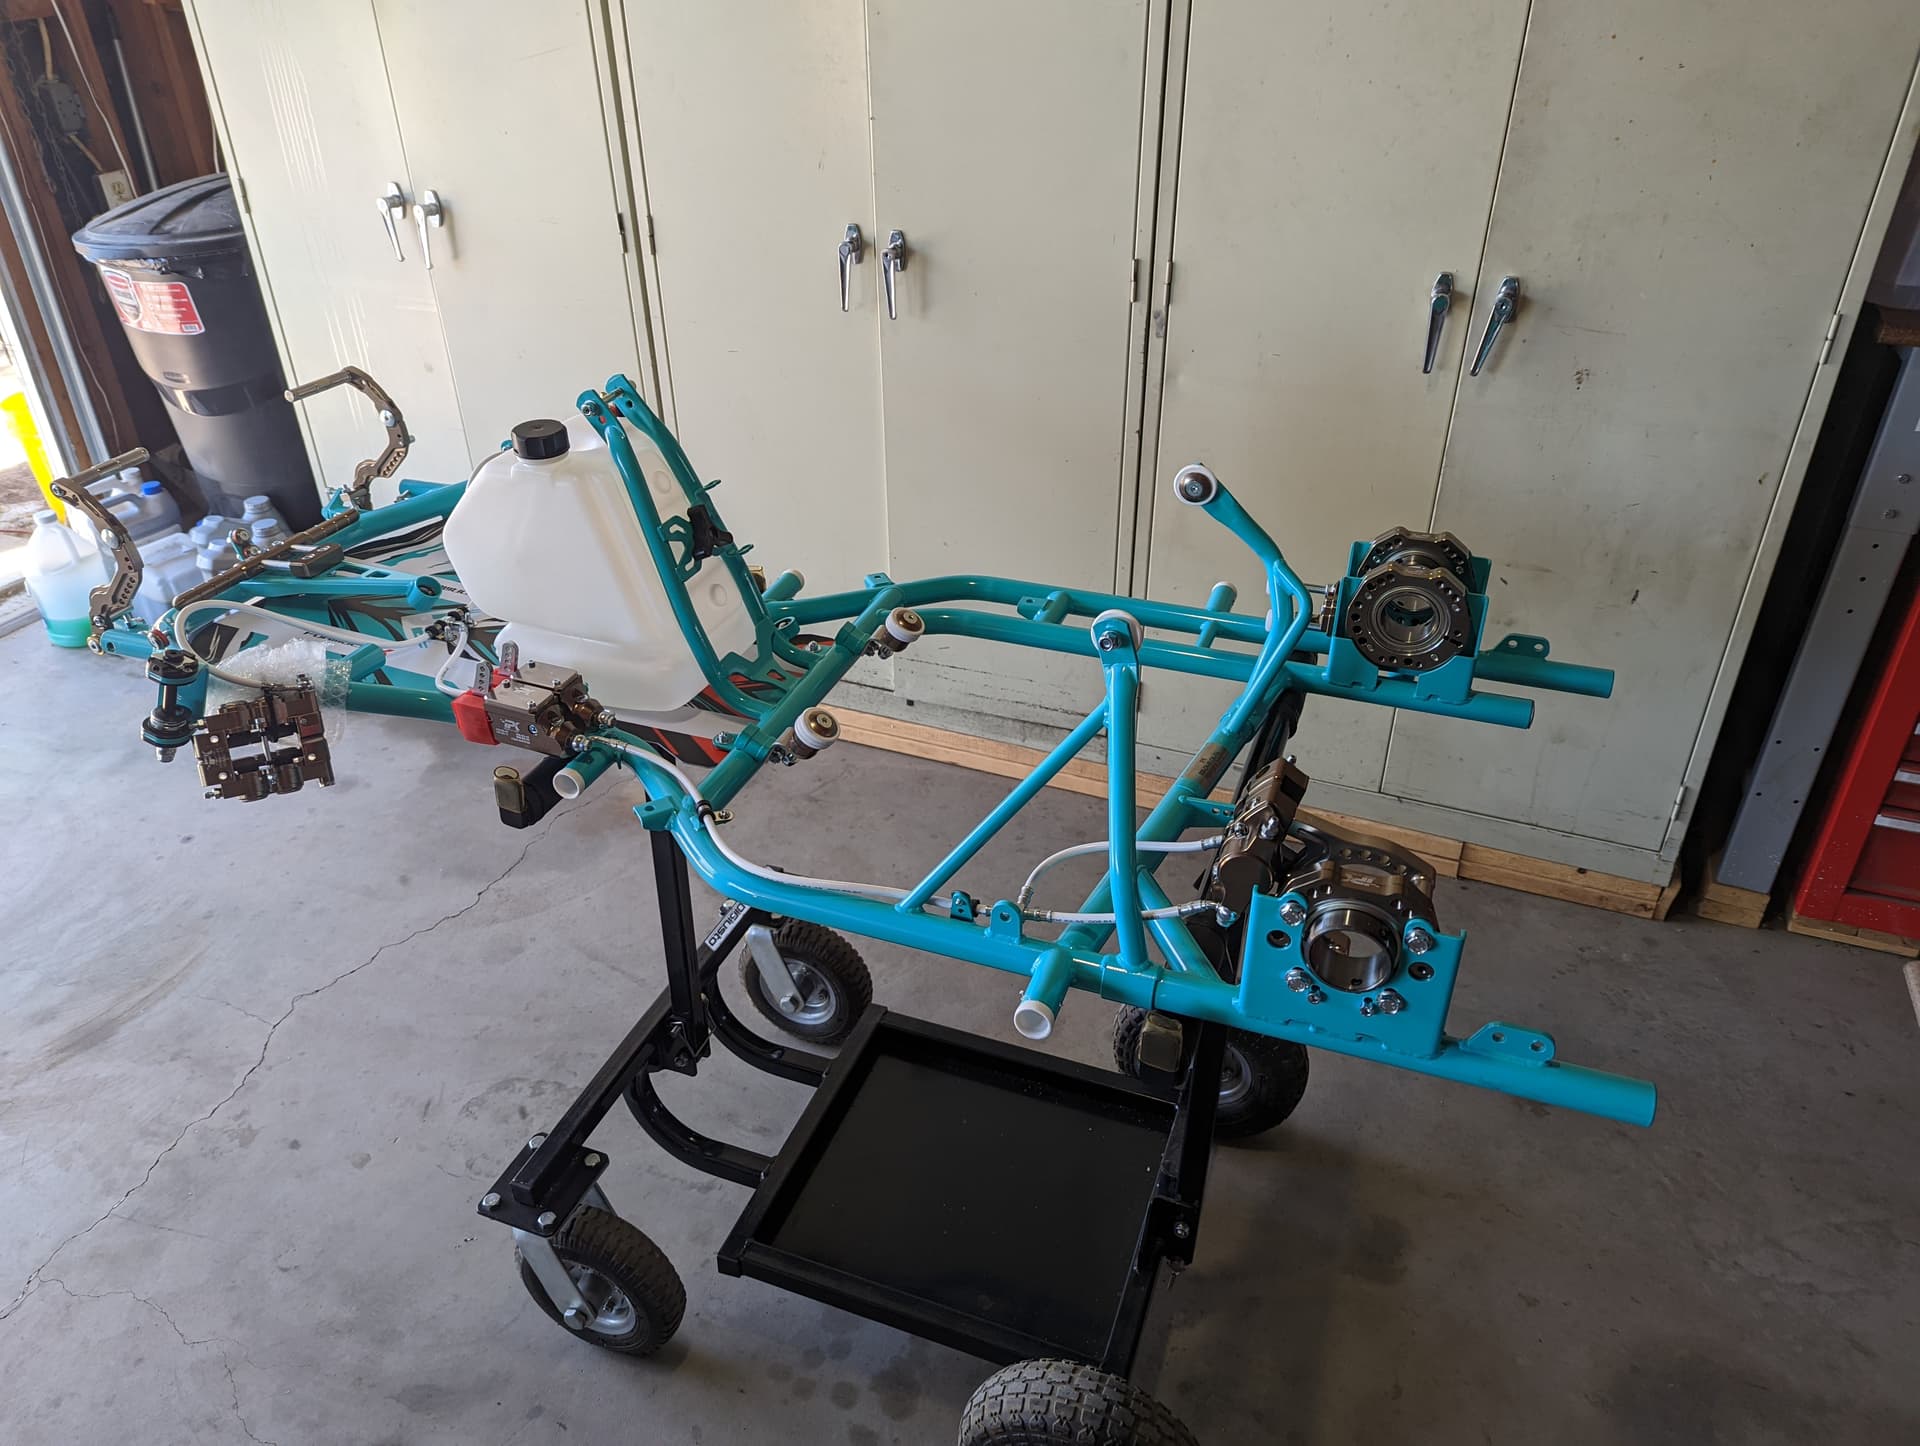
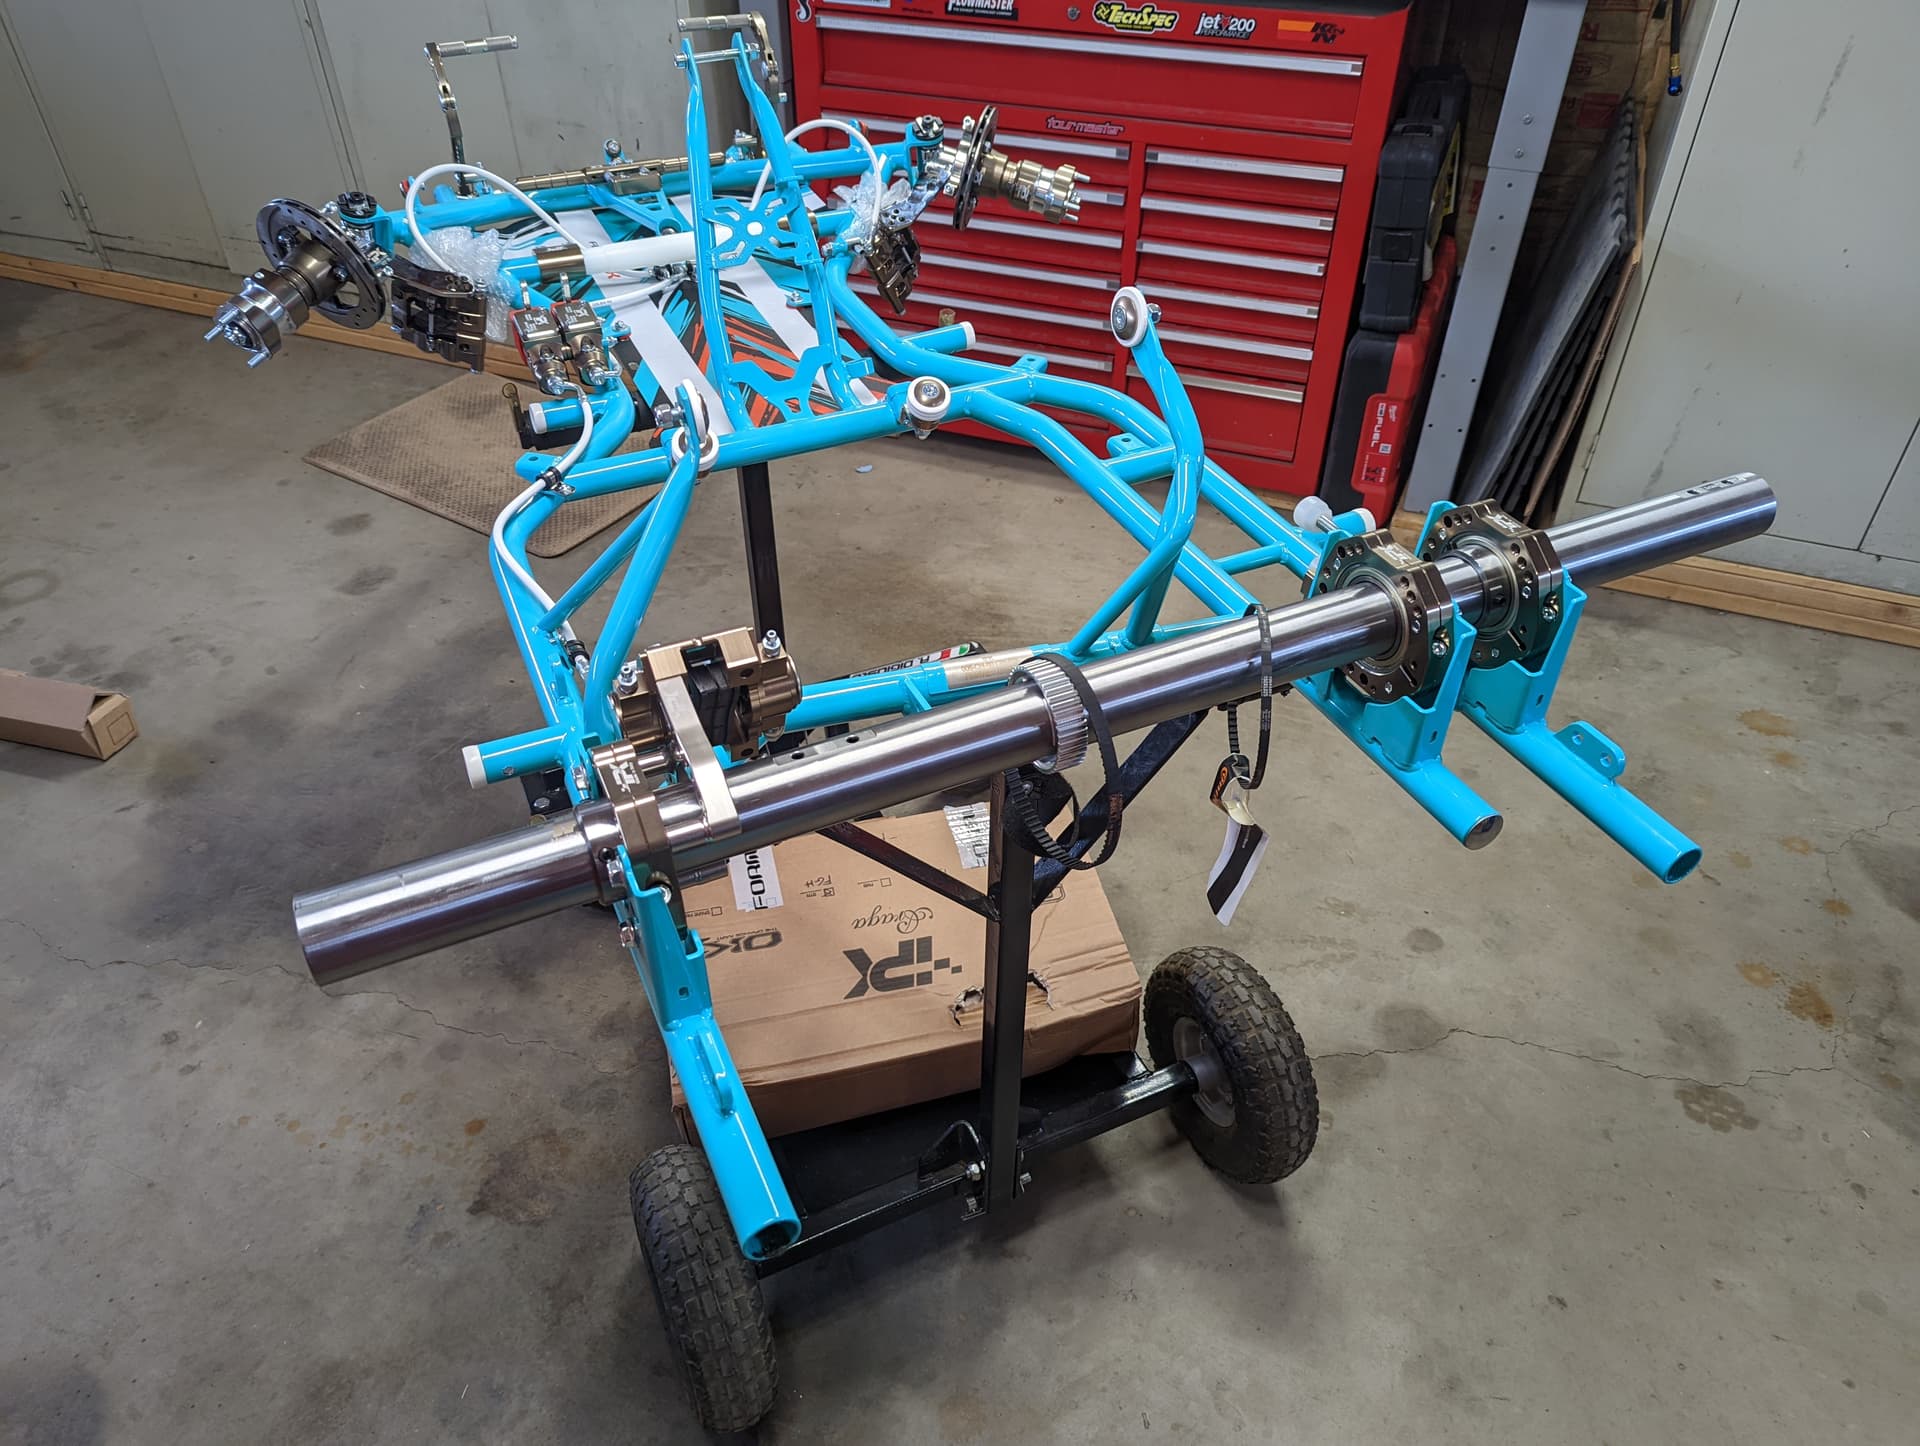
Next step is rear axle, which normally has 2 painpoints.
First one is alignment. You need to make sure bearings are perfectly aligned so that the axle moves freely in and out. This is crucial: misalignment robs HP, preloads areas that are not supposed to be loaded and also wears out the bearings much faster.
To align it is very simple: once the cassettes are locked at the standards height, loosen the pinch bolt, force the axle until it naturally aligns, tighten the pinch bolt back up. First you do the outside cassettes, then the middle one.
3 Likes
Second pain point: water pump
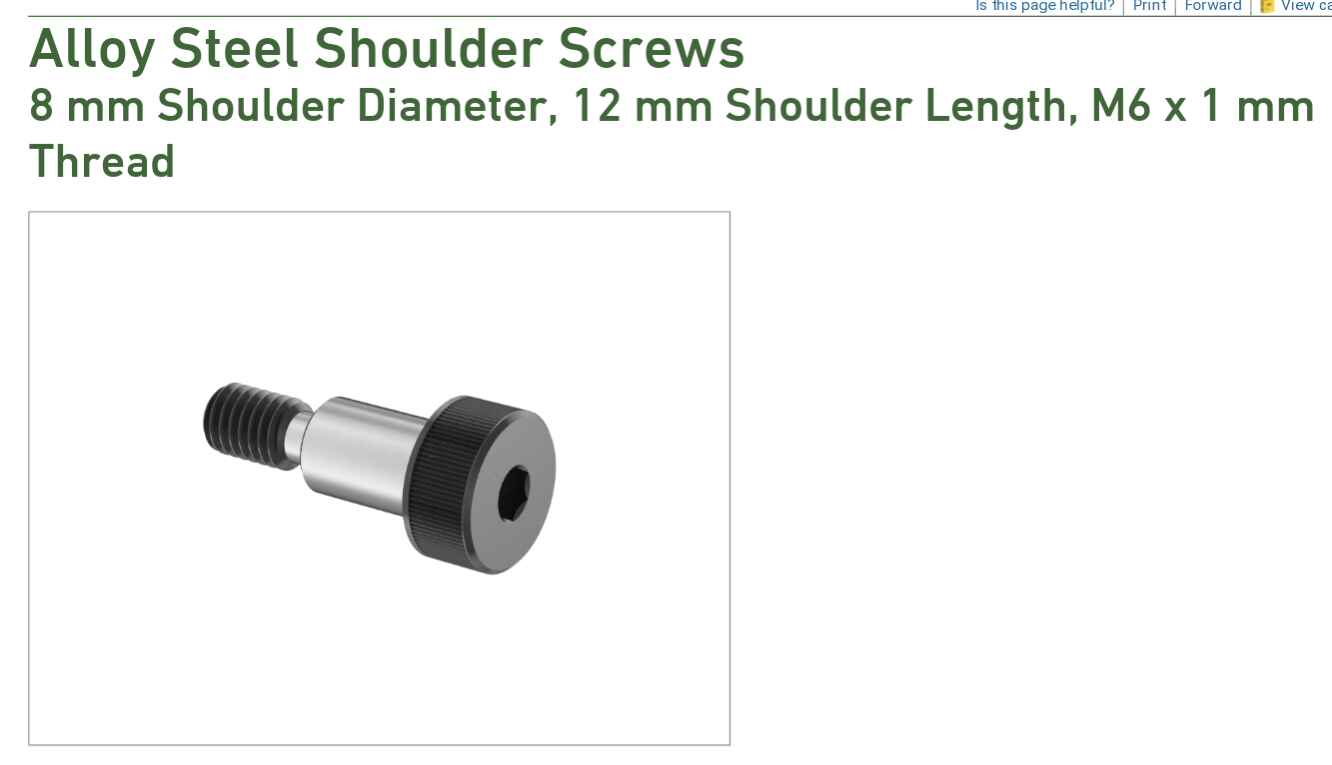
CRG and similar have a sturdy bracket with an 8MM hole, very easy. IPK and others have a smaller bracket with 6MM holes, perfect for their proprietary pump but a little bit of a pain for the standard ones.

You can easily fix the issue with a special shoulder bolt 8mm to 6mm
4 Likes
90% of people don’t know to do this, and then wonder how anyone does an axle change in under 10 minutes. You align the bearings, and that thing should just slide out easy-peasy.
4 Likes
Axle alignment can be more difficult in a shifter since we run the third bearing hooked up 100% of the time. As mentioned, tighten down the two outer bearing cassettes first, and then tighten the third bearing cassette to the frame. A quick cross check that I use in order to ensure proper alignment of the third bearing is to verify that the inner bearing race spins freely around the axle (I never run grub screws on the third bearing). If it doesn’t spin freely then there is likely a bind.
3 Likes
In my experience, you would be less than 100% satisfied if you did this with every new chassis, as well…
1 Like
All my new chassis go straight to a table and 90% of them need pulled on.
1 Like
Ahahah I know, it’s weird with the new chassis. They move quite a bit from new, even if they are perfect out the box (and most aren’t). I usually take them to the track and then measure to see where they are at after they settle down. I’ve seen anywhere from 0 to 3mm off, some even upwards to 4mm out of the box. Either way, I found it more productive to run a shakedown first, then put it on a table. Some people like to do both, meaning measure right of the box, fix, shakedown, check again and fix it again if needed. My theory is that during welding these chassis are held in a jig and some of the stresses will only release after they are properly flexed for few laps, which can’t be simulated on a static table.
Do you do both or only initially out of the box?
3 Likes
FK (and i guess by extension all IPK) don’t come with the axle already fitted, i guess thats to save on box width.
In my innocence I’ve been spoilt with karts arriving with this already done for me lol.
Also, don’t forget the brake disc ![]()
1 Like
The interesting part is that yes the axle came separate but it had very light fitting marks on it…I tried it and it was 90% aligned, something you don’t get by just randomly bolting the cassettes and bearings on…I think they pre-fitted it at the factory and then boxed it separately
1 Like
Table out of the box and after a couple of track days just for peace of mind.
1 Like
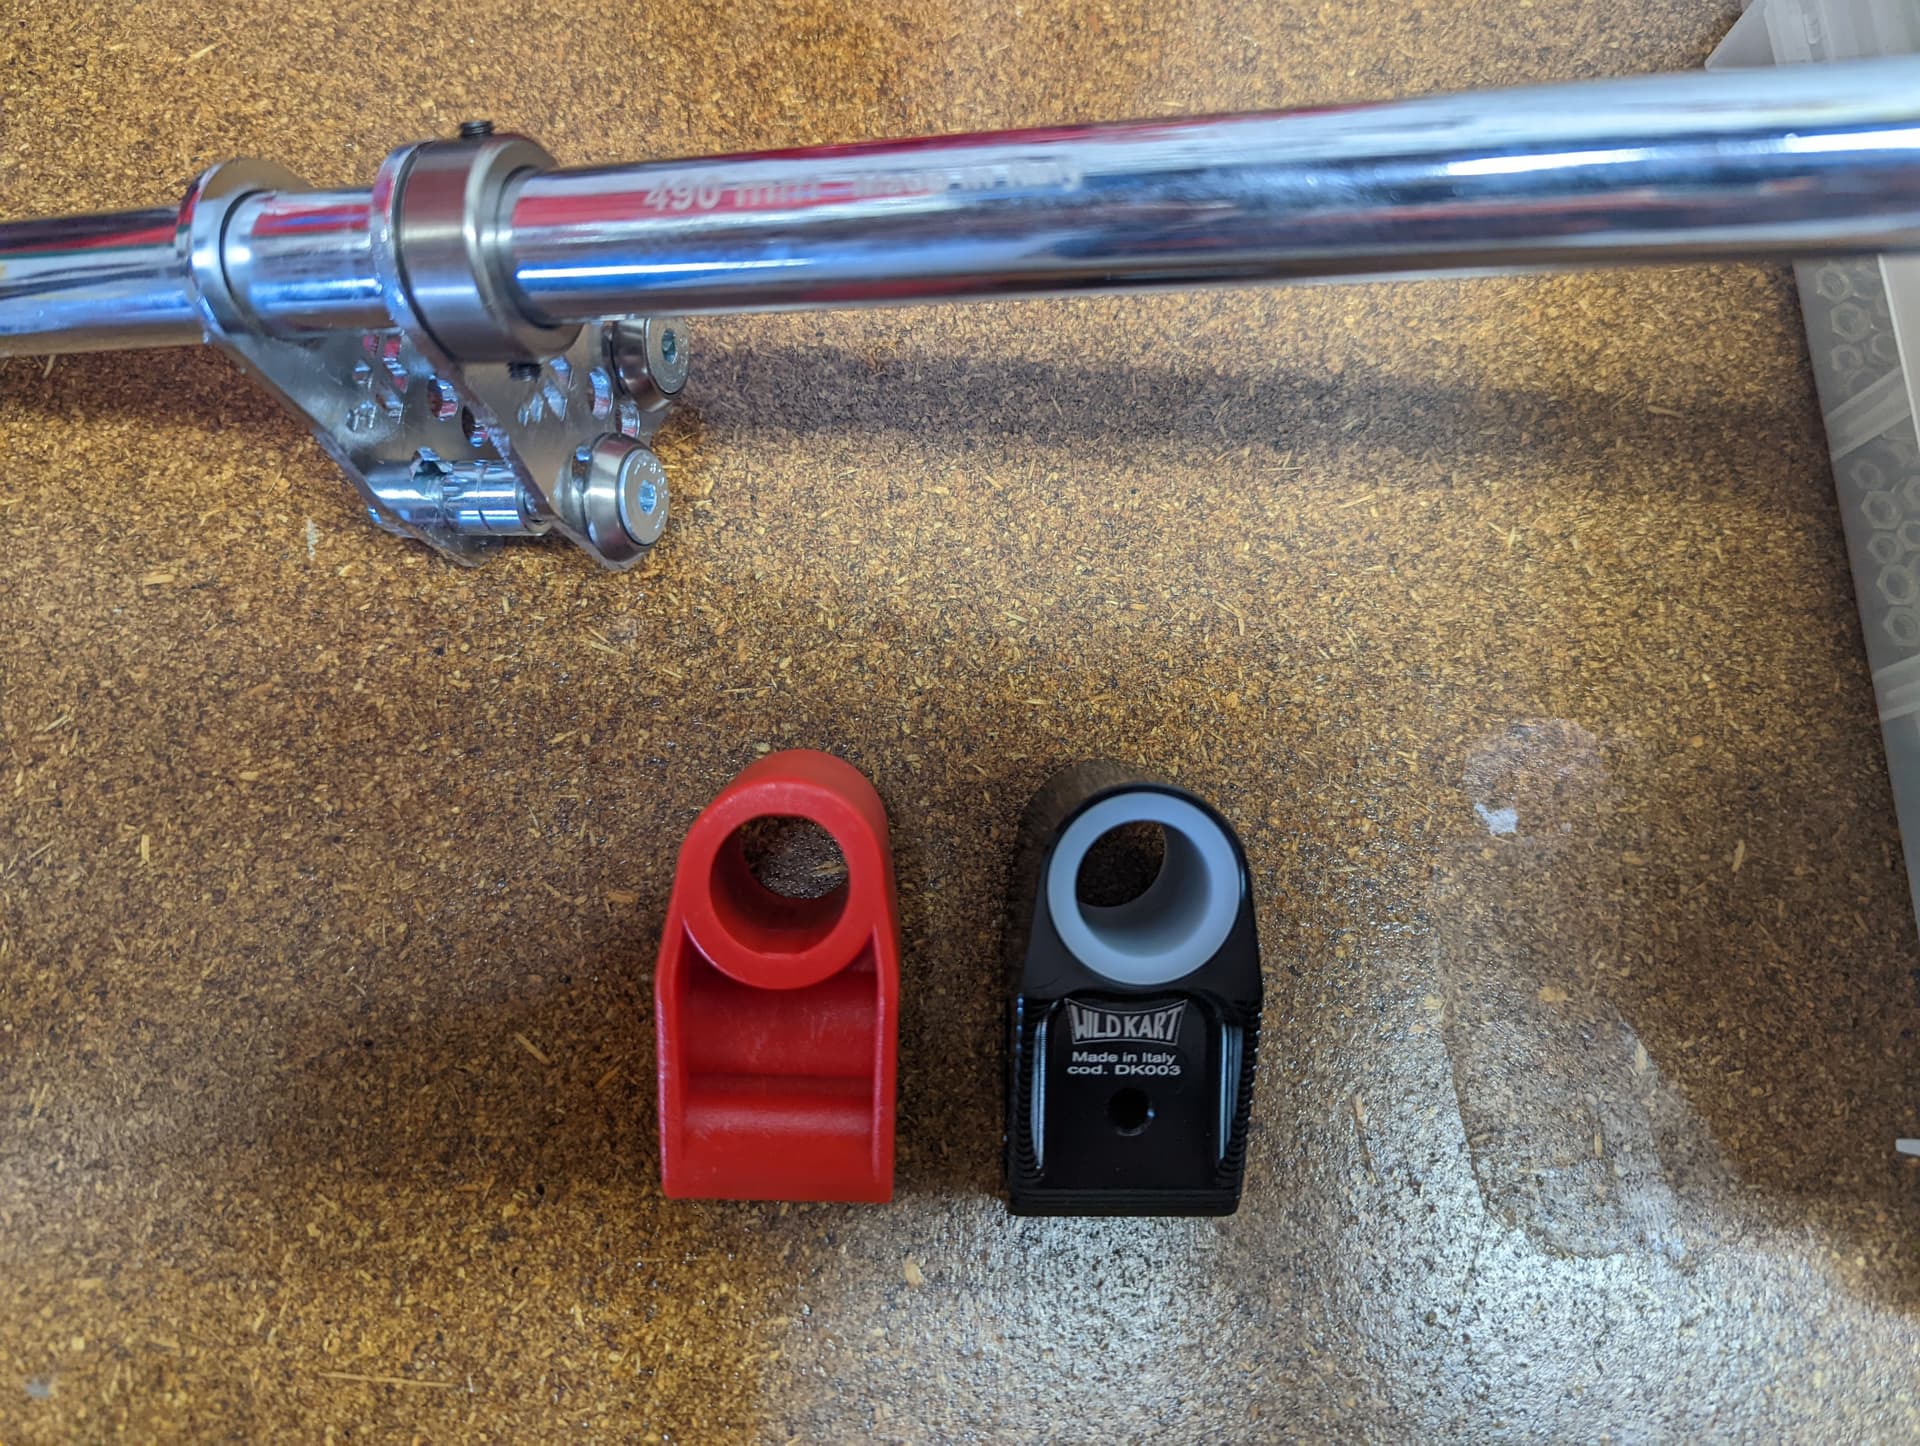
Back at it. As I’m waiting for a couple of parts to finish the axle, I moved to the front and setup the steering shaft. First off, I dumped the original plastic support in favor of a nicer unit from Wildkart. It’s billet aluminum with a teflon insert. Much more durable, doesn’t flex and rattle like the plastic one. It also has 3 holes for a finer adjustment and it’s not that expensive
2 Likes
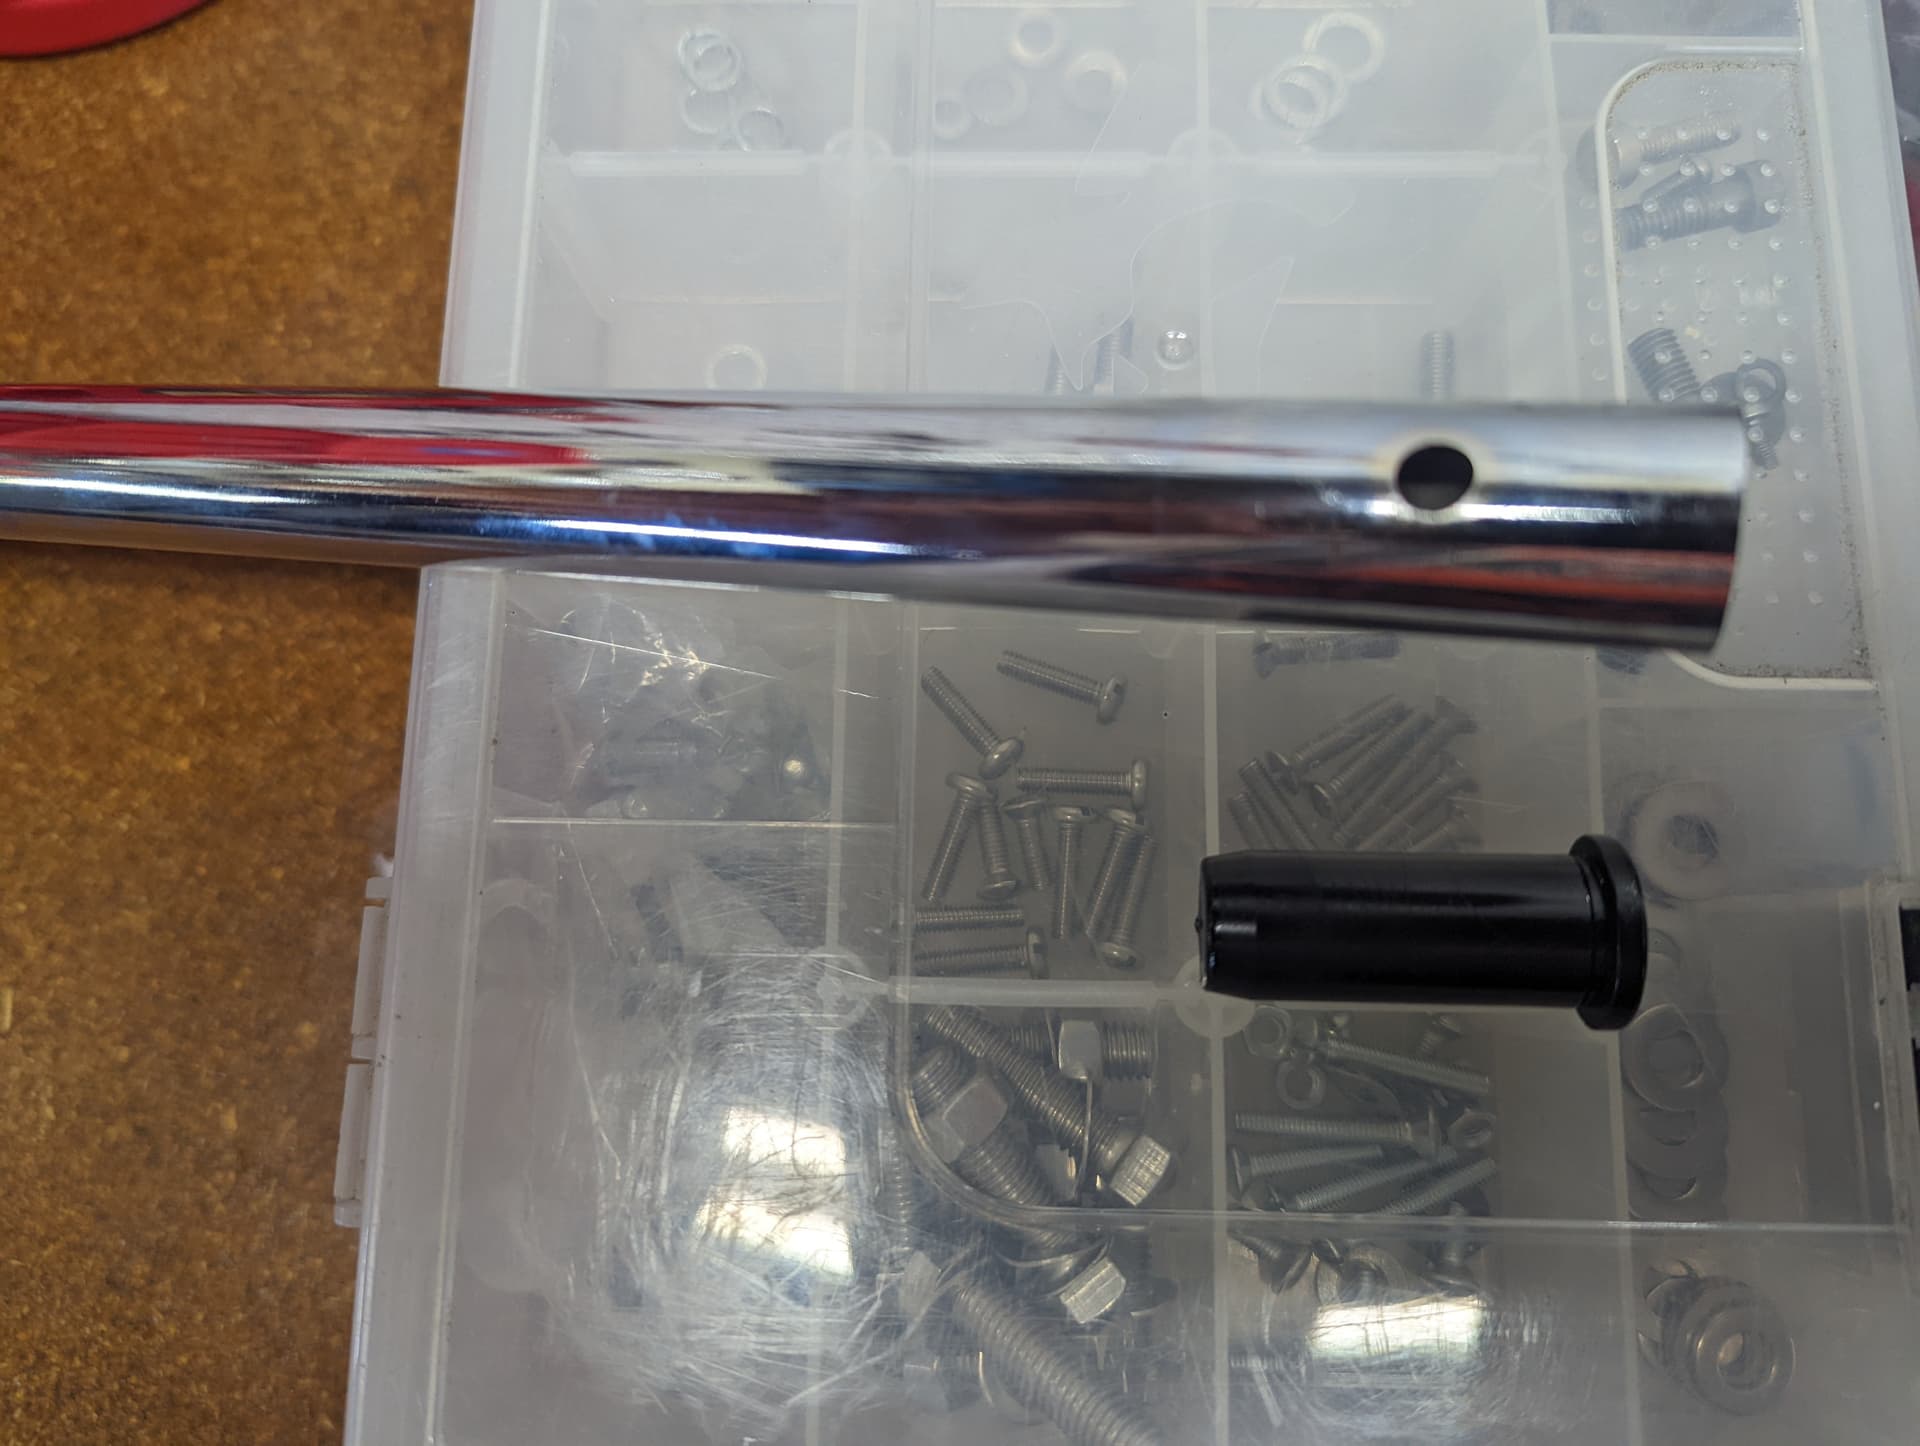
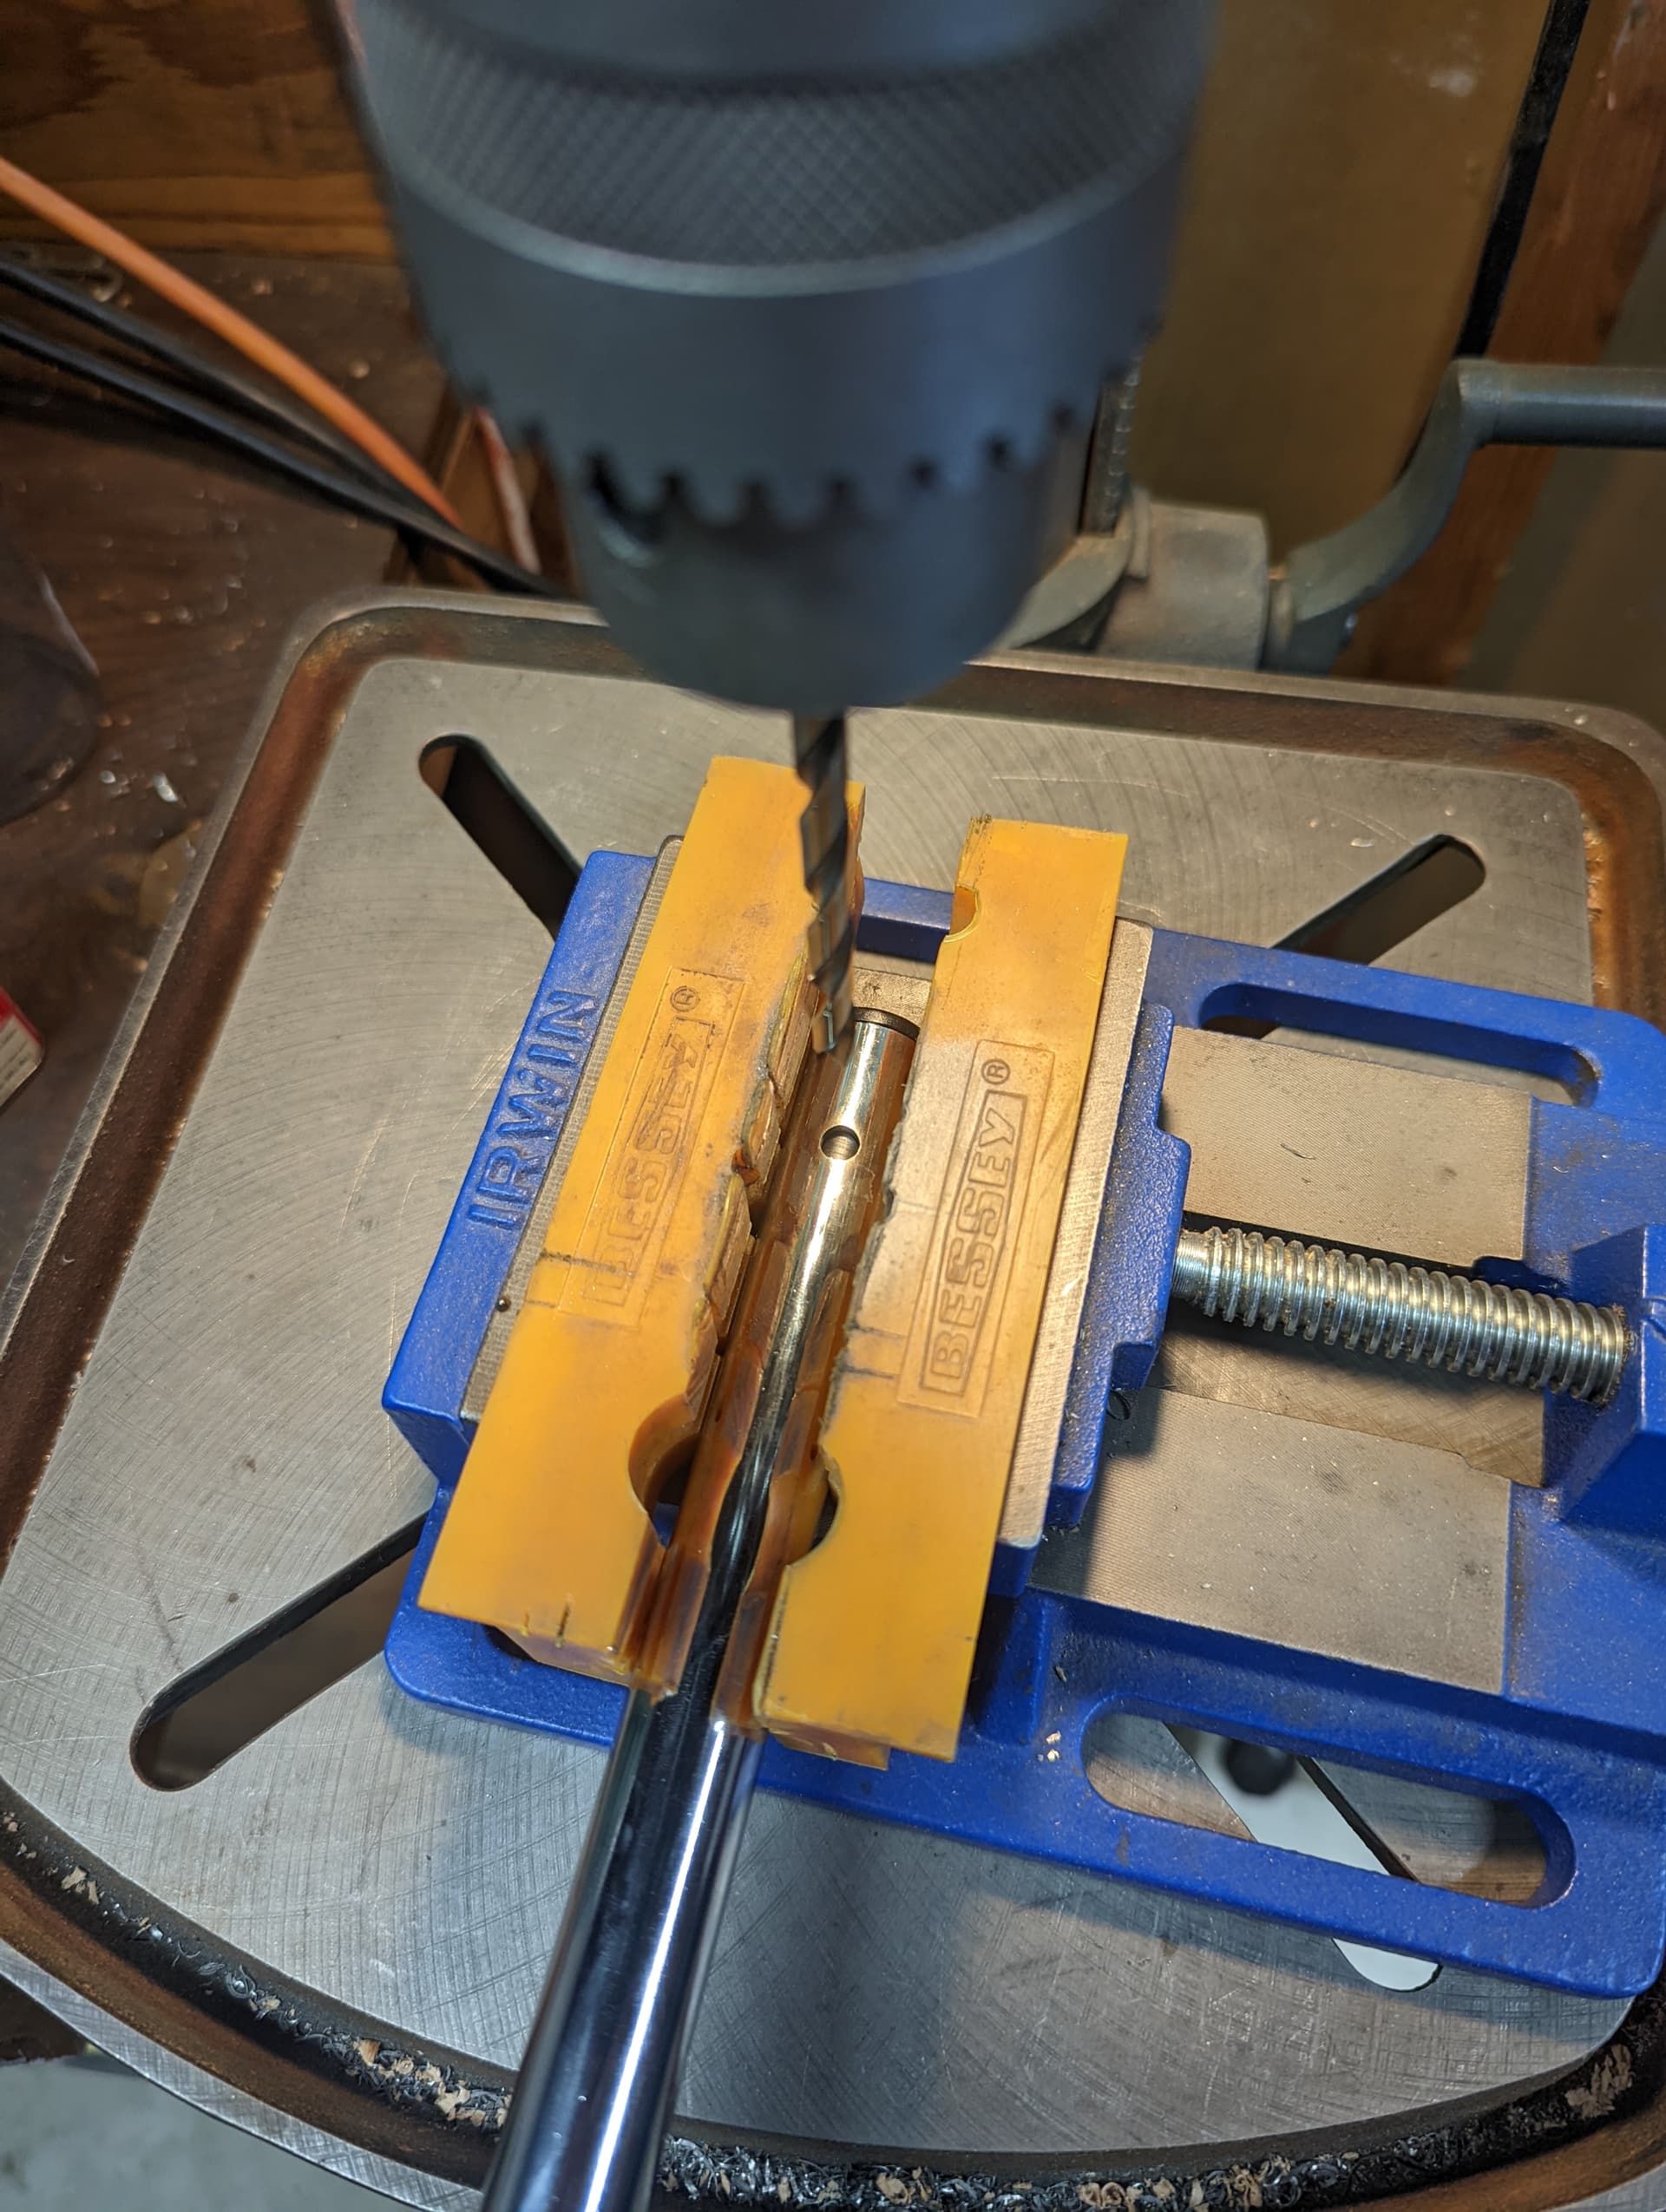
On the top end, it’s always a good idea to press in a safety insert. It makes the area much stiffer and prevents the shaft from getting squashed by the steering hub bolt. $3 investment, definitely worth it

5 Likes
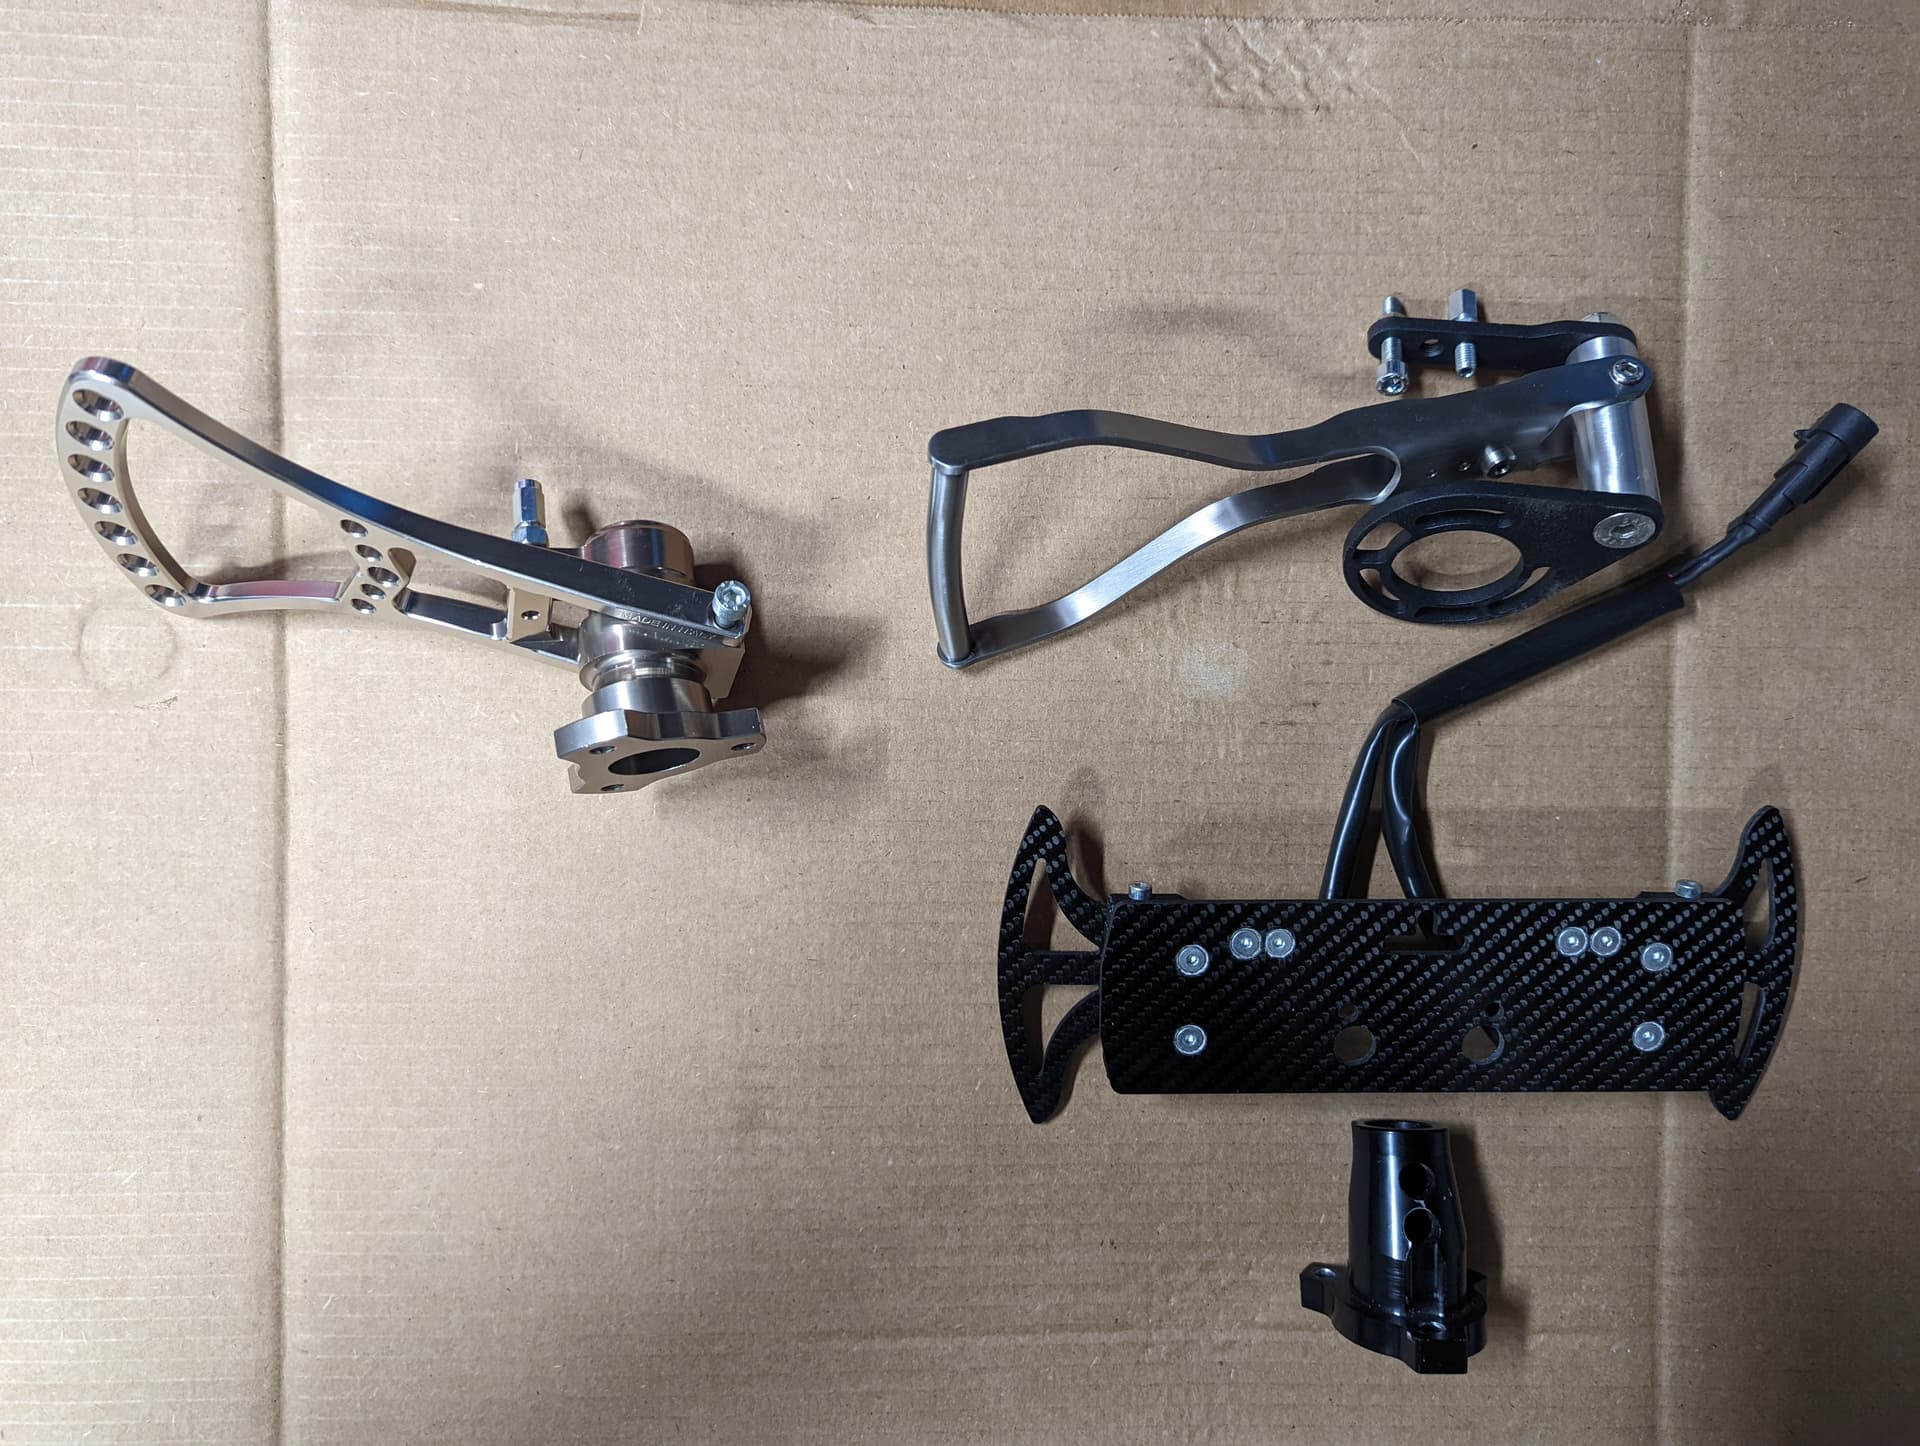
Last part for the day was the steering wheel setup.
IPK has one of the nicest hub/clutch lever pieces, very well made (left) but for this build I’m going a different route. Since I’m installing paddles, I’m going with a CRG-style hub and a Tecno kart clutch lever system, which is the only one I found to be working great in tight spaces and unusual angles.
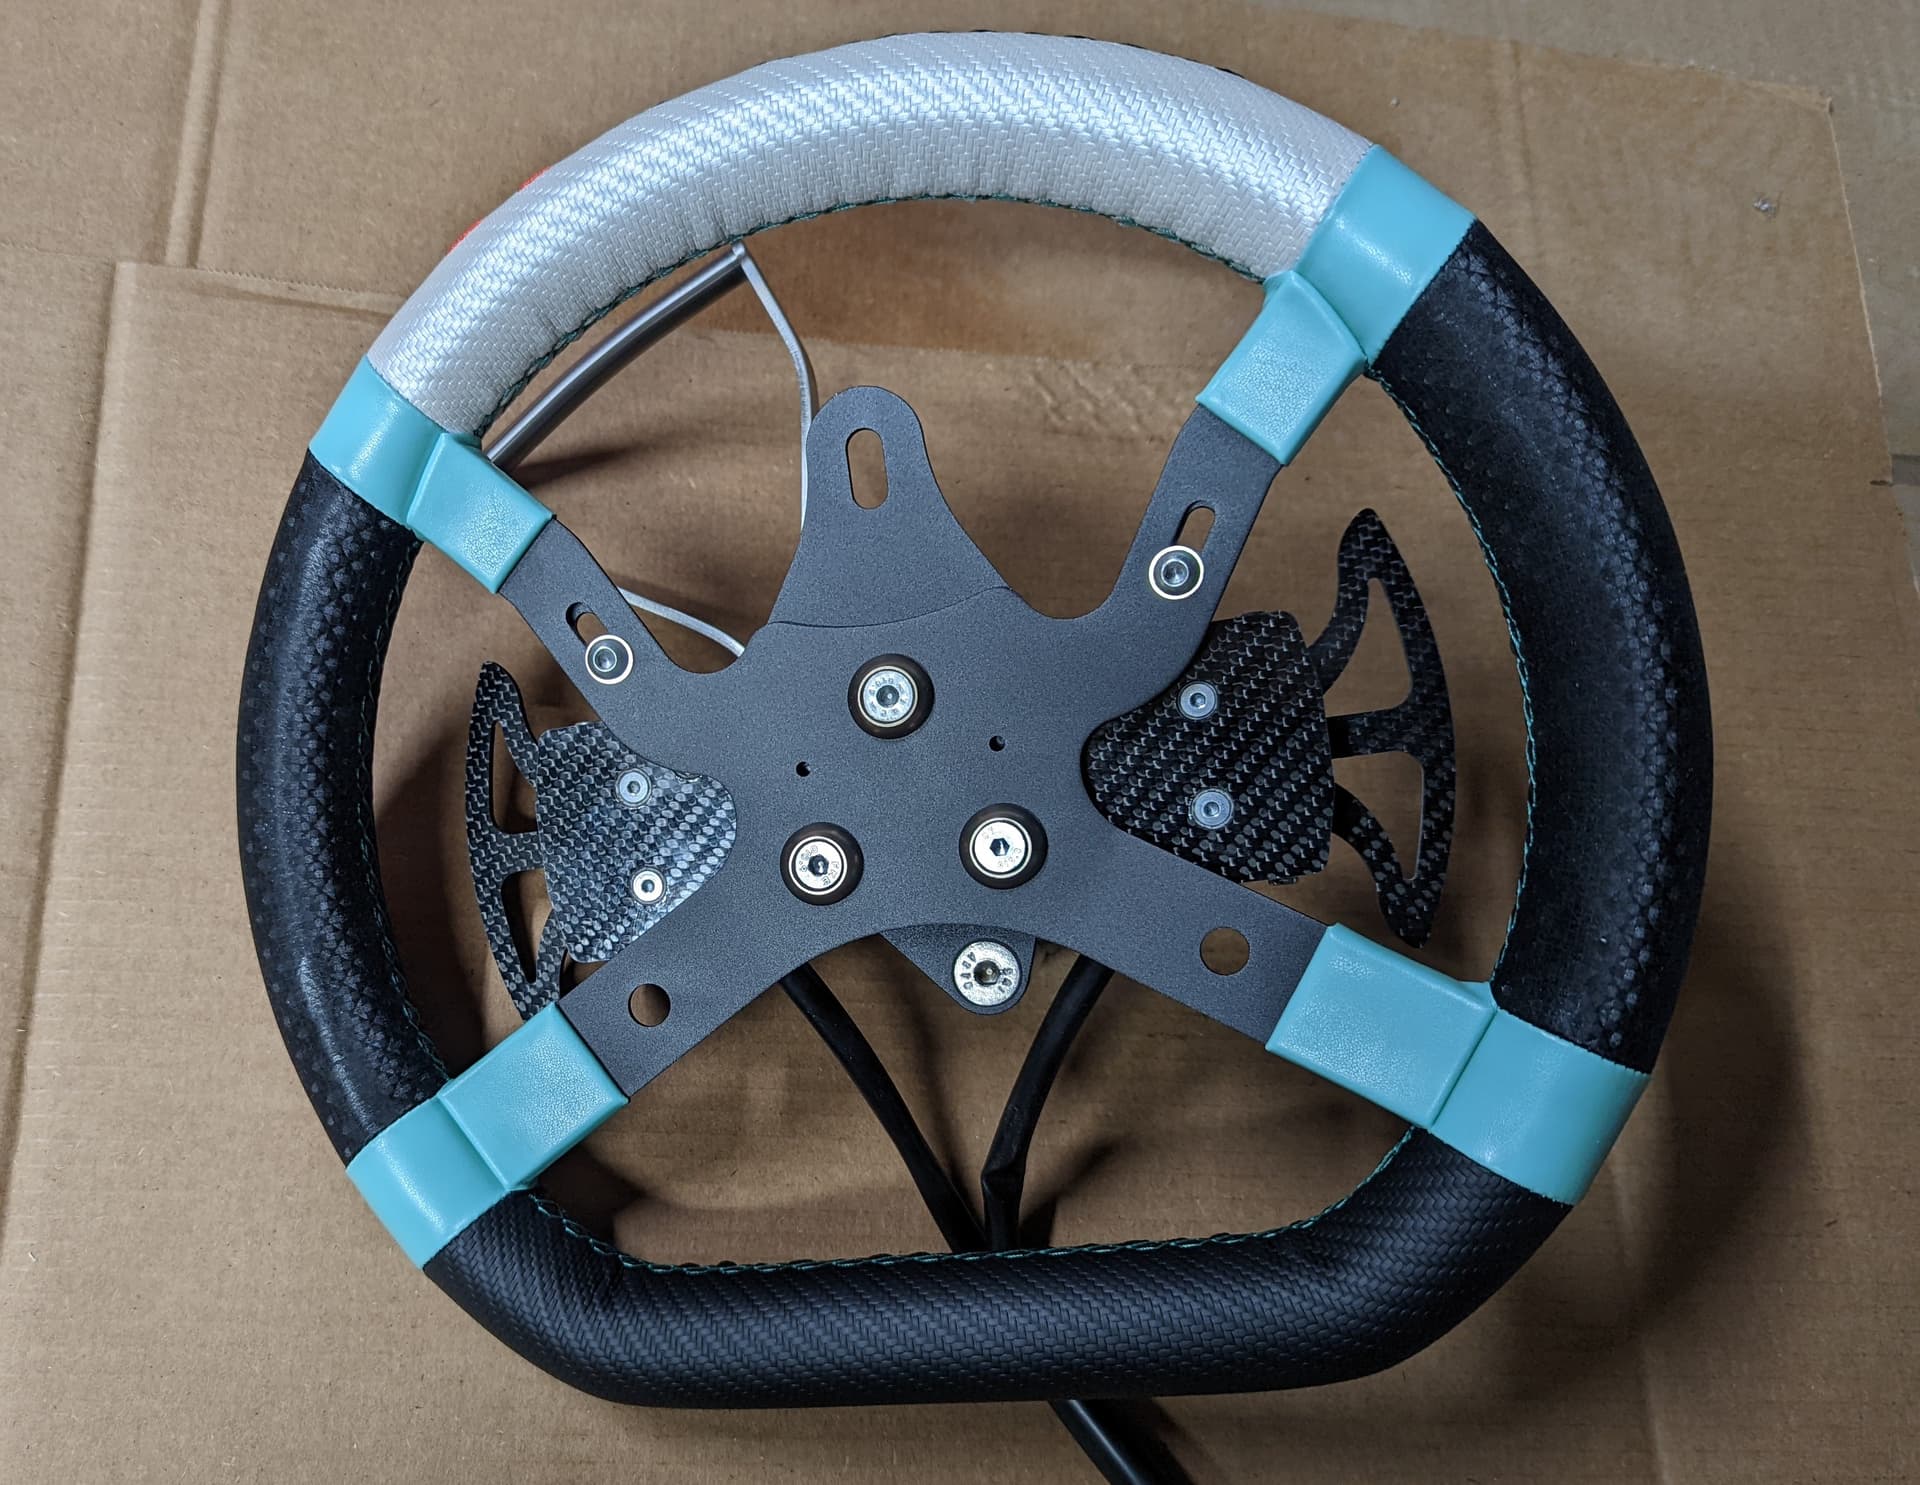
2 Likes
I’m going to have to litter this thread with pics of my KZ project when i finish it (Use the same paddle shift system, almost done).
New thread!! New thread!!
Glad to see more people coming onboard! I’ve used it extensively and it’s great, reliable and as fast as it claims to be. Helps a ton with fatigue and minimizing the impact of any mistake…it’s just a great system!
Instead of using an aluminum shift rod, I’m using 4130 steel, much stronger.
I’ve got a TM KZ10-ES (electric start) motor & am powering the SS + Mychron + electric radiator curtain (your hands never have to leave the wheel) via onboard Li+ battery that powers the starter, & am routing power to them via fuse block. Also added ignition cut & master power switches.