NOS switch too or nah?
I know the guy who invented it and the whole background of what happened during world finals and why it got scrapped from official races. Genius idea, data was very clear on the advantage. Is it the automated one that self-regulates based on temperature or is it manually operated?
As for the other parts, I’d keep a separate battery for the shifter and run the rest on another, the shifter system is pretty hard on battery consumption and you can feel it getting lazier as the battery drains (I’m running the spec race battery, I believe it’s 6.5A 4S 120C Hi-voltage Graphene pack).
Manual curtain. I hadn’t heard about an automated version. That’s pretty slick.
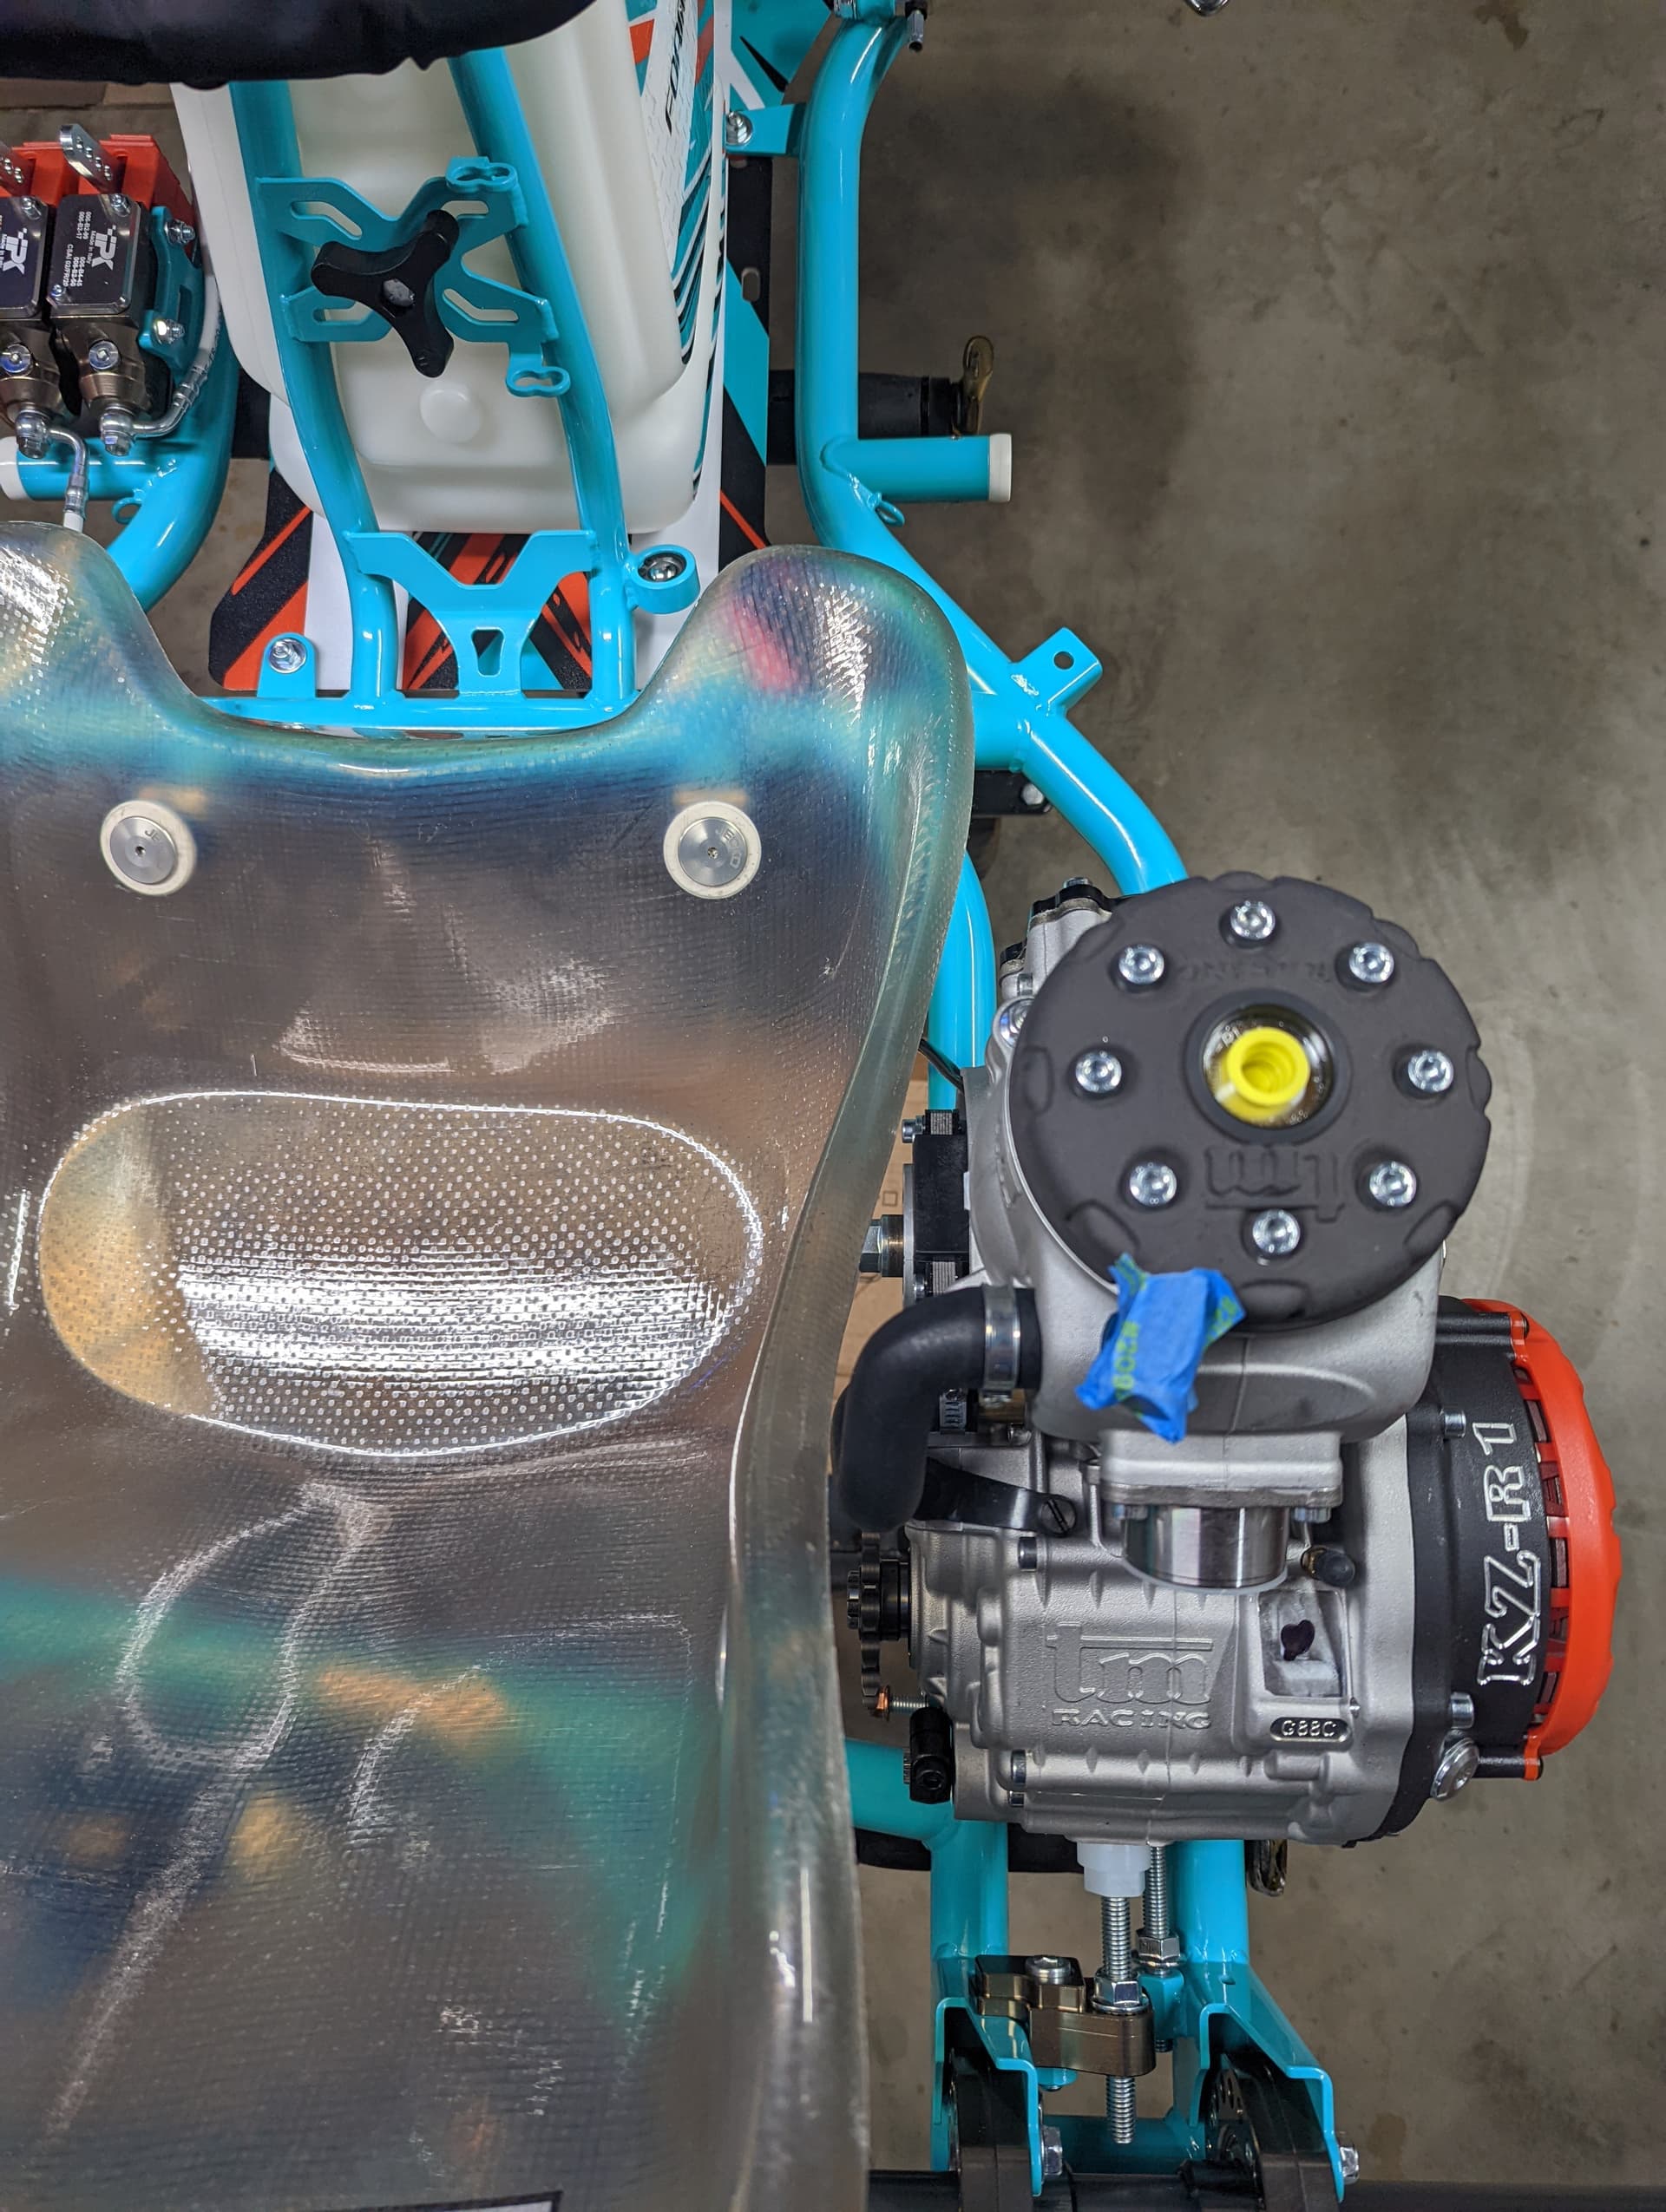
I’m going to test the battery to see how it fares. It’s a Li+ with 12Ah theoretical/6.1 Ah actual rating. Ultimately, it comes down to capacity. Also worth noting that this particular KZ motor has a battery recharging circuit.
This should be the final painful step…seat install.
Once you get into larger sizes (in my case XL), compromises need to be made. In my case it’s not too bad as I need the larger size due to hip width, but I’m still on the heavy&tall side at 6’2"
This is how a T11T XL fits out of the box, you can clearly see it needs major adjustments to the seat stays.
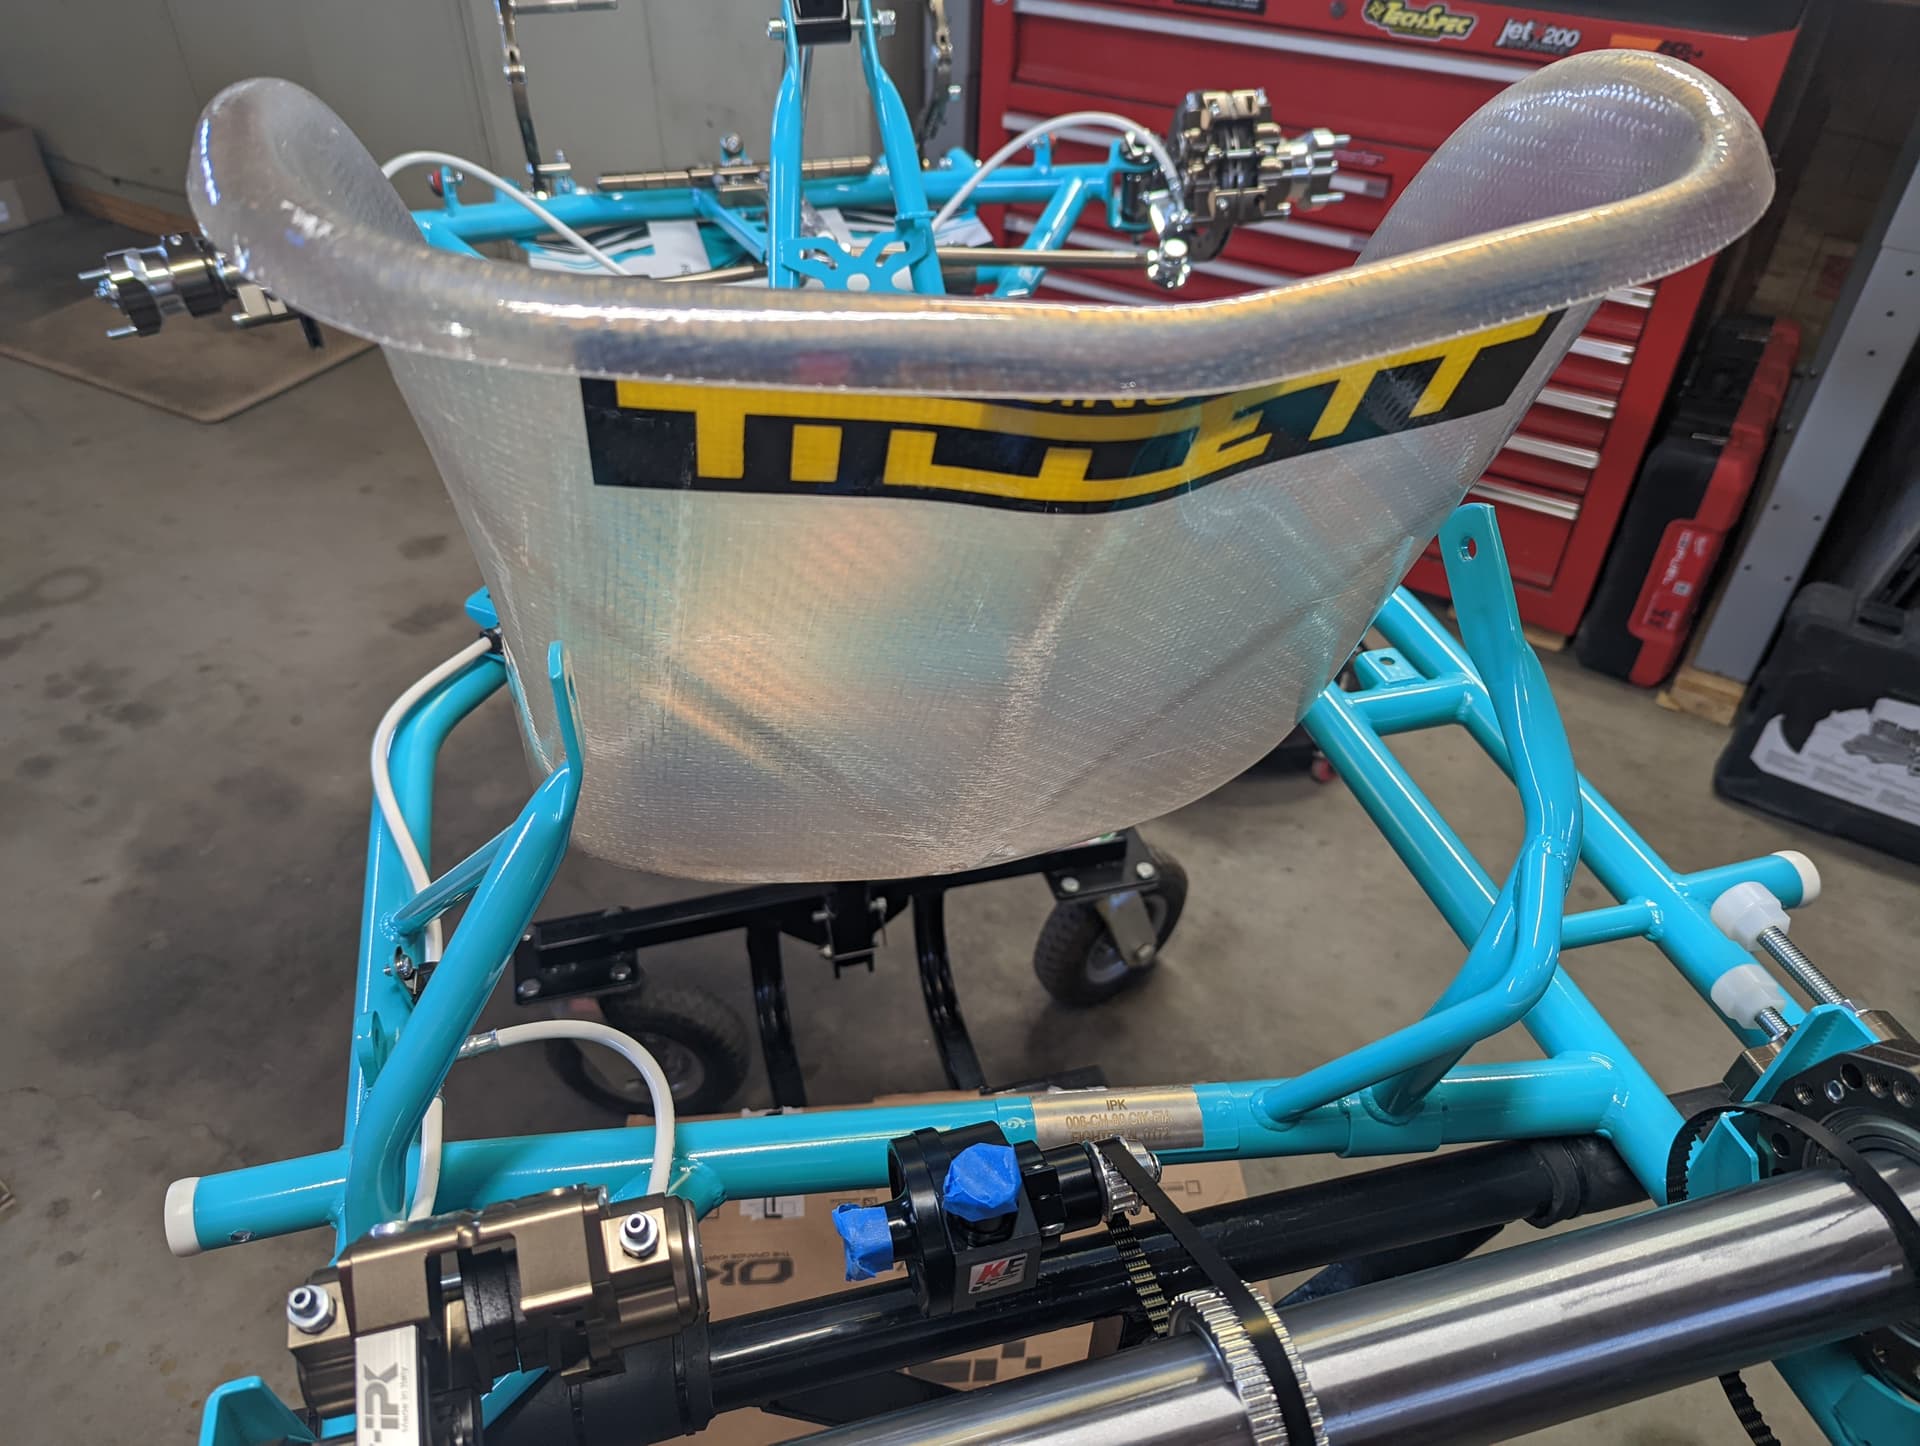
Note: a T9.5t, same size, is narrower at the stays and helps a lot in positioning. I don’t like the lean angle of that seat, so it was not an option for me this time
1 Like
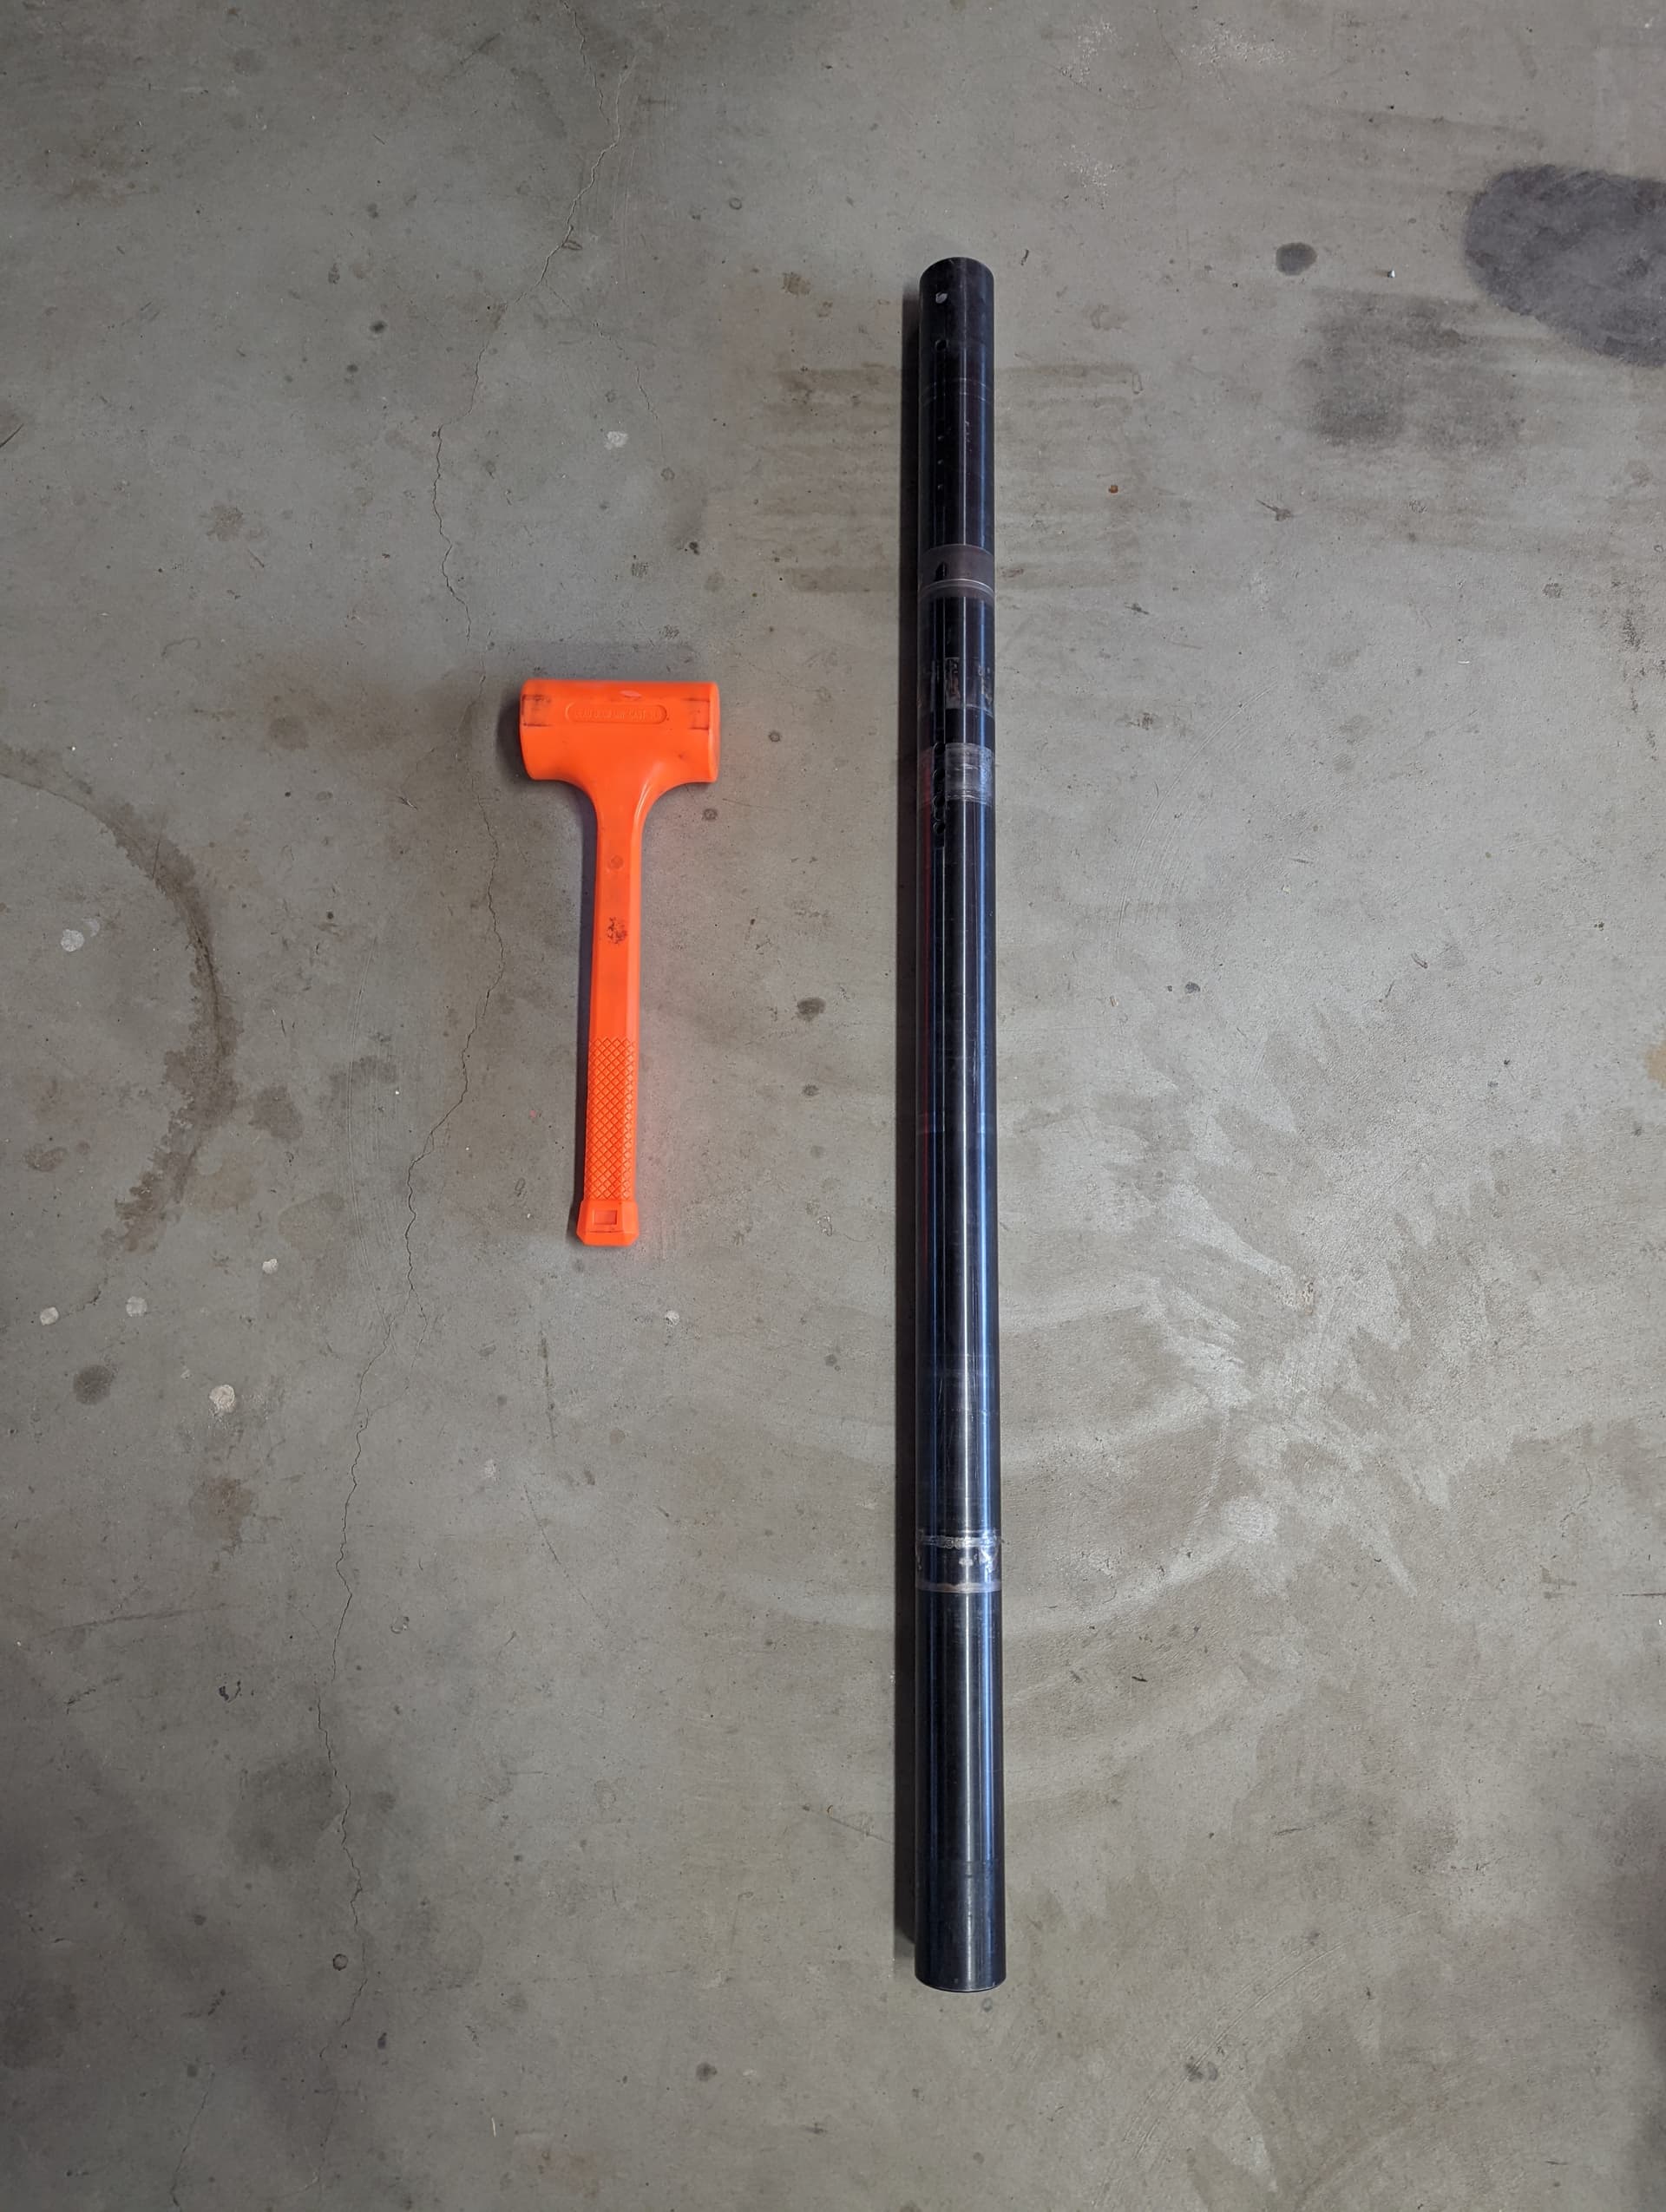
You need to use the axle for the left stay and hammer for the right. Many people say you should bend the left one only…all good until you get to Large/XL and up, at that point you can’t do that anymore, or you’ll be seating all the way to the left with a silly offset angle. So a good compromise is to hammer the right seat stay out by 0.5 to 0.75 inch, that’s all you usually get without risking breakage. Depends on the chassis though, this particular one had some give so I could bend it out safely. Then I got the rest of the clearance by bending the left stay. The seat offset (left side closer to the brake vs right side further away from the gas) increases from the typical 5mm to 10mm and I believe that’s a workable compromise. Position-wise, I’ve added 20mm to the suggested IPK measurement (from 106 to 108mm C to seat top), which got me to about 13.5mm from the axle (Tillet’s suggestion for KZ). In general, you don’t really want to move the seat too far away from the recommended position, regardless of your weight and height. Given my height/weight and dislike for curbs, I will go about 3mm below the bottom rails which is still pretty safe
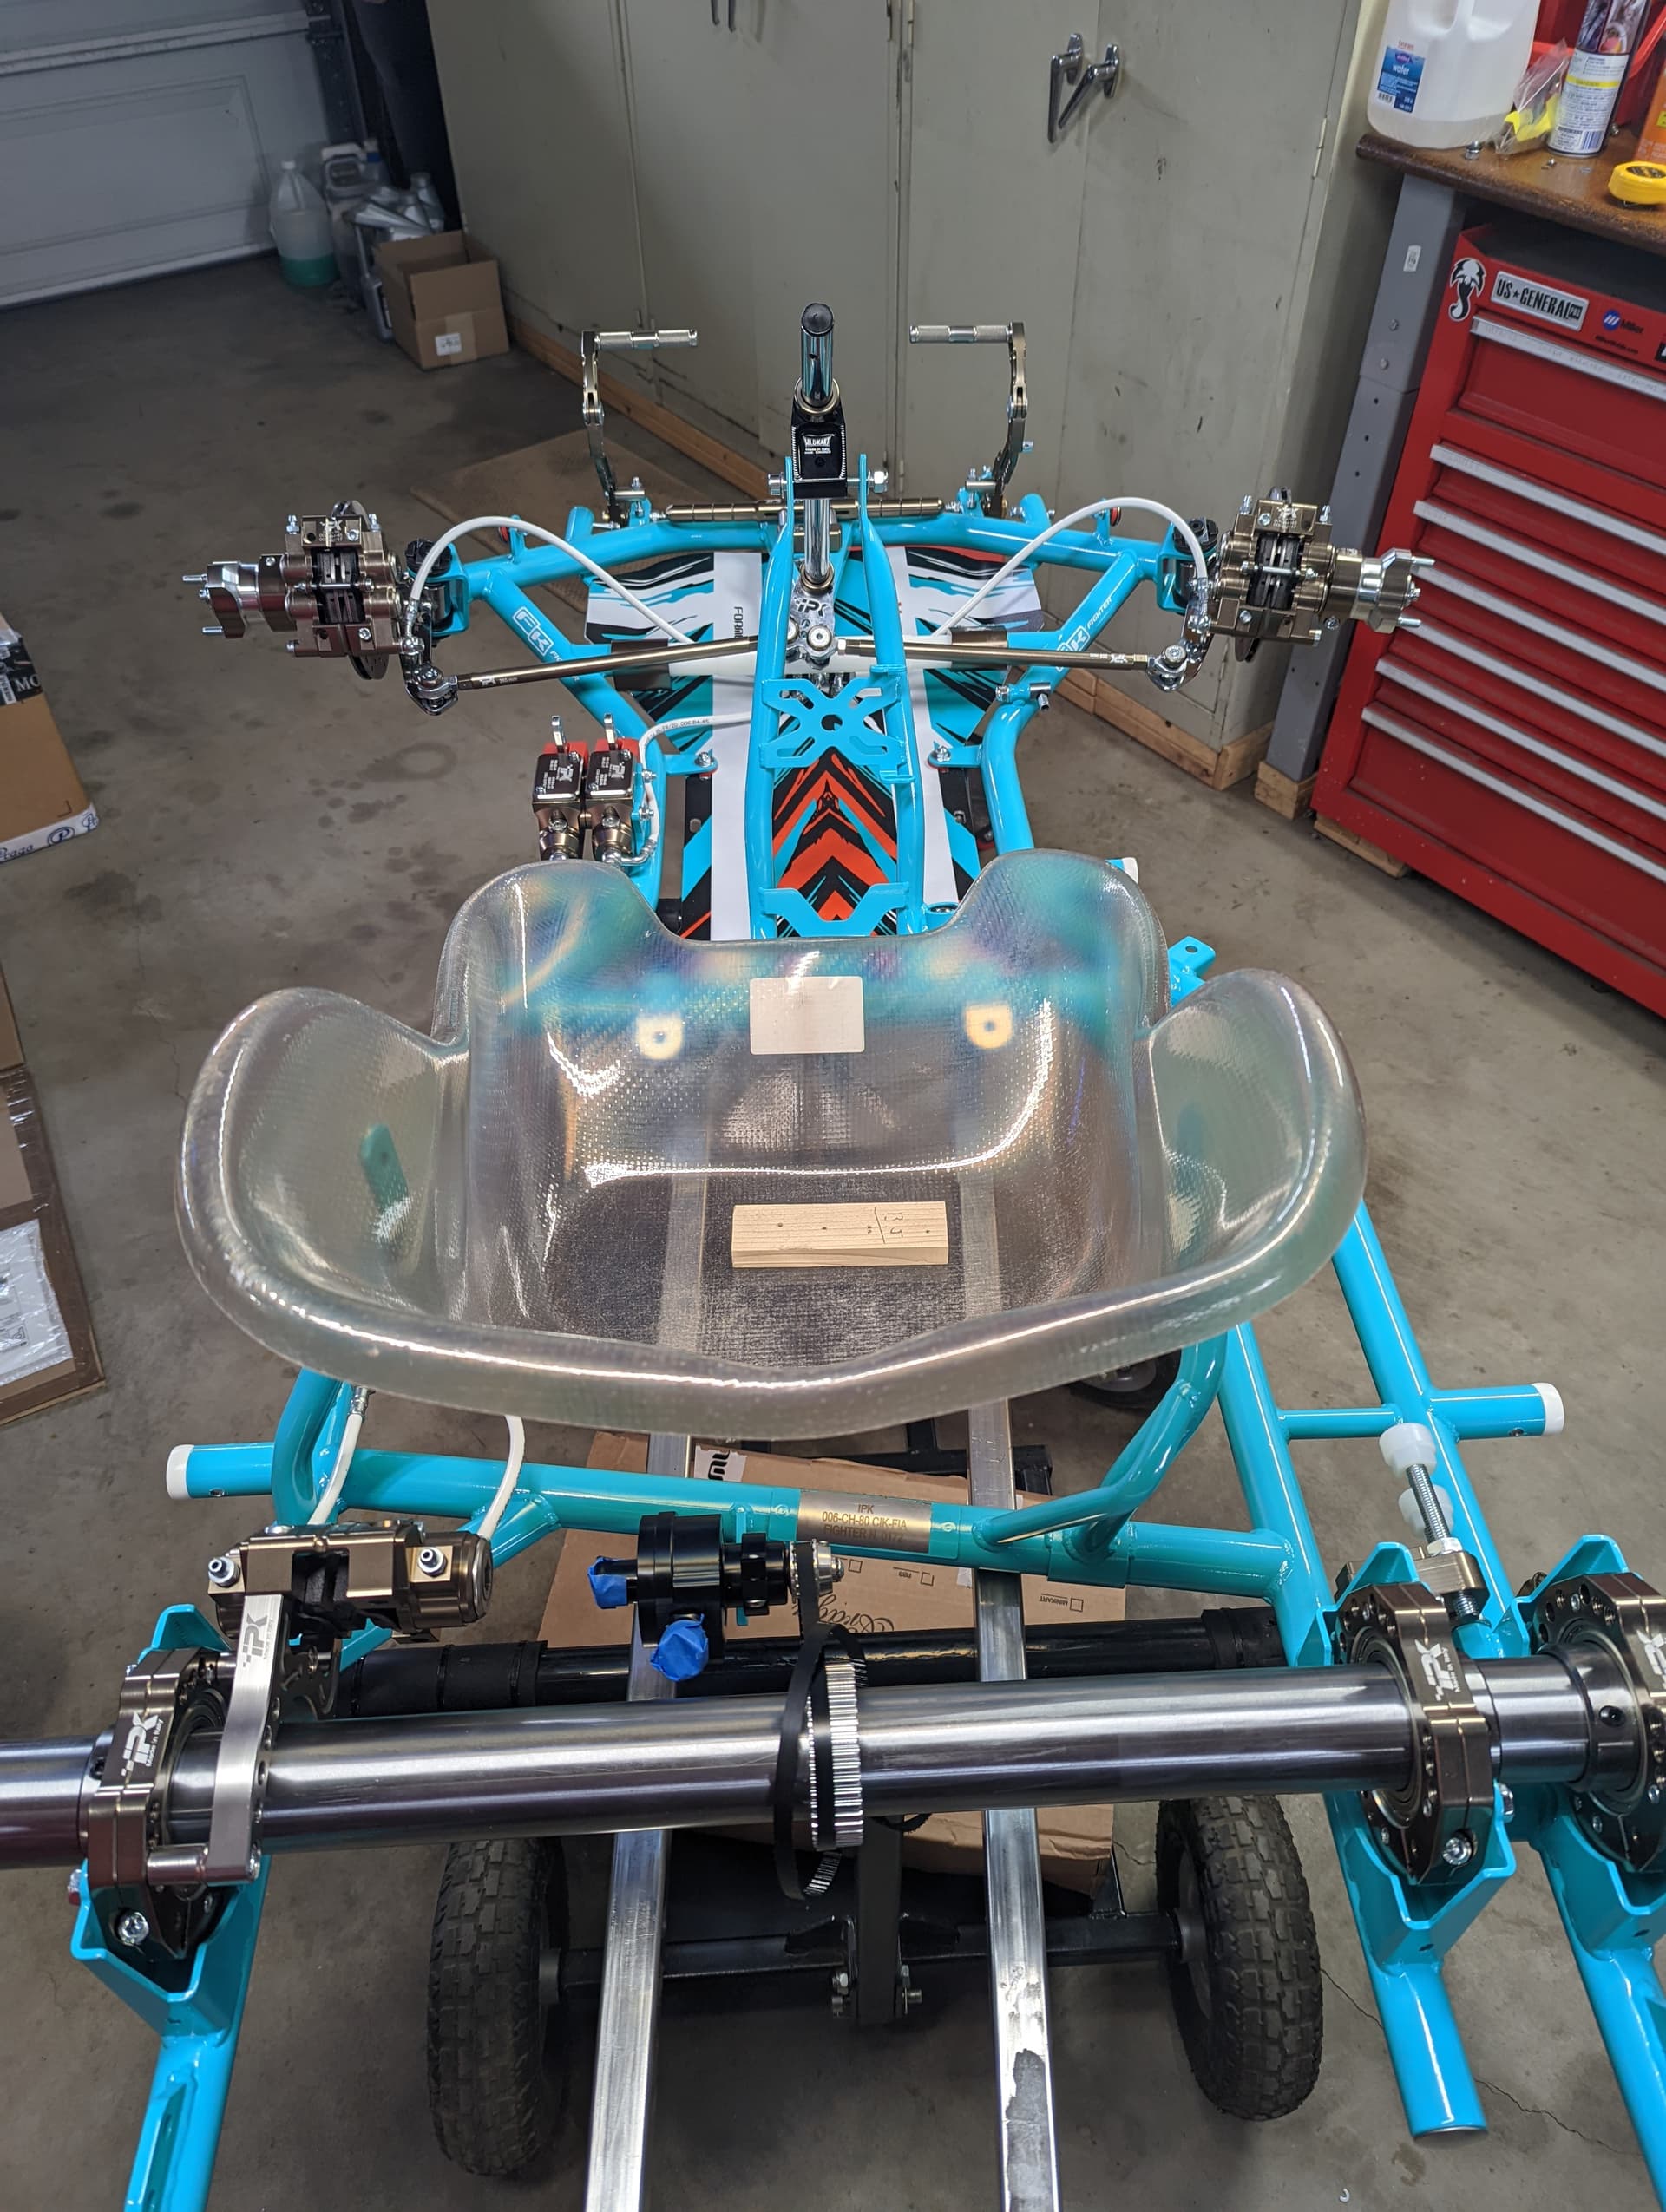
Now it looks more like a kart…
Notice the clearance on the right, that’s with a 1 inch widening of the seat support. Even with that an XL seat has quite of an offset, so working on the left side only doesn’t really work.
Next up will be 4 sections
Cooling system
Some tips on useful (and cheap) accessories
Paddle shifter vs lever - Weight comparison and setup
4 Likes
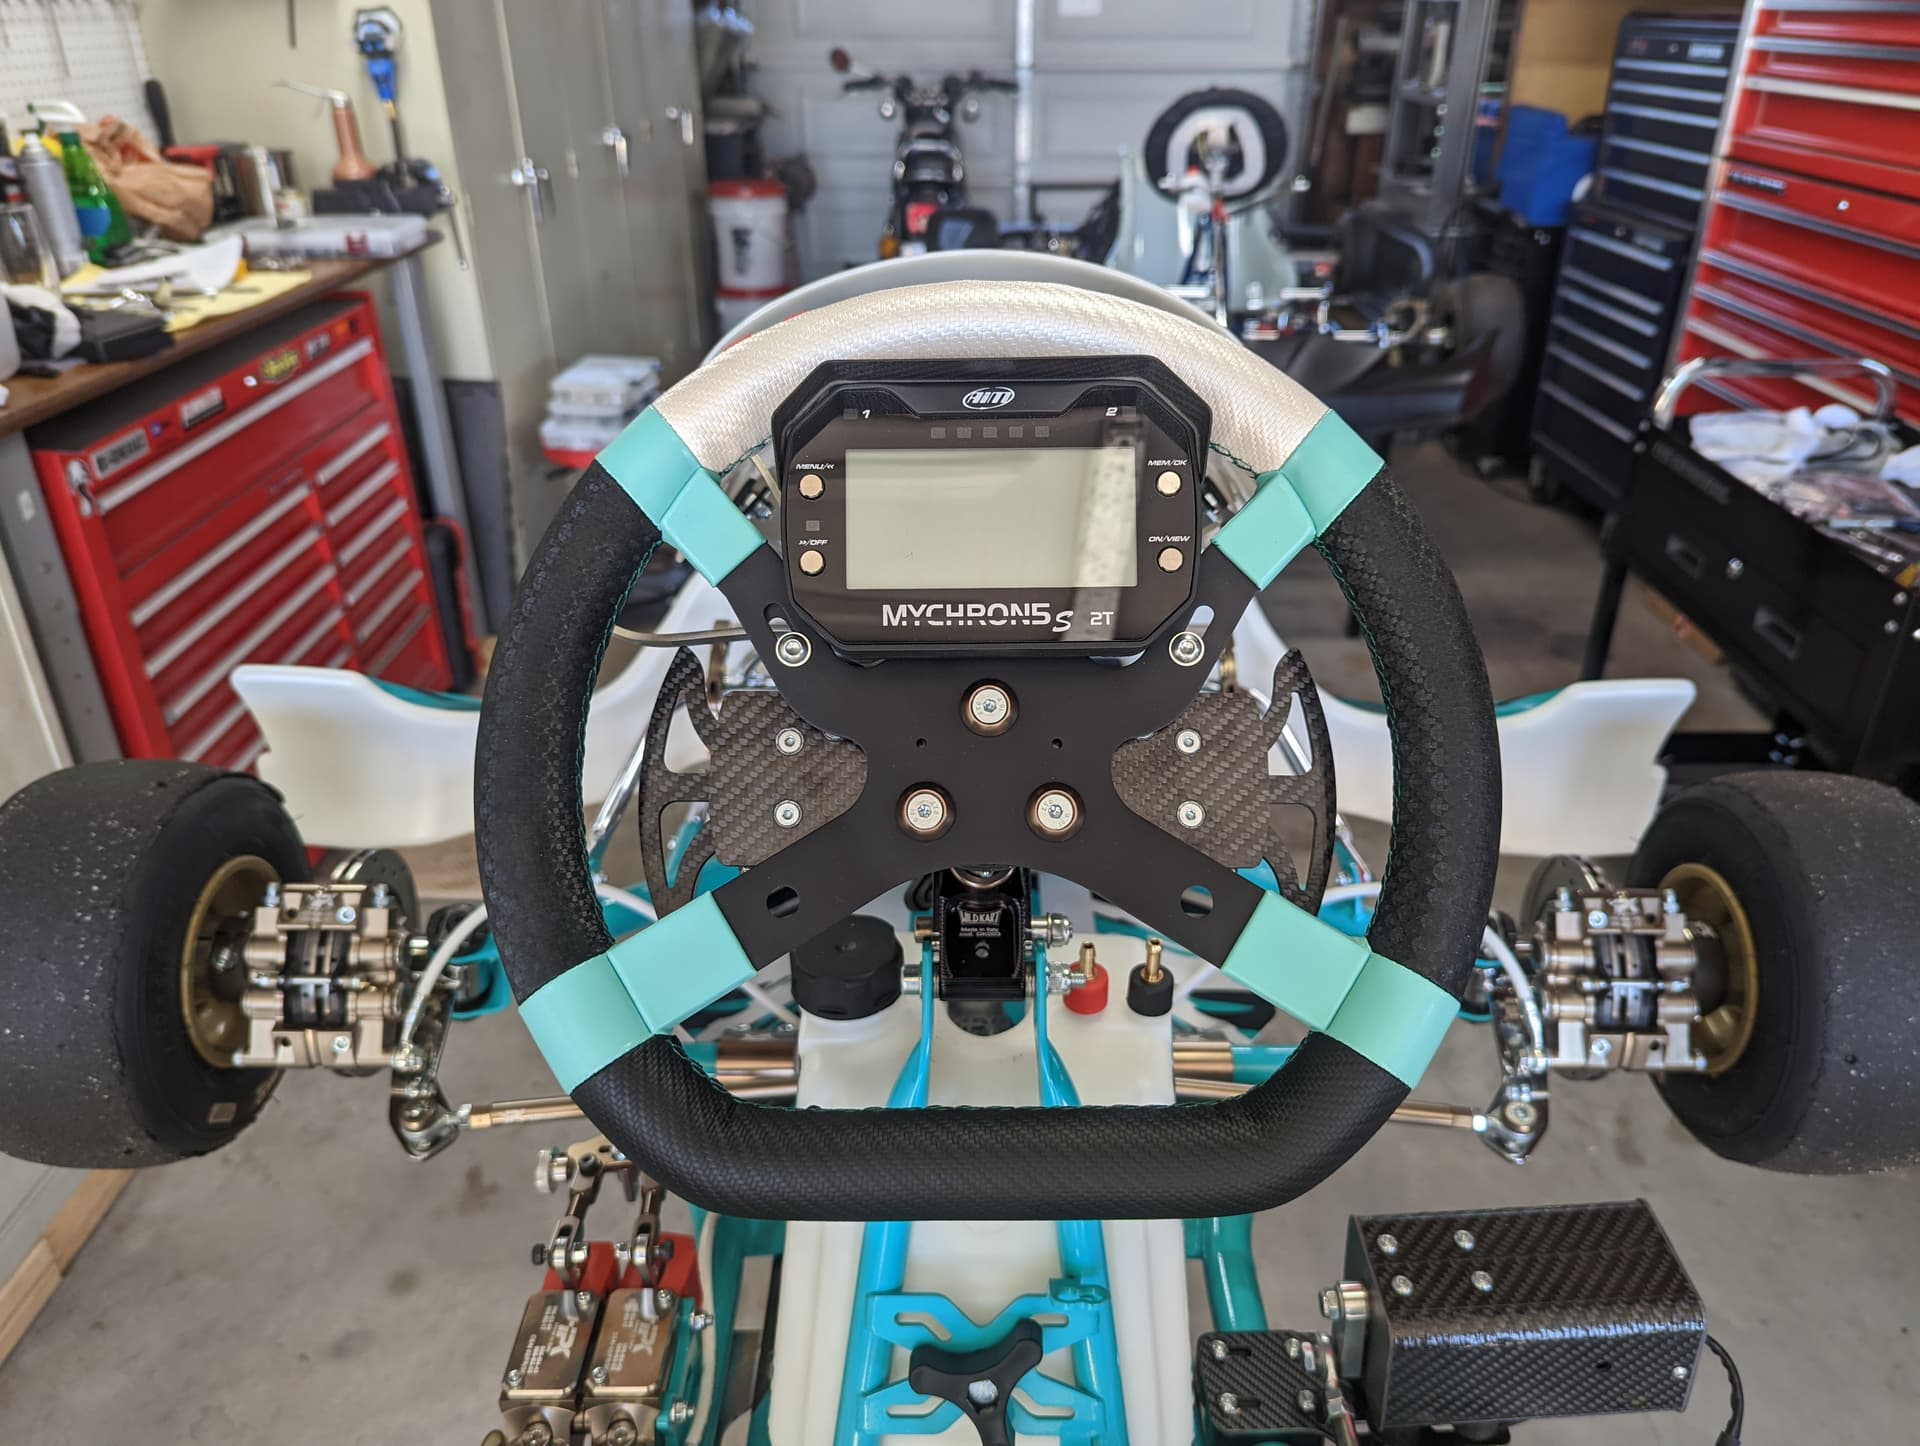
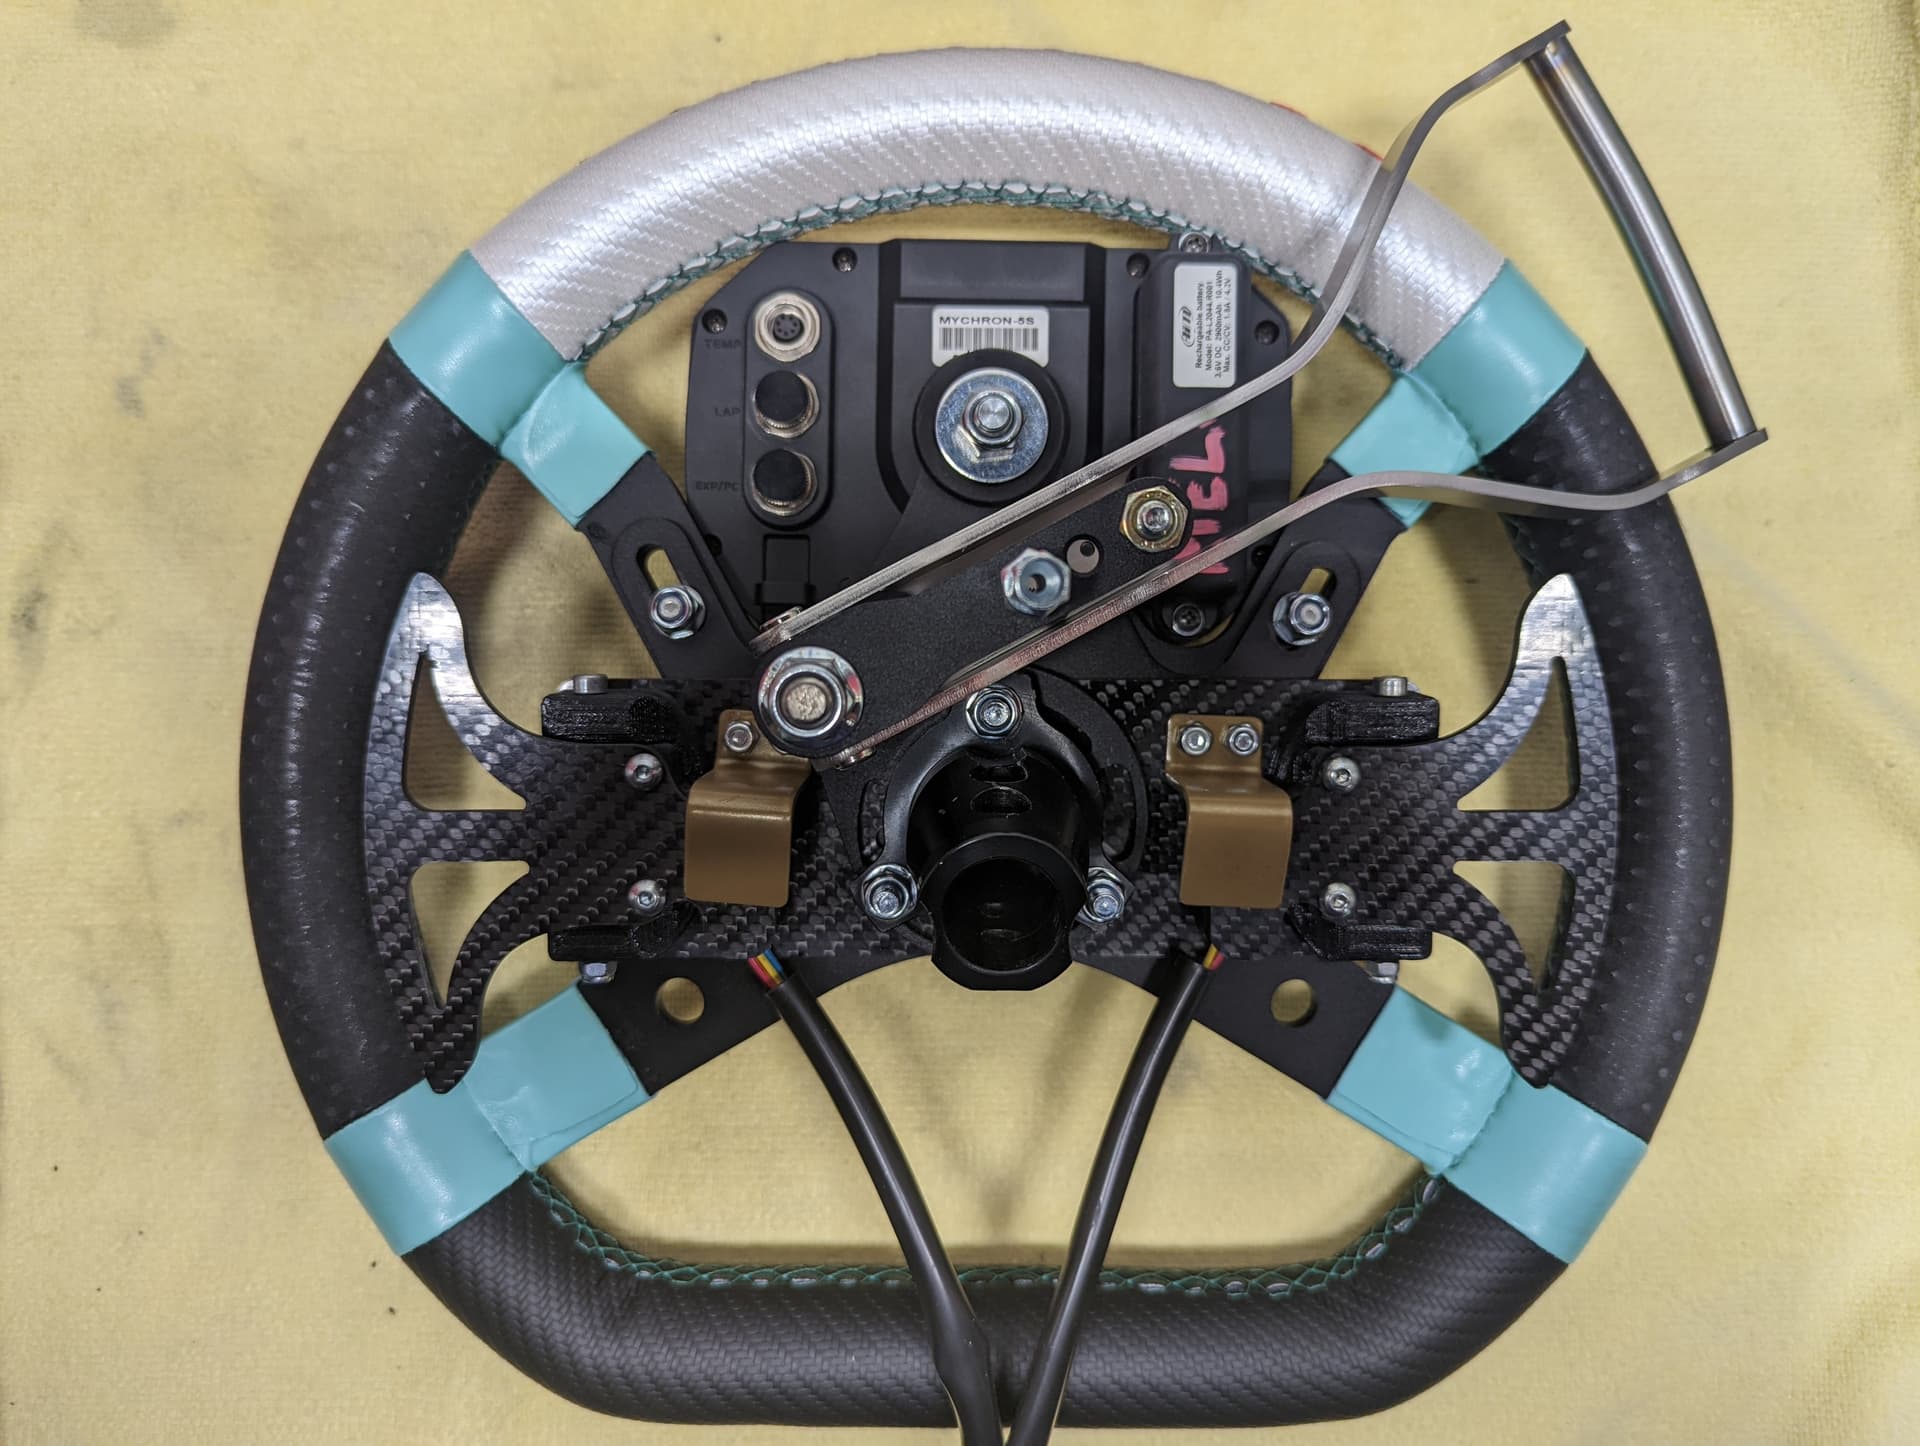
Here is the paddle system setup and a list of things to watch out for.
Model/type: my suggestion, based on testing and first hand experience, it that the only system that works is TheLab. Magnetic based system are too finicky and other motor-based solutions tend to break really fast (gears). The only downside to this model is that I wish they provided multiple paddle shapes to adapt to each driver’s preferences.
Things to watch out for during installation:
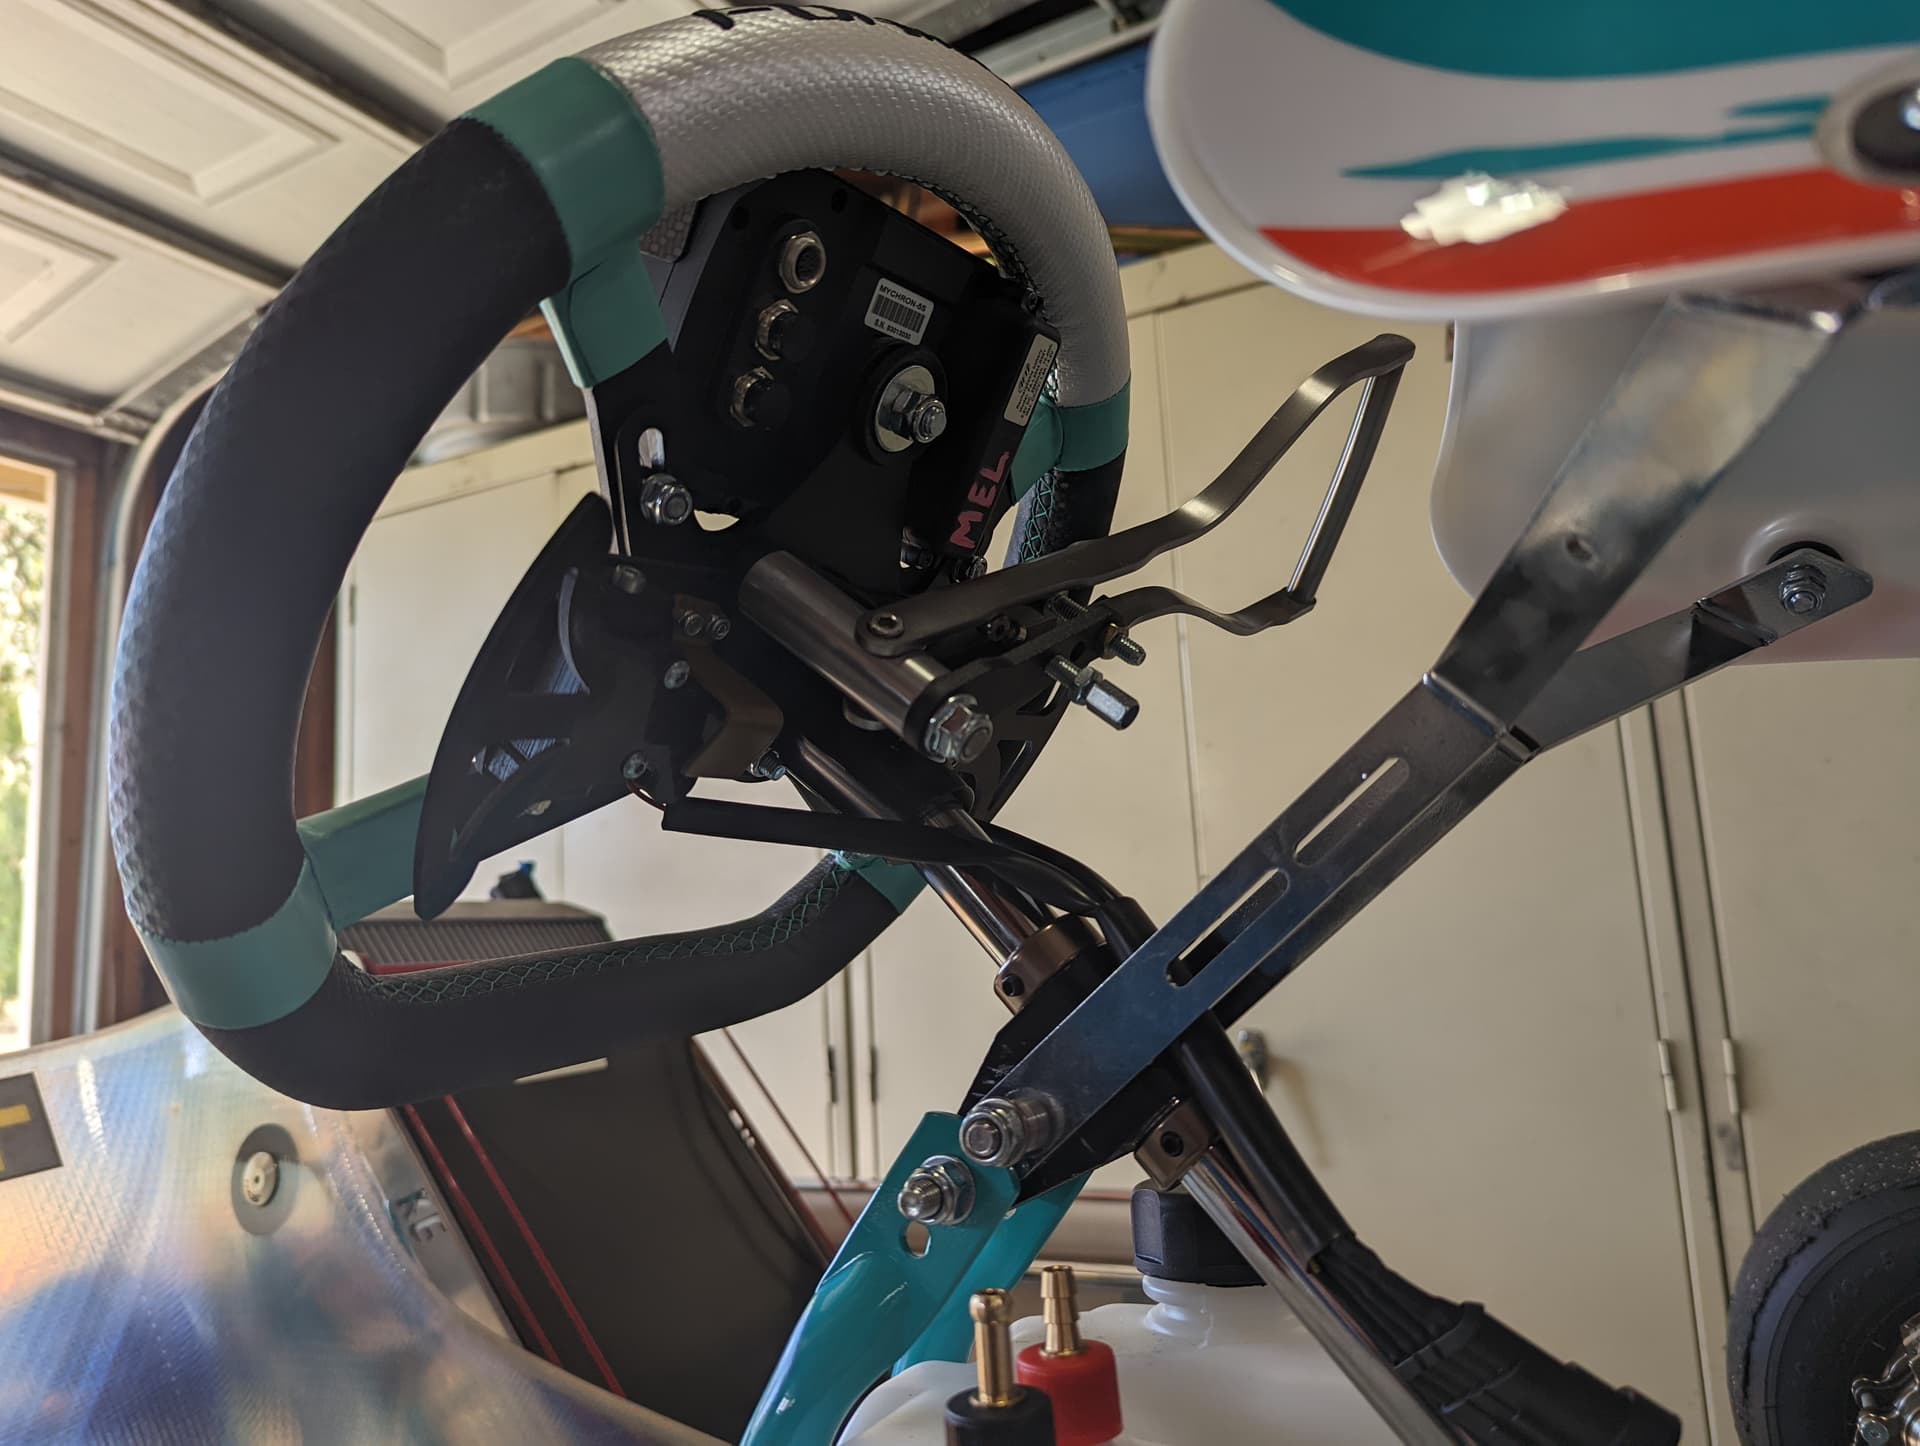
-Clutch lever: find the one that is compatible with your steering hub and steering wheel
-New 508 fairing: may interfere with clutch as you need to move the lever up. My solution was to use the special column support from Wildkart, use the lower hole for frame and attach fairing brackets separately using upper hole. This moves the fairing up and away from steering wheel. Another solution would be a longer steering hub, not the best idea if you are tall with long arms
-Set the shifter motor in the correct position along the side frame rail: if you are running the engine all the way back on the stops, place the shifter motor all the way back on the frame rail. So when you change engine position to adjust for gearing/chain tension, instead of messing with rod length, you simply slide the shifter motor unit forward
-Be careful with frame savers. They usually end up being directly below the actuating motor, so install the chassis savers first, then figure out how to install the shifter motor
1 Like
I did the opposite & mounted the motor & actuator as far apart as possible due to the Righetti “Active” airbox requiring a fair amount of space & rely on the rod length adjustment when sliding the motor forward to set chain tension.
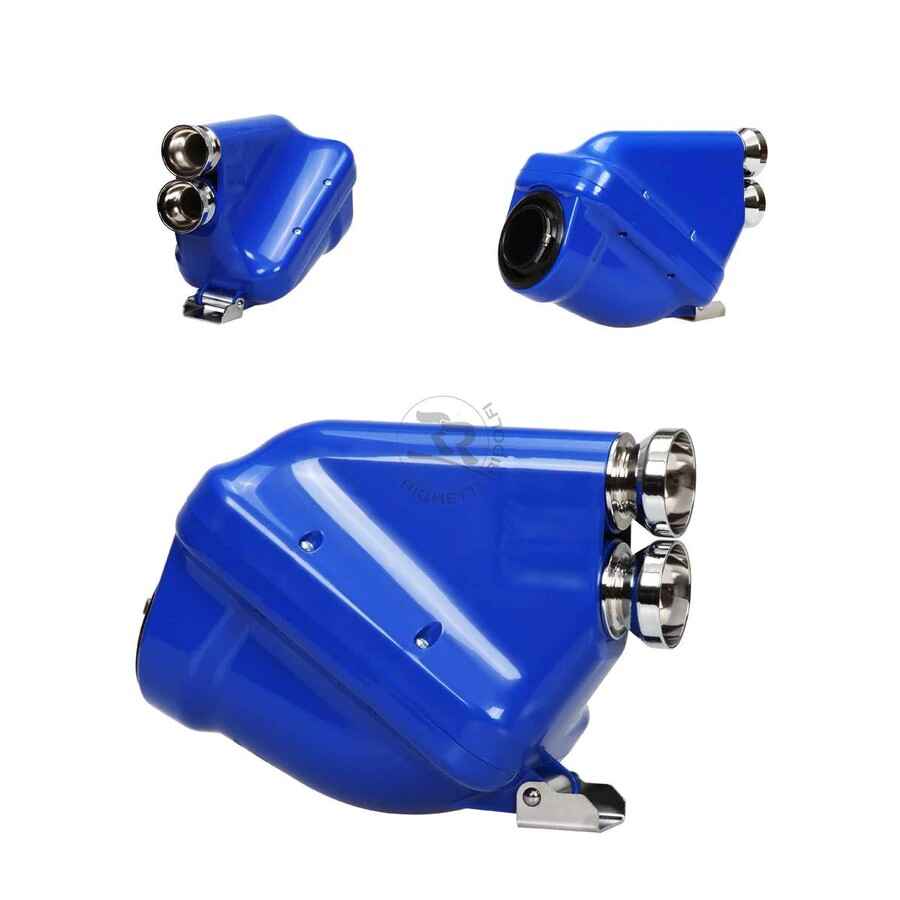
Probably about 1 inch of space between the actuator & airbox mounting tab.
1 Like
Interesting! I’ll post a picture of mine when it’s done, I’m using a different box mandated by my tuner, no clearance issues. I see the issue with the Righetti, takes up a lot of vertical space compared to the KG old style, which has a flat bottom. You are also using a different engine, does the ES work better with that airbox or is there another reason why you are running it?
Honestly, it was displayed that way in the shop, & I’ve also seen it used on others’ karts with this motor, so I just kind of figured it was an option. I’m not consulting a tuner like you.
The vertical profile isn’t an issue, but the length does make for less clearance between it & the actuator as opposed to, say, a Nox style box.
How does the Ignition cut work and adjust. I’m assuming it’s a no lift shift?
No I actually bought a version without cutoff, so I can race it in sanctioned events with a medical exception/approval. There is also a version with cutoff from the same vendor, but I’m not sure how it works. This one you have to lift throttle like you do with a traditional lever system, so it doesn’t give you a huge speed advantage, for me the advantage is that I can keep both hands on the wheel, as my left shoulder is bad and I can’t drive all out for more than 3 or 5 laps. I can do 15/20 laps with this one, so huge difference
2 Likes
The top shelf D-Shifter S model uses an ECU with adjustment via mobile bluetooth app & has a neutral finder. Pretty slick. I have the same D-Shifter (called SS2 when I bought it) no throttle cutout model as Andy; you also have to shift to 1st or 2nd & then just quickly “blip” the L or R paddle to “short shift” into neutral, but it works surprisingly well.
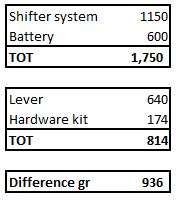
I weighted the parts, excluding the shifter rod, which is the same for both. Weight refers to IPK setup so hardware kit includes the upper bracket and heim joint. Different brands may vary
Overall paddle vs lever shows a difference of about 950gr, and I think extra 200/300gr can be gained with a lighter battery back, their weight vary a lot
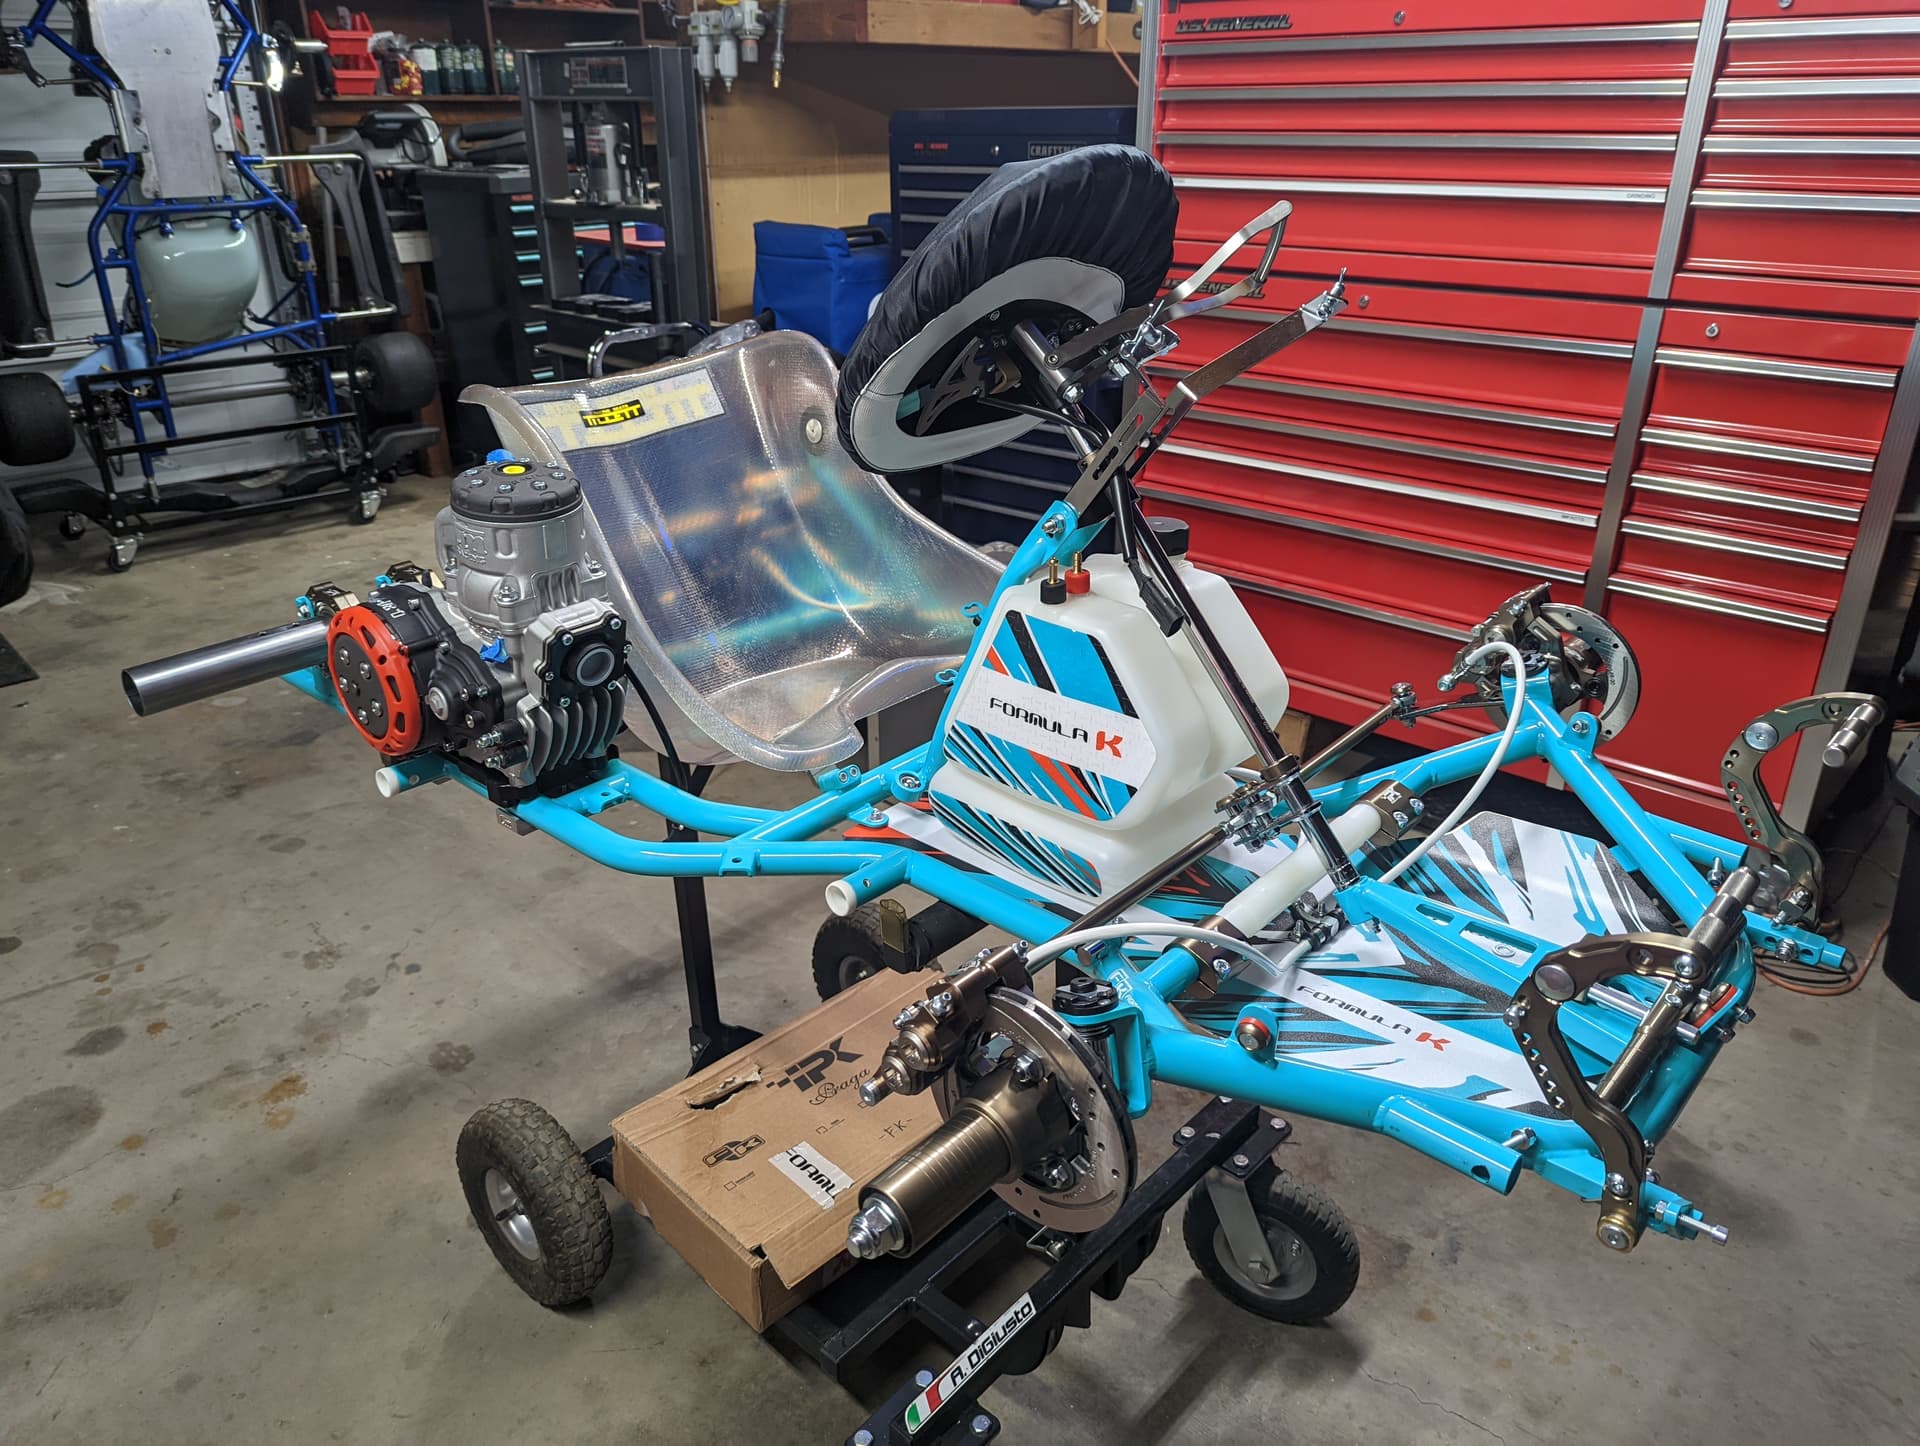
Since I moved the seat to the right, I was able to get an almost perfect left to right balance. Without water in the cooling system, it scaled about 1.5 lbs heavier on the right side. I think once I fill in the system, it should re balance very close to a perfect 50-50. Some if it is luck, I know
1 Like
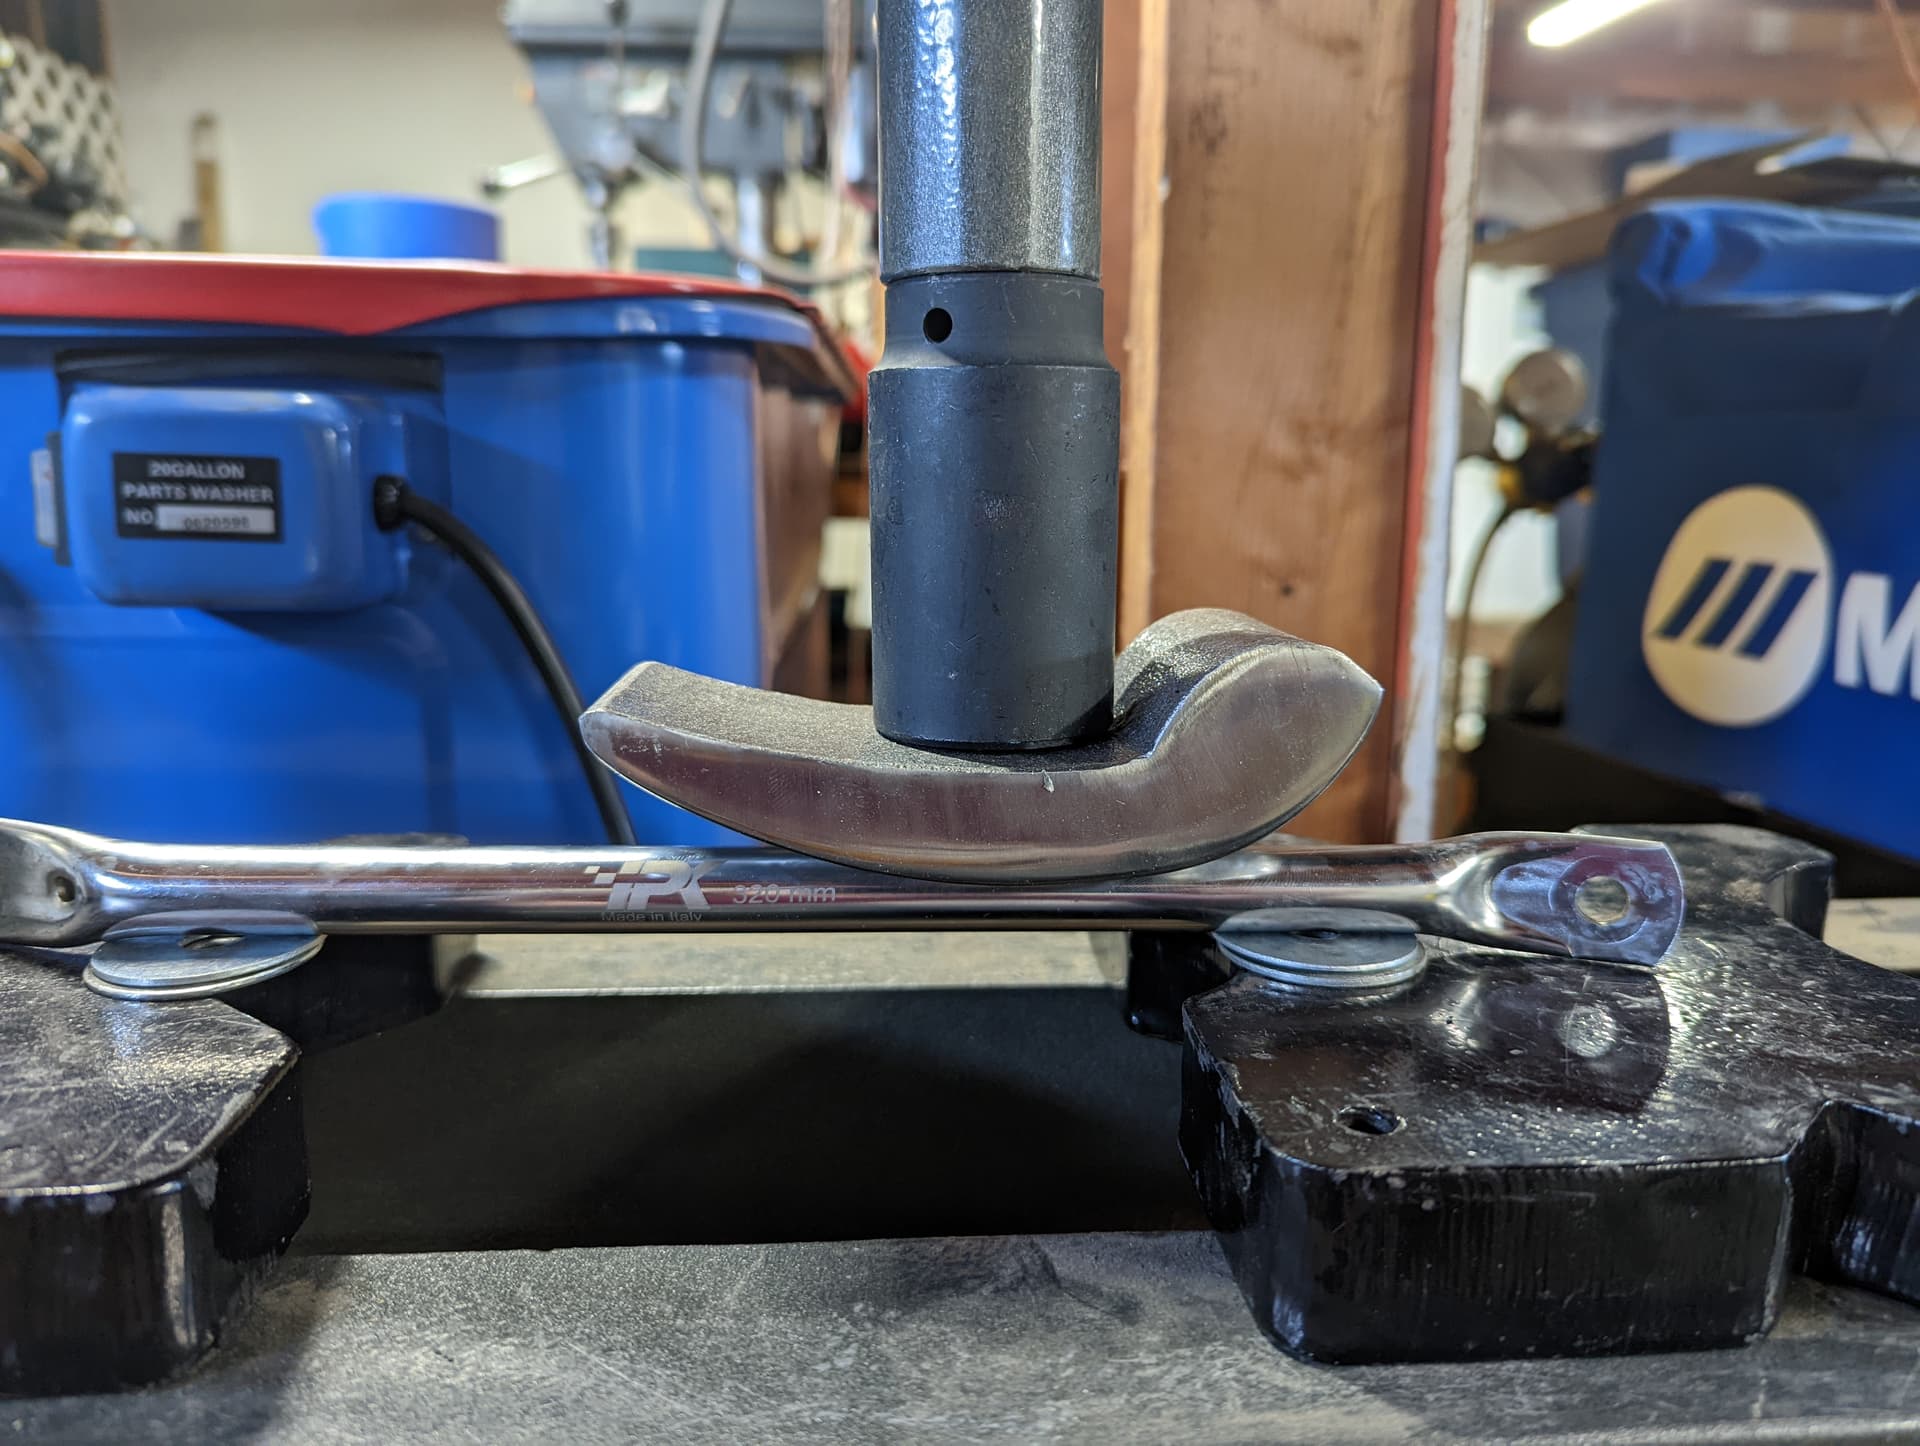
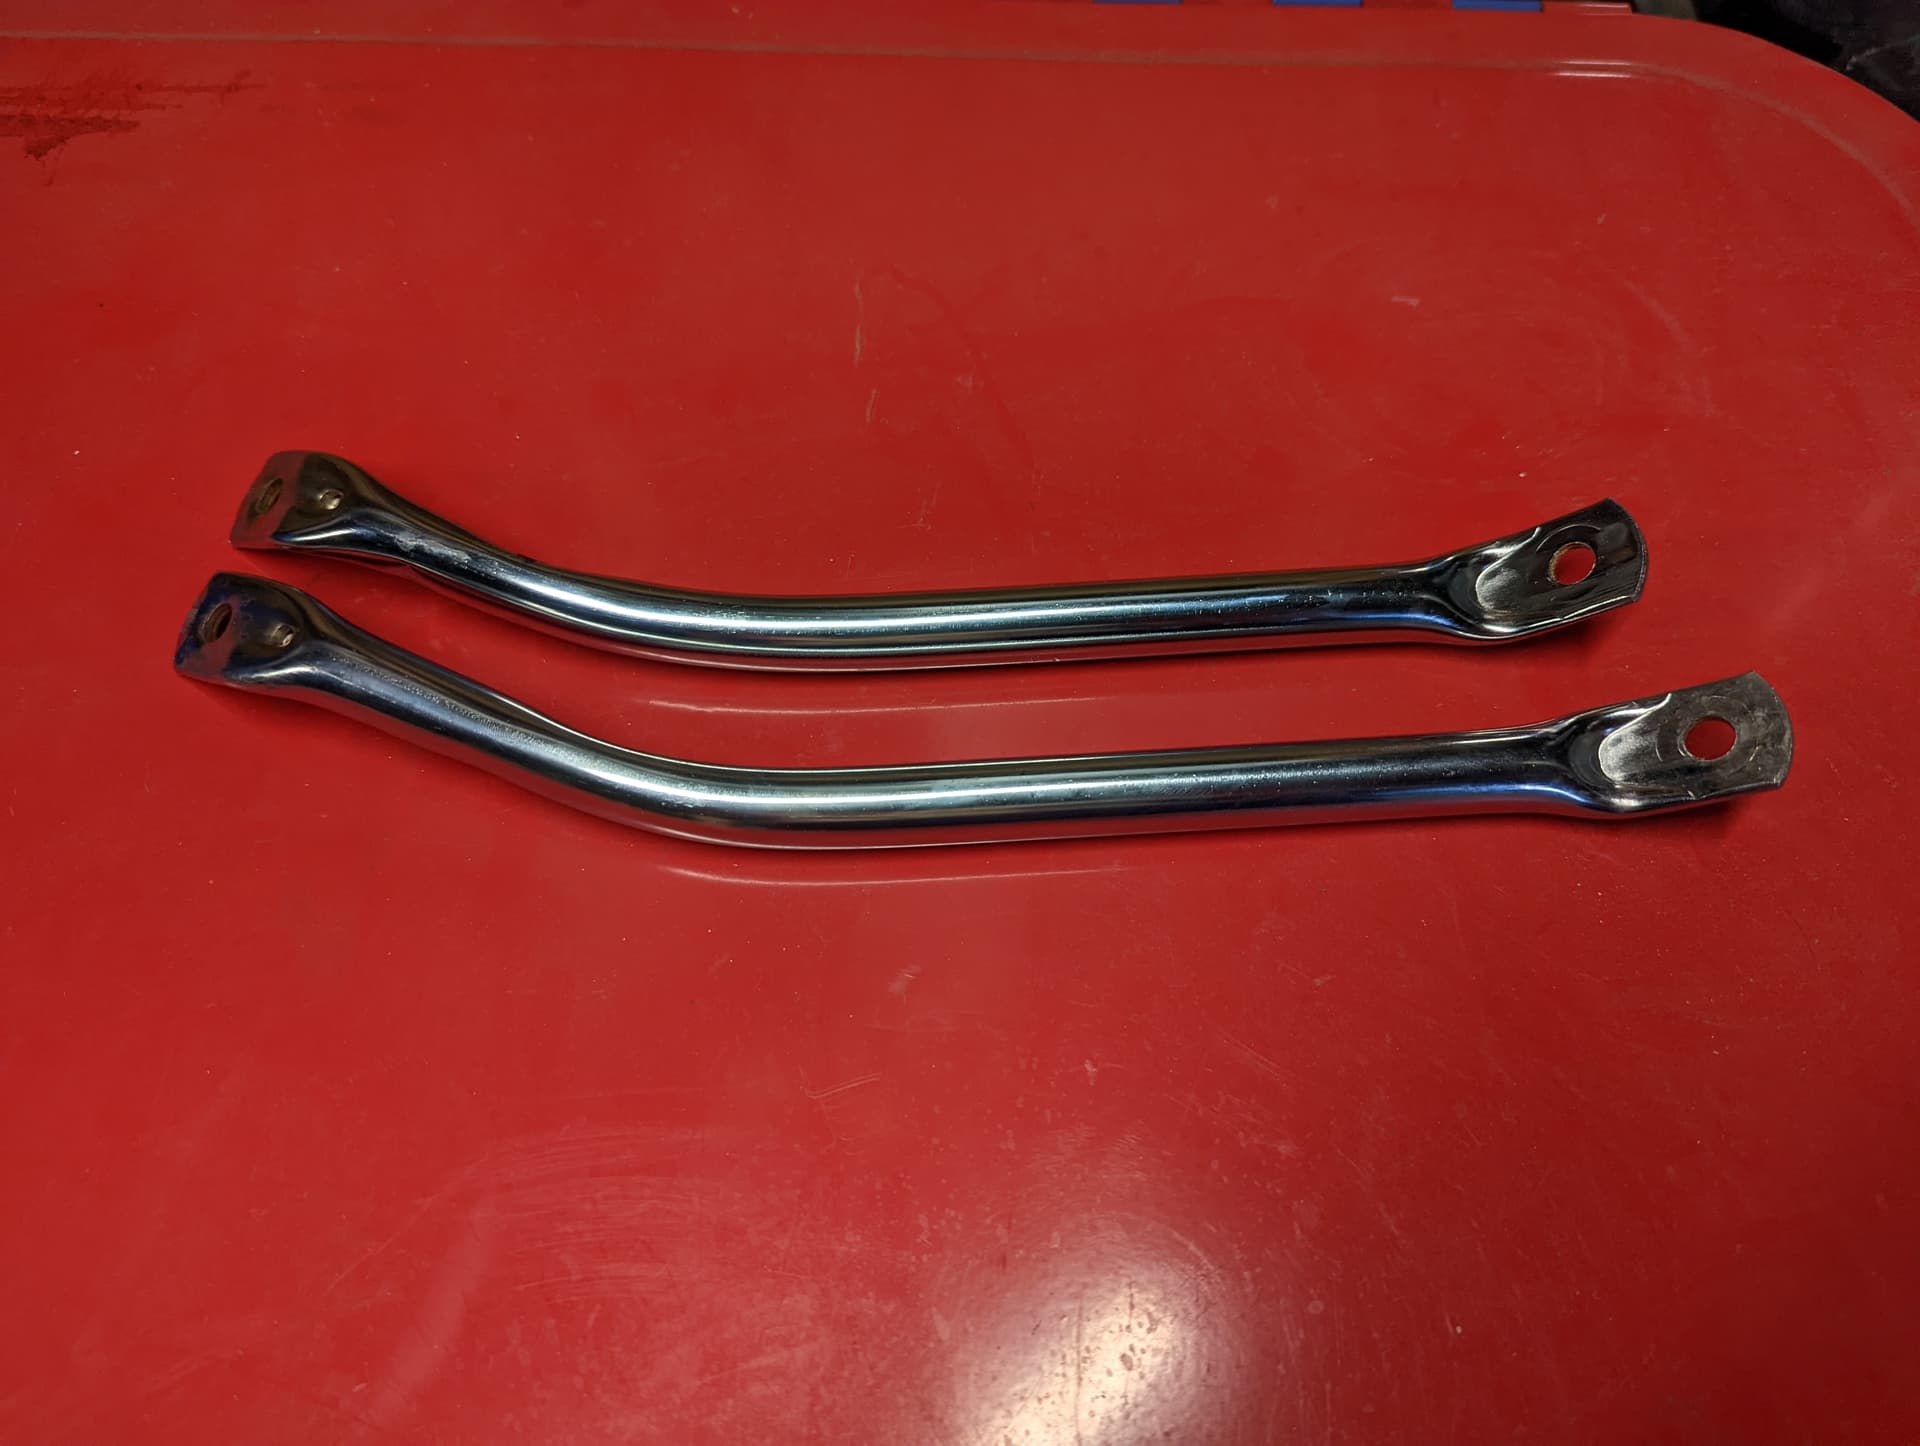
Before I move on with the final steps, I wanted to share how I normally bend the seat struts and shift linkage. I found that using a press and tools with different radiuses is the best way to avoid kinking the struts
After measuring the radius I need, I either use the side of a 1.5" impact socket or a body dolly, the ones you use to bump metal.
You first press the radius you need, then angle the tabs, then bend the top one outwards to align with the shape of the seat

6 Likes
I have a fondness for Formula K in KartKraft btw. It’s the best chassis in game, imo.
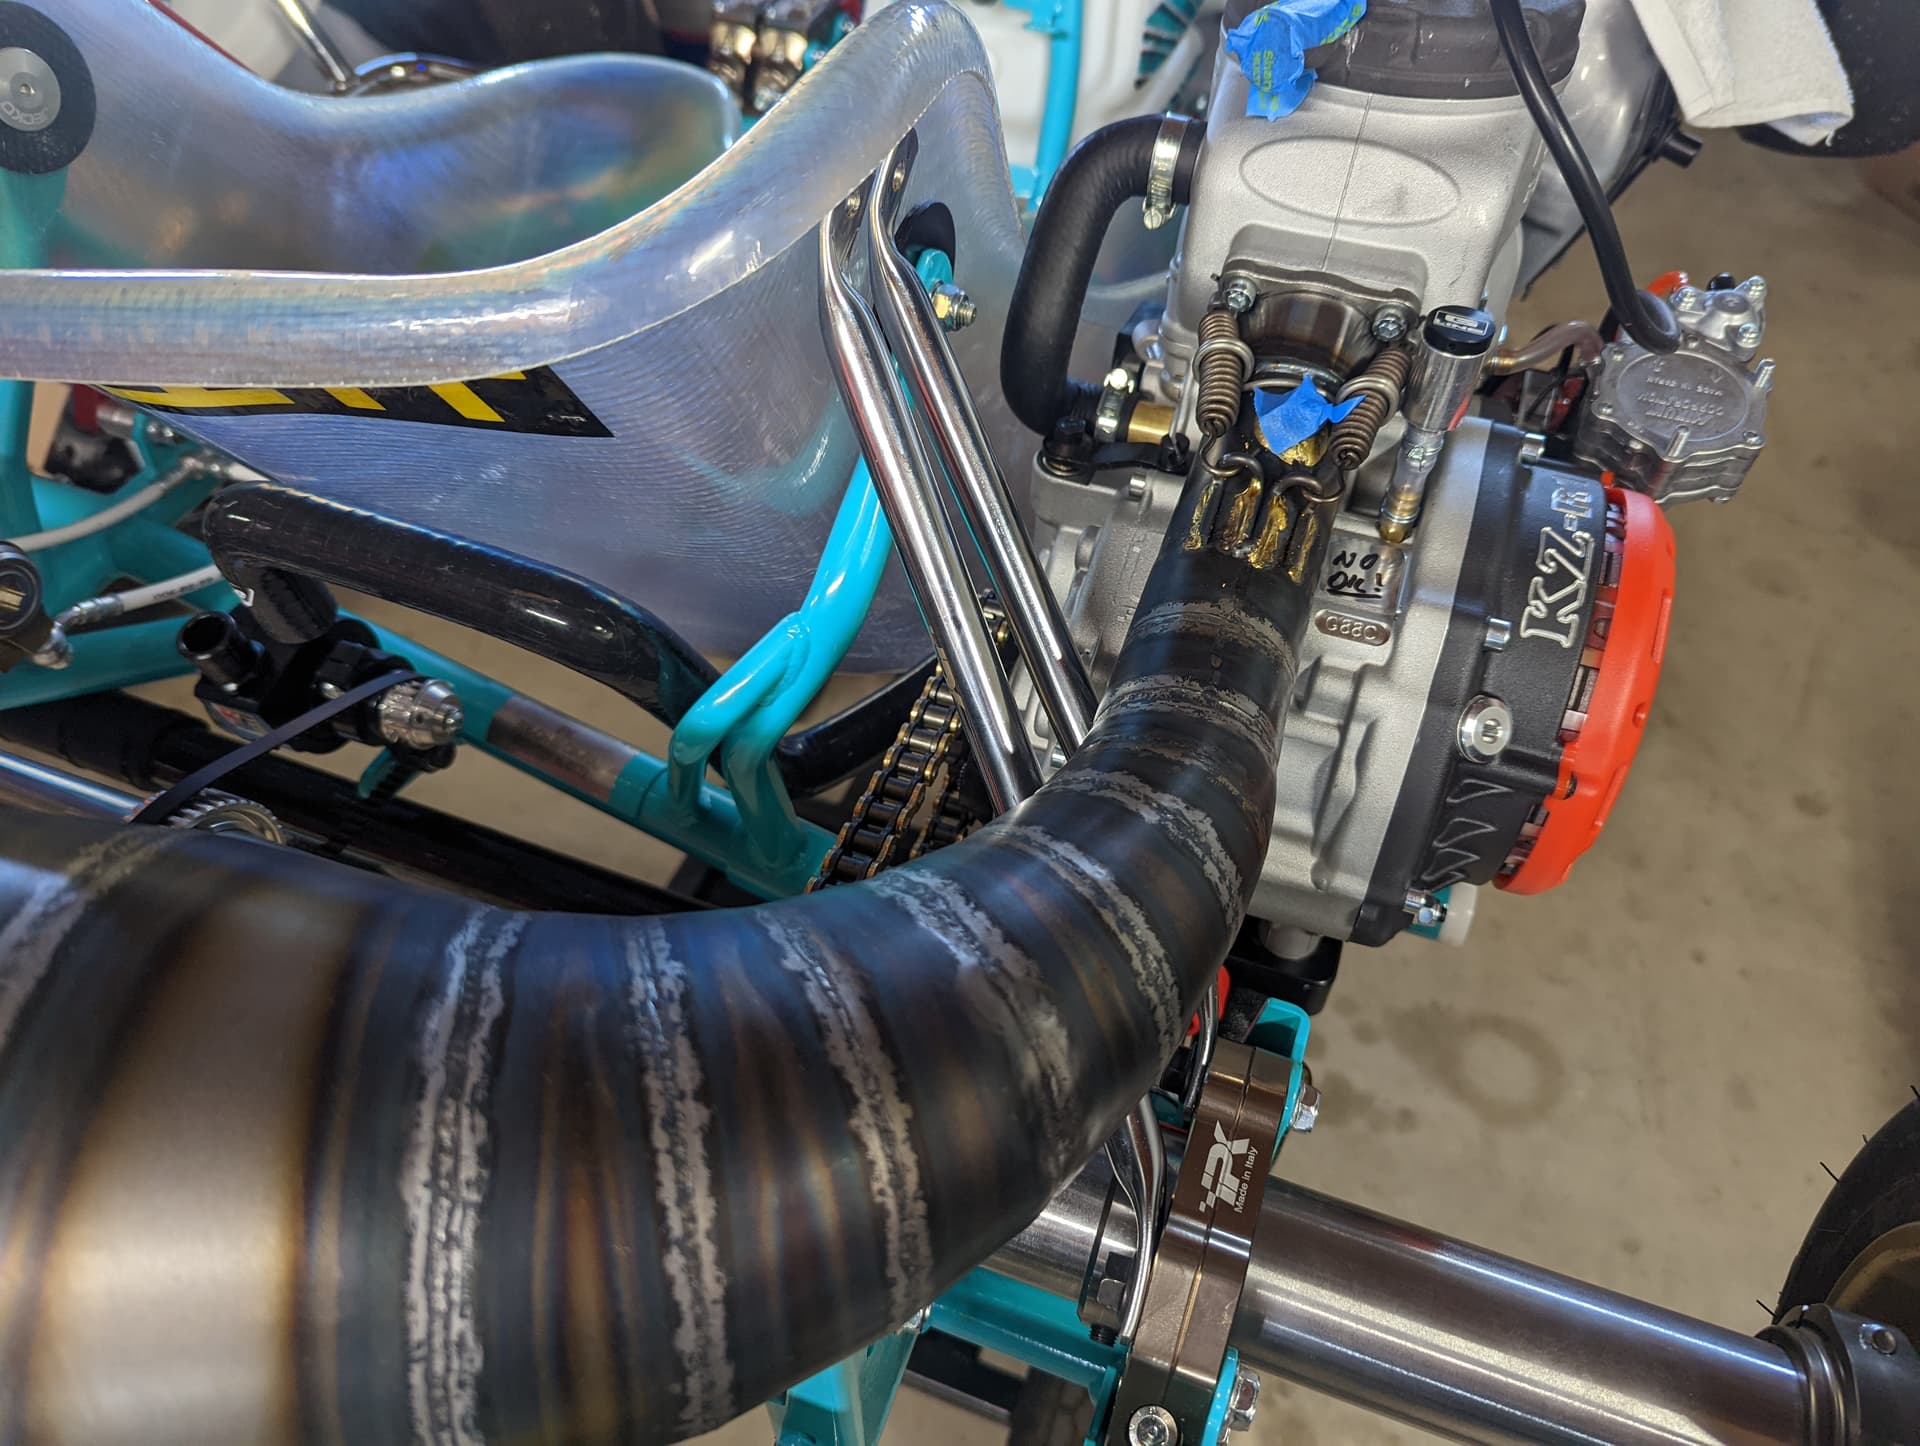
Andy, that wire tying the 2 exhaust springs, is it for vibration damping?
They’re normally used to prevent them from coming off under vibration. I never used one and never had a spring come off but it’s an option and some people run them