Oh, I’m wearing it! No pictures yet, thankfully (that way you don’t have to face my ugly mug ![]() )
)
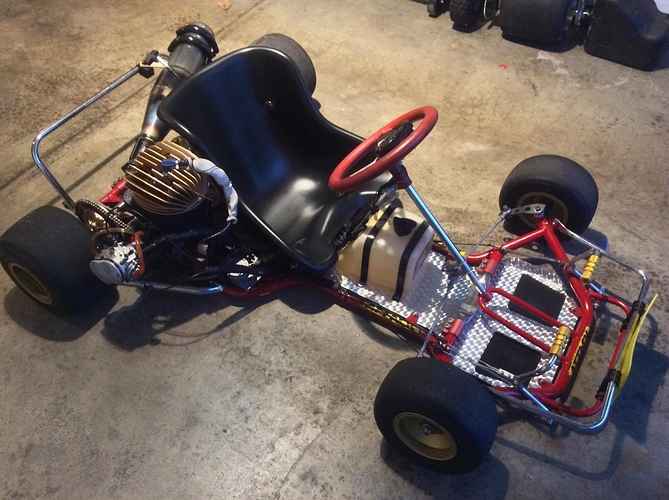
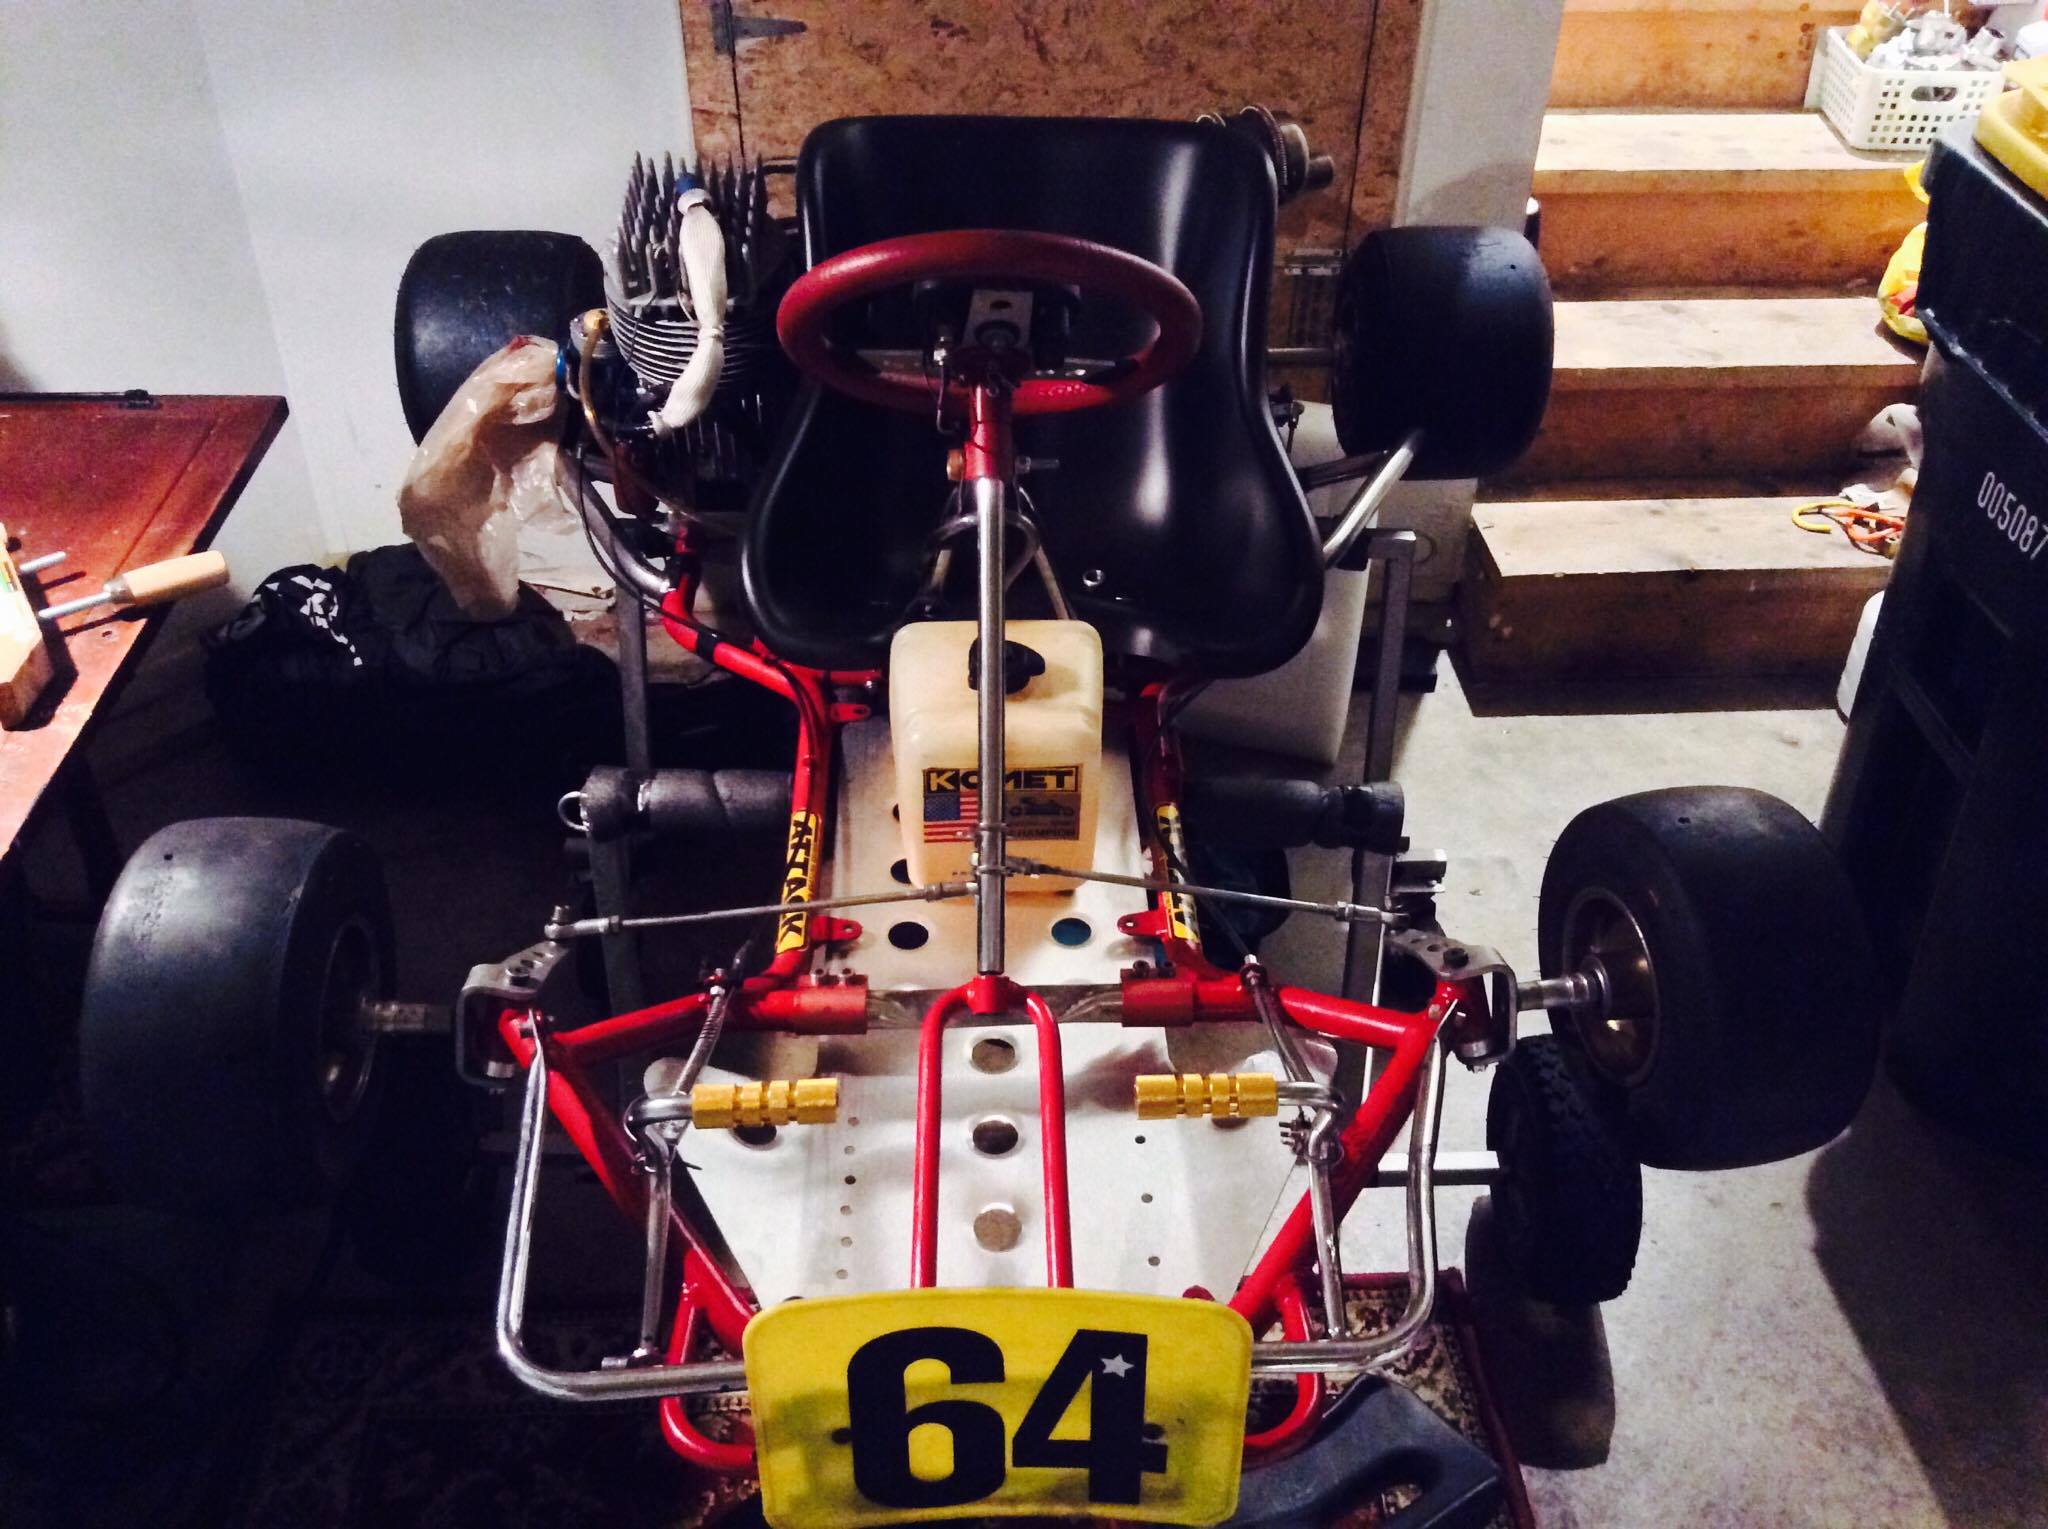
First iteration of my kart. Looking good!

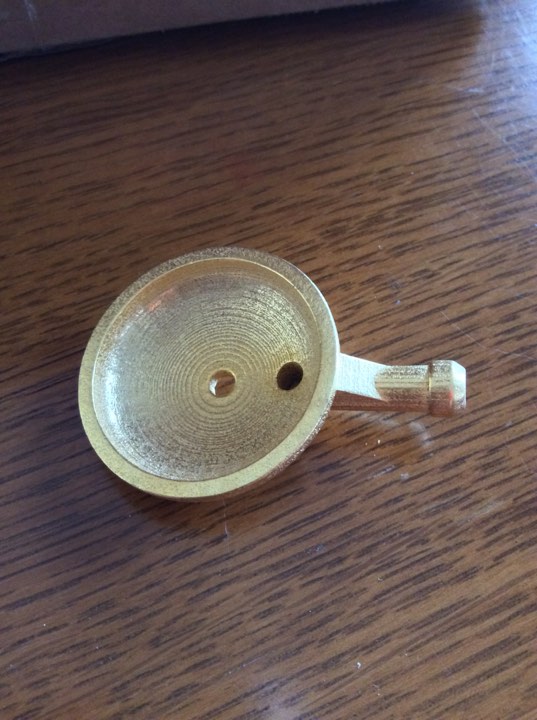
Detail on the Komet vinyl for the front of the fuel tank. Found on eBay in great condition. Installed, but not without 50 layers of clear coat. I want to make sure it won’t get damaged!

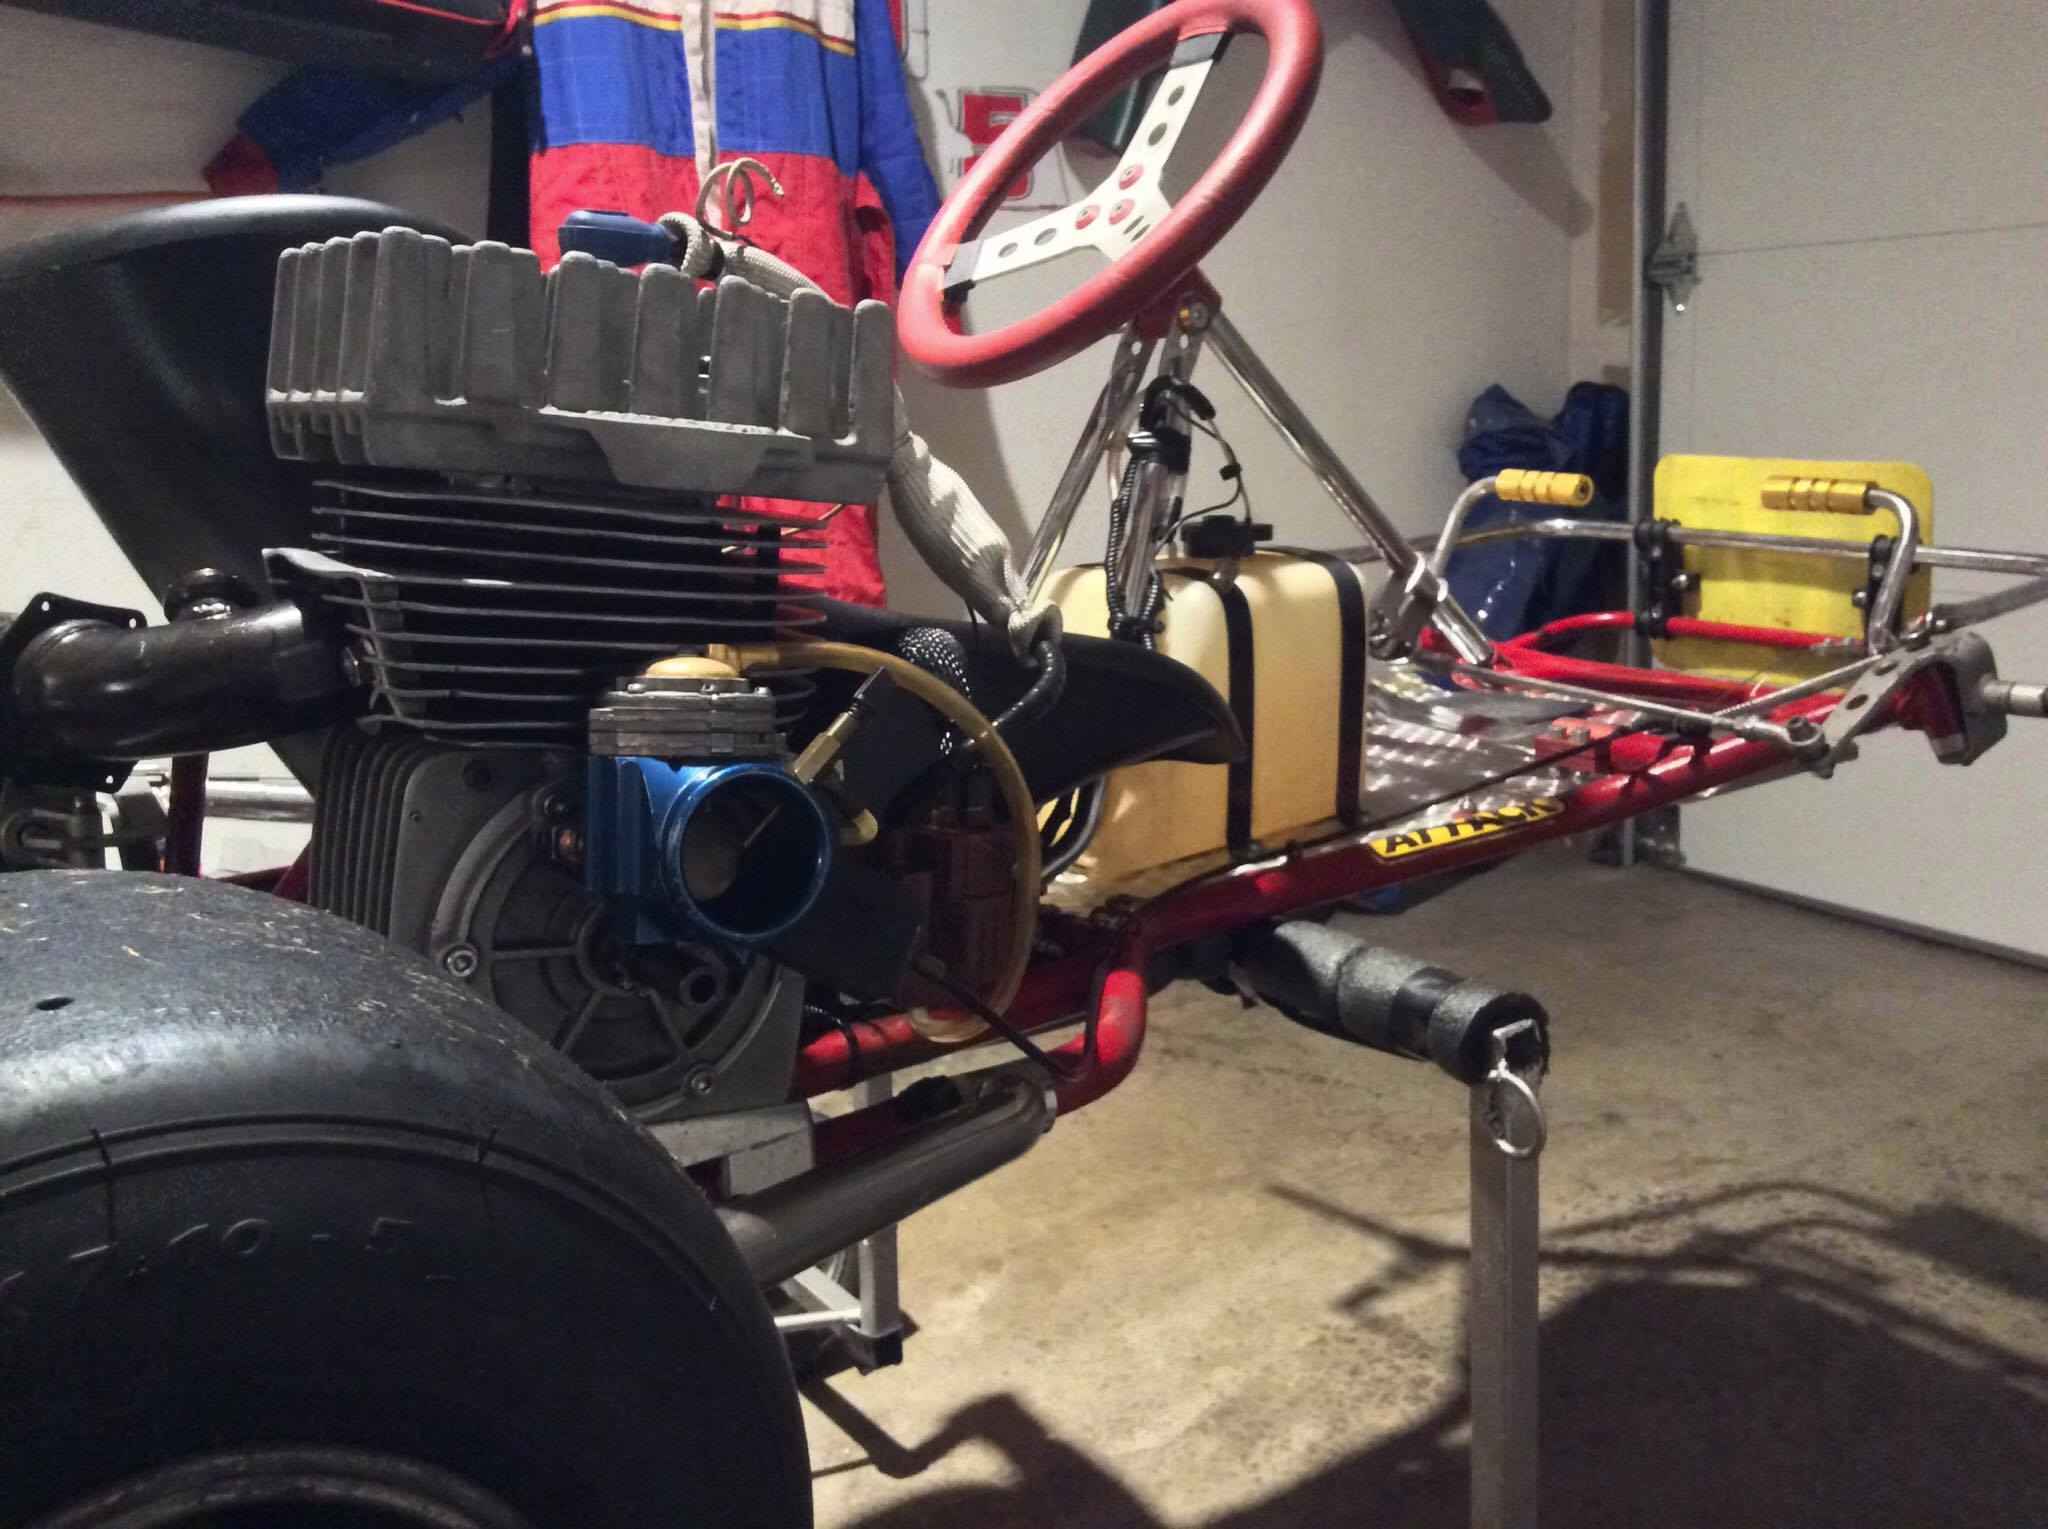
Now for the carburator. When the motor was hooked up to the Margay, it was running on a single 27mm 3-Jet IBEA yellowpower carb, especially massaged by E.C. I liked the idea of the triple jets, but the engine was too big, I needed more carburator.
My only option was to find a 35mm carb, either a Mikuni or Tillotson, and run that. Or was it?
I ended up stumbling on ANOTHER IBEA Yellowpower on eBay that needed a ton of work. If one is not enough… How about two? Inspired by Bueller’s twin carb SUDAM, I was determined to make it happen.
Being a direct drive, traditional twin carb setups would get in the way of the engine sprocket. So first, I would need to fabricate a 2-to-1 intake manifold. The victim was this intake manifold for a 40’s Royal Enfield…

… But was you probably noticed by now, the carb bodies would end up being on each other’s way. Here comes the angle grinder, and the aluminum soldering…


1st iteration of the finished product:

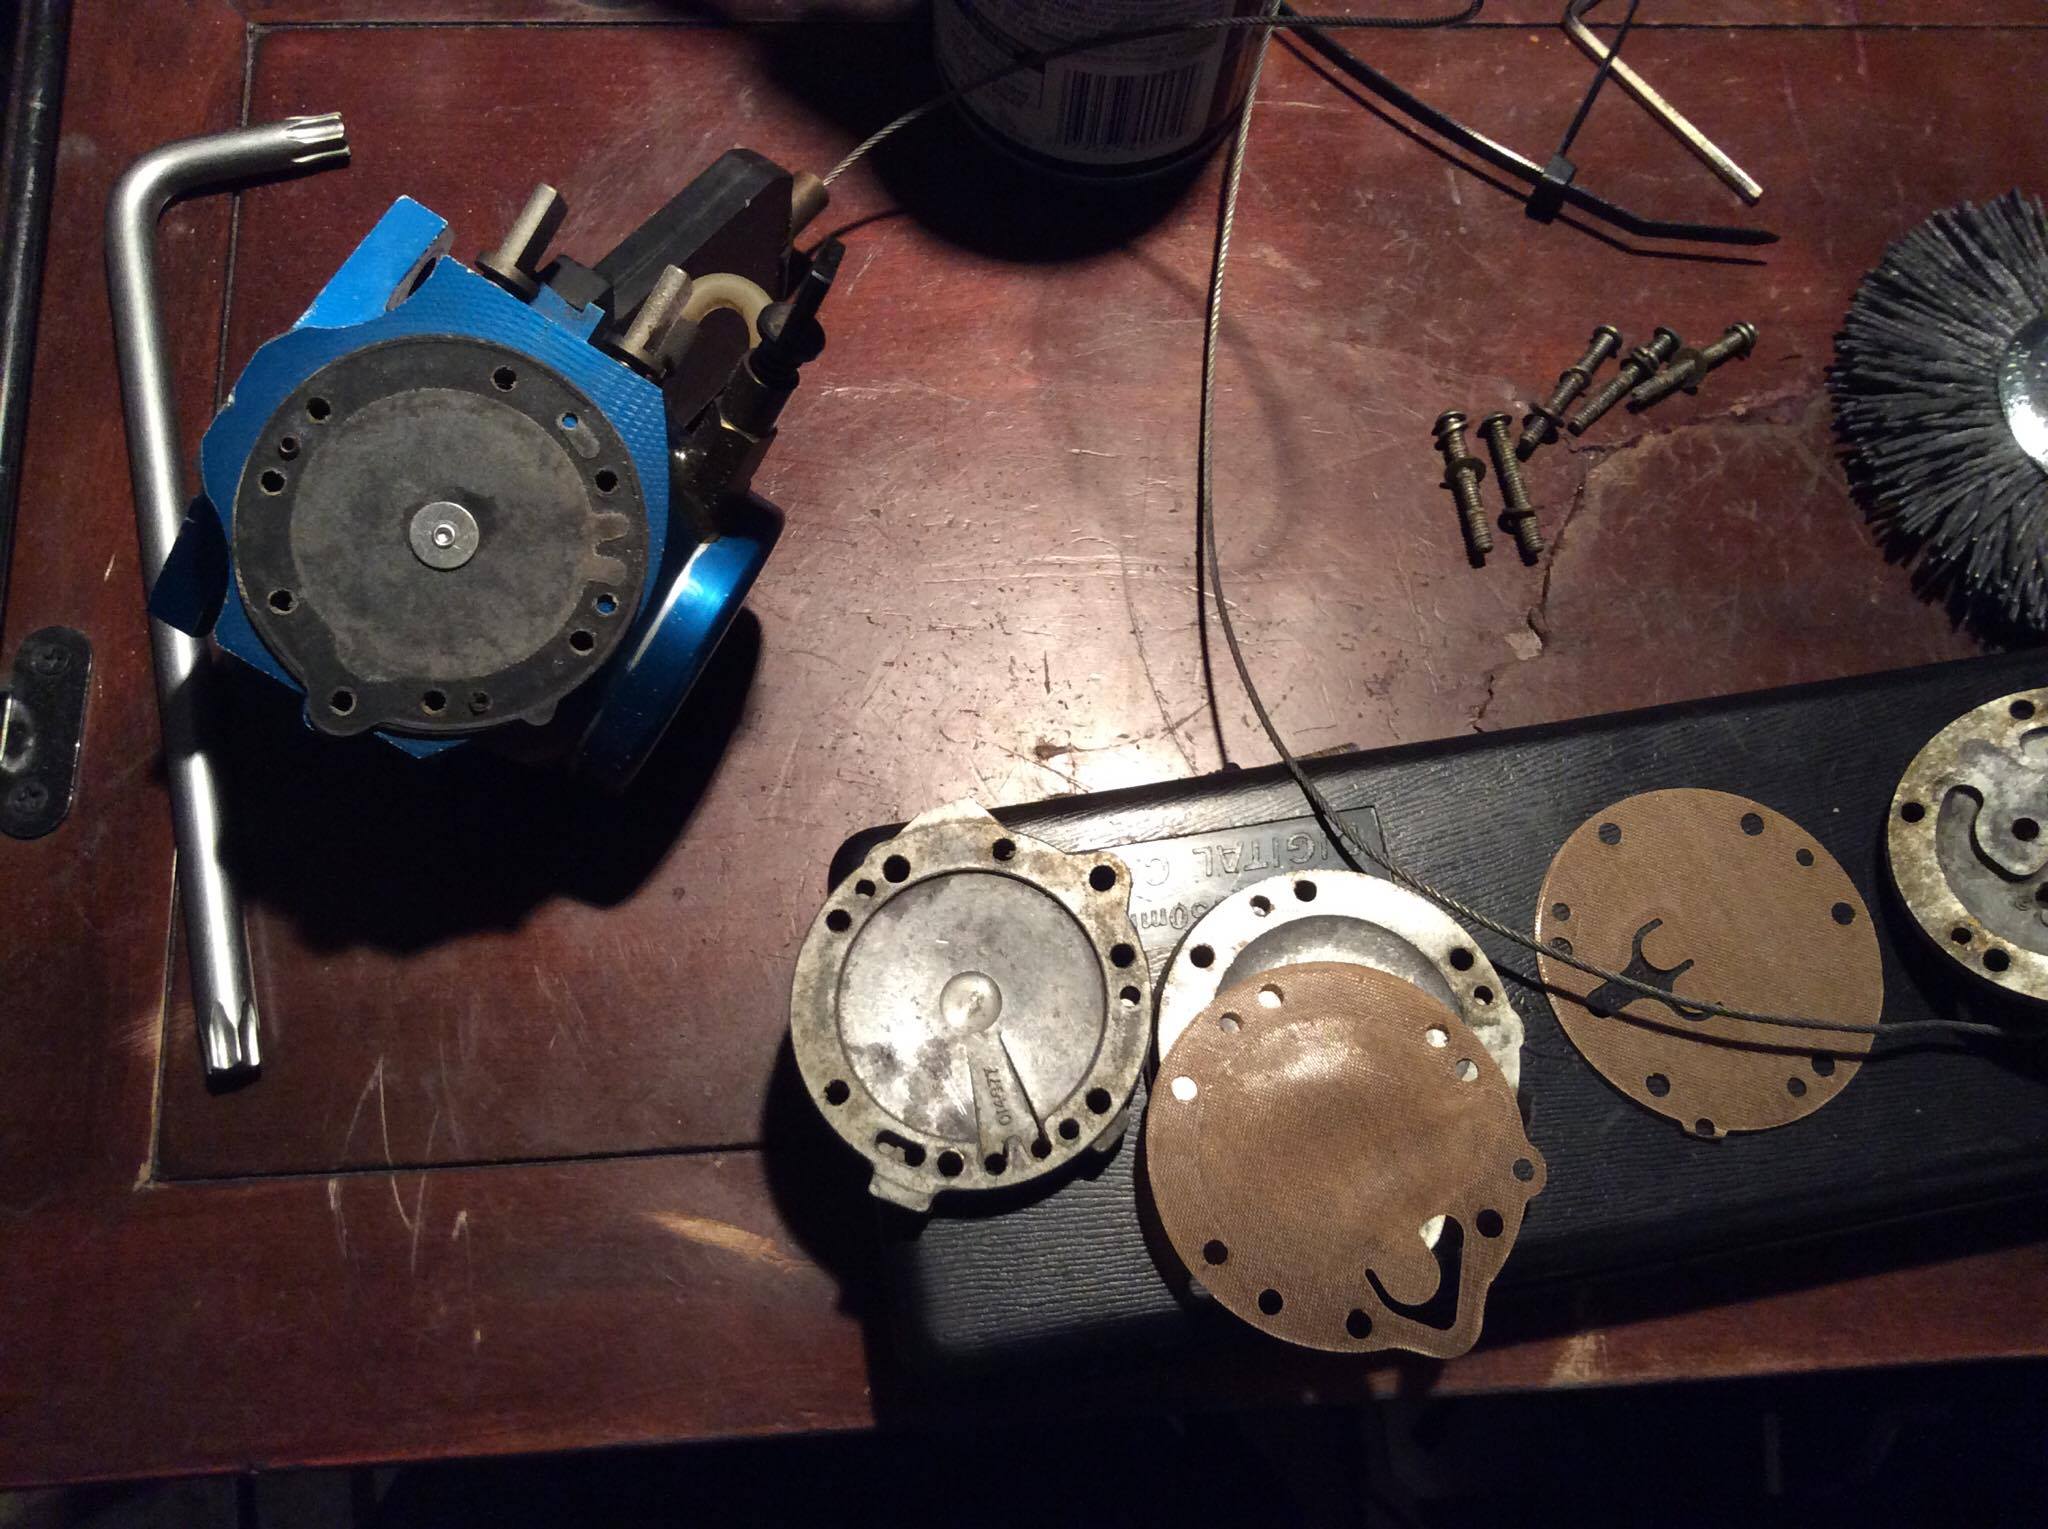
That side of the motor is a pretty dynamic area. The manifold is connected to a rubber boot, that is then connected to the motor. This helped isolate most of the bounces and vibrations, but it still vibrated enough that the carburetors cracked and separated slightly after my first race.
Thus I went through the process again. This time I’ve machined the carbs more, opening up the gap between them, while also focusing on soldering the large gaps behind the carburetors. I’ve used 2-part reinforced epoxy putty (which creates a joint with a bit more flexibility) to help dampen the areas around the solder points. Finished it by painting with fuel resistant epoxy paint. The result is cleaner looking, and more functional:

The triple fuel pump setup was an idea from that same guy who mentored me through the build. It seems to be a popular setup with the circle track guys, cheap insurance for in case you loose pop-off in one or both carbs.
Vacuum pulls from the crankcase to a vacuum block, which then distributes vacuum between the 3 pumps. Pump is a vintage Mikuni, but the vacuum block is a shameless modern OBX tuner car piece. 

2 Likes
So do you have the front spindles figured out on the Swiss Hutless yet?
I know, I know. Have to update this thread.
In short, NEVER claim a project is finished. 
1 Like
So, at the track for the 2017 White Knuckle Scramble. Things are looking good, the kart behaved like it always does, and like it always did since the first build 2 years ago.
On the first practice things were looking good. I was keeping up with the duals without issues. Stuff started going south on the second practice session, ironically right after a group of people came in appreciating all the work that went into the dual carb system. I should have known better. 
The engine started behaving erratically, with the midrange “moving”: I would have it, then I wouldn’t. Thinking it was just the motor getting to temp, I pull in to find the back of the engine drenched in fuel.
I’ve scrambled and tightened every nut and bolt on the motor, managed to make it to Heat 2 and the final. Kart drove like poop on heat 2, and on the final it just wouldn’t rev past 6K RPM.
I retired 2 laps in. There was something wrong and I had no idea what it was. When I came home I started taking stuff apart:

With several engine rebuilds under my belt since when I first got my K30 nearly 4 years ago, I was flabbergasted at the crappyness of my work back then. That head gasket looks terrible, although the cylinder wear looked decent.


Quite probably the main culprit: Base gasket blowout. The base gasket I had made 4 years ago looked terrible. The way I worked around my weird K30 case was by just trimming a stock K30 base gasket to fit. That left very little material around the transfer ports to actually seal.

Another view of that disaster of a base gasket.
I also removed the dual carb and accessory fuel pump systems. The pulse lines were full of fuel, with gas gushing out of the lines upon removal and making my entire house smell like a gas station (the wife was thrilled  )
)
In conclusion: I believe loose head nuts in turn loosened the cylinder, allowing for a poor seal of the jug against the case. Retightening did nothing, especially with a now soaked base gasket with so little material around the ports.
I also believe the carb and fuel pump setup had to go. They looked neat and served me well, but I had to be able to do better then that.
The whole thing was delivering too much fuel, and doing so erratically. On top of that, having some real VKA competition at that weekend taught me that simple is good and Alky (methanol) is great, so I was now on the hunt for a single BIG 34+ mm carburetor.
In better news, the entire kart fueled up weighed at 127lbs, on the Intercomp track scales so that was pretty cool. 
It was time for me to open up that bottom end, for the first time ever, and do a proper rebuild. Let’s take this project to a different direction!
Here are some take-home suggestions the VKA peeps also running 135cc Komets gave me:
-
You want big 7" rear tires. Make it happen.
-
You want a wide track in the front end too. That will require new or fabricated front spindles.
-
These big motors run best in Methanol. A lot more power, and great charge cooling.
-
You don’t want to be dealing with tuning 2 carbs at 70+ MPH in the back straight. Keep it simple enough that you can reach in and cure your carb problems with 1 hand, without looking.
-
Set up the seat so it is as far forward as you are comfortable having it. A weight distribution as close to 50:50 as possible works best on old frames, albeit it will be hard to achieve since most of the weight is in the back.
-
Get rid of the EZ-Start wheel. I was pretty proud of my EZ-Start dolly wheel system, but I guess it is unnecessary on board weight.
-
Being really big, these motors take a lot of work to get started which is normal. I usually have my kart tow started, but these guys take it to a whole other level: They had some custom fabricated 3 wheeled dollies they prop the karts on. The karts are then started with electric starters, like you would start on a stand. The driver gives it the beans, have someone push and them you off. The stand tumbles out of the way and you’re off tires squealing. It is amazing!
I’m working on getting all of that done, and officially looking forward to my first VKA event!
In the meantime, it is time to downsize my engine and carb collection. Working on that, too!
PART 2: INSPECTION
I mean, at least the piston still looked super fine. Running rich and low (~14k) RPMs makes your engine last a while.

Rotary valve was scratched to heck, but still useable. Always run an air filter, kids!

Spark plug looked fine, maybe about to foul with all the oil on it. What do you think?

PART 3: GASKETS
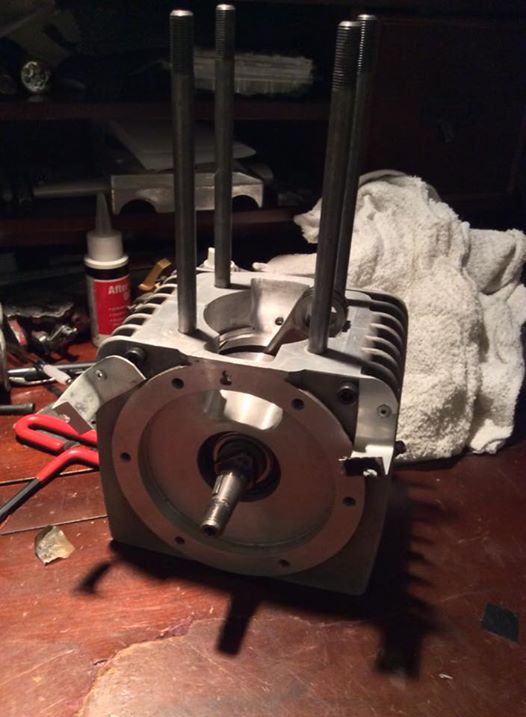
Having never opened the case before, I was surprised to find self aligning ball bearings on both sides. I’ve seen engines with one deep groove and one self aligning bearing, but never an engine with both. That could easily account for the odd linear and radial play I was feeling on the crankshaft.
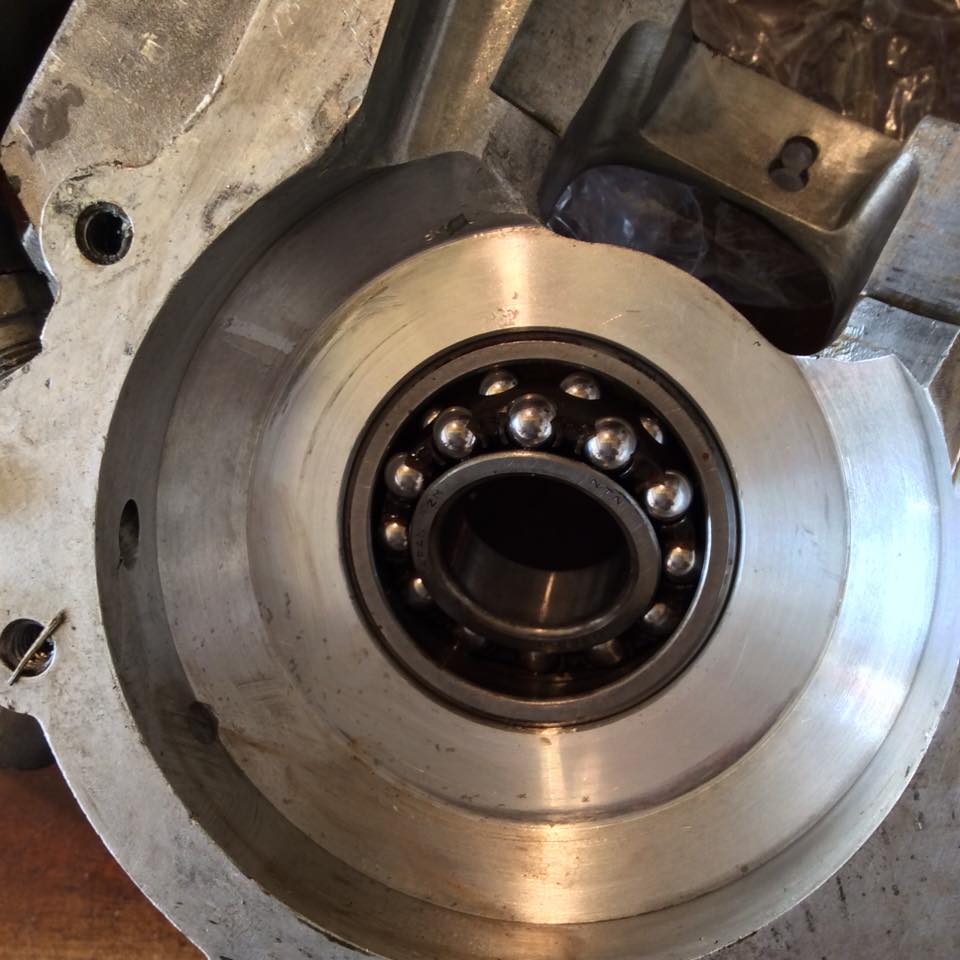
The bottom end received standard sized 6205 hybrid ceramic bearings from Fastech Racing. Really expensive, but super smooth.
Now it was time to figure out a case gasket and a new base gasket, without a gasket there was no crank play and that was no bueno. I ended up buying some 1/32" felpro material and hammering my own case…
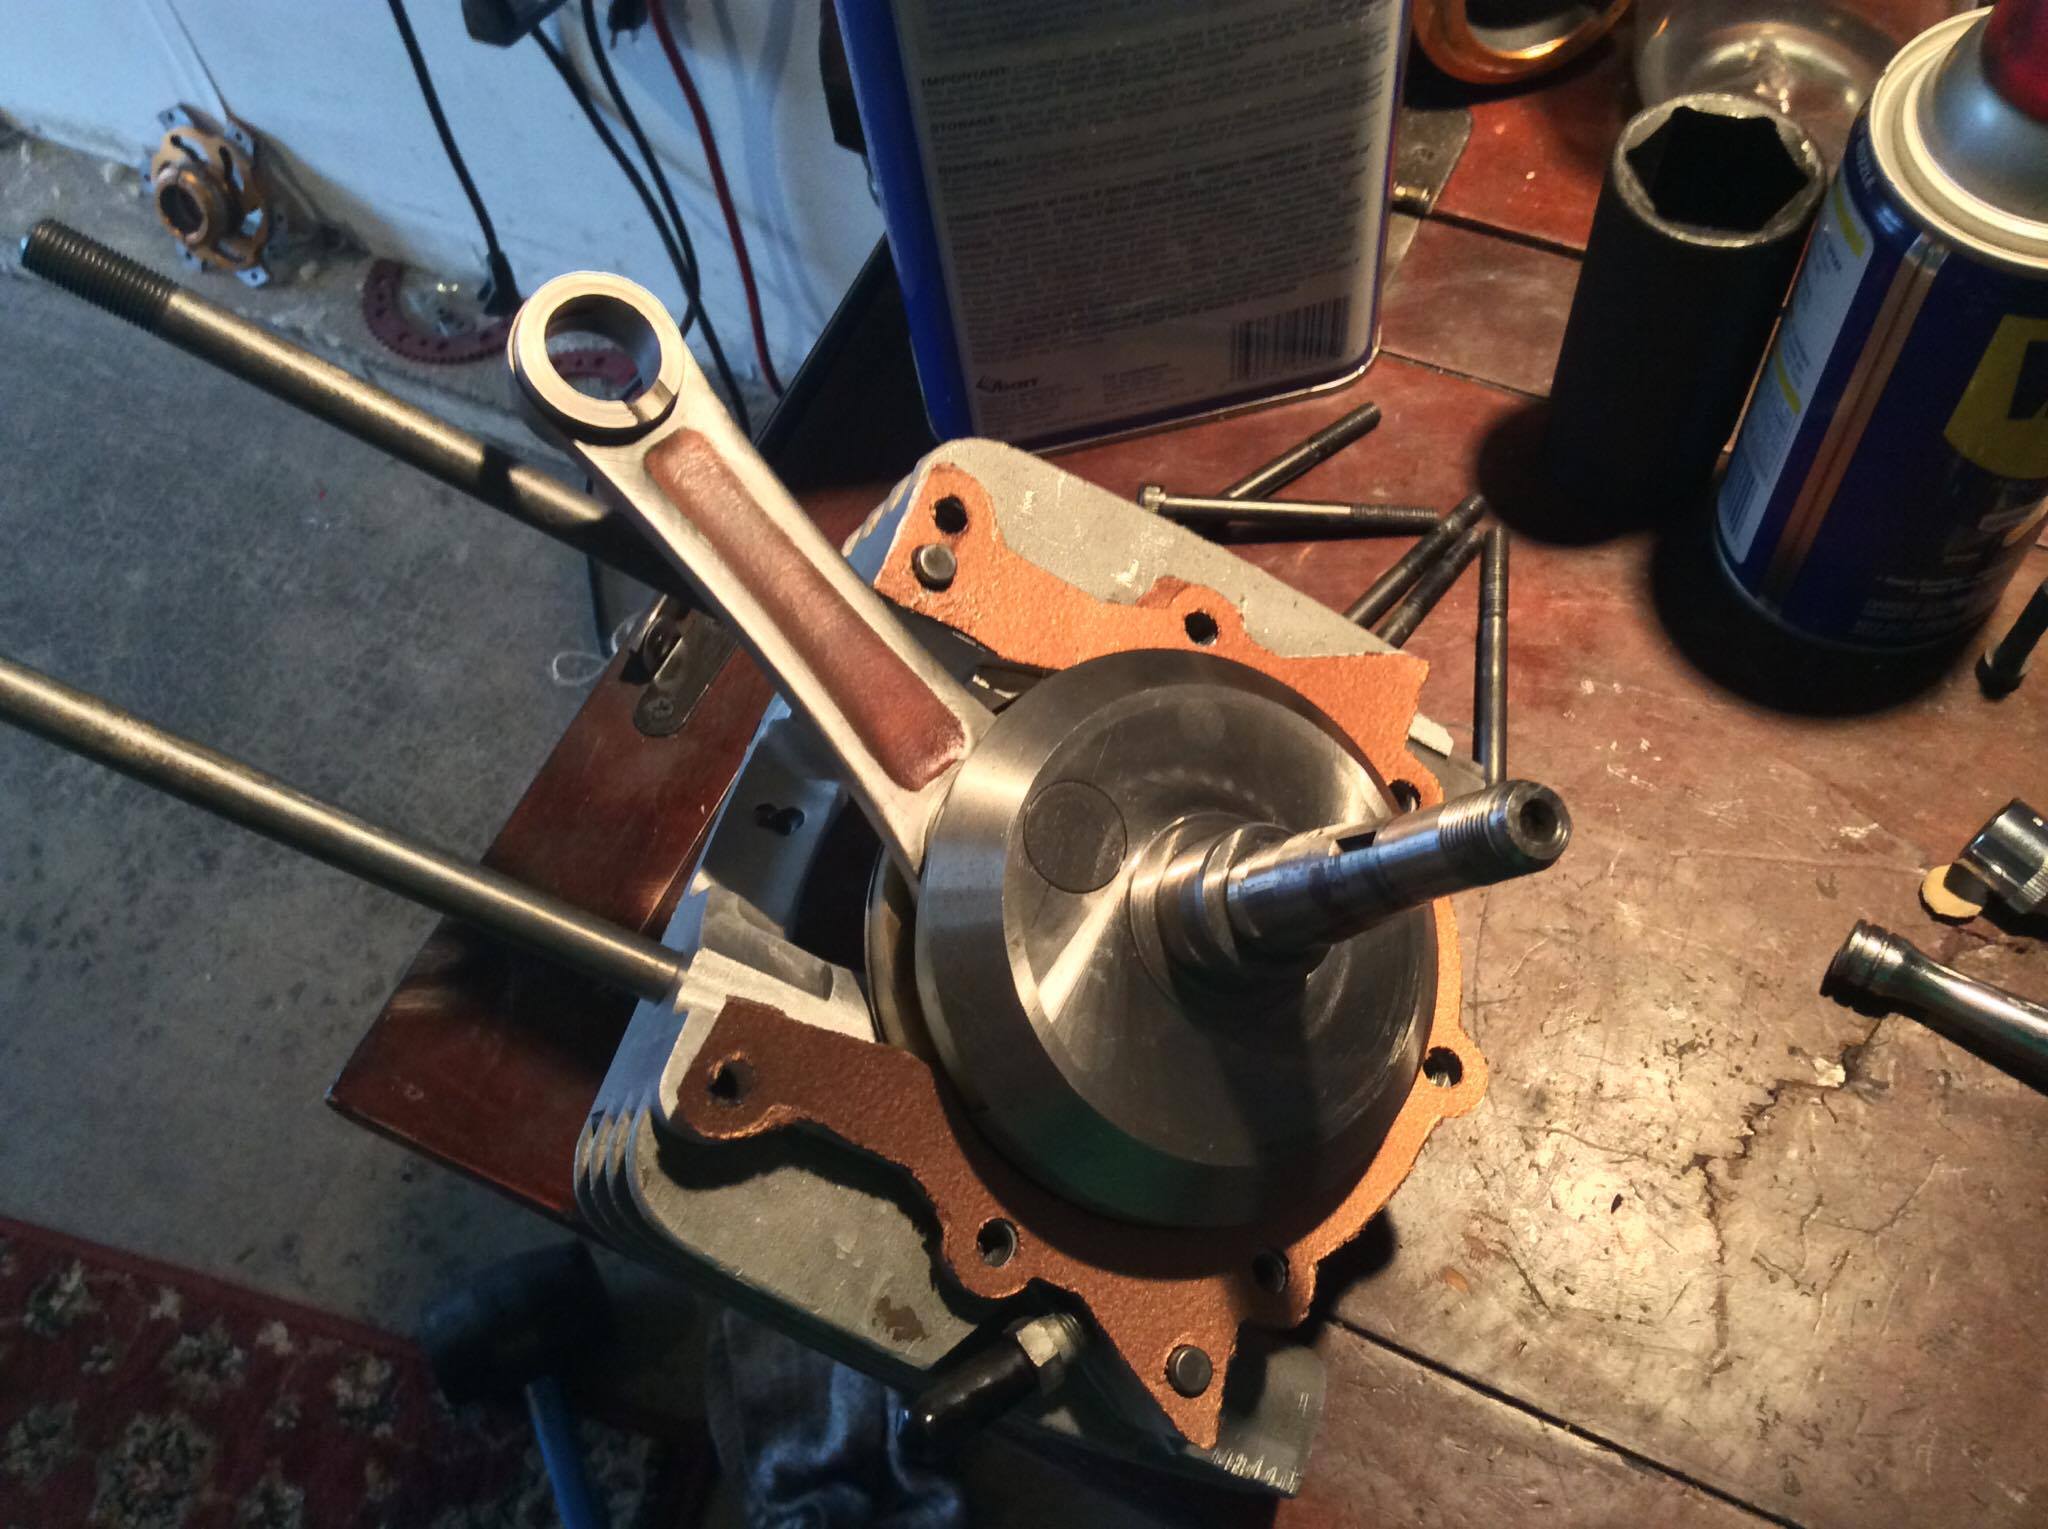
… and base gaskets. Gaskets were sprayed with copper sealant, and now crankshaft endplay was right where I wanted it at 0.02".
This picture will explain my struggle with the base gaskets. It’s hard to seal an engine with transfer ports looking like this:
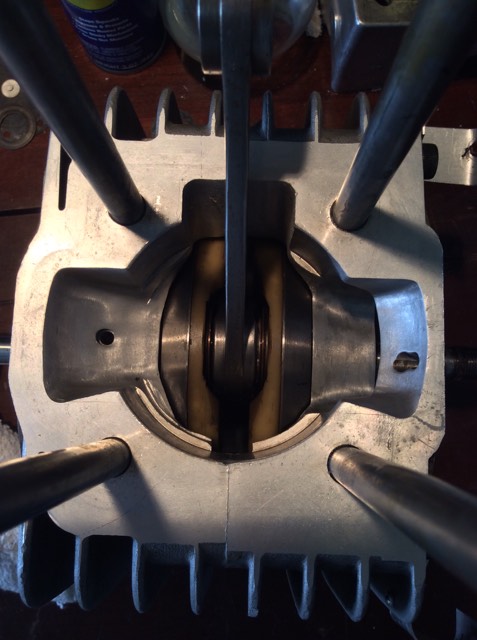
When standard K30s have straight transfer ports. DYI was really the only appropriate option.
By the way, Michael @ SpeedParts has all sorts of vintage/classic reproduction stuff if you don’t have a weirdo engine like mine. Get in touch with him!
2 Likes
I’m glad you’re keeping this log up to date.
2 Likes
I’m trying! ![]()
PART 4: LOADED WITH CARBS
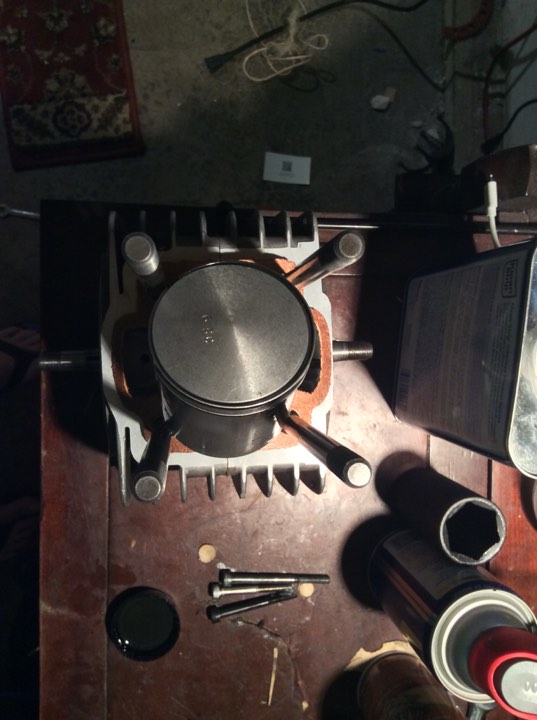
Crankcase closed up! Used standard grade 8 bolts to close the crank, but the valve cover will take stainless hardware. Time for a couple of mockups with some carbs:
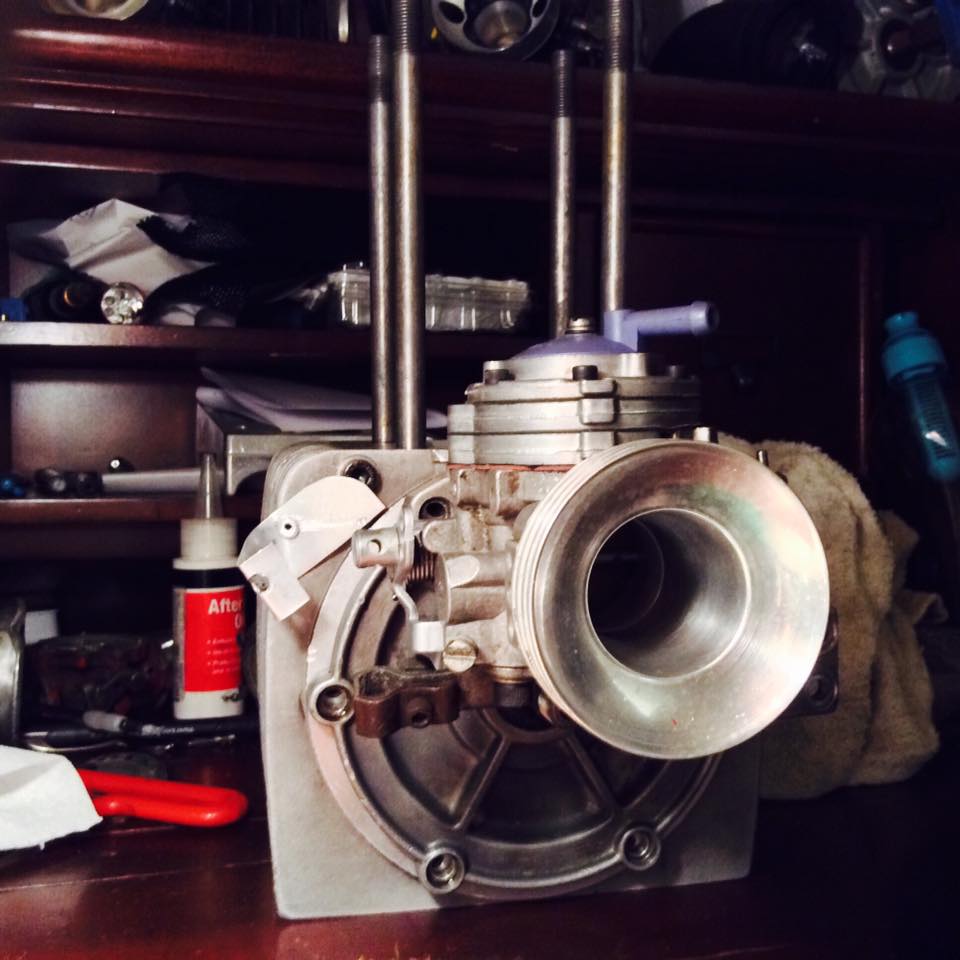
I’ll have my options. A very special alky Tillotson HR atomizer, 34mm…
Or a monster diagonal slide IBEA double pumper, 35mm… THAT one being rather special too. It was really crusty upon disassembly, but it had an interesting carb needle setup called Grose Jet.
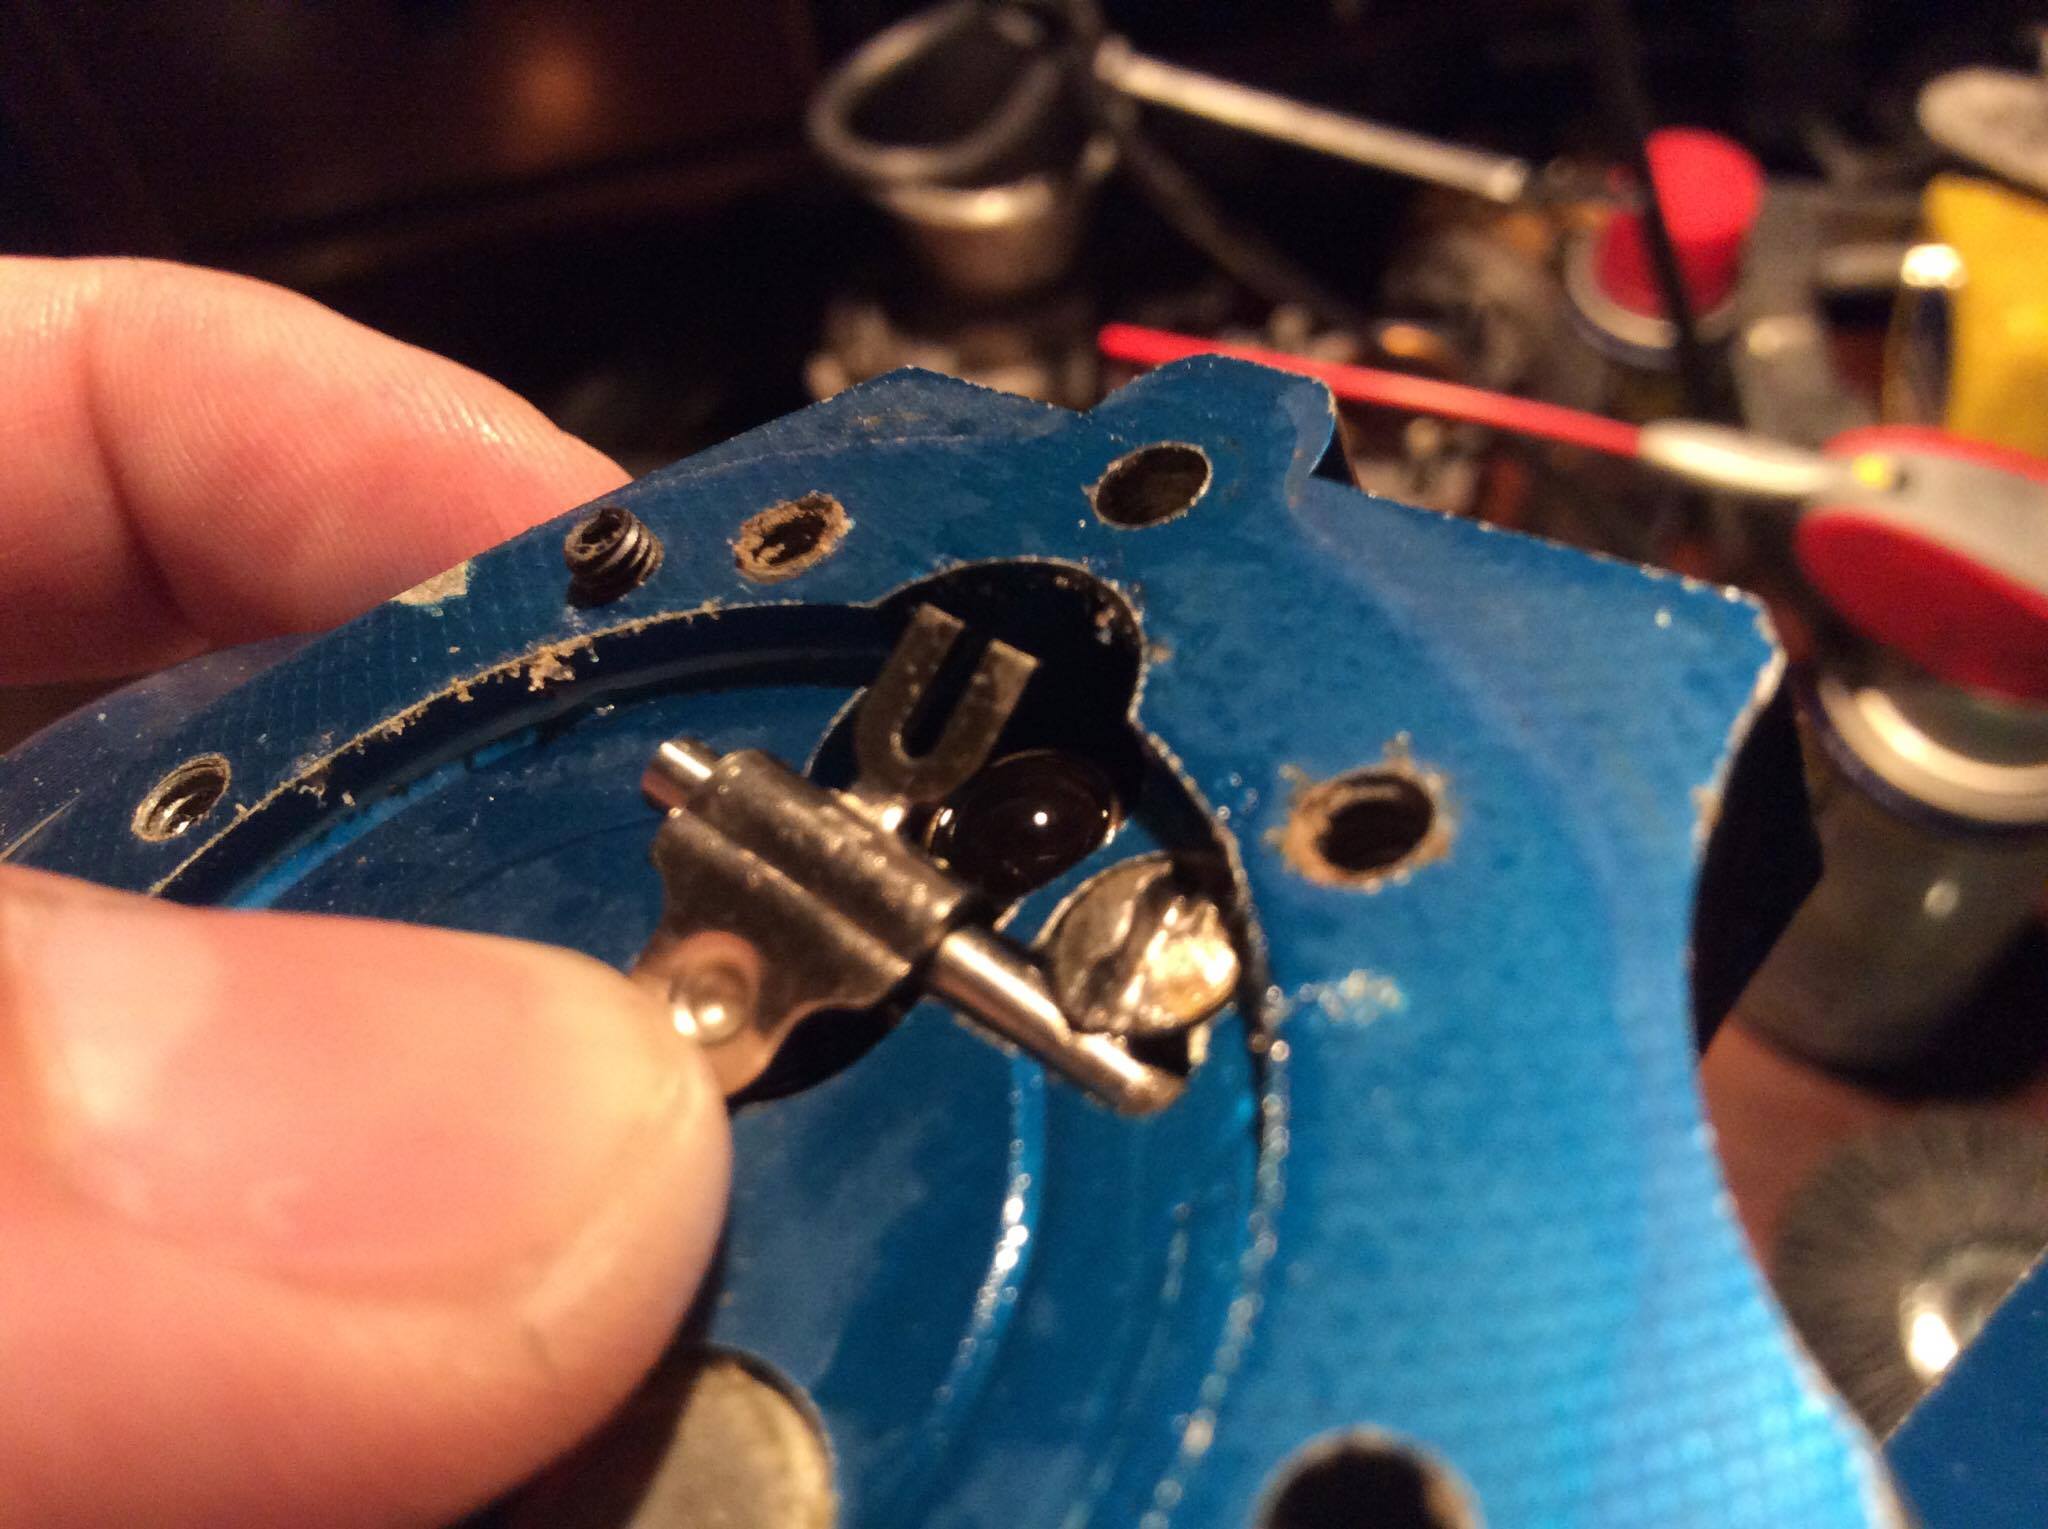
Grose jets were commonly used in alky carbs back in the day. They are nothing but a little glass ball sitting on top of a stainless ball within the needle assembly:
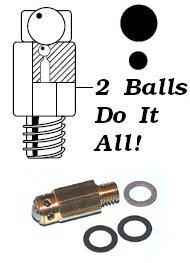
2 balls do it all! is probably the greatest slogan of all time.
The advantage is not having a rubber seat at all, which deteriorates with extended use of methanol. It is also virtually maintenance free, all you have to do is to clean the glass ball with a piece of cloth instead of occasionally having to replace the entire assembly.
Thanks for the updates, this is an awesome thread!
Is there a backstory to why you chose this chassis and engine combination?
2 Likes
In summary, the ultimate goal was low curb weight with the highest possible power, and the lowest drivetrain losses. A kickass machine, with a package that would still be within the ruleset of a pavement race series, so I could still legally practice and compete.
I didn’t go out specifically looking for Formula K 135 motors, vintage euro frames, or any of the stuff I’ve ended up stumbling on. I’ve only became fascinated with the historic aspect of vintage karts AFTER I’ve started the build.
With the engine I was just lucky to find the right K30, with the right stroked crankshaft. More on that later.
I went vintage after getting hooked to the purity, simplicity, and low curb weights of vintage karts. I knew a local shop had this Swiss Hutless stripped bare sitting against a wall, and I had looked at it before. I’ve noticed it was interesting (although it needed work) but I honestly didn’t know about the brand much until after I bought it. I didn’t REALLY know what I was looking at. Lucked out big time with that too.
Ultimately, I think the “old gods of karting” made the universe conspire in my favor. I ended up having a lot of luck in this sport both when it comes to the parts I’ve found, and the great friends I’ve made along the way.
I could have built a modern kart with a Honda CR500 powerplant and end up achieving a very similar power to weight ratio, but I wouldn’t be able to race it anywhere (no modern sprint race series allows for a 2 stroke over 125cc) nor run open practice (track insurance requirements would have shot that down pretty fast.)
PART 5: PORCUPINE
I had already tried without much success to strip the powdercoating off the cylinder and head. Tried everything from paint stripper to sand blasting to just grinding the thing down. While the cylinder came out looking decent, the head looked like a mess, with a bunch of different layers of paint one on top of the other.
Then it dawned on me… Since this is a no holds barred build, why not try to find a porcupine B-bomb head instead and leave the stock head alone?

Torqupine “Porcupine” heads were made by a company called BTM in the late 70s. They were only made for Komets of the 100cc and 135cc variety, and essentially the only aftermarket head ever made for Komet engines. I assume their development was aimed right at the dual engine C-Open and single engine B-Open crowd in the USA.

… And it shows. Evidently, these heads are still very popular with the C-Open crowd, although I am sure someone, somewhere, has to have one on a direct drive big single engine.

The idea behind the odd prickly design is to improve cooling by increasing the surface area in contact with the moving air, and to add cooling channels underneath the head (like a reedjet / KA100). They are very rare and very, VERY hard to find, so there were many myths and legends:
-They were heavier then stock heads (they are in fact lighter)
-The casting quality was poor (it’s alright, the casting is really crude on some areas)
-And my favorite: Porcupine head fins sound like a xylophone when hit with a screwdriver (100% TRUE!  )
)
In order to get mine, I had no choice but to come forward on the VKA Facebook group with an undeniably irresistible cash offer (my wife does NOT know about this purchase.) Those who have these heads (wisely) do not want to get rid of them. Thus, after a short struggle I ended up with a genuine Komet K299 Torqupine head!

Tiny problem: Turns out Komet K299 case stud bolt patterns are SLIGHTLY different from a weird Komet K30 (surprise?) The solution? Drill larger stud holes on the head. And done!

You can see the lower cooling channels clearly here. Pretty neat.

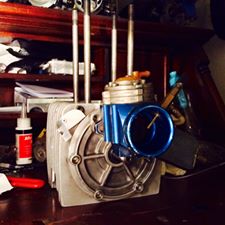
And a mock up shot with the huge IBEA triple jet carb:

I think it looks functional and unique. I love it. I was lucky to find one in such great condition, and it goes with the new “period-correct restomod” approach I’m now taking with the kart perfectly. 
2 Likes
- Swiss Cheese Floor Pan
- Engine Turned Floor Pan
0
voters
I’m considering going for a change of looks at this point. Should I go for a lightweight Swiss cheese’d floor pan for my Swiss Hutless (![]()
![]() ) specifically this polished one from QRC, with the added benefit of being light weight:
) specifically this polished one from QRC, with the added benefit of being light weight:

Option #2 would be to stick with the engine turned look:
Then another poll, this time for frame color:
- Keep the frame red
- Strip the frame, clear coat only
0
voters
Should I keep the frame painted red, or strip the frame and run it with a clear coated metal finish?
In this case there might be no benefits to stripping the frame outside of the cool looks, considering I will still have to clear coat the frame and probably with a bunch of layers to protect from rust, which will be adding just as much weight as just painting the frame.
50:50 split, I’ll need more votes then that. 
True story… Share it on your facebook page and maybe some appropriate FB groups. ![]()
Polls closed, swiss cheese floor pan ordered, kart will be kept red!
1 Like
Lots of things happened between here and there.
-Carb pump was cleaned up, polished, and assembled with new methanol compatible components. A new, high flow, brass & stainless carb cover was developed and 3D printed from scratch!

-Had a MASSIVE car accident and totaled my race van ![]() finding a replacement vehicle took 100% of my attention.
finding a replacement vehicle took 100% of my attention.
-All bolts and nuts in the steering system were staked or changed to metal lock nuts (save for 1 nut, and this is KEY for the video later!)
-Installed swiss cheese pan. Looks great!
Overall, kart got so light I could pick it right off the ground and carry it like a suitcase, generating this ridiculous meme courtesy of James himself:
Track scales say 124 lbs net weight with a full tank of fuel, 341-342 lbs with an added porky driver.
With the driver in, 211 lbs rear 131 lbs front for a 38/62 weight split front/rear.
Took it out to the track, spent 3 hours messing around with the jetting only to realize the BIG carb needs a lot less methanol then both James and I thought. Then this happened:

Yep, the one nut I didn’t stake nor change to a metal lock nut came off. Scary stuff, but she runs good and I can’t wait to go back.
1 Like